Disclaimer: This post contains affiliate links. As an Amazon Associate, I earn from qualifying purchases at no extra cost to you. [Learn More]
Introduction
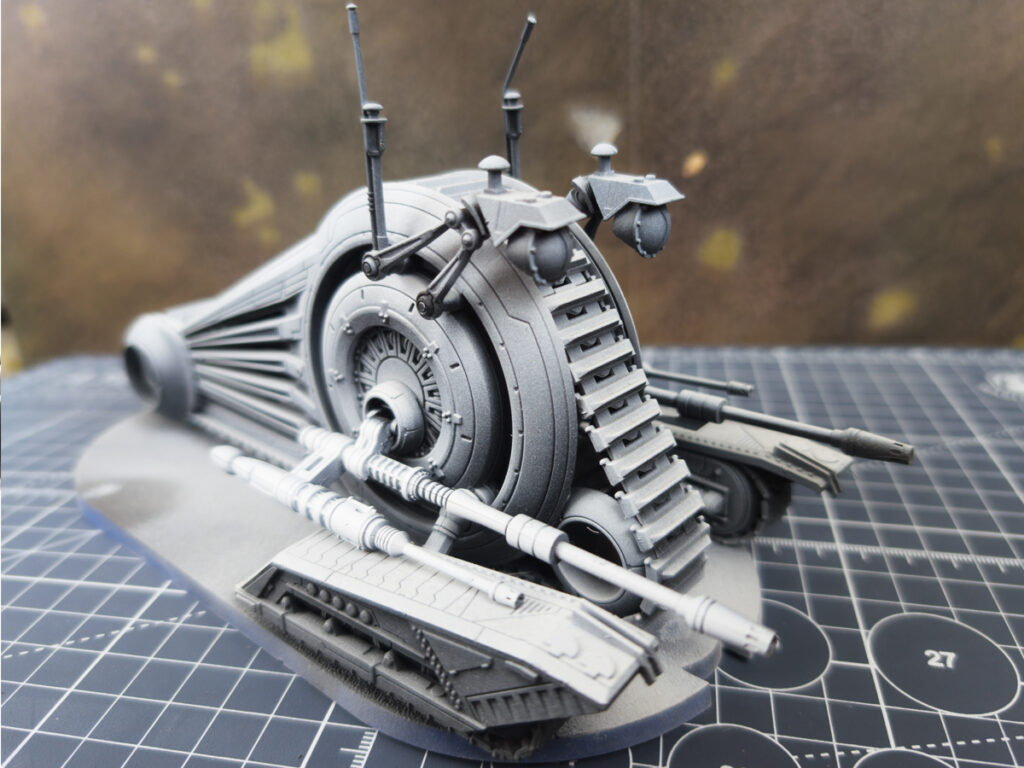
Zenithal priming is one of the simplest ways to establish light and shadow on a miniature before you start painting.
Instead of beginning with a single flat layer of primer, you build a gradient from dark to light. Black establishes the deepest values, gray builds the midtones, and a lighter color applied from above creates the brightest areas. The result gives you a built-in value structure that can guide your painting and remain visible beneath translucent colors.
I use zenithal priming most often when I want the light and shadow of the miniature to do some of the work for me. It is particularly useful with paints that allow the underlying primer to show through, such as Contrast paints and glazes.
In this guide, I’ll show you the basic process and explain what each stage is doing.
What is Zenithal Priming?
The word zenithal refers to the highest point in the sky above an observer. In miniature painting, the idea is to simulate light coming from above by spraying progressively lighter primer from higher angles.
A basic zenithal prime uses three values:
- Black for the deepest shadows
- Gray for the midtones
- White or an off-white for the brightest areas
The goal isn’t to create a perfectly realistic lighting effect. You’re establishing a useful value map that tells you where the miniature is light and where it is dark.
That distinction is important. You don’t need every miniature to have a perfectly smooth transition from black to white. You simply want the upper surfaces to be lighter than the areas underneath them, while allowing the deepest recesses to remain dark.
Why Zenithal Prime a Miniature?
A good zenithal prime gives you several advantages before you’ve even put down your first color.
It Establishes Light and Shadow
The miniature already has a sense of volume before you begin painting. Raised surfaces catch the lighter primer while recesses and downward-facing areas remain darker.
It Helps You See the Details
The contrast between light and dark makes sculpted details easier to read while you’re painting. This can be especially helpful on complicated models where it isn’t immediately obvious how individual surfaces relate to one another.
It Provides a Guide for Painting
The value structure can help you decide where to place highlights and how strongly to apply color. Instead of starting with a completely uniform surface, you’re working from an existing map of light and shadow.
It Works Especially Well With Translucent Paints
This is where zenithal priming becomes particularly useful.
Transparent and translucent paints allow some of the value underneath to remain visible. When applied over a zenithal prime, the color can inherit some of that underlying light and shadow.
Contrast paints are a good example. Rather than completely covering the primer with an opaque layer, they allow the values underneath to influence the finished appearance.
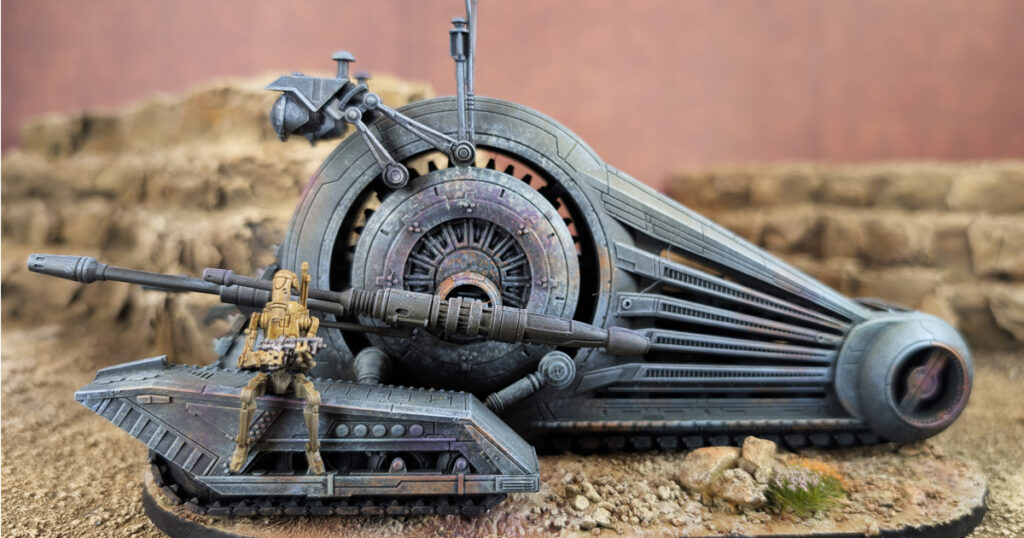
I’ve used this approach on everything from small units of B1 Battle Droids to larger models such as the NR-N99 Persuader Tank Droid.
How to Zenithal Prime a Miniature
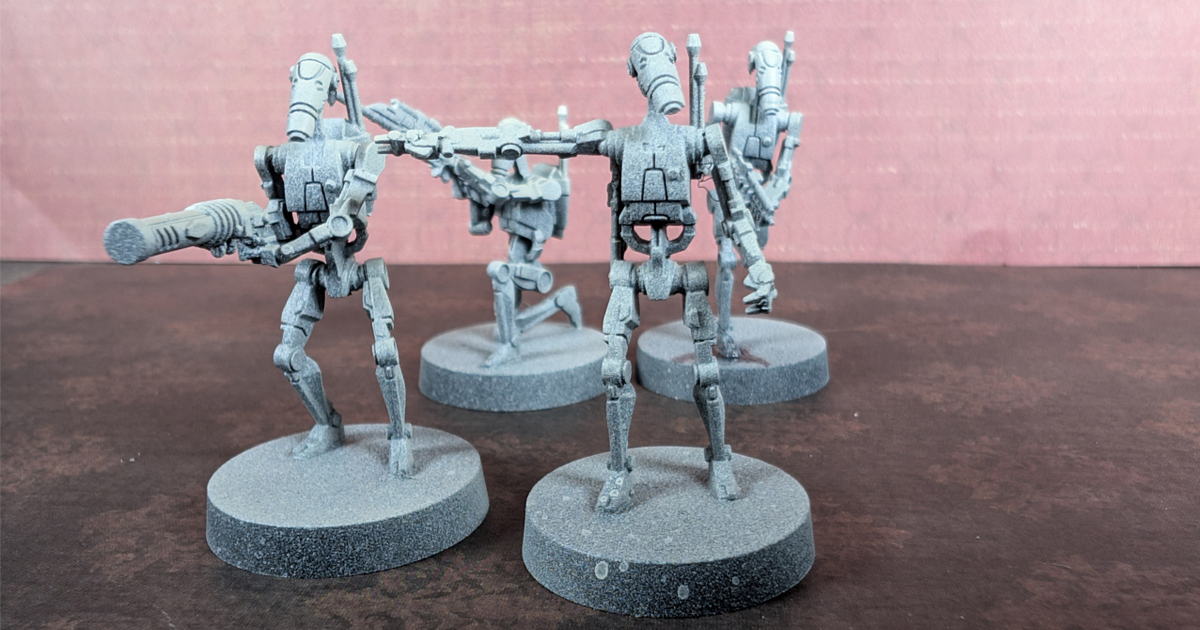
For this demonstration, I’m using B1 Battle Droids. The models already have a solid coat of Citadel Chaos Black primer before the zenithal layers are applied.
The process is simple:
Black → Gray → White
The important part isn’t hitting an exact angle with every spray. You’re changing the direction of the primer so that each lighter layer reaches progressively more upward-facing surfaces.
Step 1: Start With a Black Primer
Begin with a solid coat of black primer.
The black provides the darkest value in the miniature and should cover the model completely. Take your time here and make sure the primer is applied evenly before moving on.
Once the black primer is dry, you’re ready to begin building the lighter values.
Step 2: Establish the Midtones With Gray
For the next stage, I use Citadel Mechanicus Standard Grey.
Hold the miniature so that you’re spraying from roughly a 45-degree angle rather than directly at it. The gray should cover most of the exposed surfaces while allowing the black to remain visible in the deepest recesses and underneath the miniature.
You don’t need to obsess over the exact 45-degree angle. The goal is to create a broad middle value while preserving some of the black underneath.
Think of this stage as establishing the general shape of the light. You’re moving from black shadows into gray midtones.
The shape of the miniature will affect exactly how the primer lands, so adjust the angle and position of the model as necessary.
Step 3: Add the Light From Above
Once the gray layer is dry, it’s time to establish the brightest values.
For this pass, I use Citadel Wraithbone and spray from a higher angle, concentrating the primer toward the top and upward-facing surfaces of the miniature.
The higher angle means the Wraithbone reaches fewer of the lower surfaces. This leaves the gray visible through the middle of the miniature and allows the black to remain in the deepest areas.
At this point, you should have a gradient that moves roughly from:
Black → Gray → Wraithbone
The brightest areas should generally be toward the top of the miniature, while the undersides and deepest recesses remain dark.
And that’s the zenithal prime.
How Precise Does a Zenithal Prime Need to Be?
Not very.
It’s easy to watch someone demonstrate zenithal priming and come away thinking there is a precise formula you need to reproduce perfectly. There isn’t.
The model’s shape, your spray equipment, the distance you’re spraying from, and the angle of the miniature will all affect the result.
What matters is the overall value structure.
You want to be able to look at the miniature and immediately see:
Where is the light? Where are the midtones? Where are the shadows?
If those relationships are clear, the zenithal has done its job.
Painting Over a Zenithal Prime
The real benefit of zenithal priming appears when you start applying color.
With opaque paints, the underlying primer will eventually become less important as you build up your layers. But with translucent paints, the zenithal can continue influencing the appearance of the finished model.
This makes the technique particularly useful for Contrast paints.
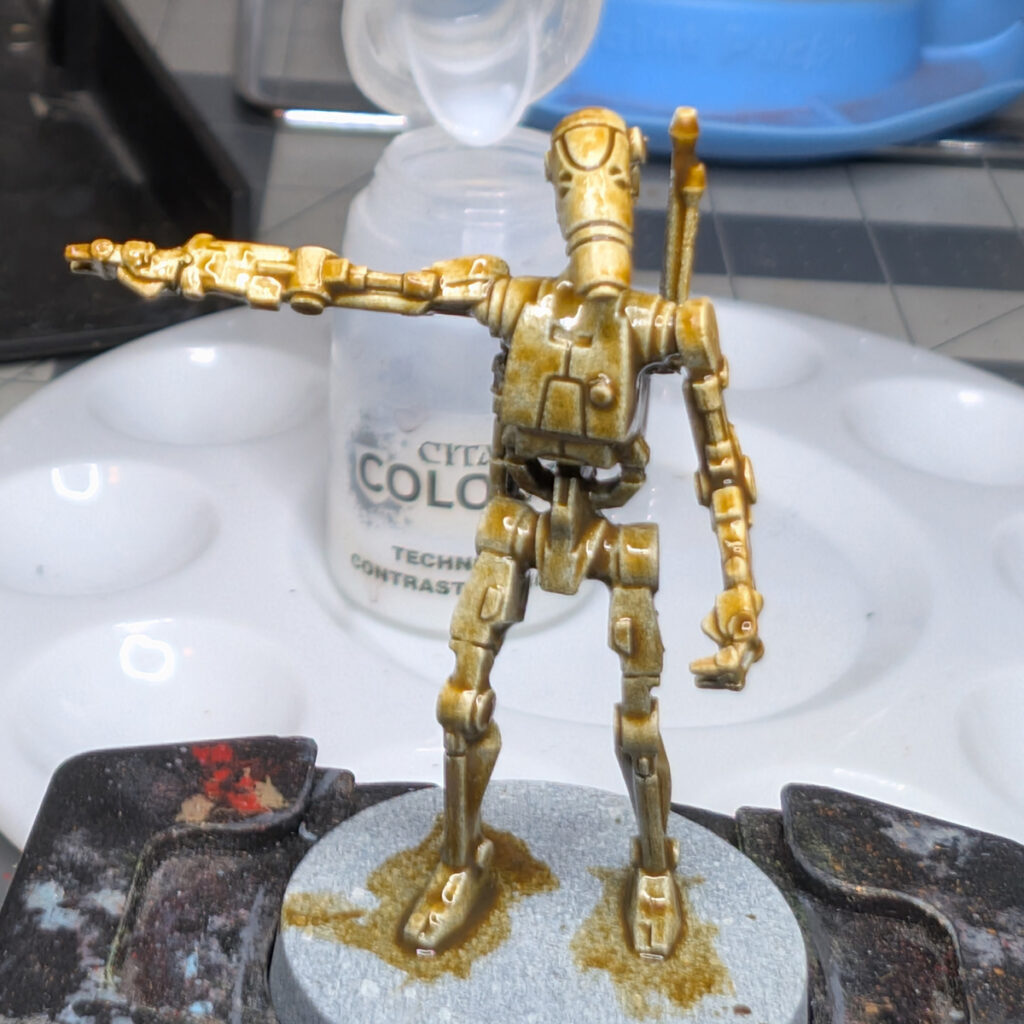
For example, I used a zenithal prime underneath the B1 Battle Droids in my guide to painting B1 Battle Droids with Contrast paints. The Skeleton Horde allows the black, gray, and light values underneath to influence the finished armor.
That’s one of the reasons the technique works so well for quickly painting units: you’re establishing part of the shading before the color even goes on.
Zenithal Priming With an Airbrush
An airbrush gives you particularly fine control over the transition between the three values, but the basic principle remains the same.
You don’t need an airbrush to zenithal prime. Spray cans can work perfectly well, particularly for larger models and straightforward three-value zenithals.
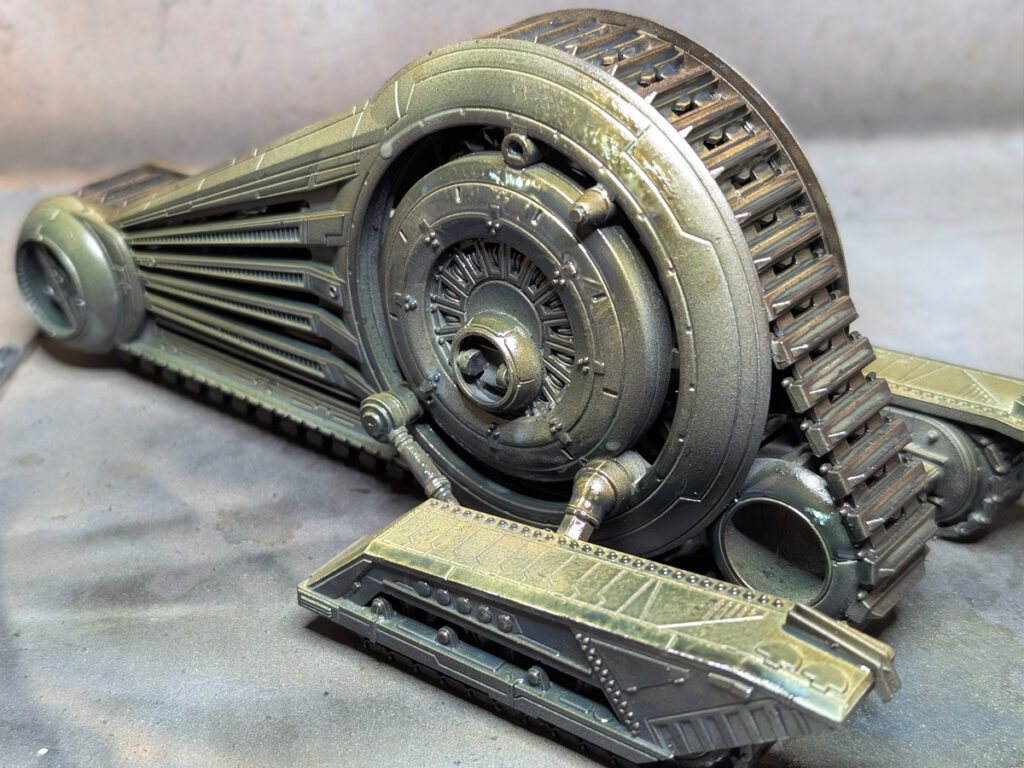
I used an airbrush for the zenithal on my NR-N99 Persuader Tank Droid, where I followed the same basic black-to-gray-to-white approach before experimenting with Contrast paints through the airbrush.
That project also taught me something unexpected about how translucent colors behave when they’re sprayed rather than brushed onto a zenithal surface.
When Should You Use Zenithal Priming?
Zenithal priming is particularly useful when:
- You’re using Contrast paints or other translucent colors.
- You want to establish shadows quickly.
- You’re experimenting with speed painting.
- You want a visual guide for highlights and shadows.
- You’re painting a model with lots of sculpted detail.
- You want to experiment with color over an existing value structure.
It isn’t necessary for every miniature, though.
If you’re planning to cover the model almost completely with thick, opaque basecoats, much of the underlying zenithal will eventually disappear. In those cases, a simple primer may be all you need.
Zenithal priming is a tool, not a requirement.
Final Thoughts
Zenithal priming gives you a head start.
Before you’ve painted a single armor plate, cloak, weapon, or face, the miniature already has a basic relationship between light and shadow. You can use that information as a guide, allow it to show through translucent colors, or simply use it to make the miniature easier to read while you work.
The technique also doesn’t need to be perfect. You’re not trying to photograph a miniature under studio lighting. You’re building a useful value structure that helps you paint.
Once you’ve tried it a few times, the process becomes remarkably quick: black for the shadows, gray for the middle, and a lighter color from above.
From there, you can decide how much of that work you want your subsequent layers to preserve.
Continue Your Painting Journey
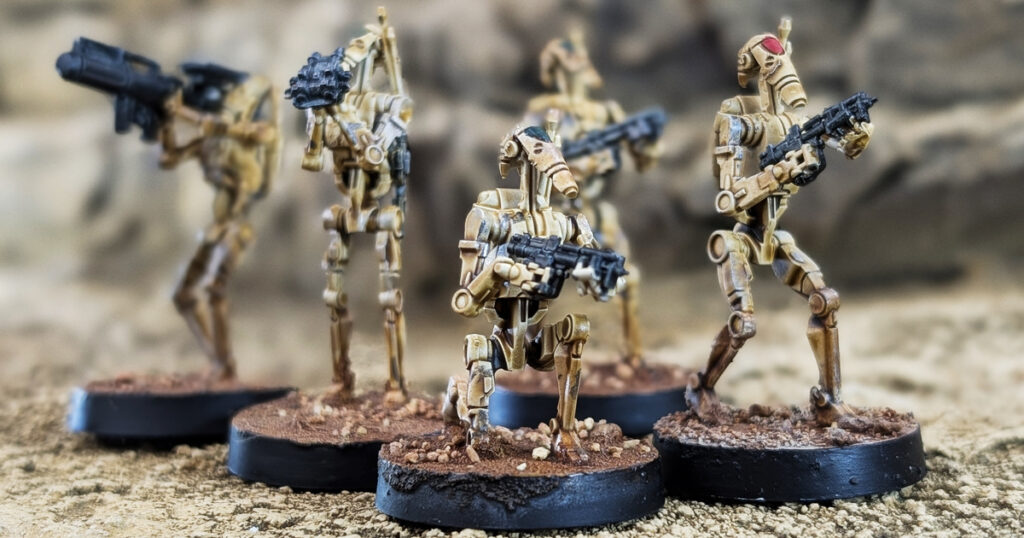
Paint B1 Battle Droids With Contrast Paints
See how I used a zenithal prime as the foundation for painting a unit of B1 Battle Droids with Contrast paints.
Paint the NR-N99 Persuader Tank Droid
See how I used a zenithal prime before experimenting with Contrast paints through an airbrush on a Star Wars: Legion Persuader Tank Droid.