Disclaimer: This post contains affiliate links. As an Amazon Associate, I earn from qualifying purchases at no extra cost to you. [Learn More]
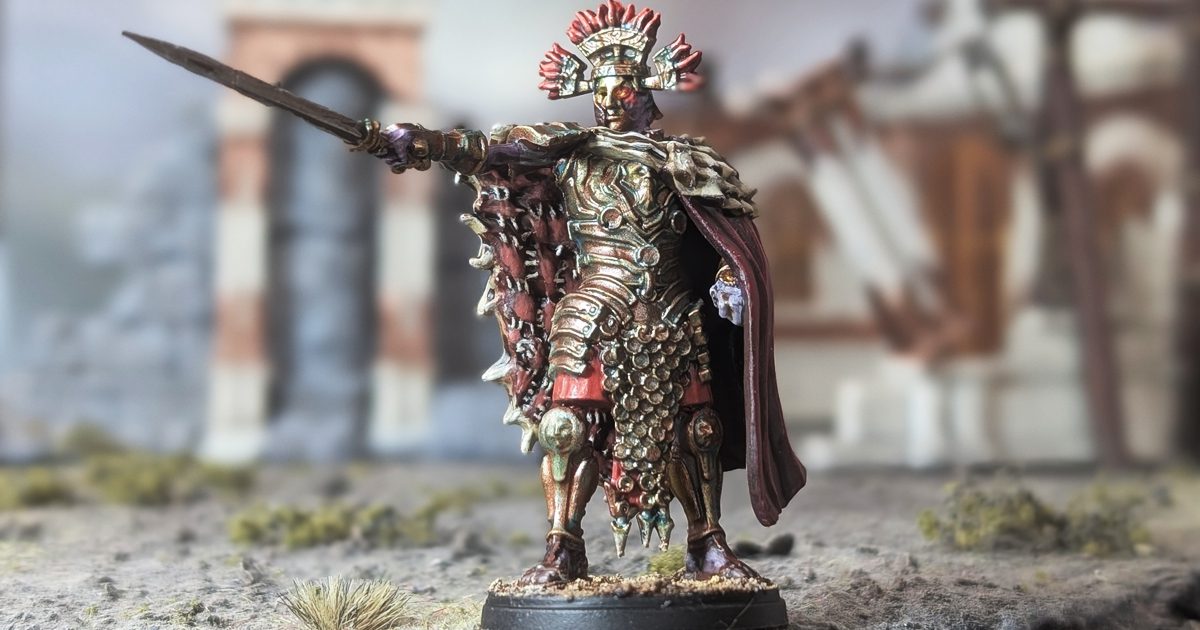
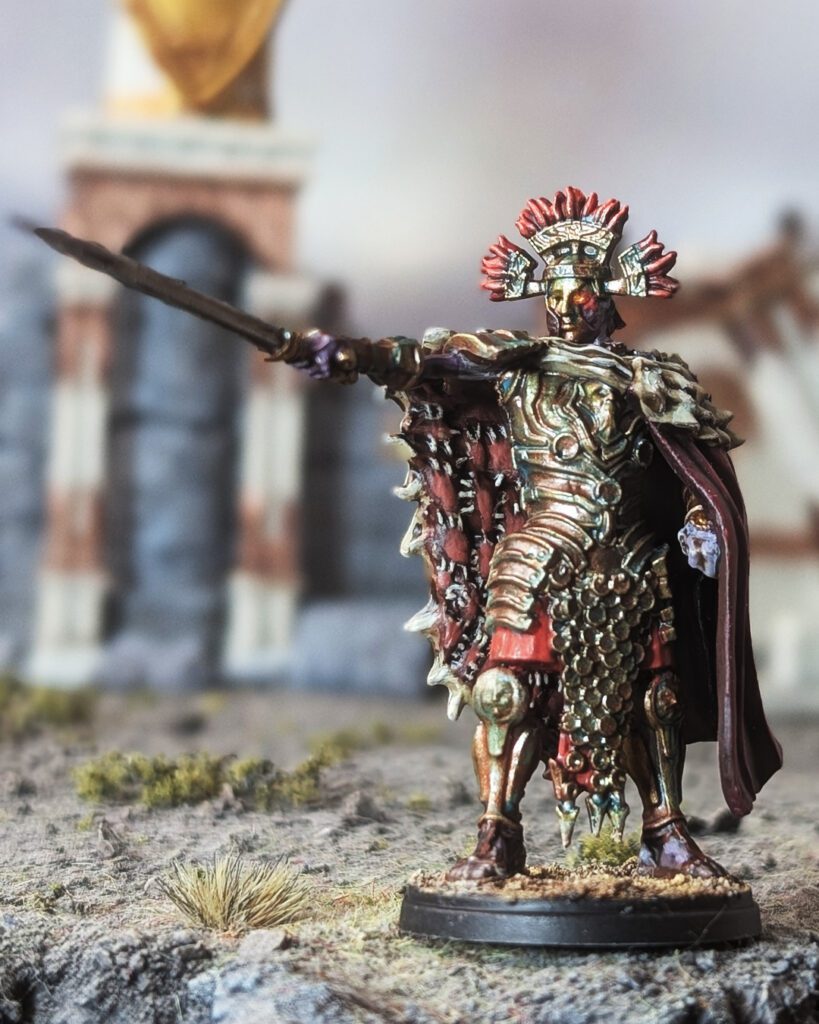
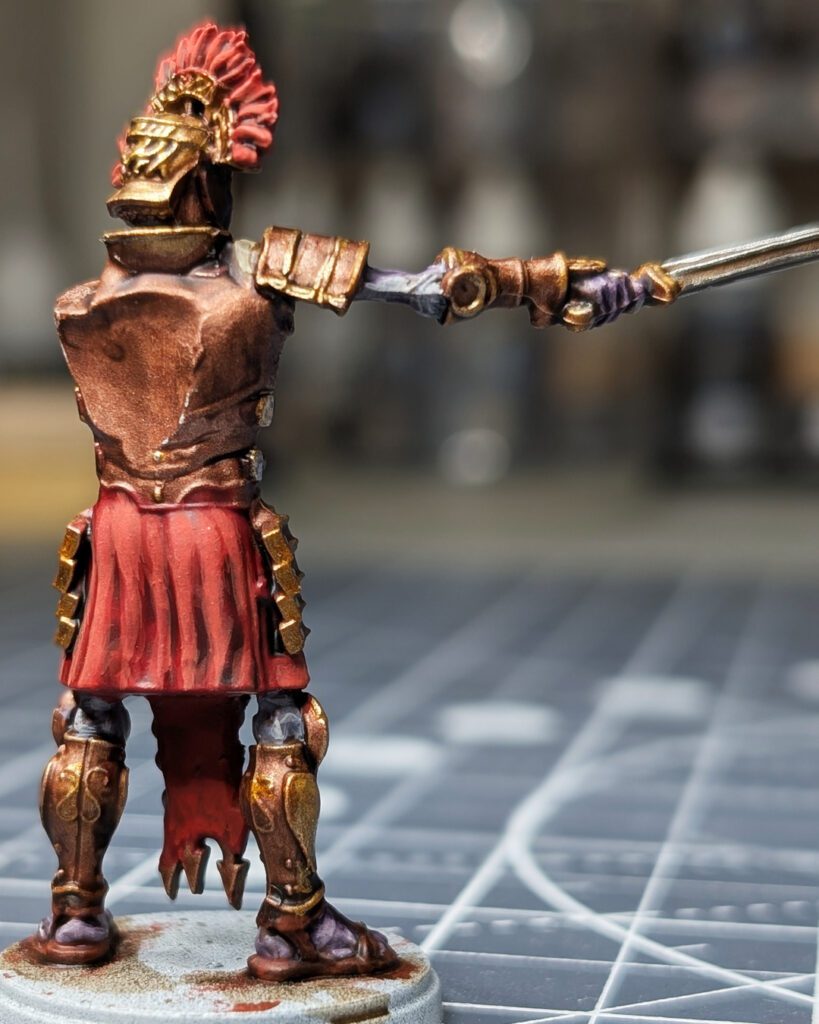
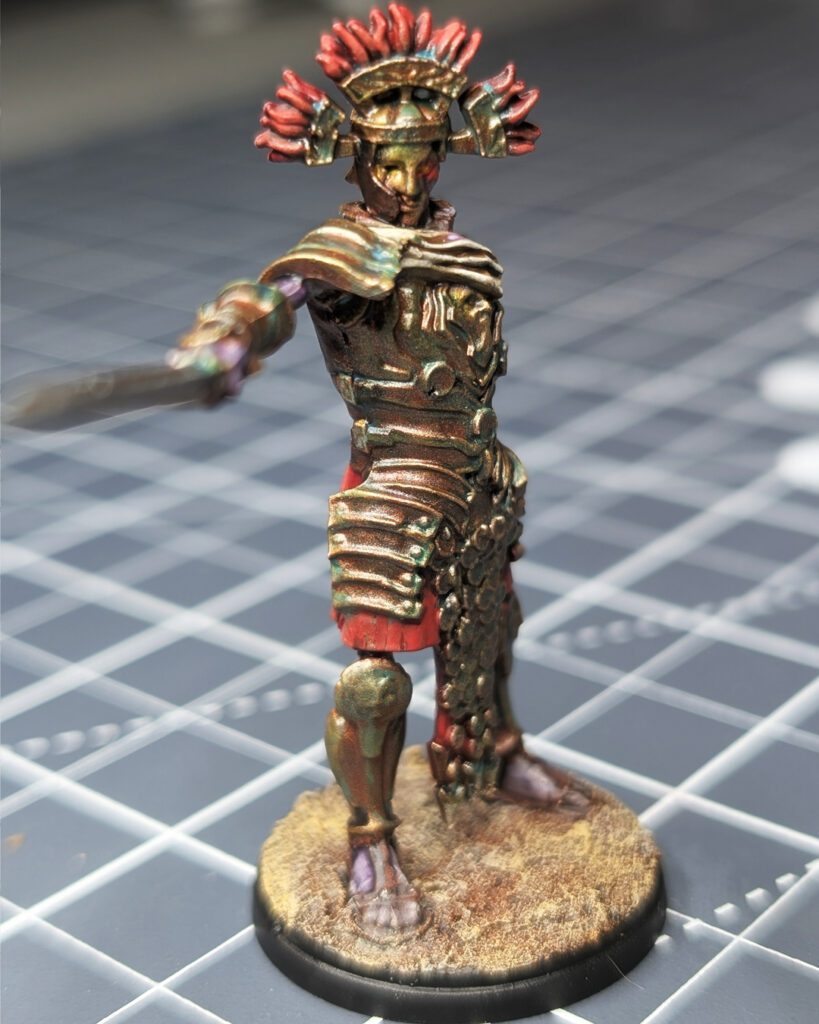
The Old Dominion range from Conquest has a distinct character – aged armor, rich fabrics, and a sense of worn grandeur. For this Xhiliarch, I focused on a traditional layer painting approach, translated from a tutorial by Duncan Rhodes.
Rather than relying on drybrushing or contrast paints, this method builds depth through controlled layering, allowing for stronger contrast and a more deliberate finish.
Build Your Own Hobby Desk
Every miniature project starts with a workspace. These are the paints, brushes, tools, and hobby supplies I regularly use while painting miniatures for Mythic Minis. Whether you’re just getting started or looking to upgrade your hobby desk, these resources can help make painting more enjoyable and efficient.

Where to Get This Model
The Xhiliarch is an imposing character from the Old Dominion faction in Conquest: The Last Argument of Kings. If you’re interested in adding one to your collection or exploring the range further, you’ll find the model and related resources below.

Paints Used
Metallics
Balthasar Gold
Iron Hands Steel
Retributor Armor
Stormhost Silver
Liberator Gold
Cloak, Leather, Fabrics
Gal Vorbak Red
Mephiston Red
Wordbearers Red
Wazdakka Red
Evil Sunz Scarlet
Wild Rider Red
Rhinox Hide
Tuskgor Fur
Furs and Skin
Doombull Brown
Zandri Dust
Warpfiend Grey
Ushabti Bone
Screaming Skull
Details and Highlights
Fire Dragon Bright
Yriel Yellow
Lupercal Green
Lahmian Medium
Baharroth
Iraqi Sand (Vallejo)
Yellow Ochre (Vallejo)
Shades
Agrax Earthshade
Fuegan Orange
Shop the Paint List
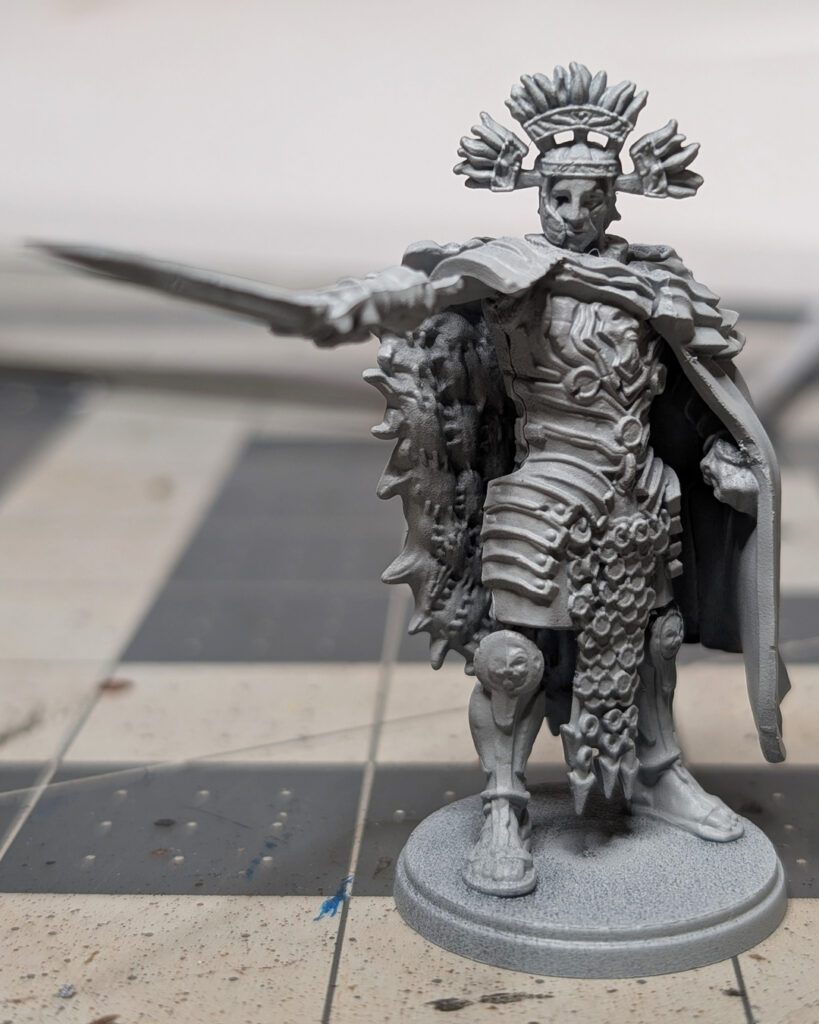
Preparing the Model
Before painting, I spent some time studying the sculpt and identifying where contrast would matter most—between armor, cloth, and fur. With a model like this, a little planning upfront makes the later stages much easier and more intentional. I primed it in a solid Grey Seer – a simple light grey that would help colors be a little more vibrant than a darker grey or black. Also, I didn’t feel a zenithal prime was necessary here as I would be using basic metallics and layering up colors instead of using contrast or speed paints.
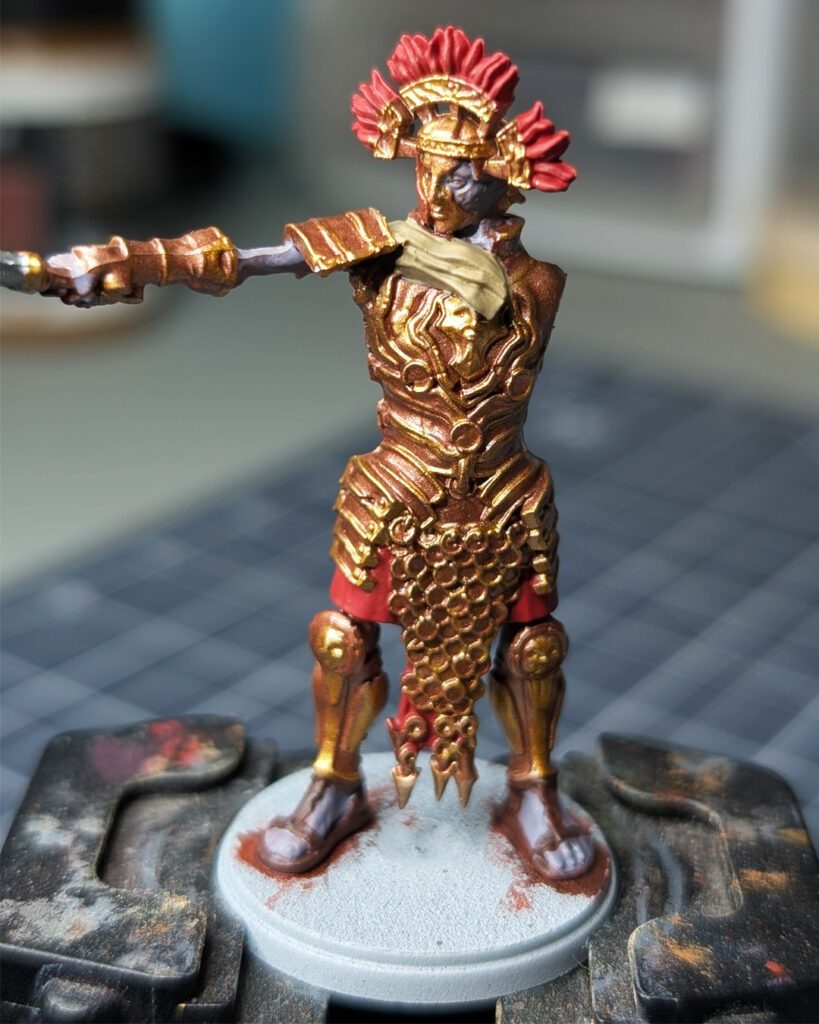
Base Coats
I began by blocking in all major colors:
- Armor (Base): Balthasar Gold
- Sword Blade: Iron Hands Steel
- Armor Trim: Retributor Armor
- Cloak (Inner & Outer): Gal Vorbak Red
- Skirt & Plume: Mephiston Red
- Inner Fur: Doombull Brown
- Outer Fur & Stitching: Zandri Dust
- Skin: Warpfiend Grey
- Sandals: Rhinox Hide, Doombull Brown
At this stage, the focus is on clean coverage and clearly separating each material. Something to note is I made a slight wet-blend between the Gal Vorbak Red and Doombull Brown on the Inner Cloak where the two materials converge. This will unlikely be seen unless the model is very closely inspected, so this detail is completely optional.
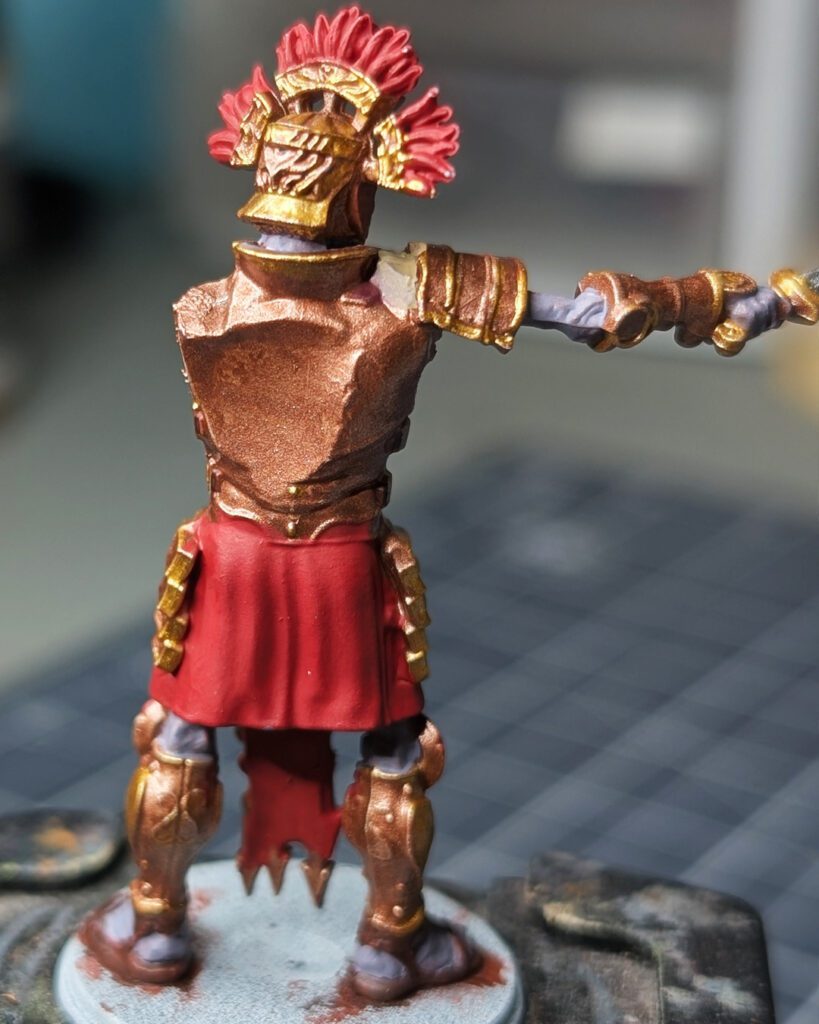
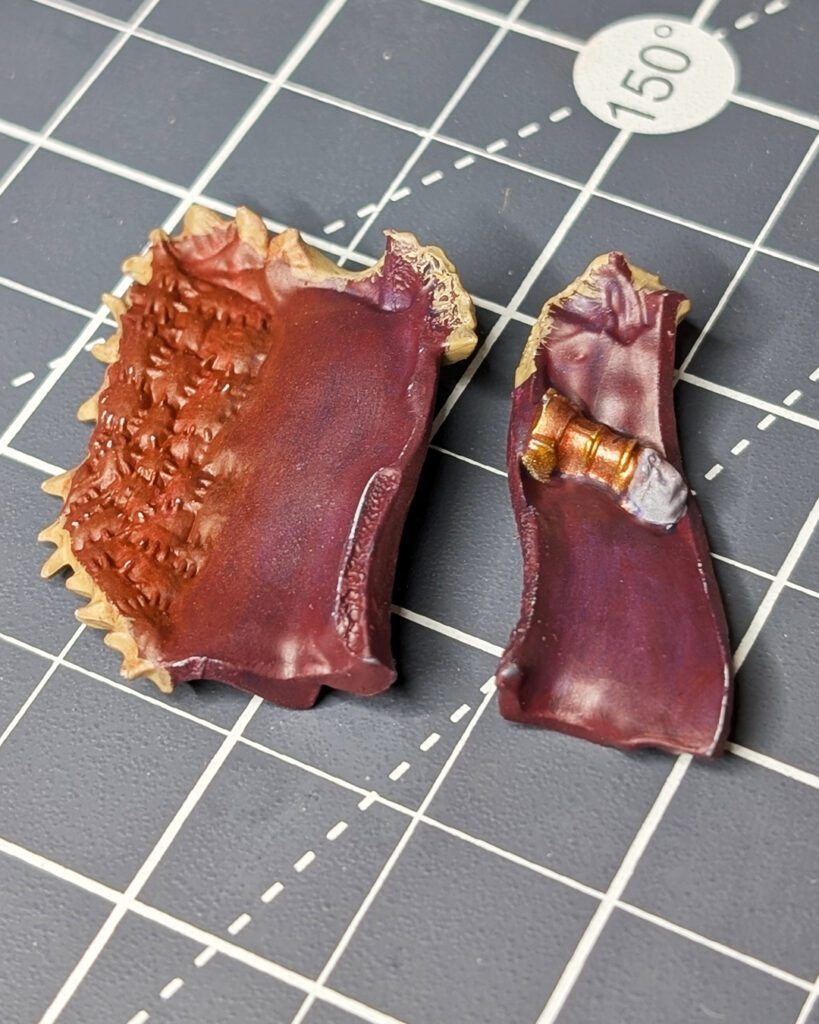
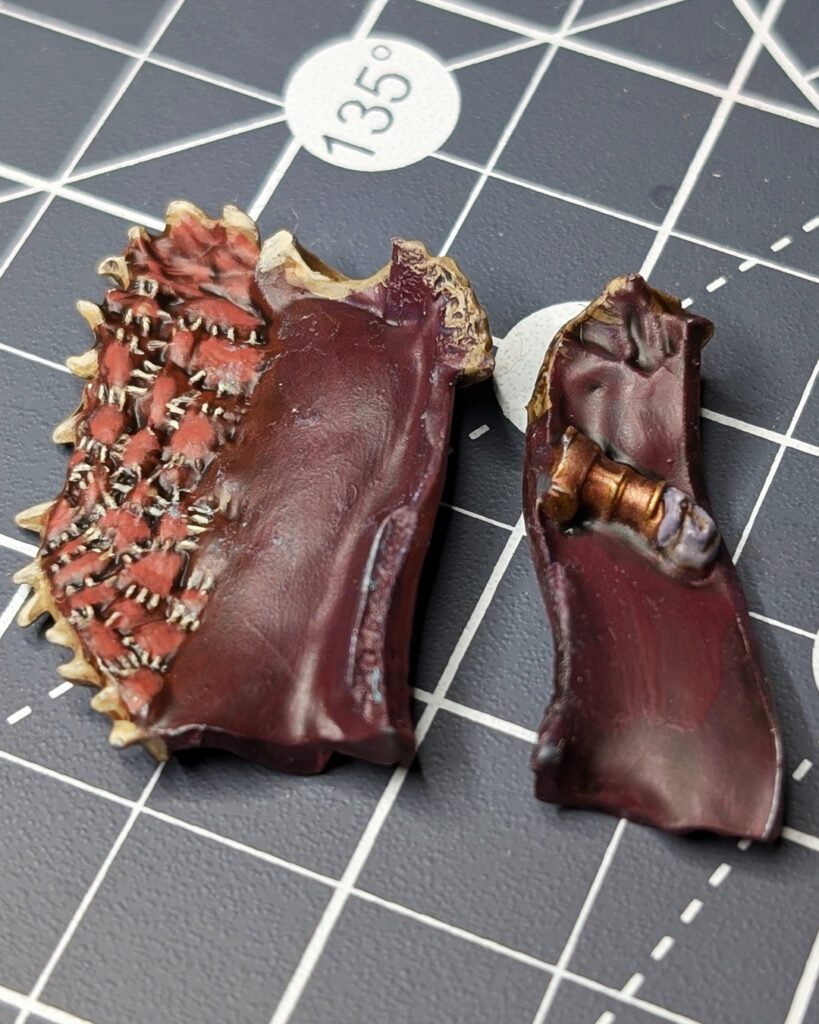
Shading the Model
The entire model was shaded with Agrax Earthshade.
This step immediately establishes depth by darkening recesses and toning down the base colors. It also unifies the palette, giving everything a more grounded and weathered look.
Not pictured here is the cloak, but both the inner and outer sections of the cloak should also be shaded with Agrax Earthshade.
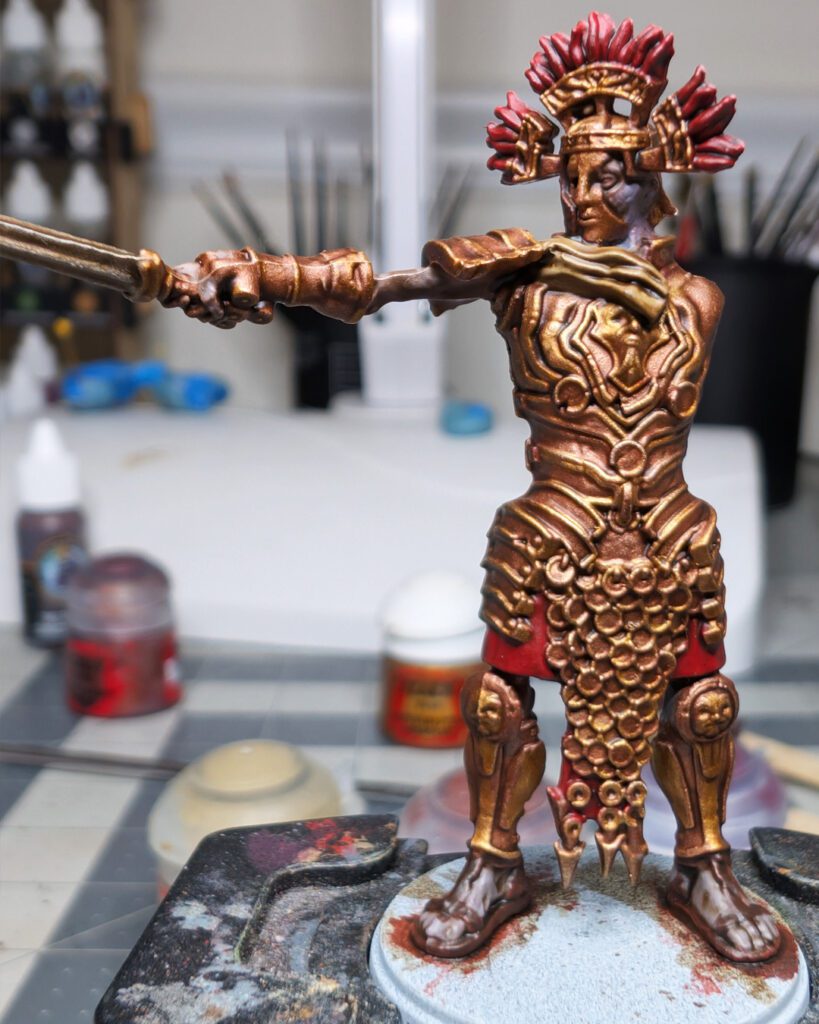
Layering and Building Contrast
Once the shade was dry, I began re-establishing color and pushing contrast in light passes of thinned paint, layering and highlighting.
- Base colors were reapplied to raised areas
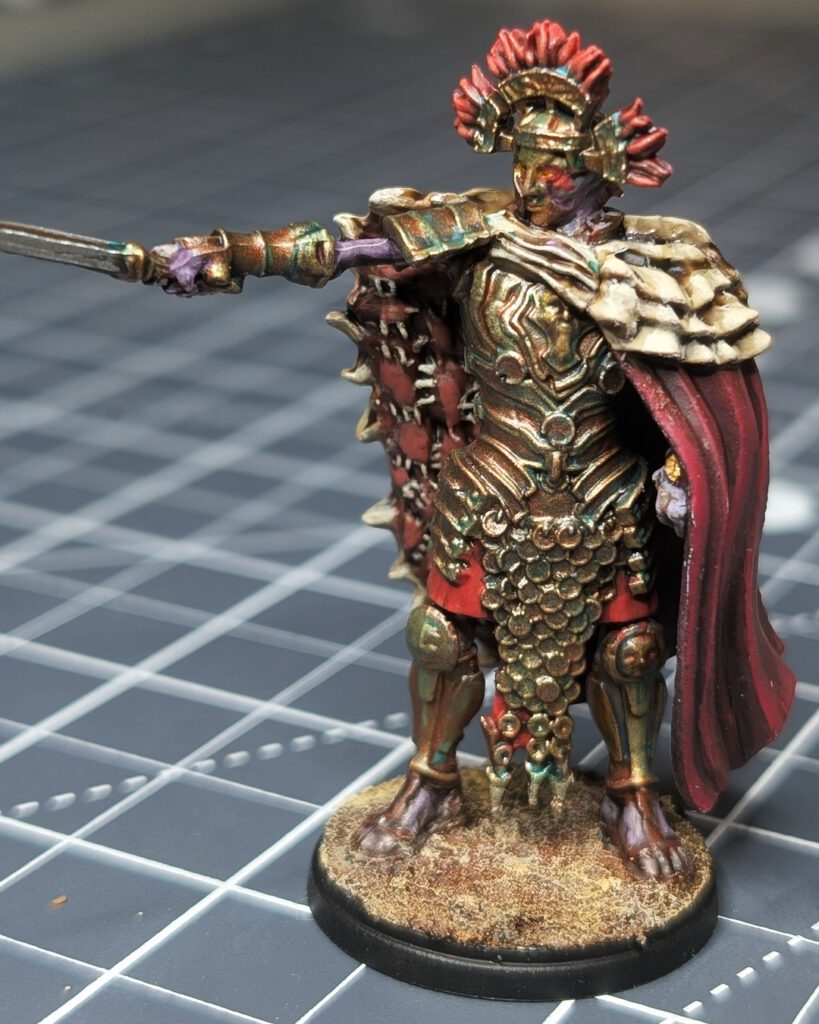
- Cloak: Word Bearers Red, then Wazdakka Red for highlights
- Plume & Skirt: Evil Sunz Scarlet, followed by Wild Rider Red
- Inner Fur: Tuskgor Fur
- Outer Fur & Stitching: Ushabti Bone, with Screaming Skull highlights
- Blade: Stormhost Silver
- Gold Trim: Liberator Gold
- Skin: Warpfiend Grey mixed with Screaming Skull for highlights
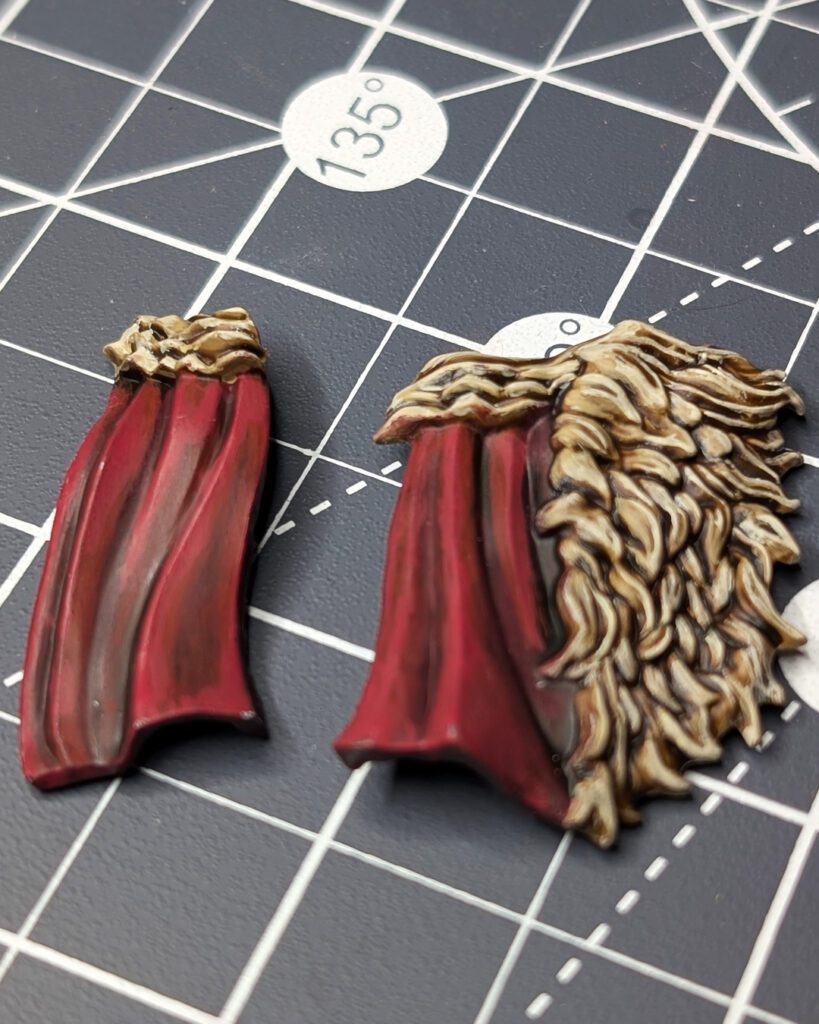
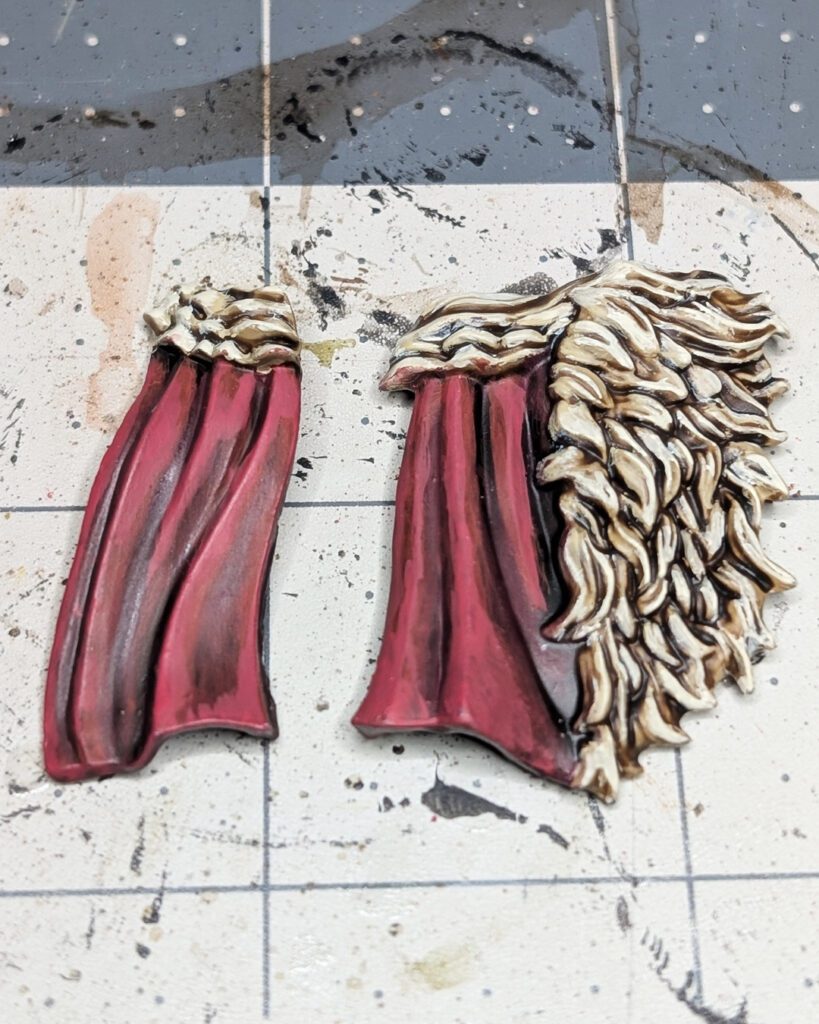
Pushing the Details
With the main work complete, I spent some extra time refining key areas to add visual interest.
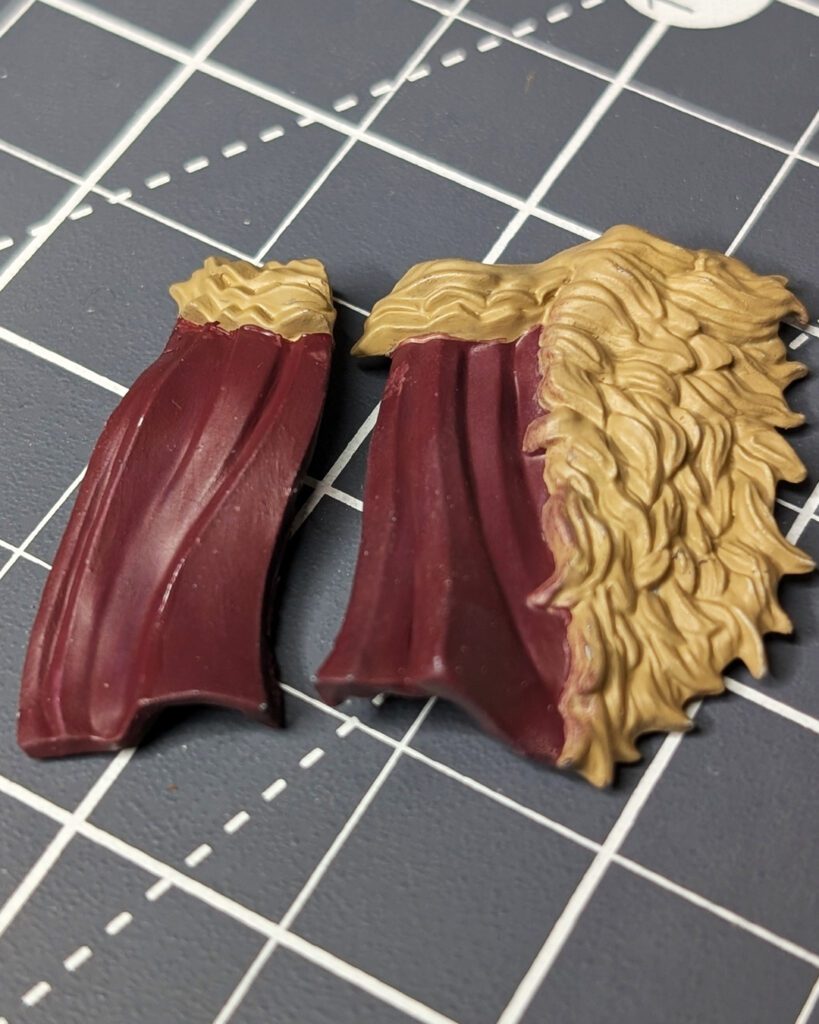
Fur Cloak:
Additional Screaming Skull highlights were applied to the fur and stitching on the cloak to sharpen texture and make those elements stand out more clearly against the darker reds.
These small, targeted highlights don’t take long, but they noticeably elevate the finish and help guide the viewer’s eye across the model.
Eyes:
- Mephiston Red glaze
- Fire Dragon Bright (inner glow)
- Yriel Yellow for the final highlight
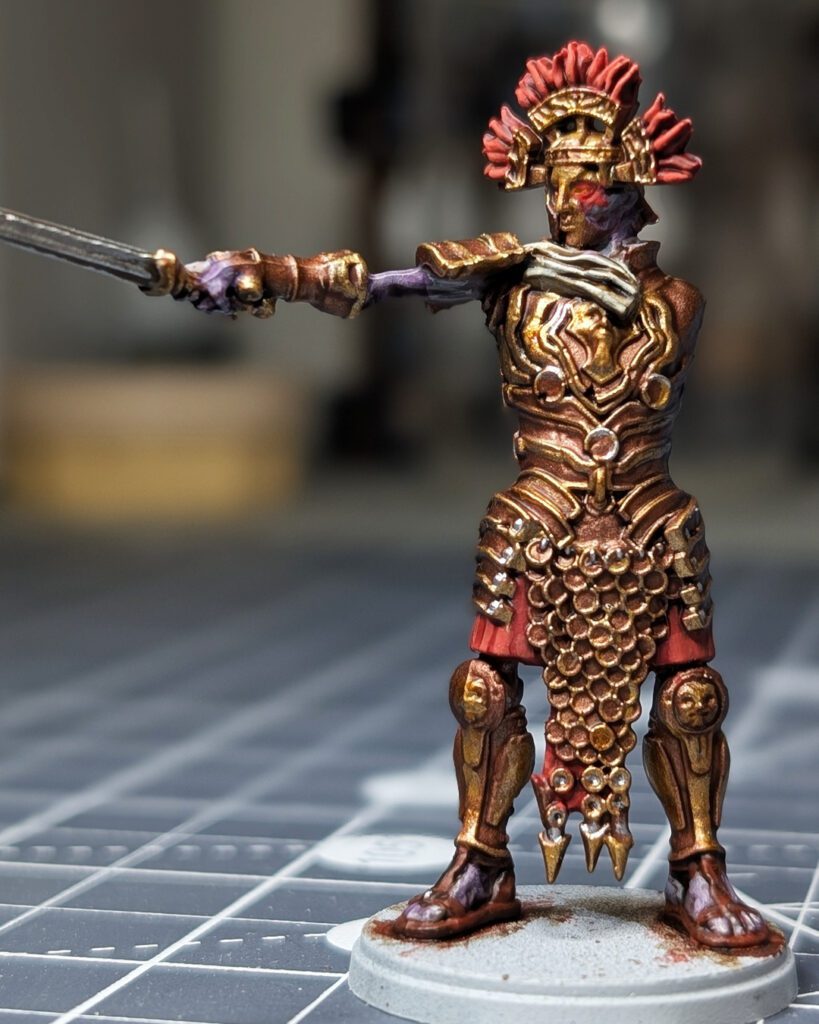
Creating the Armor Patina:
To achieve the aged, oxidized look on the armor:
- I applied 2–3 thin glaze coats of Lupercal Green thinned with Lahmian Medium
- Then added a small amount of Baharroth Blue to the mix for a final turquoise glaze
This step shifts the armor from a clean metallic finish to something that feels ancient and weathered, which fits the Old Dominion aesthetic perfectly.
This stage is where the model really comes together—restoring saturation while increasing contrast and definition across materials.
Basing the Model
The base was kept simple to support the miniature without competing for attention:
- Texture: Vallejo Brown Earth
- Shade: Agrax Earthshade and Fuegan Orange
- Drybrush Highlights: Vallejo Iraqi Sand and Vallejo Yellow Ochre
The warm desert tones complement the reds and golds while keeping the focus on the model itself.
Final Thoughts
This project highlights what you can achieve by committing to a full layer painting process. Each step builds on the last, giving you control over contrast, color, and finish in a way faster methods often can’t match.
Working from a structured approach inspired by Duncan Rhodes made it easier to stay consistent, while still leaving room to experiment—especially with the armor patina and final detail work.
If I were to push this further, I’d experiment with applying the patina more selectively to create additional variation across the armor panels.
Continue Your Painting Journey
Relearning Layer Painting (and When Not to Use It): A Xhiliarch Study
This project was as much about relearning and patience as it was about paint. Explore the mindset behind finishing projects and improving through experience.
D&D and Fantasy Painting Guides
Discover additional tutorials, color recipes, and fantasy miniature projects from Mythic Minis.