Disclosure: This post contains affiliate links. If you click through and make a purchase, I may earn a small commission at no extra cost to you. Thank you for supporting Mythic Minis Studio! For more information read my full disclosure.
Introduction
Layering is a fundamental miniature painting technique that allows you to create depth, smooth color transitions, and realistic shading on your models. By applying multiple thin layers of paint, you can achieve a professional, blended look that enhances the details of your miniatures. In this guide, we’ll walk you through the basics of layering, from selecting the right paints to mastering brush control.
What is Layering?
Layering is the process of gradually applying thinner and lighter layers of paint over a base coat to create highlights and depth. Unlike dry brushing, which focuses on raised edges, layering provides smooth transitions between shades for a more refined look.
Why Use Layering?
- Creates Smooth Highlights and Shadows – No harsh transitions.
- Adds Depth and Realism – Great for faces, cloaks, and armor.
- Works Well with Other Techniques – Can be combined with glazing and edge highlighting for even better results.
- Allows More Control – You determine exactly where highlights and shadows fall.
What You Need for Layering
- Quality Acrylic Paints – Thinner paints work best.
- Fine-Tipped Brushes – Helps with precision.
- Palette (Wet or Dry) – Essential for thinning paint.
- Water or Thinner – Ensures smooth application.
- Stable Work Area – A comfortable setup makes precise strokes easier.
How to Layer Miniatures
Step 1a: Base coat Your Miniature
Start with a solid, evenly applied base coat. This provides the foundation for your layering process. Use a mid-tone color, as you’ll be layering highlights and shadows over it.
For more about base-coating a miniature check out our post How to Base-Coat Miniatures for a Strong Foundation.
Step 1b: Shade Your Miniature
Before jumping into layering, it’s essential to apply a shade or wash over your base colors. Shading is a crucial step that enhances contrast by darkening the recessed areas of your model, instantly adding depth and definition. This not only makes details like armor panels, muscle definition, and cloth folds stand out but also serves as a visual guide for where highlights should go during the layering stage.
A well-applied shade brings your miniature to life—creating natural shadows and a more three-dimensional look with minimal effort. Simply brush the wash over your base-coated areas and let it flow into the crevices. Be sure to check for pooling in unwanted areas and wick it away with a clean brush. Once dry, the miniature will already look more detailed and dramatic—setting you up for success when building highlights with layering.
For a walk-through on shading miniatures, check out our post How to Shade Miniatures for Depth and Contrast.
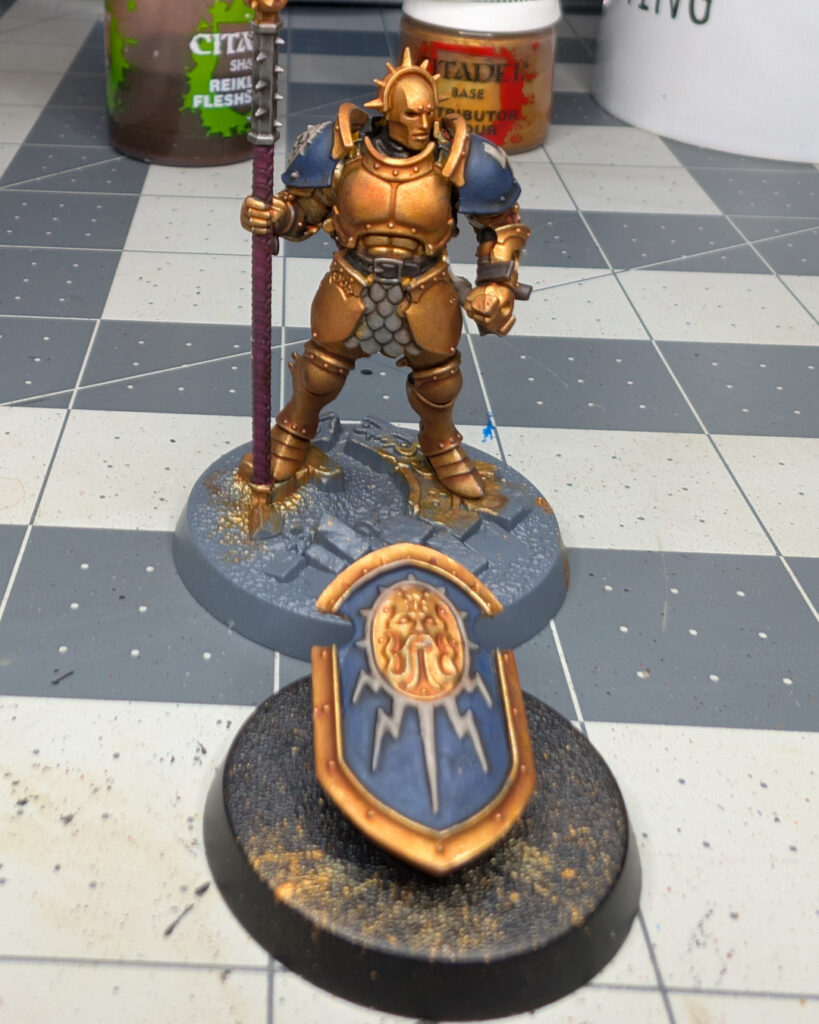
For layer painting examples we’re going to use our pal, the Vindictor. Here we have a base-coated Vindictor and shades have been applied.
For a step-by-step guide on how we painted this Stormcast Eternal check out our post Beginner’s Tutorial for Painting Miniatures: How to Paint Stormcast Eternals Step by Step
Step 2: Thin Your Paint
- Mix your paint with a little water or a thinning medium.
- The consistency should be semi-transparent—thin enough to let some of the previous layer show through but not too watery.
- Test the paint on a palette or paper before applying it to the miniature.
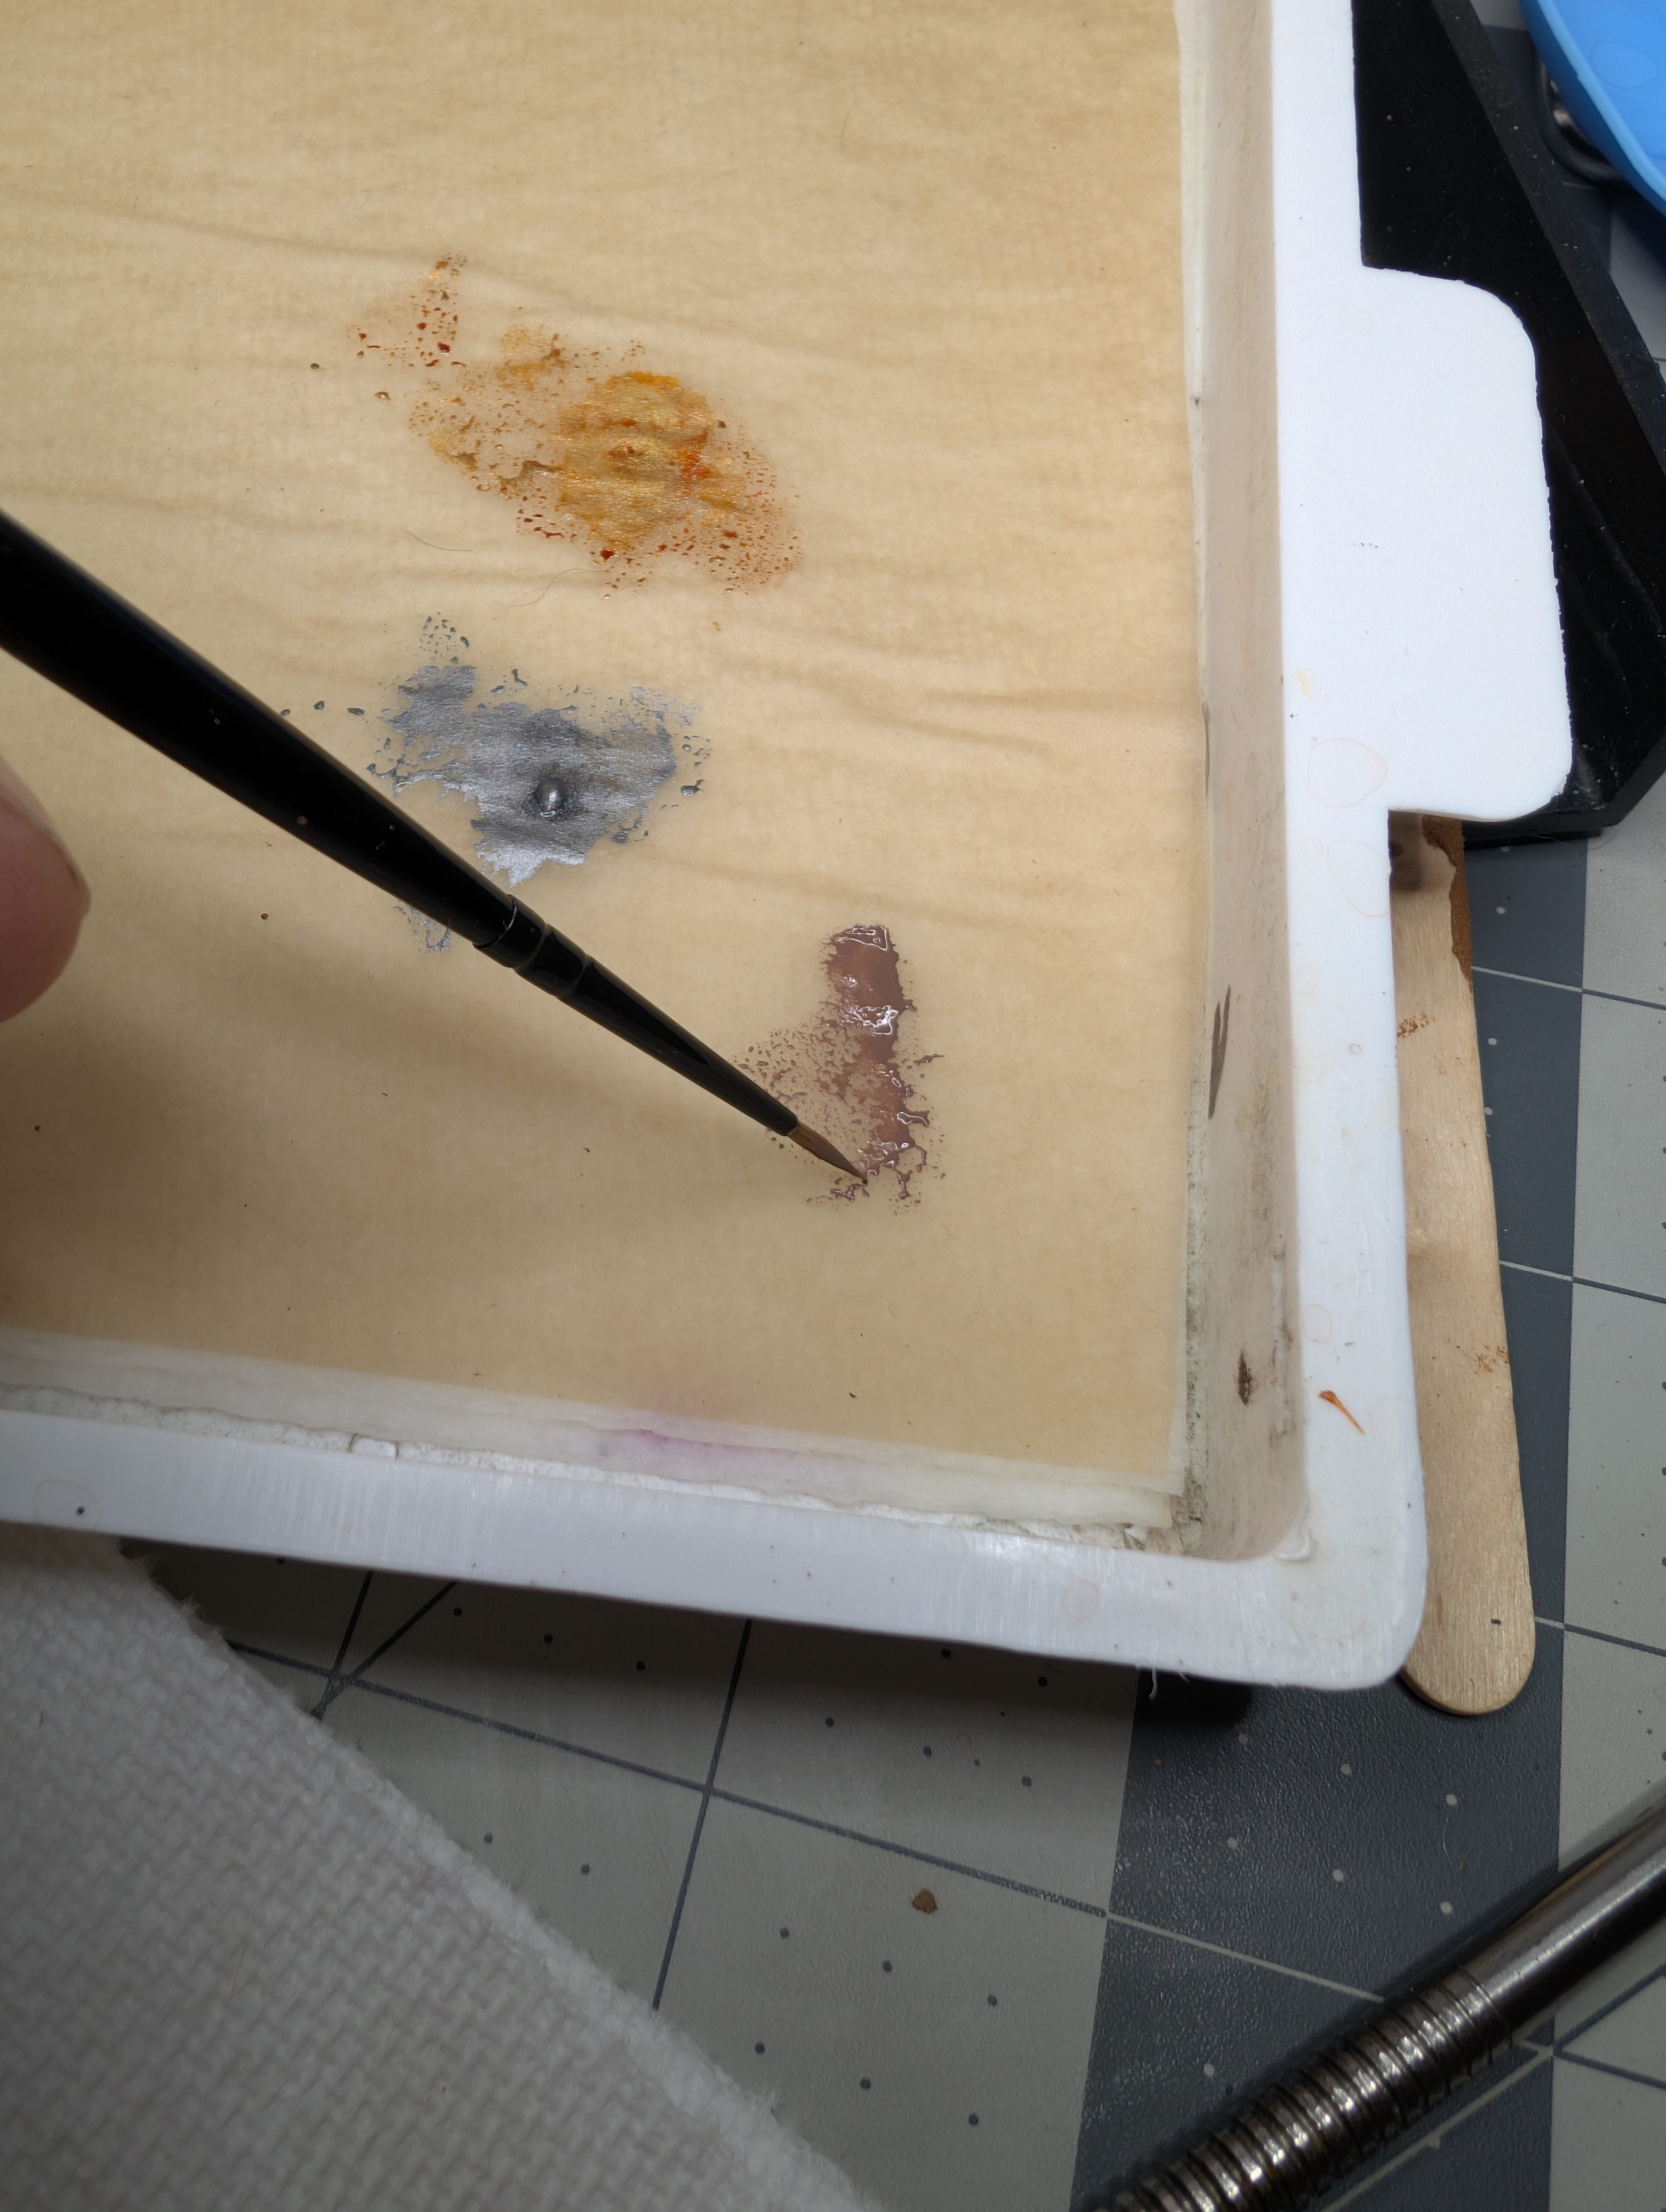
Here we’re loading up some Gorthor Brown as a layer over the existing Dryad Bark painted on the model’s leather belt and straps found on the shield and armor. We want the paint to be about as translucent as we can get without being a watery, uncontrollable mess. The trick is to thin the paint, not too much, and blot off as much paint as possible onto the palette. Do this by twisting the brush on your wet palette surface to keep the point of your brush intact.
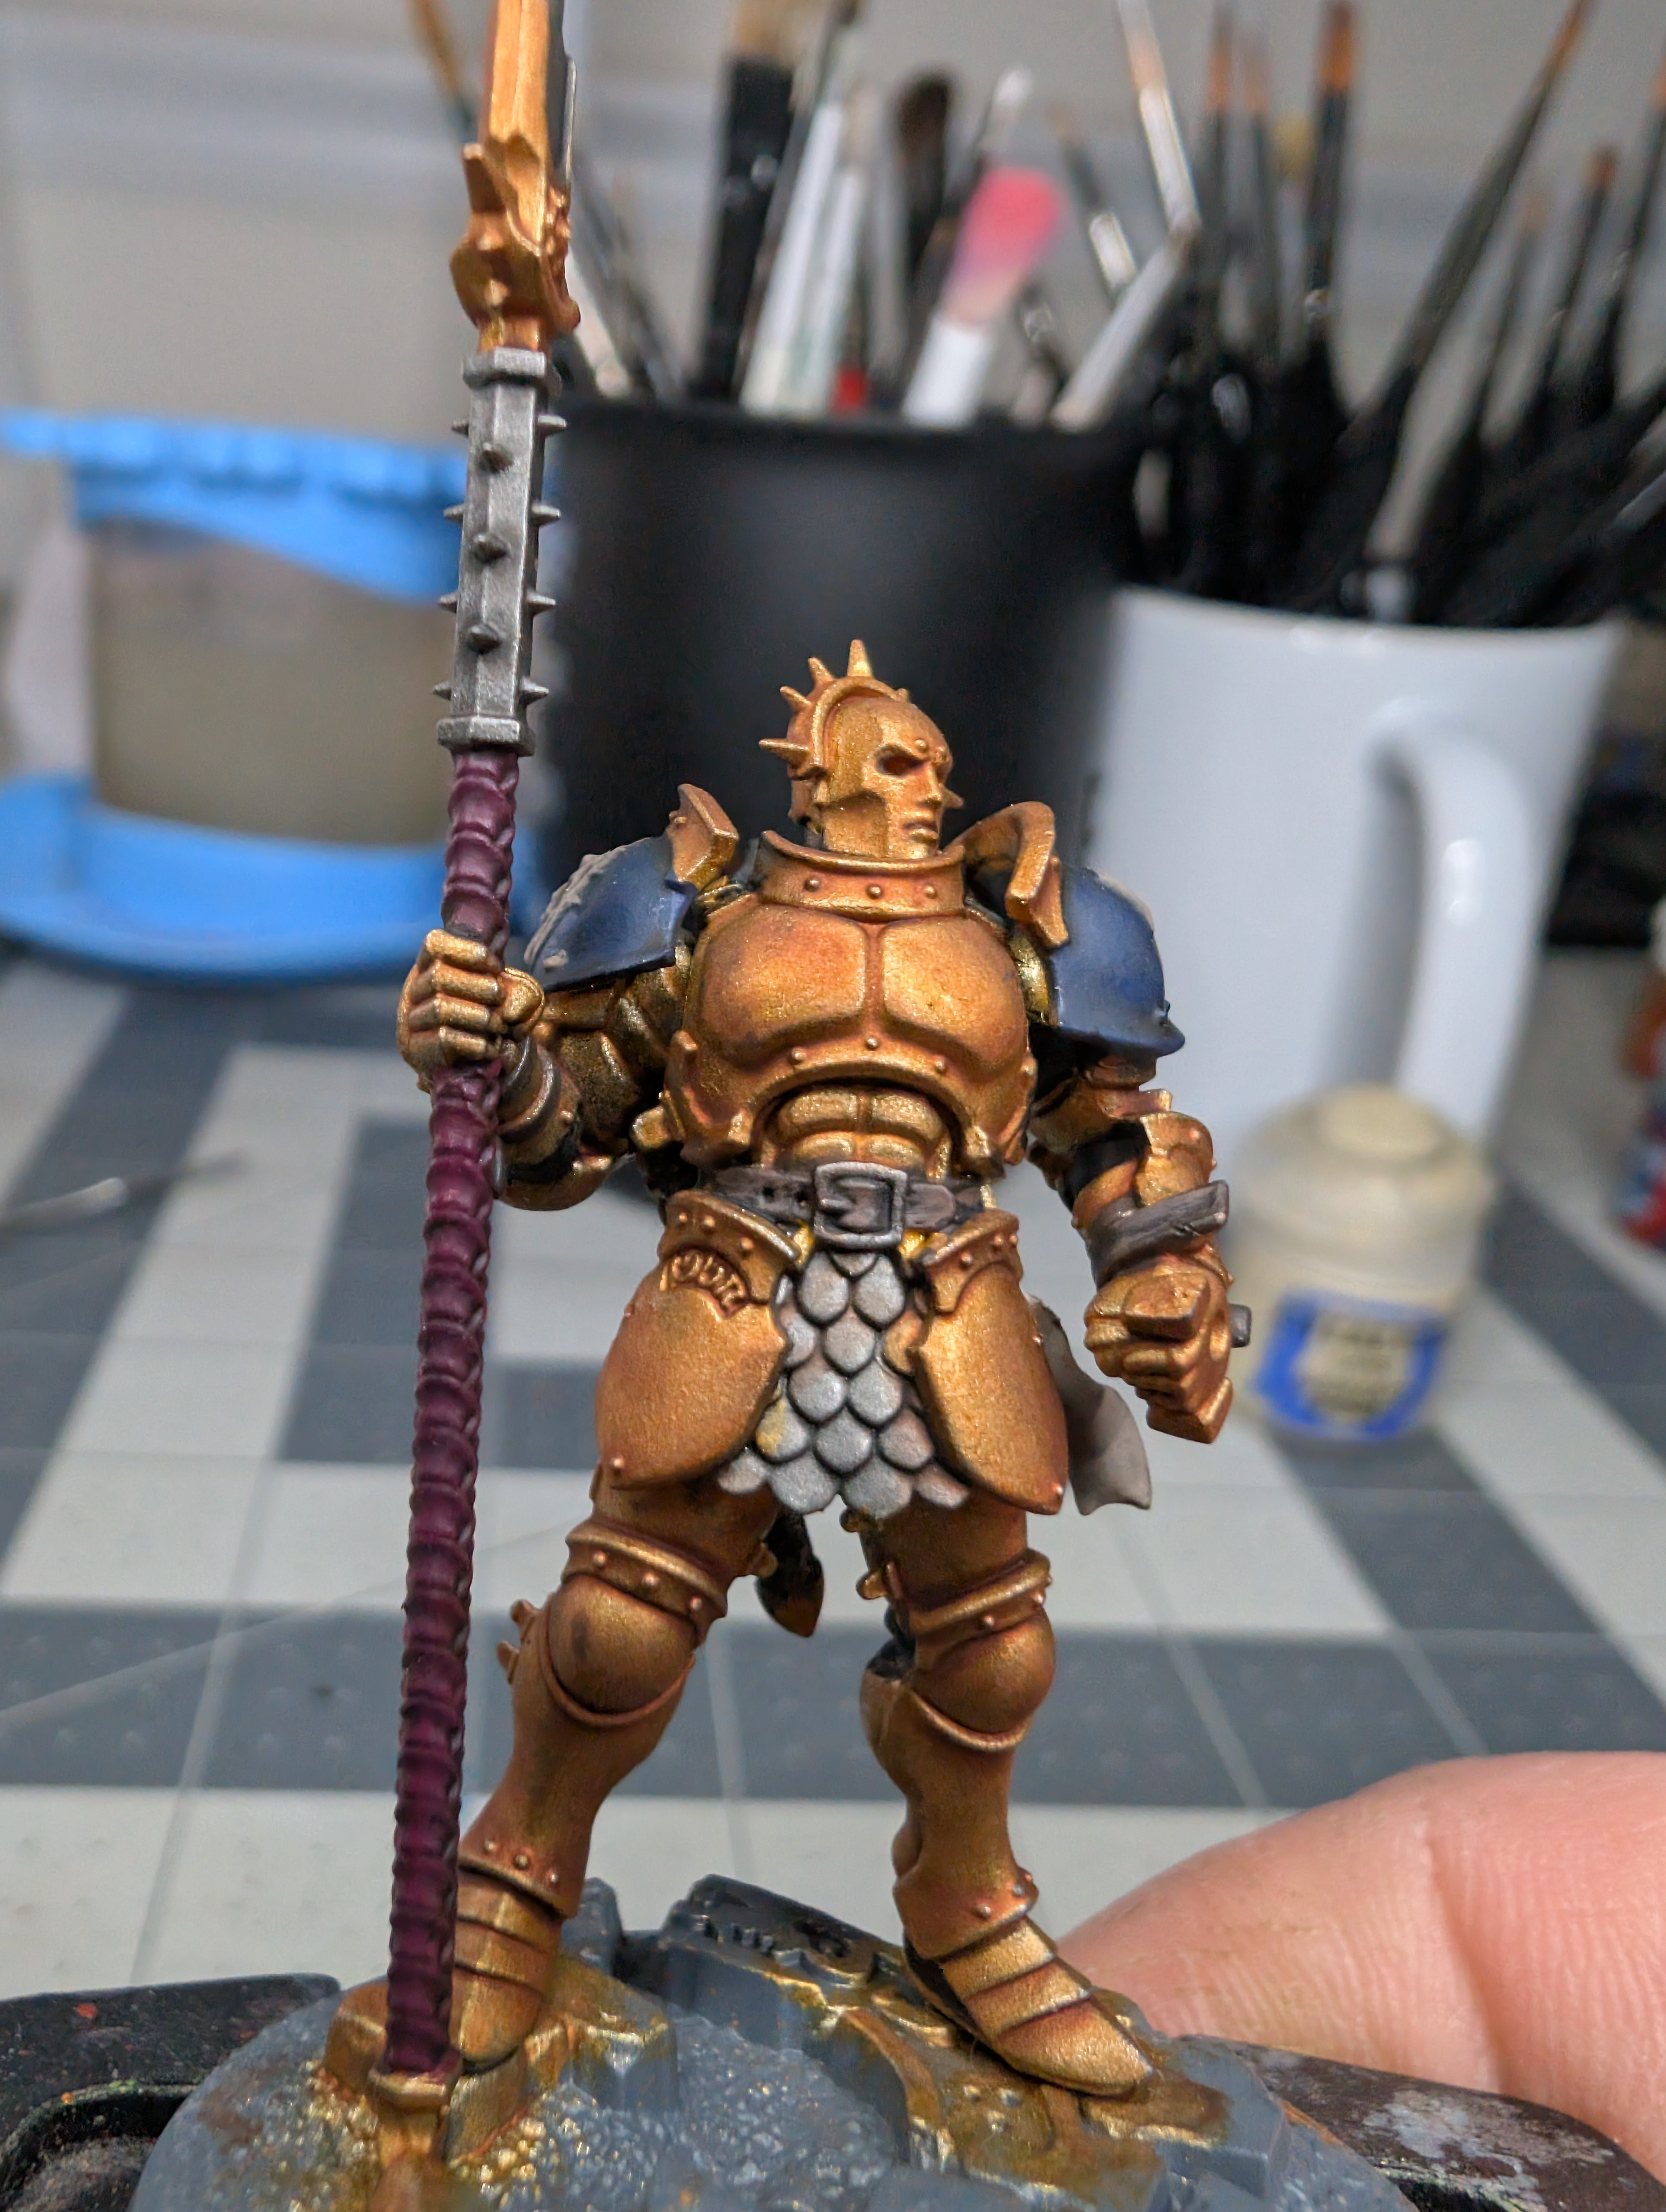
And here I’ve applied the Gorthor Brown to the leather parts. I’ve tried to keep some of the recesses, such as around the buckle and creases in the straps, the original Dryad Bark color to give the model some contrast. As you can see, it’s not the smoothest color blend, but for my purposes with this model I’m happy with the way it turned out.
You’ll find that details in a model like this are so tiny that minor paint imperfections will go unnoticed. The eye extrapolates the color and the model still reads quite well. Smooth color blends are something every painters aspires to have, and it can take much practice to achieve that perfect color transition. Do not despair, the model looks good! Let’s continue!
Step 3: Position the Model and Your Hands for Stability
- Hold the model in a way that keeps your hands steady. Resting your painting hand against a stable surface can help prevent wobbly strokes.
- Rotate the model instead of moving your brush too much. This keeps brush strokes uniform and reduces errors.
Here is a somewhat impromptu video I made describing how I loaded my brush with paint, how I’m using the side and tip of my brush, and how I’m holding the object and my hands for stability in order to get precise brush strokes in order to brighten up the white parts of this shield without making a mess of the other colors.
Step 4: Apply Layers in Gradual Steps
- Paint lighter layers on raised areas and surfaces exposed to light.
- Let each layer dry before applying the next to avoid streaking.
- Use soft brush strokes and multiple thin layers to build up the effect naturally.
- Apply strokes in the same direction for consistency.
Layer painting can often require multiple layers to achieve the desired brightness or color. It is important to remain patient and take your time with the area you’re working on. Oftentimes, it’s easy to want to race the paint job to get it finished, or we are excited to move onto painting other areas of the model. Take your time and focus on what you’re doing – you’ll find it saves time in the end rather than correcting mistakes or being unhappy with results.
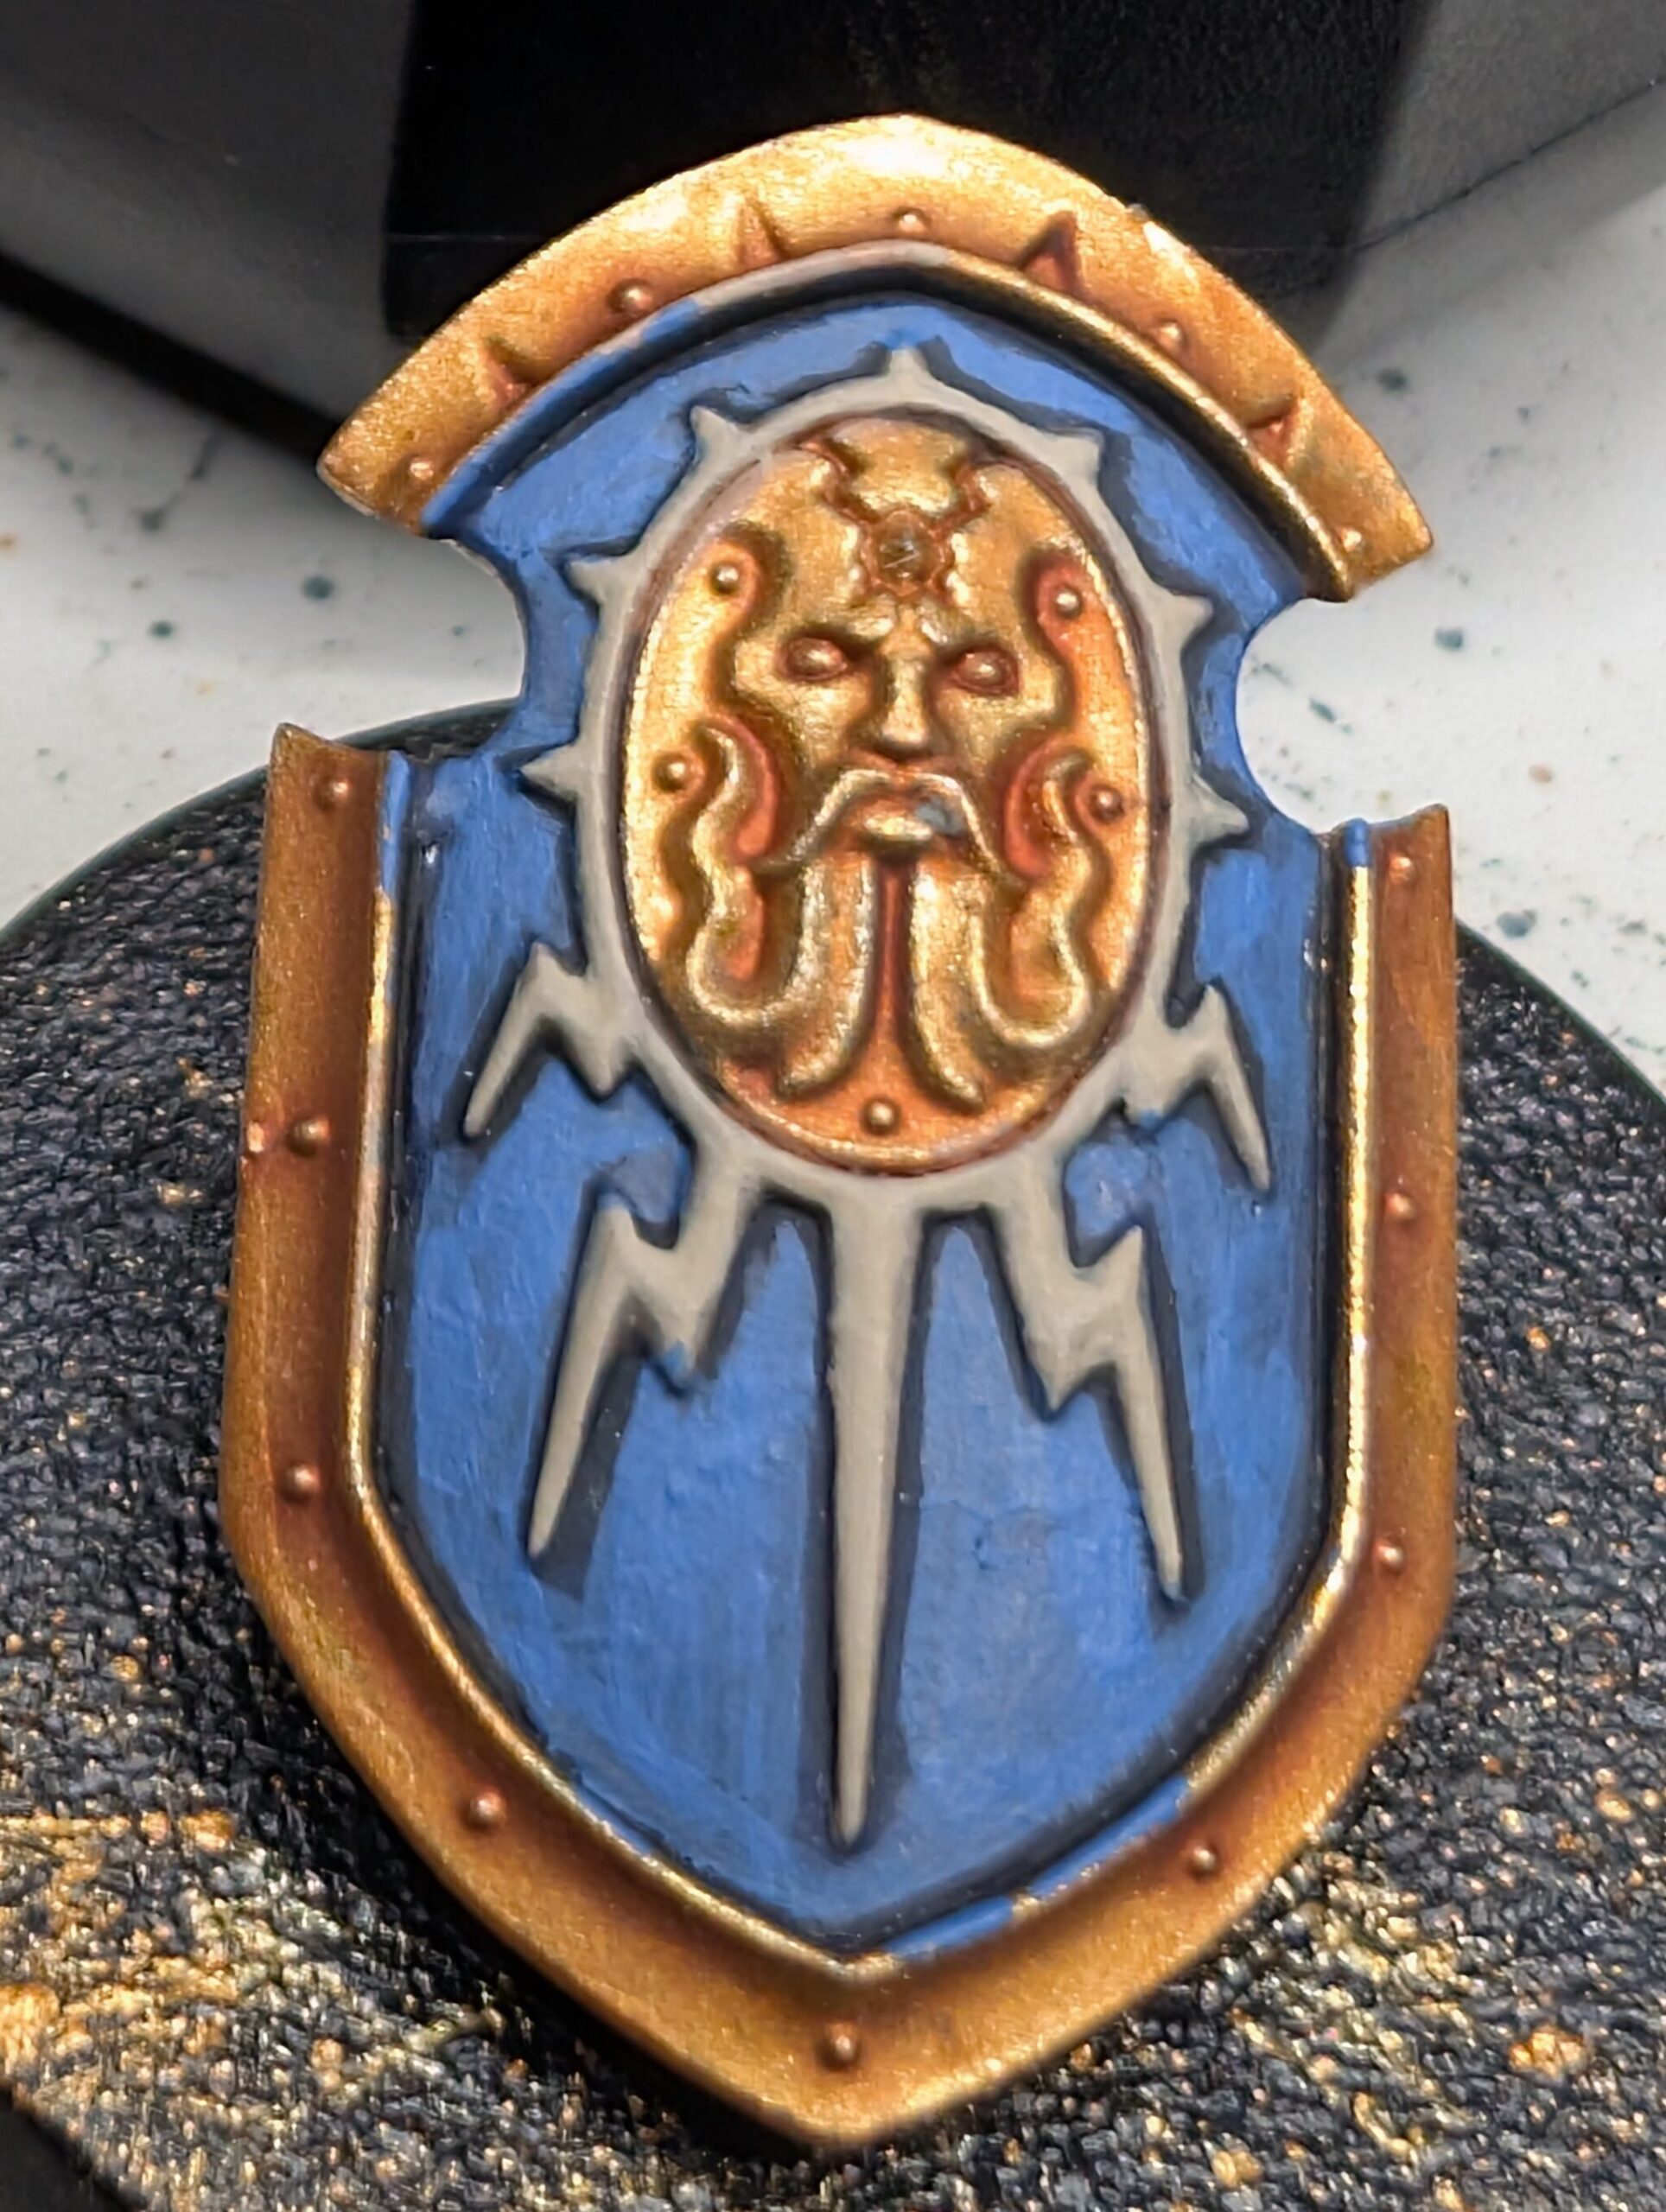
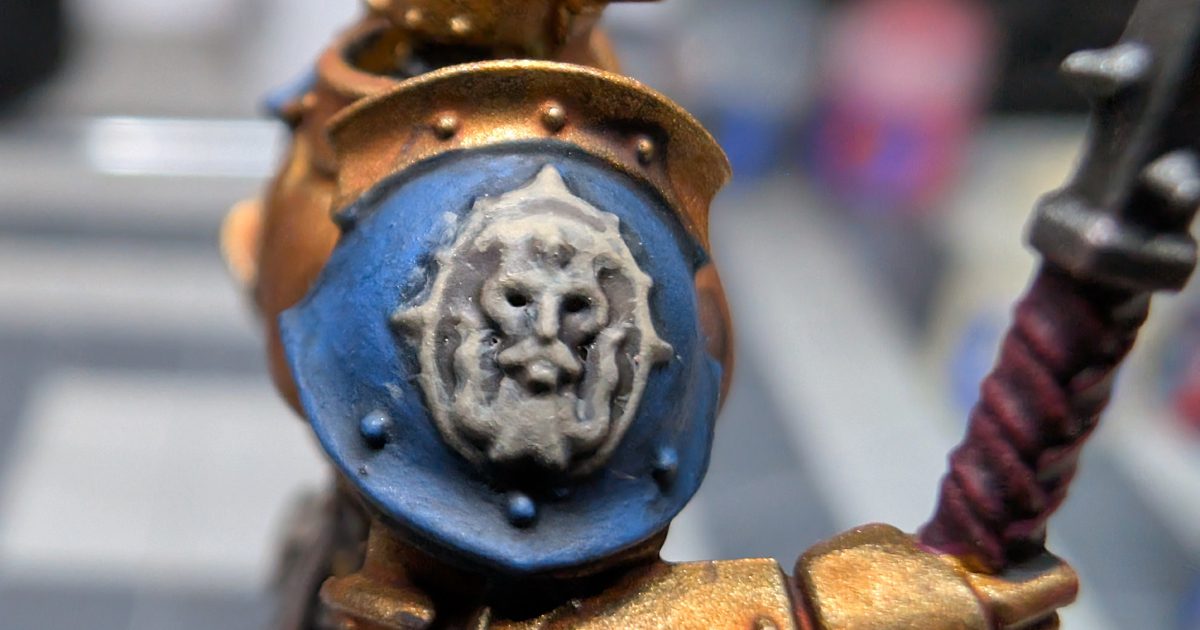
Here is an example of a single layer of Alaitoc Blue painted over the base color of Kantor Blue on the shield. Notice how splotchy the color looks, and my lines aren’t perfect. This is fine – when this layer dried I will paint another layer of the Alaitoc Blue to bring the color up, clean up my lines, and to correct any mistakes.
Step 5a: Blend the Transitions
- If the transition between colors is too harsh, use a slightly thinned-down mid-tone color to blend the layers together.
- Feathering and glazing can help soften any abrupt edges.
- Work in small, controlled strokes to keep transitions smooth.
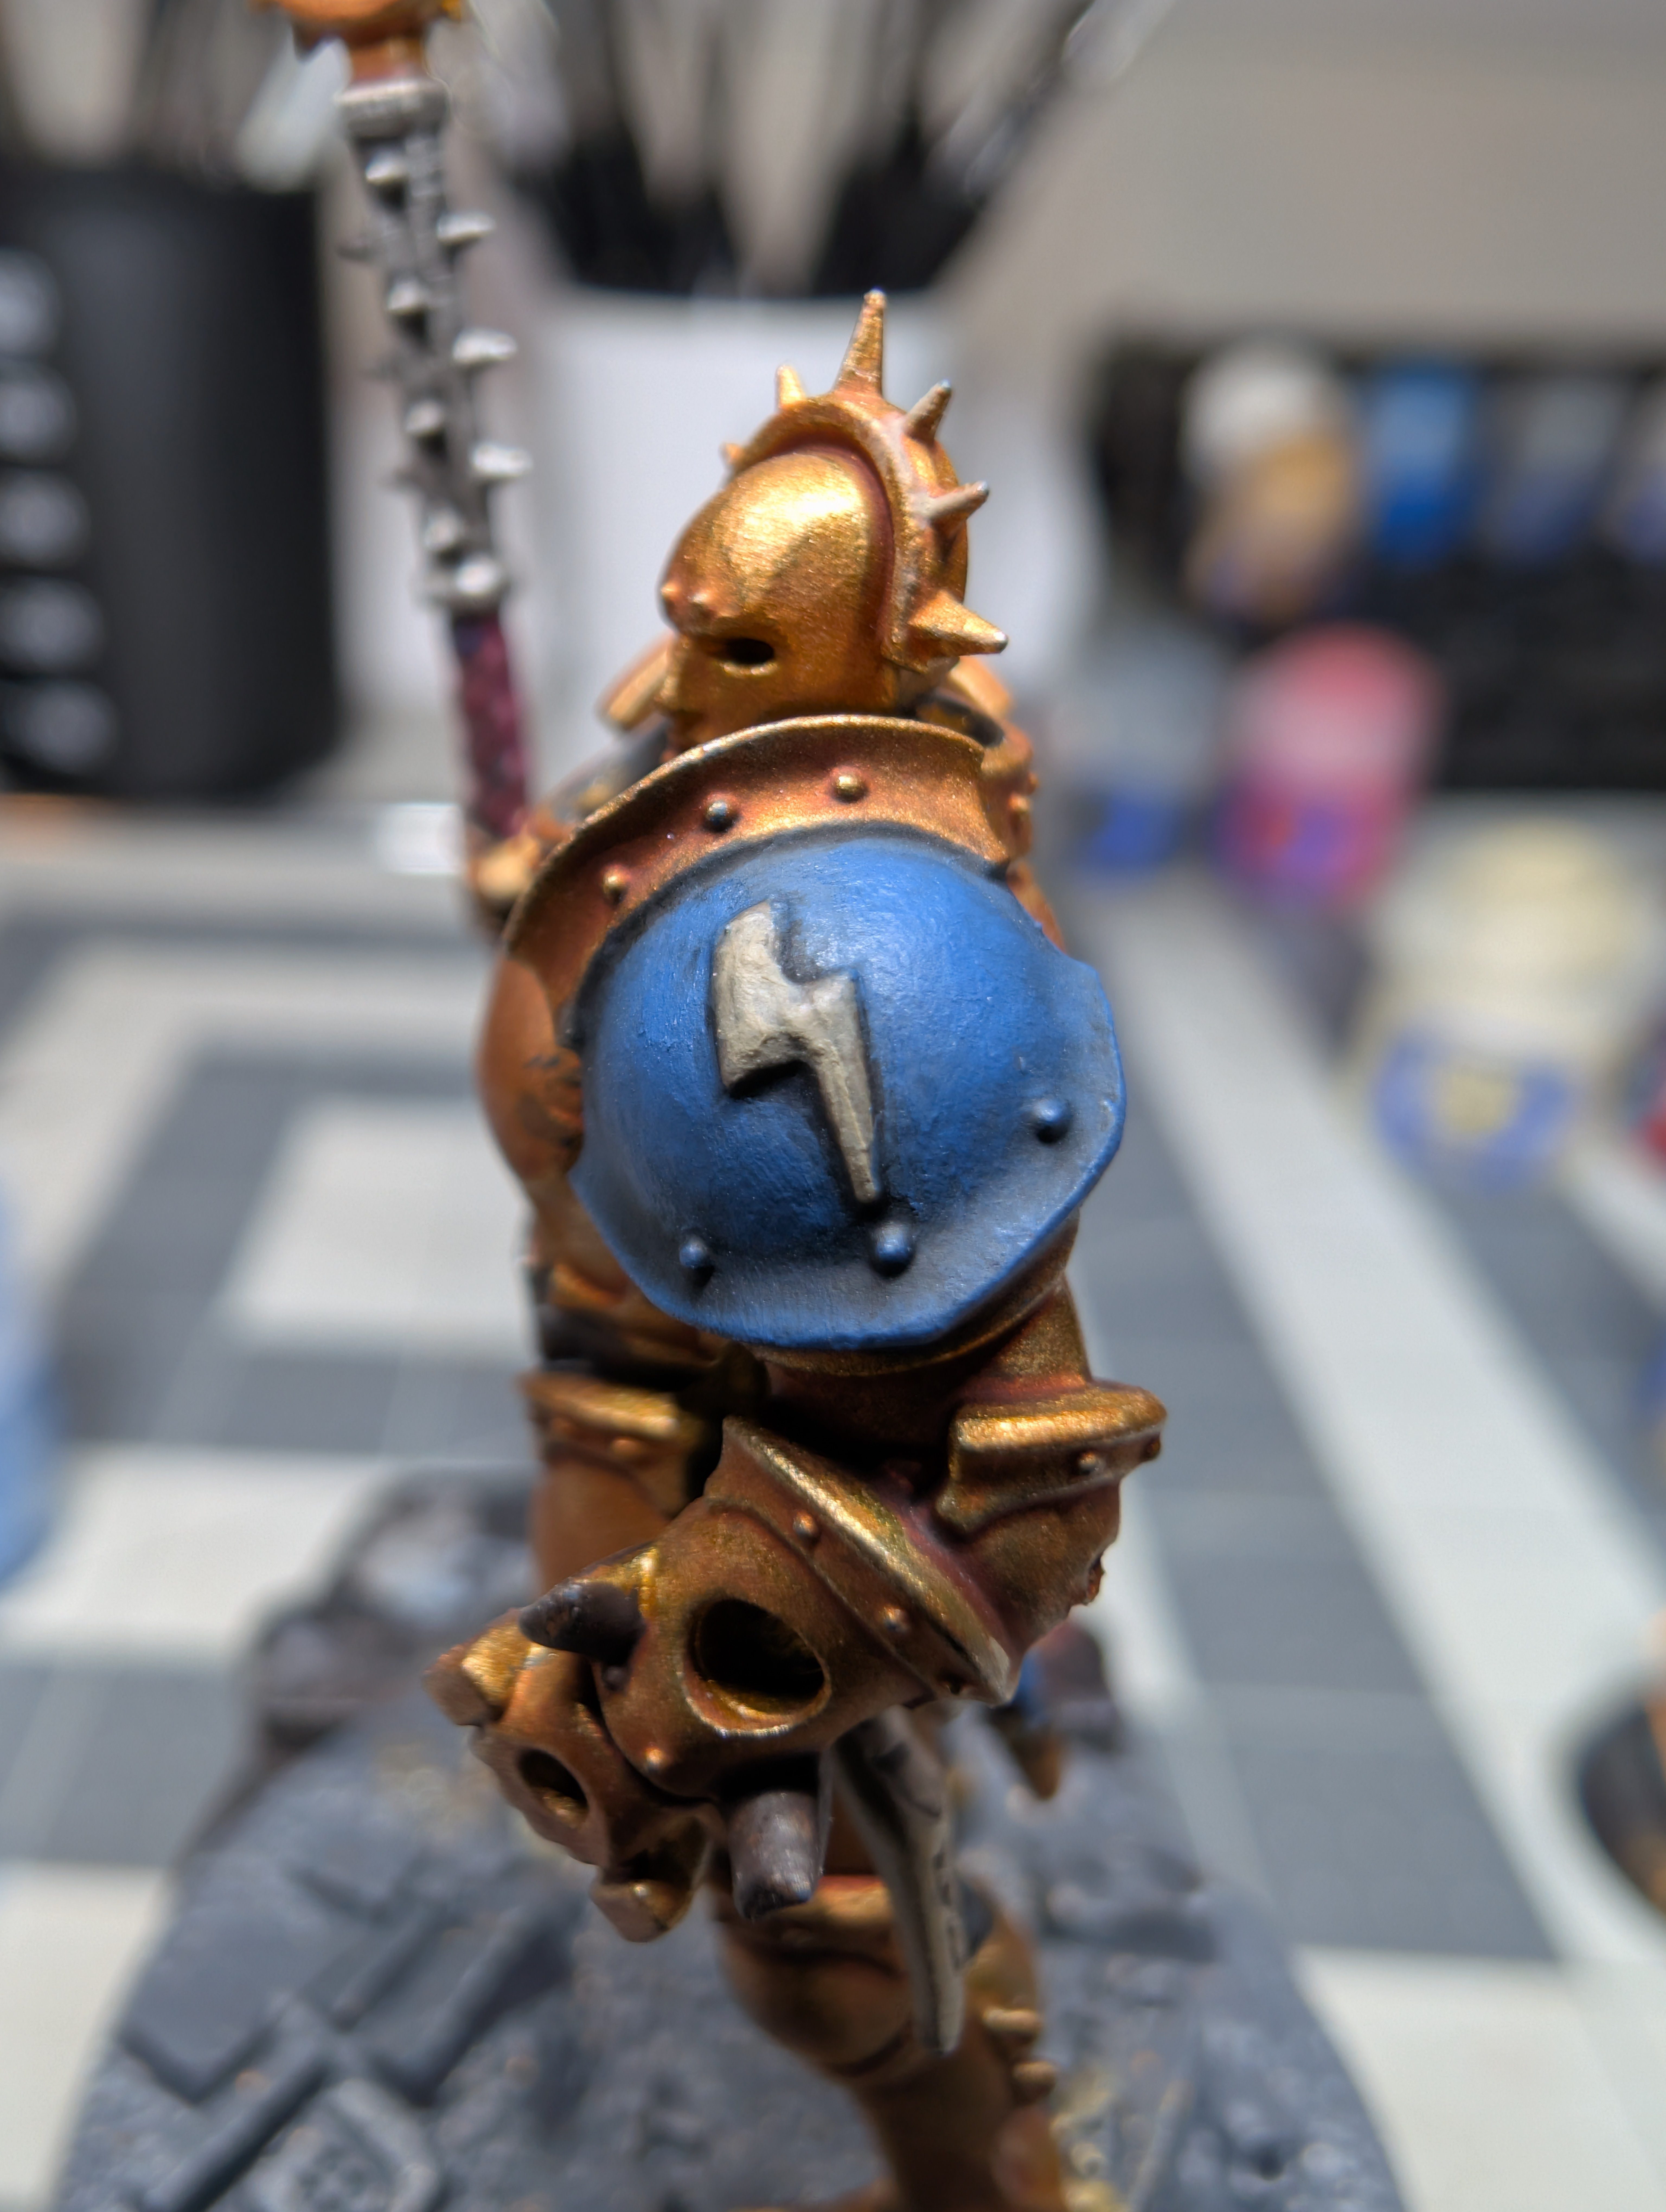
For example, here on the shoulder the shape is curved metal, and the shade settled nicely into the crease where the shoulder pad flares out at the bottom. This crease is also along the bolts in the shoulder pad, which I was want to maintain shading around.
My base color is a dark, Kantor Blue, and my layer color is a lighter, Alaitoc Blue. But, to jump from a shaded (Nuln Oil) Kantor blue to Alaitoc would be too severe and the layer would choppy and rigid. My solution was to mix a little bit of the Kantor Blue and Alaitoc Blue on my wet palette to tone down the paint color just a little. I then thinned the color way down, removed most of the excess paint of my brush, and feathered the color on the edge of the should blade and above the crease going upwards toward the top of the shoulder pad, where the color would be brighter from light sourcing. I also just dabbed the three bolts with this color, so they would stand out from that shaded crease in the armor piece.
I then went to straight Alaitoc Blue and applied it more toward the top of the shoulder pad and along the edge of the bottom of the shoulder pad as sort of a layer-highlight.
Step 5b: Completing the Layer Painting Process
I’m going to continue working on layering the model until all the areas are completed. I’m going to layer the gold last because a single color will be easiest to clean up any mistakes.
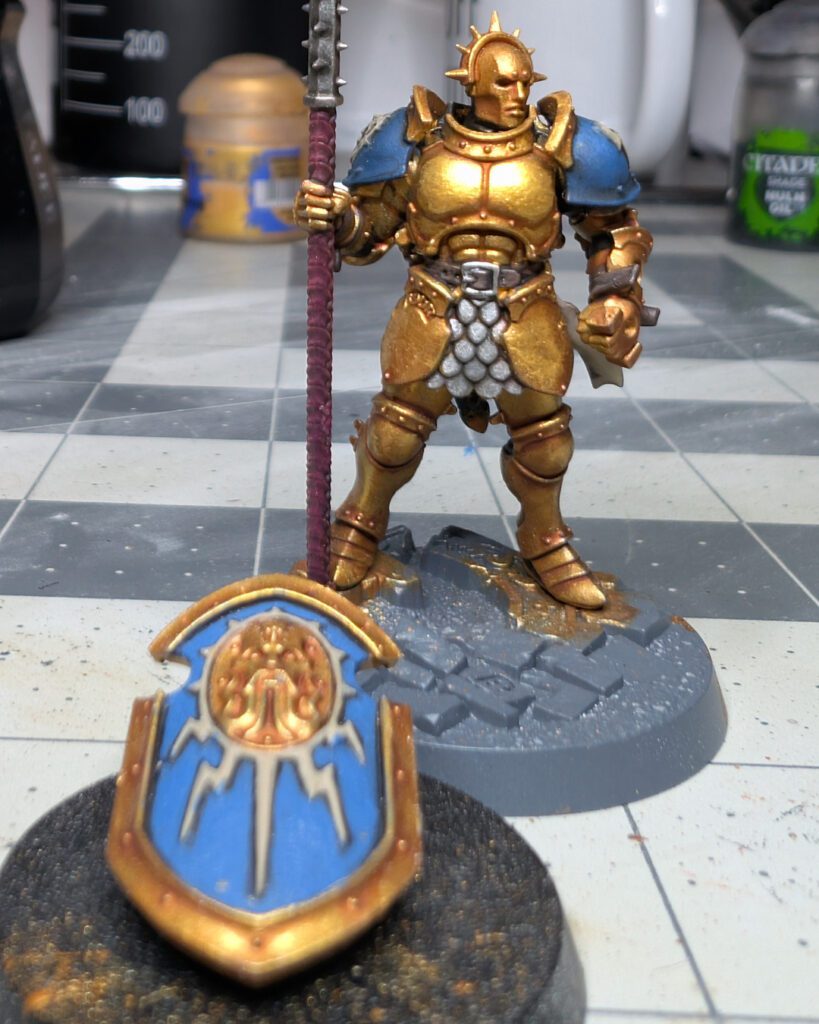
Just for some further reference, here is the model with the layering staged finished. I did a medium silver on the scale skirt, spear, and belt, a medium pink on the weapon handles, brought the grey-white emblems and scroll up a little bit with Karak Stone, and lastly, I used a translucent gold metallic paint called Auric Armor Gold to layer up all of the gold armor and shield.
Our model looks pretty good, and is definitely table-top ready, but if you want to make our model (and our army) really stand out check out our post How to Highlight Miniatures for Extra Contrast to further embellish details, define our light sourcing, and make our models pop on the table top.
Step 6: Review and Refine
- Step back and examine the miniature under good lighting.
- Adjust any areas that look too harsh or uneven.
- If needed, add a final glaze to unify the transitions.
Best Uses for Layering
- Faces and Skin Tones – Achieves lifelike gradients.
- Clothing and Cloaks – Creates realistic fabric folds.
- Power Armor and Weapons – Enhances sci-fi and fantasy models.
- Organic Elements – Perfect for blending colors on creatures and monsters.
Final Thoughts
Layering is a game-changing technique that adds depth and realism to your miniatures. With patience and practice, you’ll be able to achieve smooth transitions and professional-looking results. Incorporating stable hand positioning, controlled brush strokes, and the right paint consistency will improve your results even further. Start experimenting with layering on your next model, and take your painting skills to the next level!
Shopping List
General Supplies:
- Wet Palette
- Paint Puck or Water Cup
- Citadel Medium Base Brush
- Citadel Medium Dry Brush
- Citadel Medium Shade Brush
Paints:
Models:

No responses yet