Mythic Minis is reader-supported. When you buy through our affiliate links, we may earn a small commission—never costing you anything extra. Your support helps us keep creating helpful painting guides and hobby resources for everyone.
Introduction
Highlighting is a crucial technique in miniature painting that enhances contrast, improves readability on the tabletop, and makes your models stand out. By selectively applying lighter colors to raised areas, you create a sense of depth and realism. In this guide, we’ll explore different methods of highlighting and how to achieve sharp, eye-catching details on your miniatures.
Why Highlighting is Important
- Increases Contrast – Makes details pop and improves model visibility from a distance.
- Enhances Realism – Simulates how light naturally hits surfaces.
- Guides the Viewer’s Eye – Draws attention to key areas like faces, armor edges, and weapons.
- Complements Shading – Works alongside washes and shadows to create a balanced look.
What You Need for Highlighting
- Acrylic Paints – Choose a lighter shade of your base color or mix in white.
- Fine Detail Brush – A sharp-pointed brush helps with precision.
- Palette – Helps control paint consistency.
- Steady Hands – Use a stable grip for accuracy.
Techniques for Highlighting Miniatures
1. Edge Highlighting
Edge highlighting involves applying a thin, bright line of paint to the sharpest edges of a miniature, such as armor plates, weapons, or clothing folds. This technique enhances definition and creates a crisp, professional look.
How to Edge Highlight:
- Use a fine brush with a small amount of paint.
- Drag the side of the brush along raised edges rather than using the tip.
- Apply light pressure to maintain thin, even lines.
- Focus on areas where light naturally catches, such as helmet edges and shoulder pads.
Above is a video demonstrating basic edge highlighting techniques. It shows everything from paint consistency and volume on the brush, holding the miniature and your hands steady for precision painting, and how to use the edge of the brush with steady and consistent strokes to highlight those small details.
2. Drybrushing for Highlights
Drybrushing is a fast and effective way to highlight textured areas, such as fur, chainmail, or rocky bases. It involves using a stiff brush to apply a small amount of paint to raised details.
How to Drybrush Highlights:
- Load a drybrush with a light paint color and remove most of it on a paper towel.
- Lightly sweep the brush over raised areas in a back-and-forth motion.
- Build up layers gradually for more subtle highlights.
I did not use any drybrushing on this Vindictor, Stormcast Eternal model, but we have an awesome tutorial post, How to Drybrush Miniatures: A Simple Technique for Stunning Highlights
3. Layered Highlights
Layering involves applying progressively lighter shades in thin layers to blend highlights smoothly into the base color.
How to Layer Highlights:
- Thin your highlight color with water or medium.
- Apply the paint in multiple thin layers, focusing on raised areas.
- Feather the edges to create smooth transitions.
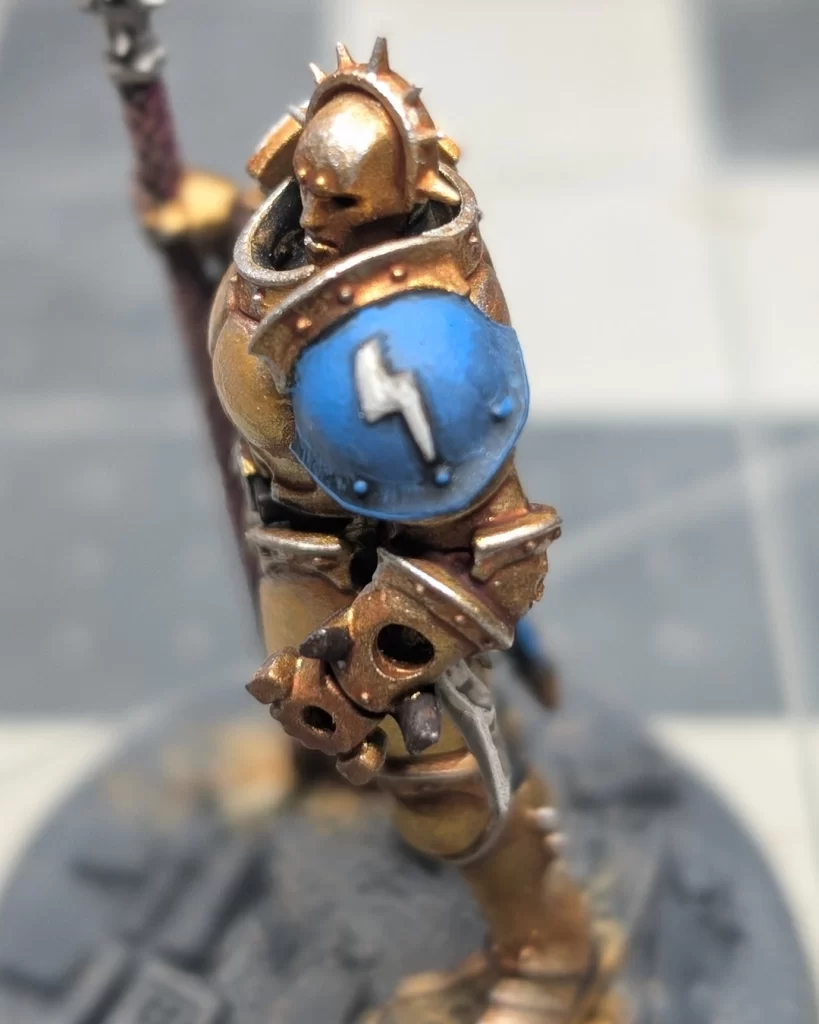
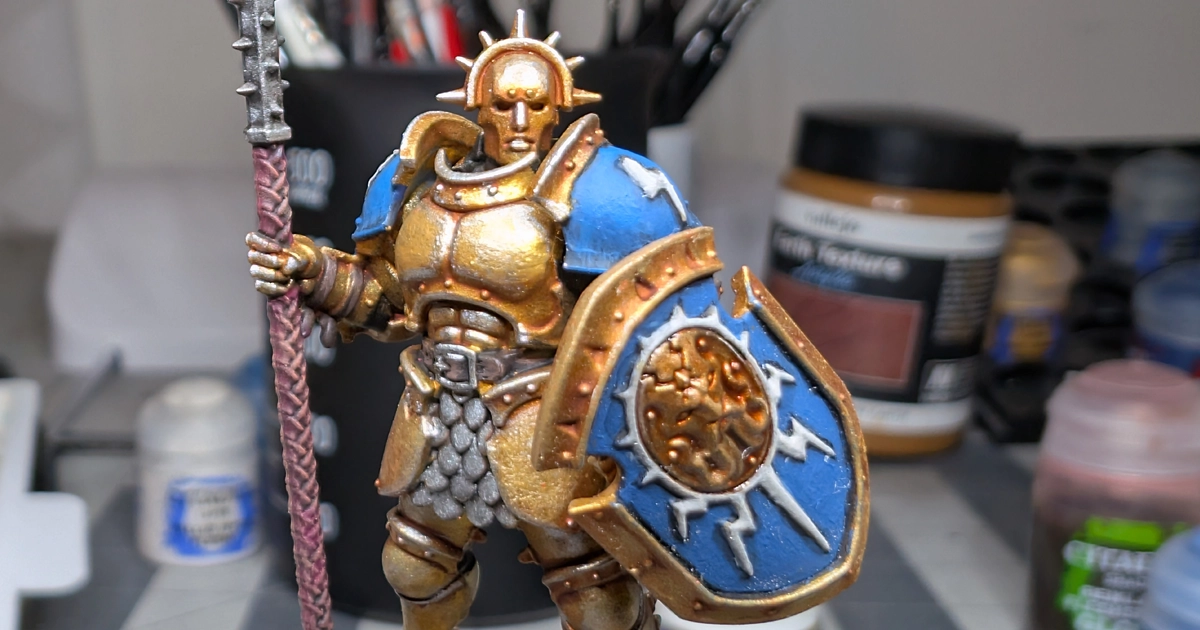
Here is an example of a layered highlight on his shoulder pad. I’ve brought up the color on the very top of the shoulder pad, where I am imagining my light source originates, by using Teclis Blue to drive the contrast against the dark blue hues underneath. Of course, my blending skills need improvement, and the camera captures every little flaw. But, the model looks terrific live and with human eyes, and yours will too!
4. Spot Highlighting
Spot highlighting targets very specific points where light would be most intense, such as the tip of a nose, knuckles, or the top of a shoulder plate.
How to Spot Highlight:
- Use the brightest highlight color sparingly.
- Apply tiny dots or short strokes to extreme high points.
- Keep highlights subtle to avoid an unnatural look.
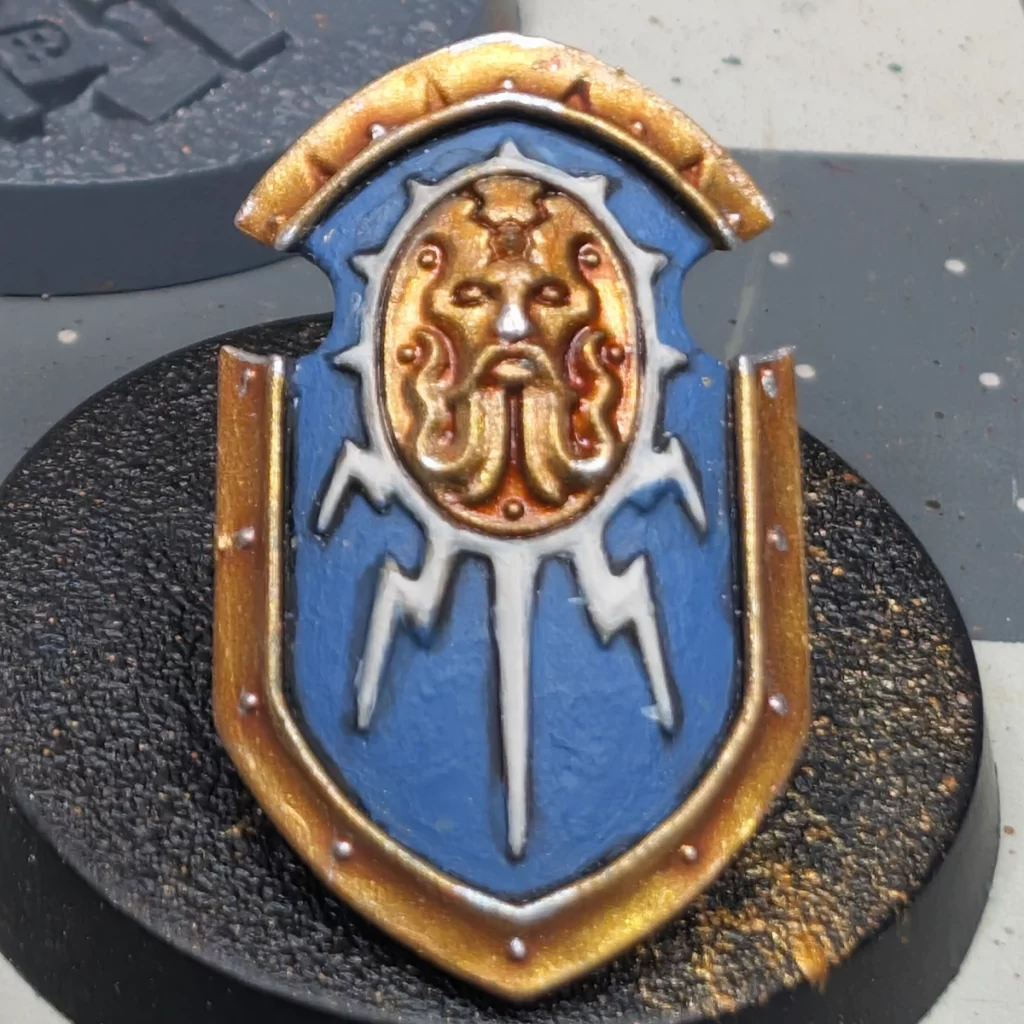
Here I have spot highlighted some of the points on the shield with Stormhost Silver, which contrasts greatly against the golds. I hit the rivets and just the corners and high points on the shield. What this does is it breaks up the color and helps guide the viewer’s eyes to make the model more readable.
The trick with this kind of highlighting is a little goes a long way. For instance, his nose looks like it has zinc oxide on it – maybe I could have skipped that. Instead, there are rivets on the mask part of the emblem and a diadem I completely missed (such small details!).
Choosing the Right Highlight Colors
- Use a Lighter Version of Your Base Color – Mix in white or a neutral highlight shade.
- For Warm Colors (Red, Orange, Yellow) – Add a touch of off-white or pale yellow.
- For Cool Colors (Blue, Green, Purple) – Use a lighter tone of the same color or mix in a neutral highlight color.
- For Black or Very Dark Colors – Use dark grays rather than pure white to keep a natural transition.
Here are 5 Best Tools for Choosing Colors and Painting Miniatures to help you pick out layer and highlight colors that will complement your base color scheme.
Final Tips for Better Highlights
- Keep Paint Consistency Right – Too thick, and it will leave harsh lines; too thin, and it won’t show up well.
- Use a Steady Hand – Rest your painting hand on a stable surface for better control.
- Turn the Miniature Instead of Moving Your Brush – This helps maintain smooth strokes and precision.
- Less is More – Over-highlighting can make models look unnatural. Keep it subtle and refined.
Final Thoughts
Highlighting is one of the most effective ways to bring your miniatures to life and add depth to your paint job. Whether you’re edge highlighting for crisp definition or dry-brushing for quick texture, mastering these techniques will greatly improve the quality of your models. Experiment with different highlight methods and find what works best for your painting style!
Now grab your brush and give your miniatures that extra contrast they deserve!
Shopping List
General Supplies:
- Wet Palette
- Paint Puck or Water Cup
- Citadel Medium Base Brush
- Citadel Medium Dry Brush
- Citadel Medium Shade Brush
Paint List:

No responses yet