Mythic Minis is reader-supported. When you buy through our affiliate links, we may earn a small commission—never costing you anything extra. Your support helps us keep creating helpful painting guides and hobby resources for everyone.
Introduction
Once your miniature has a solid base coat, the next step in bringing it to life is shading. Applying shade or washes enhances the depth and realism of the model by darkening recesses and emphasizing details. This step creates natural shadows, improving contrast and making details pop with minimal effort. In this guide, we’ll cover how to shade miniatures effectively for a professional-looking finish.
Step 1: Choosing the Right Shade or Wash
Shades (or washes) are thinned-down paints designed to settle into recesses, adding depth to the model. They come in various tones to complement different colors:
- Black Wash (e.g., Nuln Oil) – Best for metallics, dark armor, and deep shadows.
- Brown Wash (e.g., Agrax Earthshade) – Ideal for warm tones, leather, wood, and natural shading.
- Sepia or Flesh Wash (e.g., Seraphim Sepia) – Great for skin tones, parchment, and aged effects.
- Blue, Green, or Other Colored Washes – Useful for tinting or enhancing specific colors while shading.
Of course, these are not hard and fast rules that are set in stone. I often use a Sepia wash on Gold because it makes it look crisp without changing the color too much. Or, in the past I’ve switched between Brown and Red-Brown washes for bones, depending on the environment of my skeletons.
Step 2: Applying the Shade Properly
- Load the Brush
- Use a medium or large brush with soft bristles to apply the shade evenly.
- Dip your brush into the wash and remove excess to avoid overwhelming the model.
- Apply the Wash Liberally
- Brush the wash over the entire surface or focus on recessed areas.
- Let gravity and capillary action pull the wash into the deeper parts of the model.
- Control Pooling
- Avoid excessive pooling in flat areas by dabbing away excess wash with a dry brush or paper towel.
- If the wash settles too heavily in unwanted spots, use a clean, damp brush to lift excess before it dries.
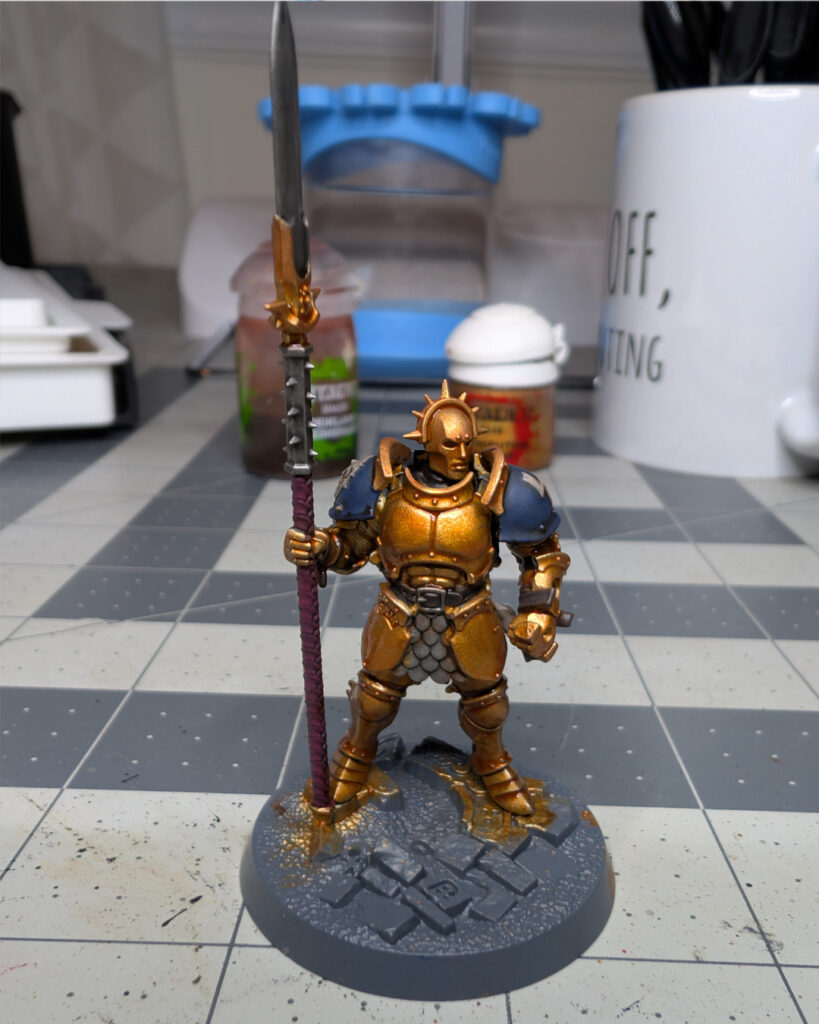
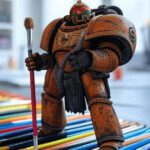
As a new painter, I was always fascinated by how slathering wash on models brought highlights and details to life on the model. The effect made me feel like I was an expert painter. The wash looks amazing and bright when it’s wet on the model, but then it dries and you find yourself with a new world of problems – pooling, detail obscuring, coffee staining on flat surfaces, and a generally dingy or unnatural look. Here is the first stage of shading a model that has been base coated with Nuln Oil in all areas that are not gold.
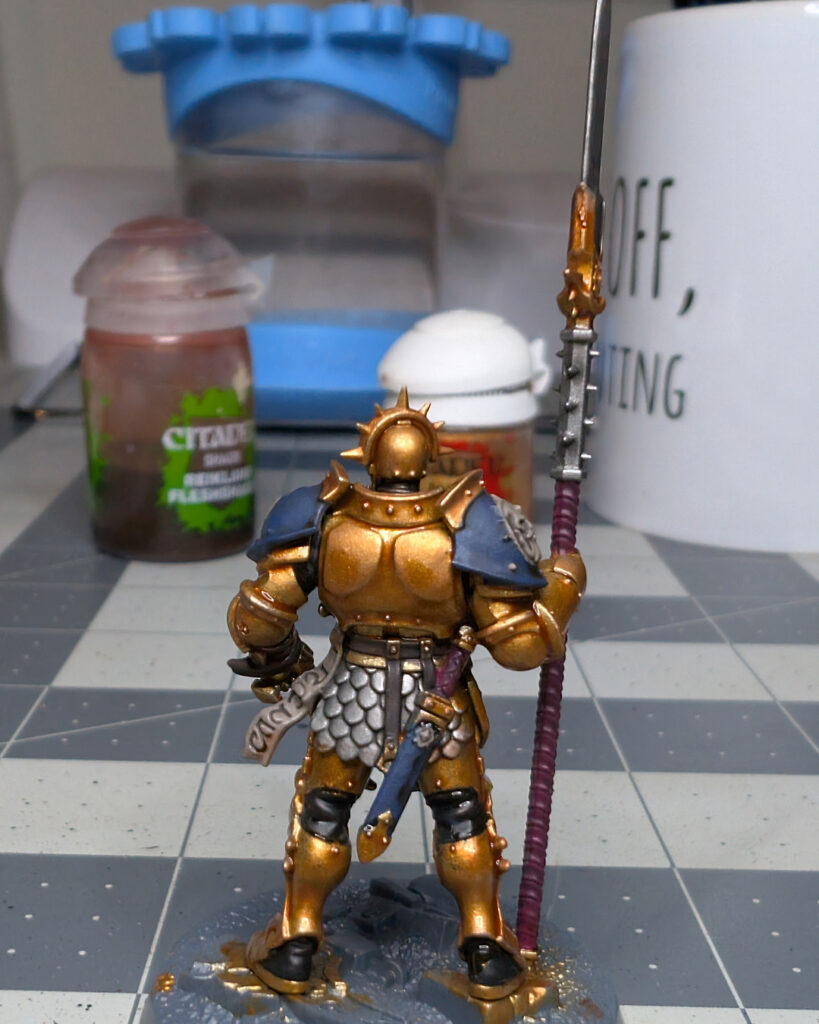
Above, all parts of the model, except for the gold, have been washed with Nuln Oil, a black shade. When approaching multiple colors of washes for a model, in this case 2 colors, visualize the most effective method and order to minimize mistakes and to easily correct them when mistakes happen.
In this case, I decided to shade with Nuln Oil first. Everything except the gold was to be shaded with the Nuln Oil, this way I know that I will only need to correct 1 color (gold) if my shading gets a little messy.
Step 3: Choosing a Wash Method
There are different ways to apply shade depending on the effect you want:
All-Over Wash
- Best for quick and effective shading across an entire model.
- Works well for organic textures, cloth, and heavily detailed miniatures.
Targeted Shading
- Applied only to recesses to maintain brighter base colors.
- Ideal for cleaner, more controlled results on armor and smooth surfaces.
Glazing for Subtle Shadows
- A thin layer of wash used to darken an area slightly without overpowering.
- Perfect for softening transitions and blending colors naturally.
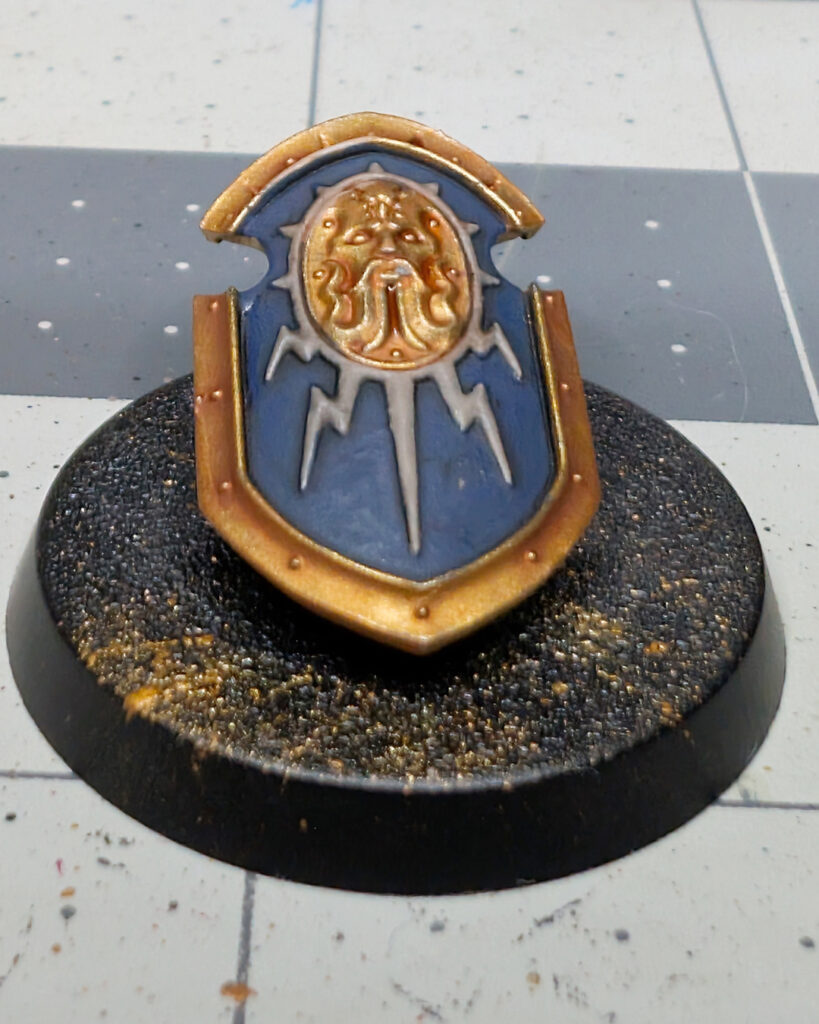
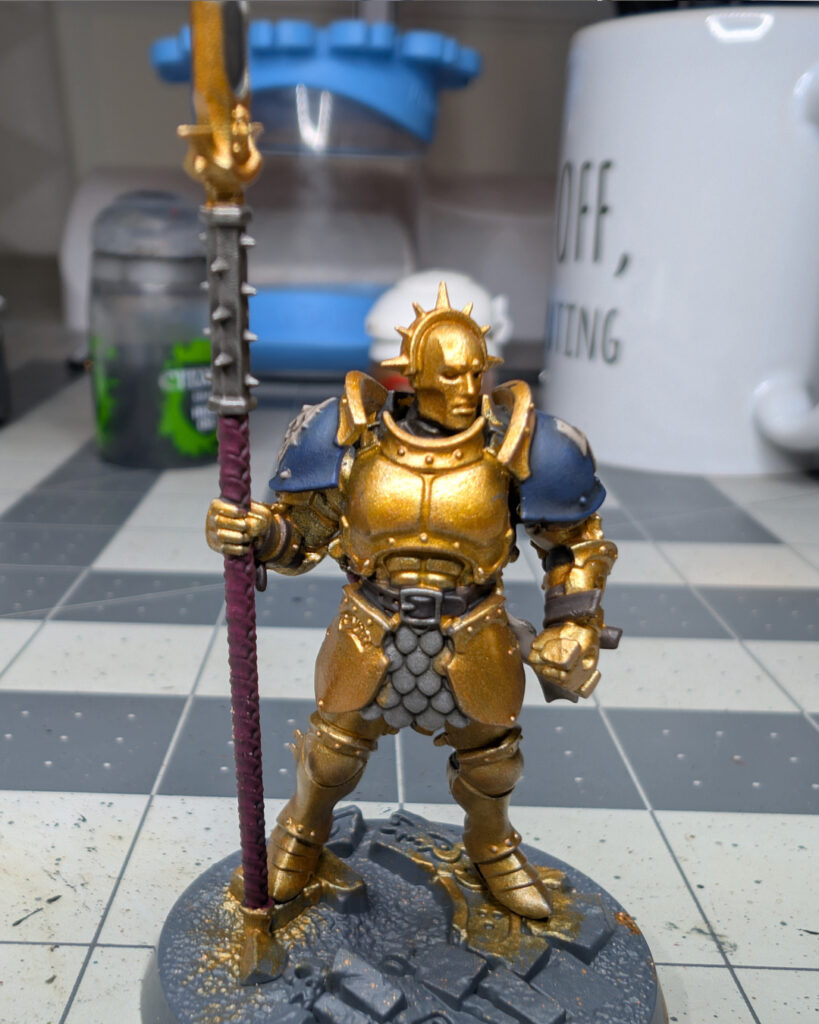
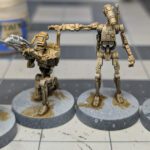
Above are pictures of the Gold being washed with Reikland Fleshshade (a red-brown). I used the all-over wash method here. While I didn’t exactly use a target shading technique, I did target the elements of the model were shaded with which colors. For this I had to use a little finesse, and in some areas I used a smaller brush.
Shading is a technique that is easy to learn but difficult to master. Many novice painters abuse shade in the beginning (like I did) and slather it on. This makes the model dark, stained, and sometimes the paint job becomes unreadable. With time and experience you’ll learn what is not too much paint to use and what is too little, and you’ll learn the behavior of the very thin paint of how it settles into recesses based on gravity and at what angle you hold the model.
Step 4: Letting the Wash Dry Completely
- Drying times vary but generally take 20-30 minutes.
- Avoid handling the model while the wash is drying to prevent smudging.
- Expect the model to look slightly darker once fully dry, so plan accordingly.
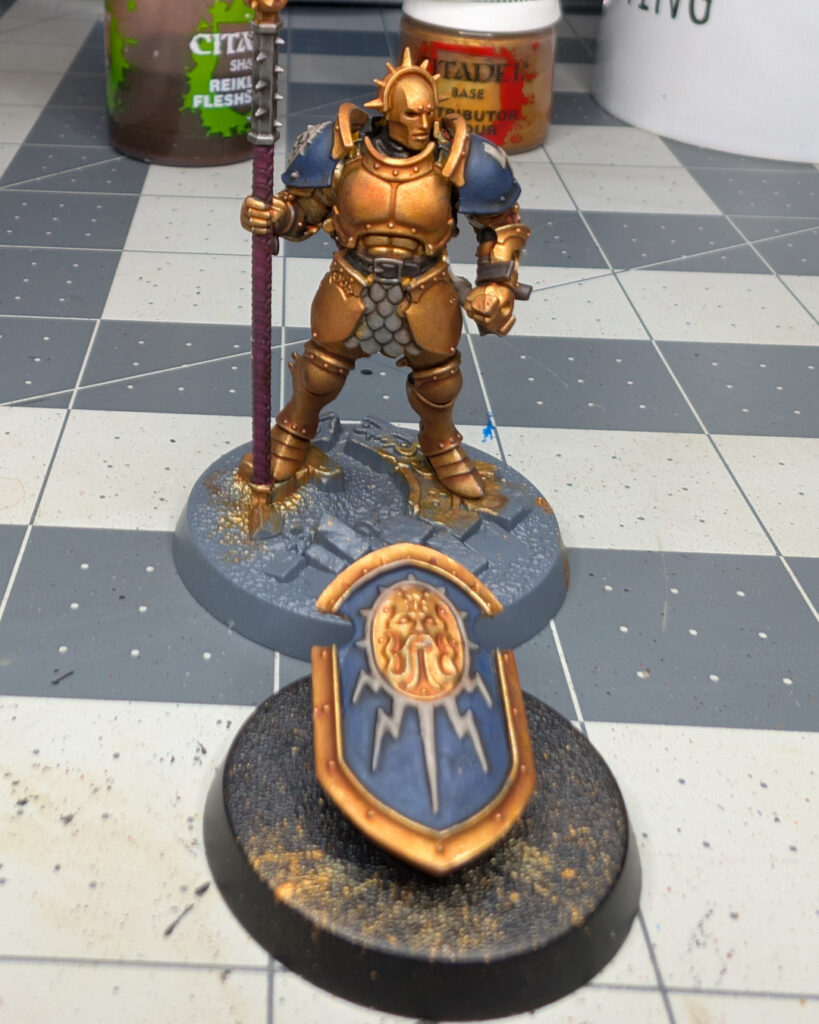
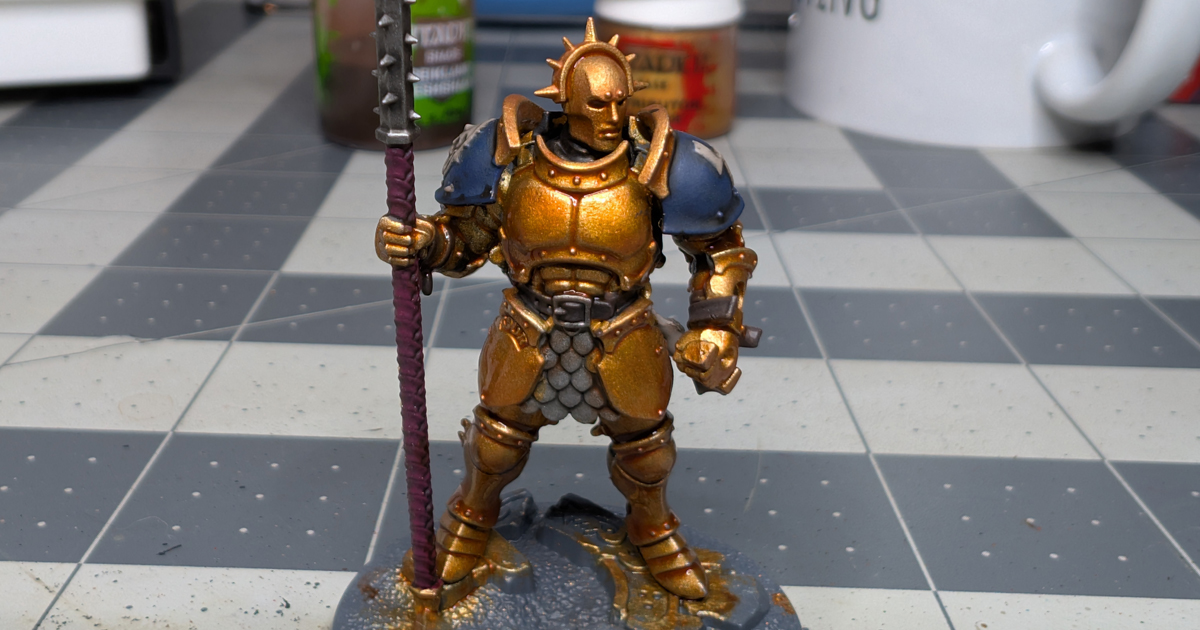
Here is the final result of the model after both shades have completely dried. As you can see the model has dulled – especially those flat panels of armor that should be bright gold. My next step is to use thinned versions layer colors to restore the vibrancy of the original colors, and brighten, and create contrast on features before highlighting the details.
Keep in mind, you want those darkened recessed areas to remain shaded, and the beauty of the shade technique is the way the paint creates a natural gradient or blend. The trick going forward is to try to make adding bright colors look natural.
Step 5: Cleaning Up and Refining the Model
- If the wash darkens areas too much, you can reapply the base color to restore highlights. Be careful doing this as mistakes can lead to reapplying the wash, and it will not look uniform and consistent.
- Use layering techniques to bring back mid-tones where necessary.
- For extra contrast, follow up with highlighting techniques to brighten raised areas.
Final Thoughts
Shading miniatures is a crucial step in creating depth and realism. Whether using a quick all-over wash or precise targeted shading, mastering this technique will significantly improve your miniatures’ appearance.
Shopping List
General Supplies:
- Wet Palette
- Paint Puck or Water Cup
- Citadel Medium Base Brush
- Citadel Medium Dry Brush
- Citadel Medium Shade Brush
Paints & Washes:
- Citadel Colour Shades
- Vallejo Game and Model Color Washes
- Army Painter Quickshade Washes
- AK Interactive Washes
- Greenstuff World Inktensity & Washes
No responses yet