Mythic Minis is reader-supported. When you buy through our affiliate links, we may earn a small commission—never costing you anything extra. Your support helps us keep creating helpful painting guides and hobby resources for everyone.
Introduction to the Sylvaneth Awakened Wyldwood
To paint the Awakened Wyldwood is a great opportunity to bring the eerie and mystical atmosphere of the Sylvaneth forests to life on the battlefield. With its twisted trees and ancient, overgrown textures, this terrain piece offers plenty of creative freedom to experiment with different techniques like dry brushing, shading, and foliage application.
In this guide, we’ll walk through the step-by-step process to paint the Awakened Wyldwood, from choosing a natural yet enchanted color scheme to adding finishing touches that highlight its role as both a beautiful and deadly feature of the Mortal Realms. Whether you’re aiming for a vibrant, magical forest or a haunted woodland, this guide will help you achieve stunning results.
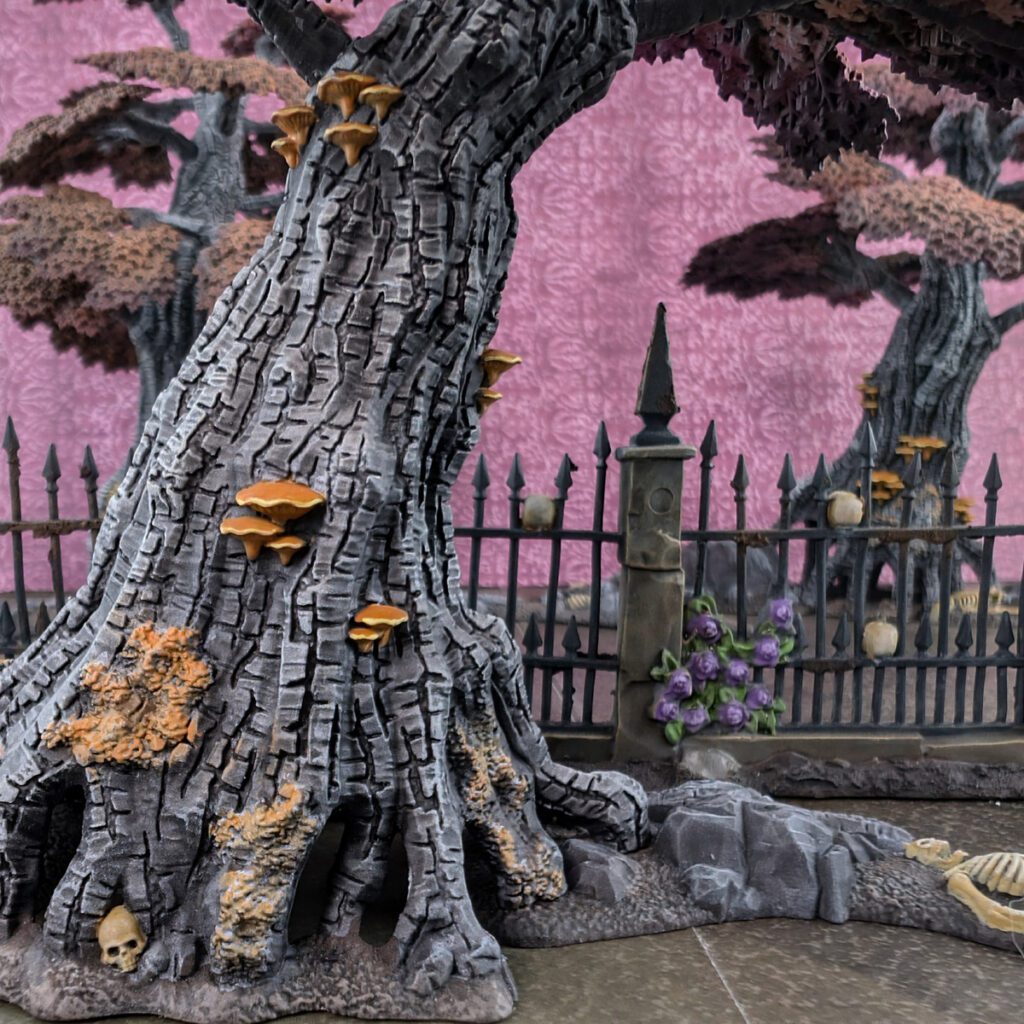
Awakened Wyldwood Battlefield Role and Strategy
Sylvaneth’s Lifeblood: Mobility and Synergy
In Age of Sigmar 3rd Edition, the Awakened Wyldwood is vital for the Sylvaneth, enabling them to harness the Spirit Paths for teleportation across the battlefield. This mobility allows Sylvaneth units to ambush or reinforce critical positions. Wizards can summon more Wyldwoods to expand the army’s influence, offering enhanced spellcasting capabilities and blocking line of sight to protect units.
Nature’s Wrath and Protection
The Awakened Wyldwood punishes enemies within range, inflicting mortal wounds when Sylvaneth wizards cast nearby, while also offering defensive buffs like cover and save rerolls to allied units. Units such as Kurnoth Hunters and Treelords gain significant benefits when fighting near the Wyldwood, making it an indispensable tool for both offensive and defensive strategies.
Why I Painted the Awakened Wyldwood
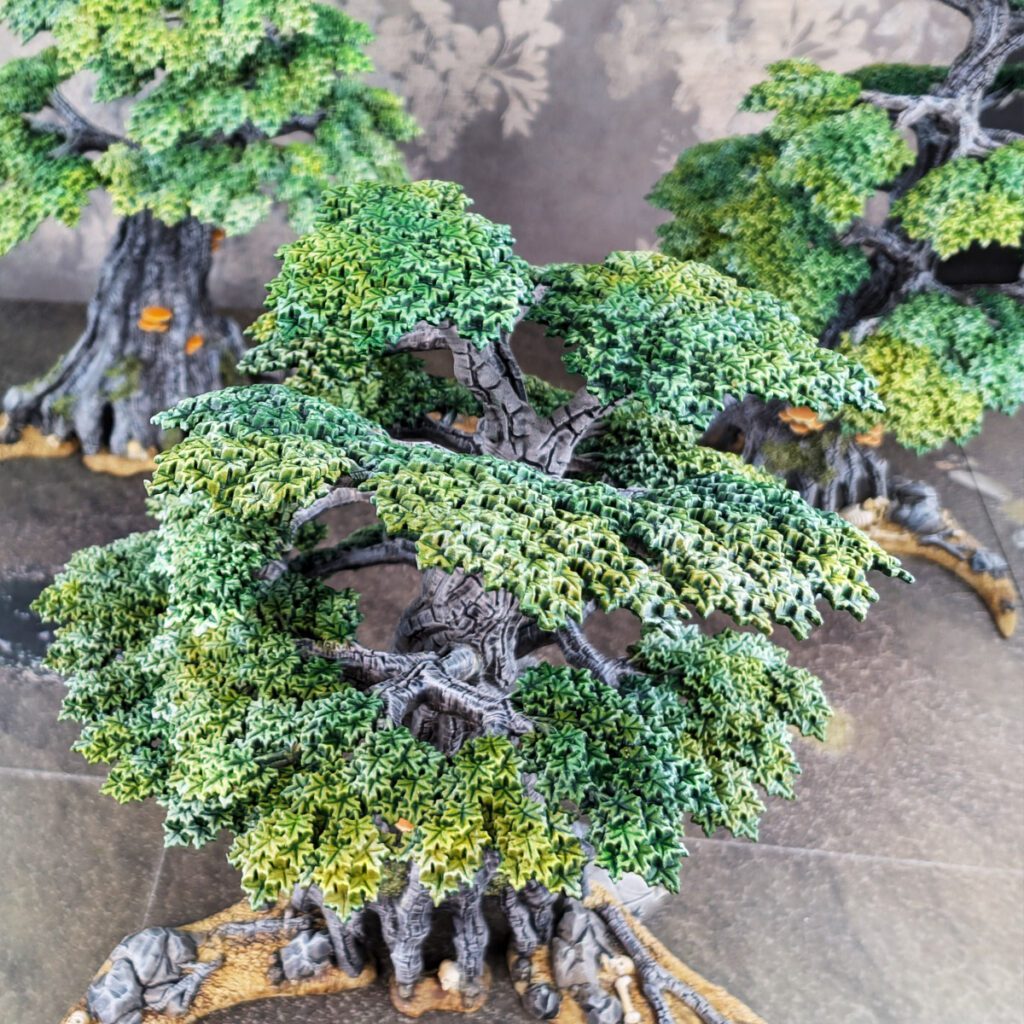
One might think I have grandiose designs for collecting a mystical, nature-bound army of Sylvaneth. Why else would I paint their signature terrain piece? Unfortunately, the reason is not as glamorous as all that.
Truthfully, I painted these trees because we need some terrain pieces and features for miniature photography. It’s that simple. A less disappointing reason though is that I saw the Awakened Wyldwood kit while at the hobby store and immediately fell in love. I had to paint them!
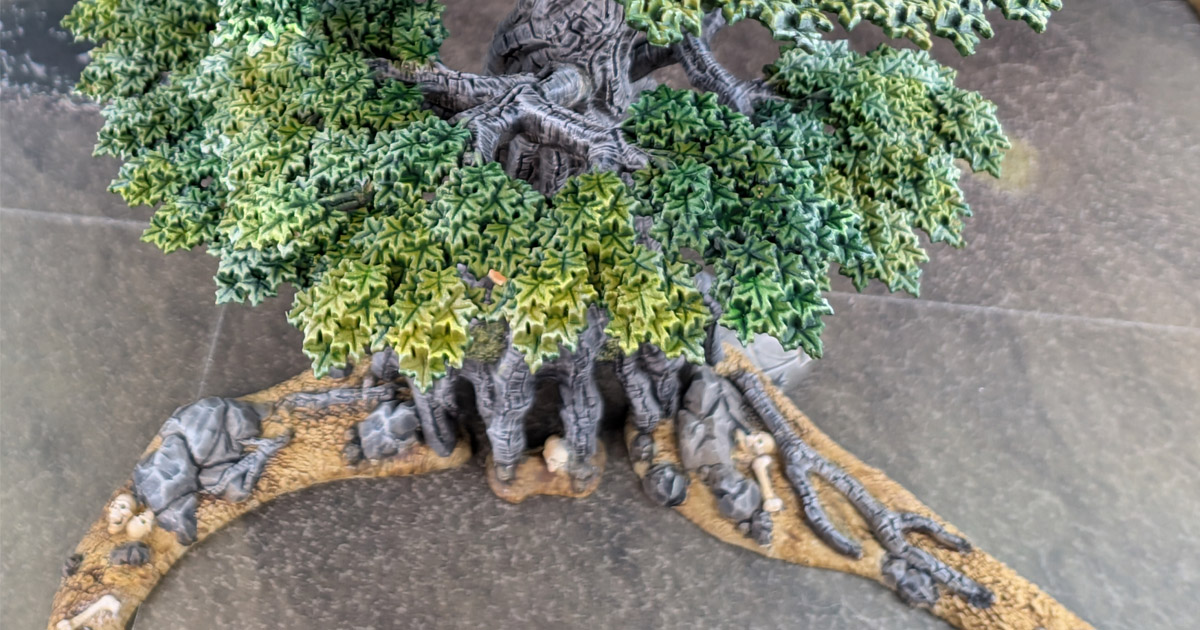
I bought two kits, because I wanted to paint some different seasons, so here I feature both Spring and Autumn
The Painting Process for Autumn Awakened Wyldwood
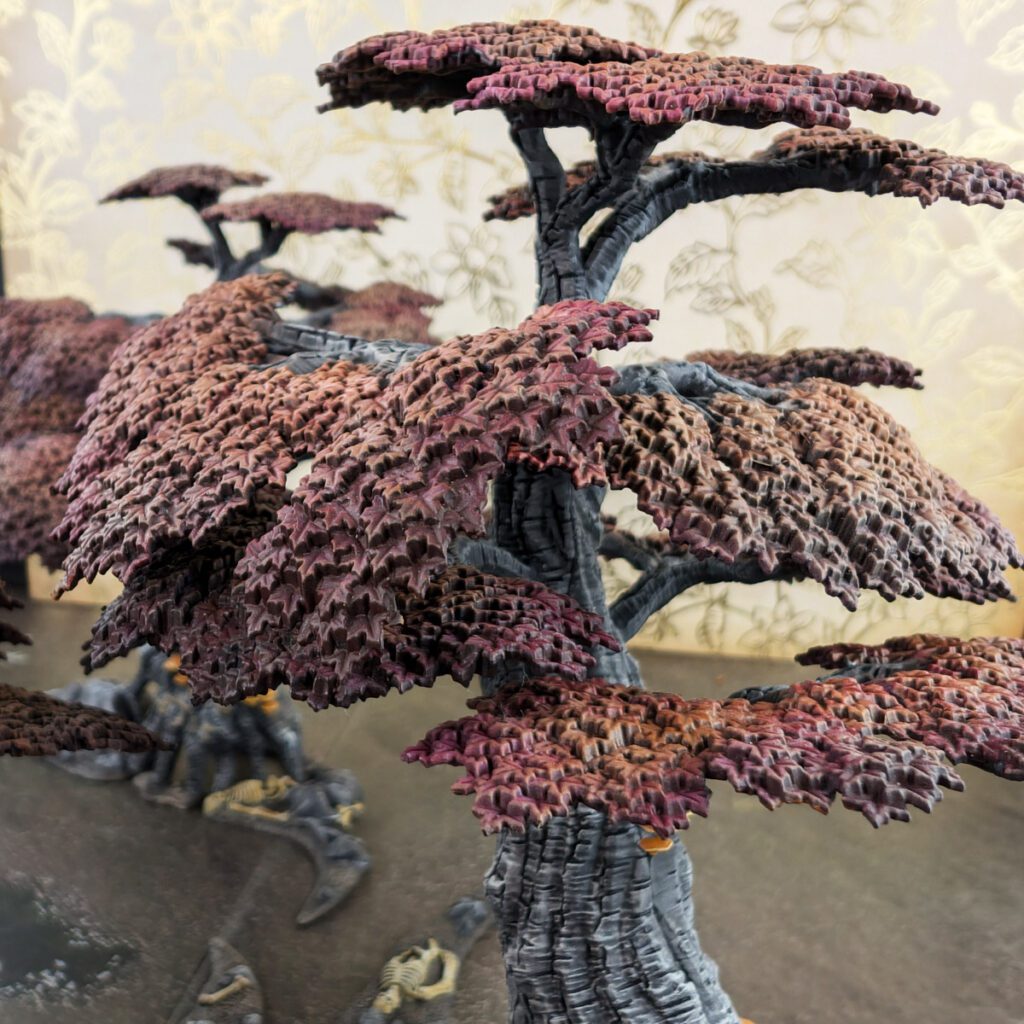
I broke the painting of the Autumn Trees into 3 main parts:
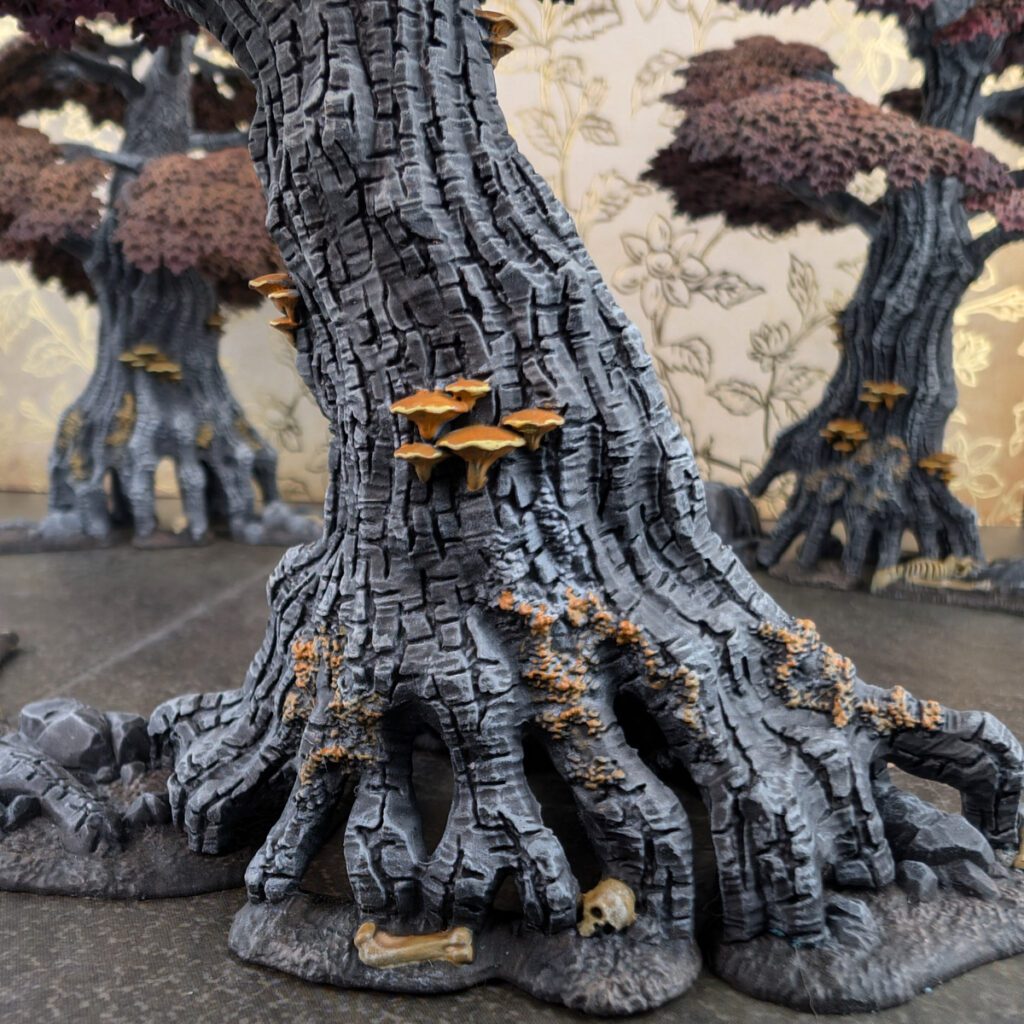
- The Bark of the tree with mushroom and moss details
- The Ground with Skeletons and Rock details
- The Leaves both top and bottom
Priming the Autumn Awakened Wyldwood
I started by priming the ground pieces, trunks, and leaves with Mechanicus Standard Grey, and because I wanted to use contrast paints I sprayed Grey Seer on all of the pieces at about a 45 degree angle. This method is what they call a Zenithal prime, and when spraying the Grey Seer, you want to spray very lightly so you only hit the top-most textures of the model.
New to Zenithal priming? Check out our guide Zenithal Priming: The Secret to Faster Miniature Painting.
Paint Colors for the Bark and Rocks
- Basilicanum Grey Contrast
- Administratum Grey
- Ulthuan Grey
First time using Citadel Contrast paints? Check out our guide How to Paint Miniatures with Contrast Paints.
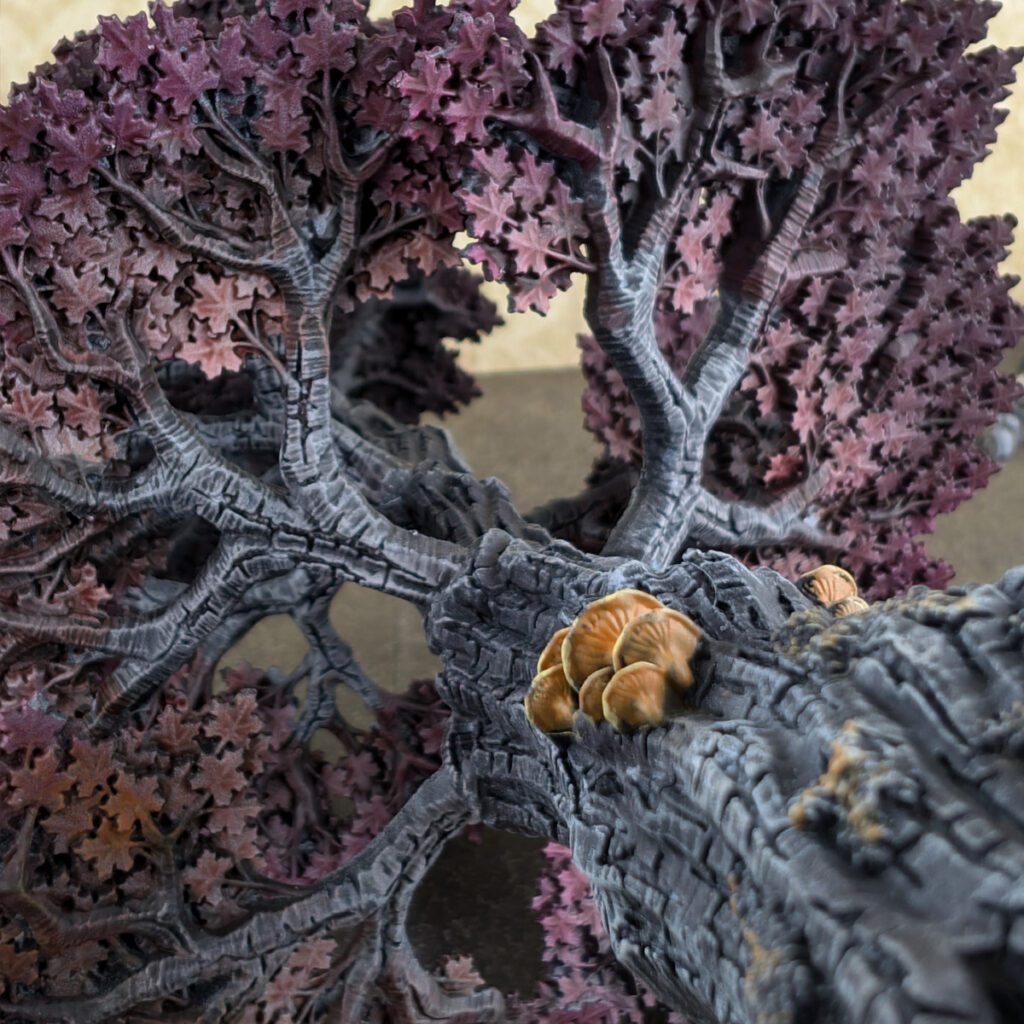
The base-coat layer is Basilicanum Grey Contrast, which will give your bark and rocks varying grey colors and darken the recesses of the bark and cracks in the rocks. Make sure to get both the top and bottom parts of the leaves, and be careful not to get paint on the leaves because it will be difficult to correct the Zenithal prime.
Once your Contrast paint is dry, do a medium to heavy dry-brush of Administratum Grey.
Finally, do a light dry-brush of Ulthuan Grey to hit the highest textures and edges of the bark and rocks to give that bright highlight.
Painting the Mushrooms and Moss
- Tau Light Ochre
- Seraphim Sepia
- Doron Yellow
Base coat the mushrooms and Moss in Tau Light Ochre. Next, use Seraphim Sepia to shade the mushrooms and moss. And lastly, highlight the edges and details of the mushrooms and moss with Doron Yellow.
Painting the Leaves
- Guilliman Flesh (Contrast)
- Volupus Pink (Contrast)
- Skrag Brown
- Deathclaw Brown
- Elven Skin (Two Thin Coats) or Kislev Flesh
Beginning with the Contrast paint base coats using the Volupus Pink along the edges of the leaves and the leaves on the under-side. The Guilliman Flesh is painted more towards the center and tops of the leaves giving the illusion of the light source scattering through the leaves and getting darker towards the bottoms of the branches.
I personally discovered that contrast paints wet-blend very nicely and create interesting color variations depending on the strengths of each color combined with the colors of the prime color.
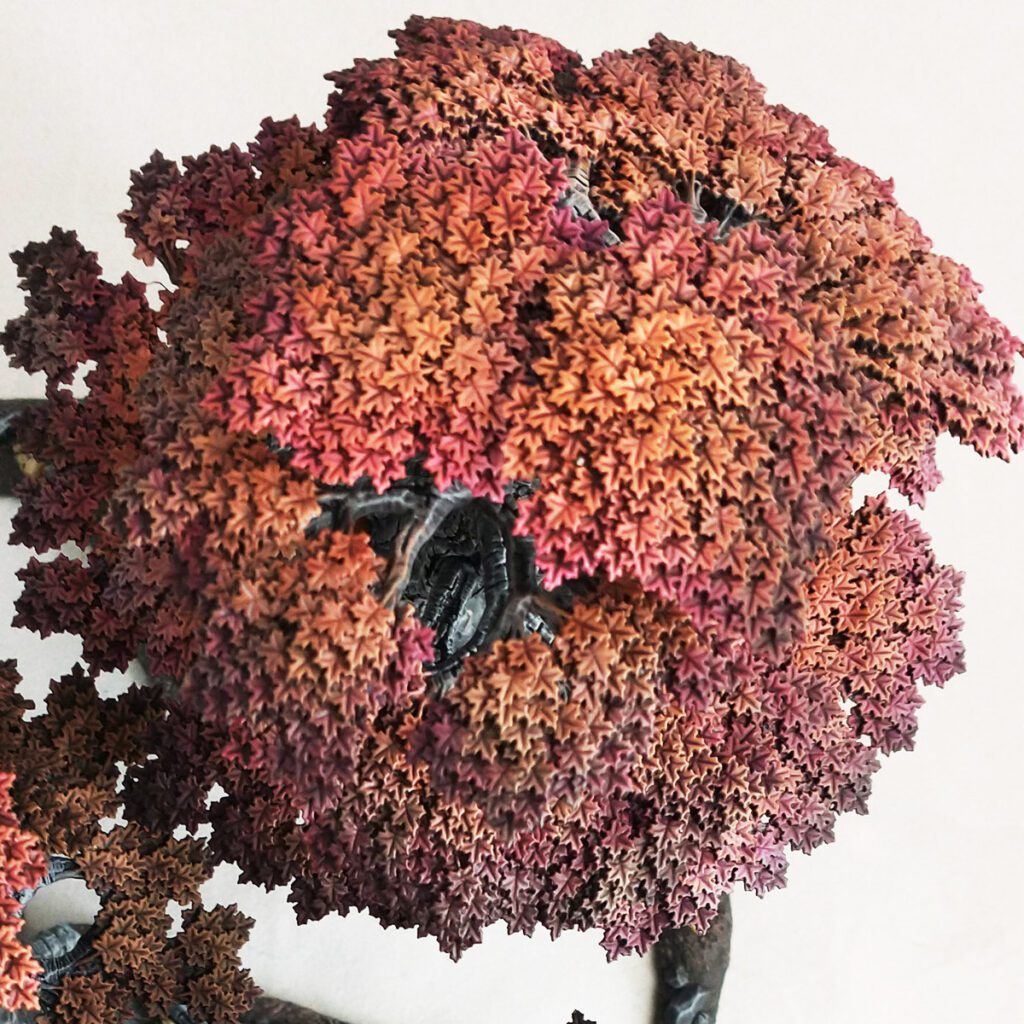
The next step is to do a medium to heavy dry-brush of both Skrag Brown and Deathclaw Brown. The method to this is to be a little random and try different color combinations. there will be different colors to discover by mixing the two colors a little bit as well.
And finally, you can push the contrast and add interest to the colors by doing a light dry-brush of Kislev Flesh. I used Elven Skin from Two Thin Coats, but the colors are very similar. Start light with this color; less is more when it come to top layer highlights. Add a little bit more as you see the need to brighten certain areas. Be careful not to saturate too much! You can also go back and hit some surfaces with the Skrag and Deathclaw Brown if you see a need to refresh your mid-tones.
Paint Colors for the Ground
- Wyldwood (contrast)
- Gorthor Brown
The earth part of the bases is a very simple process of base-coating with Wyldwood and then dry-brushing with Gorthor Brown. The idea here is to create a solid base that adds to the artistic details of the entire pieces but does not steal from the details.
A nice, dark color here with enough detail dry-brushed into the texture makes the model cohesive and helps the model read well.
Paint Colors for the Skeletons
- Skeleton Legion
- Seraphim Sepia
- Wraithbone
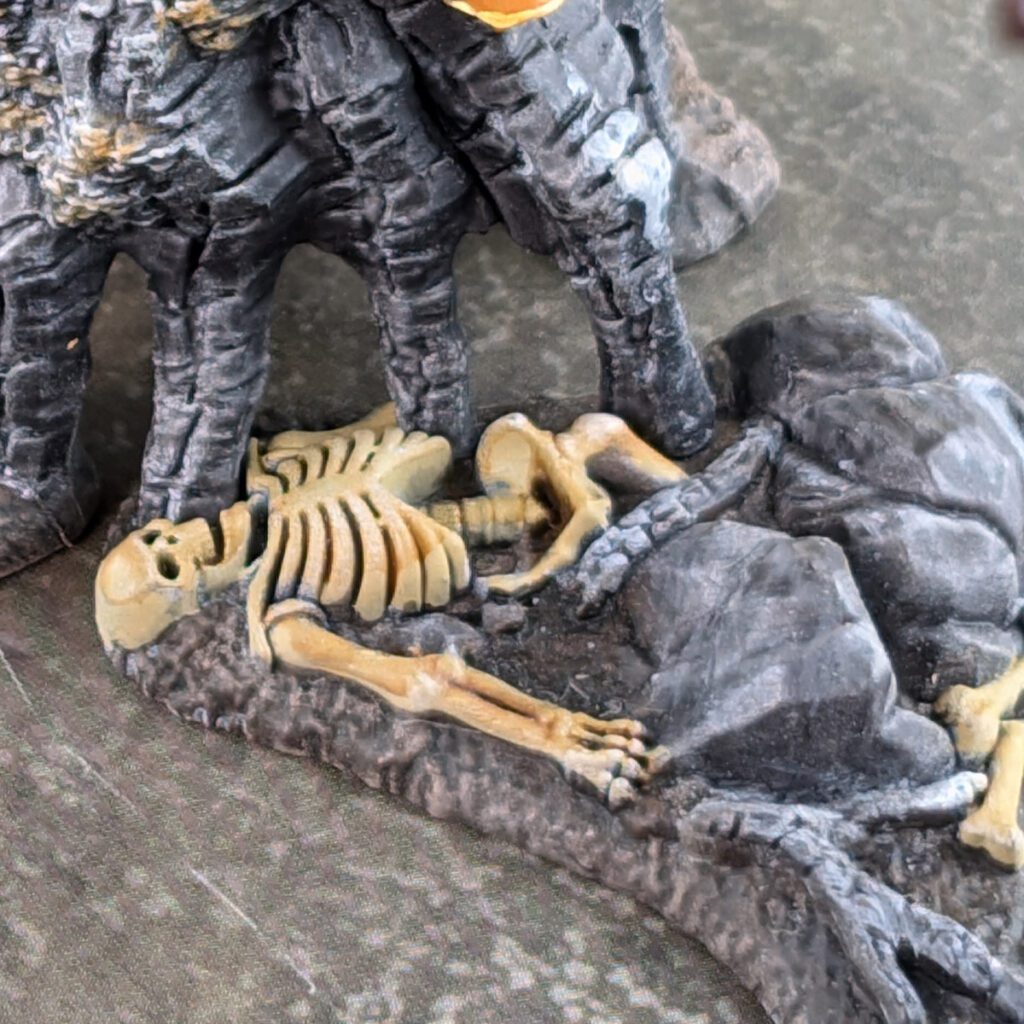
Base-coat the bones and skeletons along the bases with Wraithbone. This is an excellent warm-white base-coat to cover with Skeleton Horde contrast paint to make a brilliant bone color.
Optionally, you can shade the bones with Seraphim Sepia, and then follow up with a light dry-brush of Wraithbone to touch up some of the highlights.
The Painting Process for Spring Awakened Wyldwood
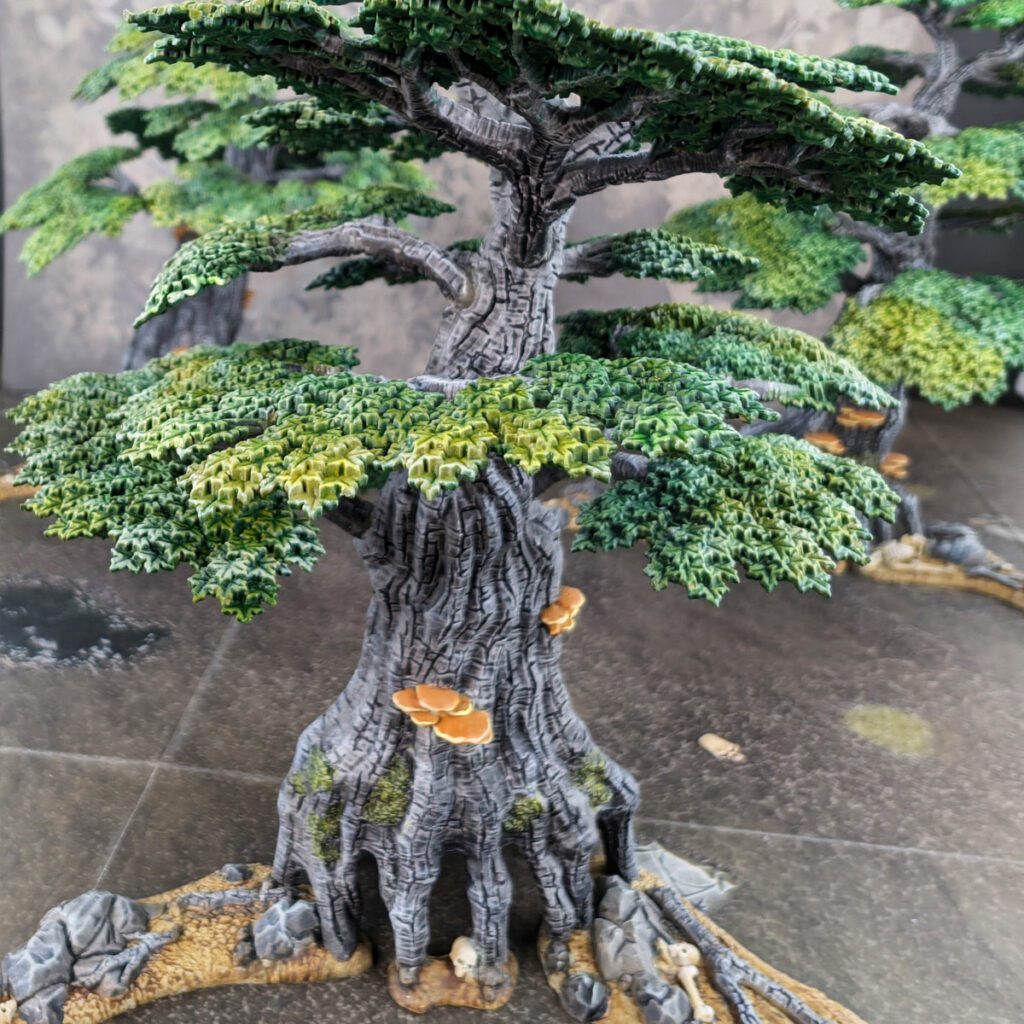
I broke the painting of the Spring Trees into 3 main parts:
- The Bark of the tree with mushroom and moss details
- The Ground with Skeletons and Rock details
- The Leaves both top and bottom
Priming the Spring Awakened Wyldwood
I started by priming the ground pieces, trunks, and leaves with Mechanicus Standard Grey, and because I wanted to use contrast paints I sprayed Zandri Dust on all of the pieces at about a 45 degree angle.
The last step in the prime was to spray Grey Seer at about a 70-80 degree angle
This method is what they call a Zenithal prime, and when spraying the Zandri Dust and Grey Seer, you want to spray very lightly so you only hit the top-most textures of the model.
Paint Colors for the Bark and Rocks
- Basilicanum Grey Contrast
- Ulthuan Grey
The base-coat layer is Basilicanum Grey Contrast, which will give your bark and rocks varying grey colors and darken the recesses of the bark and cracks in the rocks. Make sure to get both the top and bottom parts of the leaves, and be careful not to get paint on the leaves because it will be difficult to correct the Zenithal prime.
Once your Contrast paint is dry, do a medium to heavy dry-brush of Ulthuan Grey.
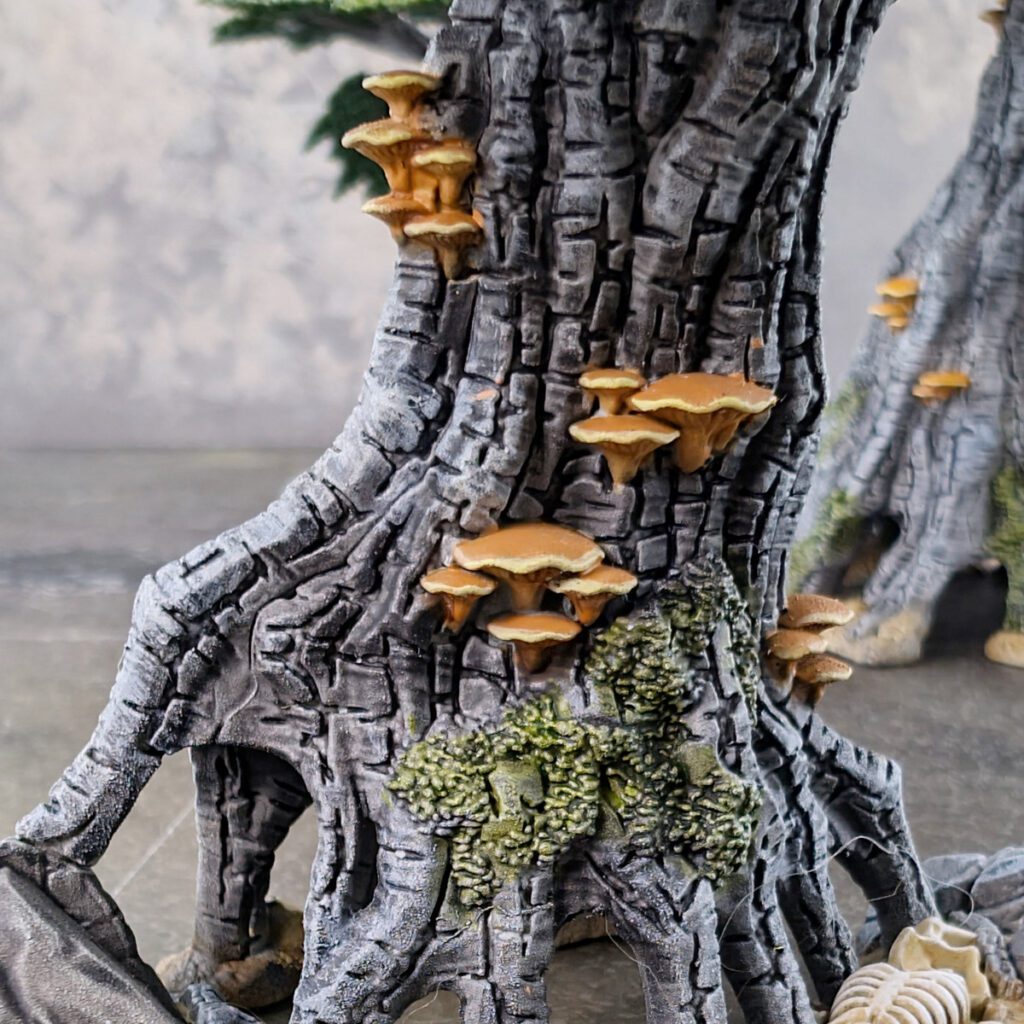
Painting the Mushrooms
- Tau Light Ochre
- Seraphim Sepia
- Doron Yellow
Base-coat the mushrooms in Tau Light Ochre. Next, use Seraphim Sepia to shade the mushrooms and moss. And lastly, highlight the edges and details of the mushrooms with Doron Yellow.
Painting the Moss
- Mantis Warriors Green (contrast)
- Moot Green
- White Scar
- Waywatcher Green (glaze)
Base-coat the moss areas in Mantis Warriors Green. After that is dry, dry-brush Moot Green very lightly over the texture.
Next, very lightly dry-brush white scar to push the highlights. And finally, use Waywatcher green to tint the moss entirely green. If you don’t have Waywatcher Glaze you could water down the Mantis Warriors Green and paint a very transparent coat using the glazing method.
Painting the Leaves
- Warp Lightning(Contrast)
- Mantis Warriors Green (Contrast)
- Moot Green
- White Scar
- Lamenters Yellow
- Waywatcher Green
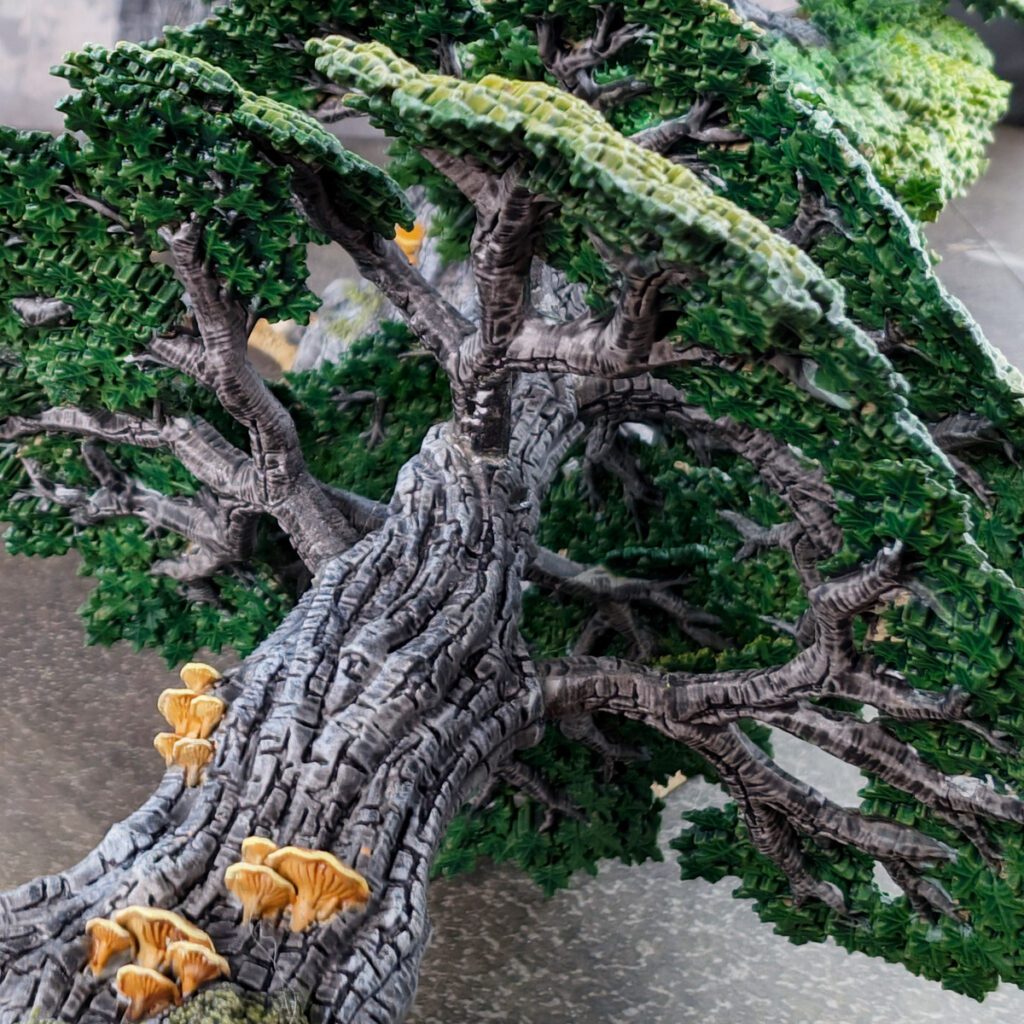
Beginning with the Contrast paint base coats using the Warp Lightning along the edges of the leaves and the leaves on the under-side. The Mantis Warriors Green Flesh is painted more towards the center and tops of the leaves giving the illusion of the light source scattering through the leaves and getting darker towards the bottoms of the branches.
I personally discovered that contrast paints wet-blend very nicely and create interesting color variations depending on the strengths of each color combined with the colors of the prime color.
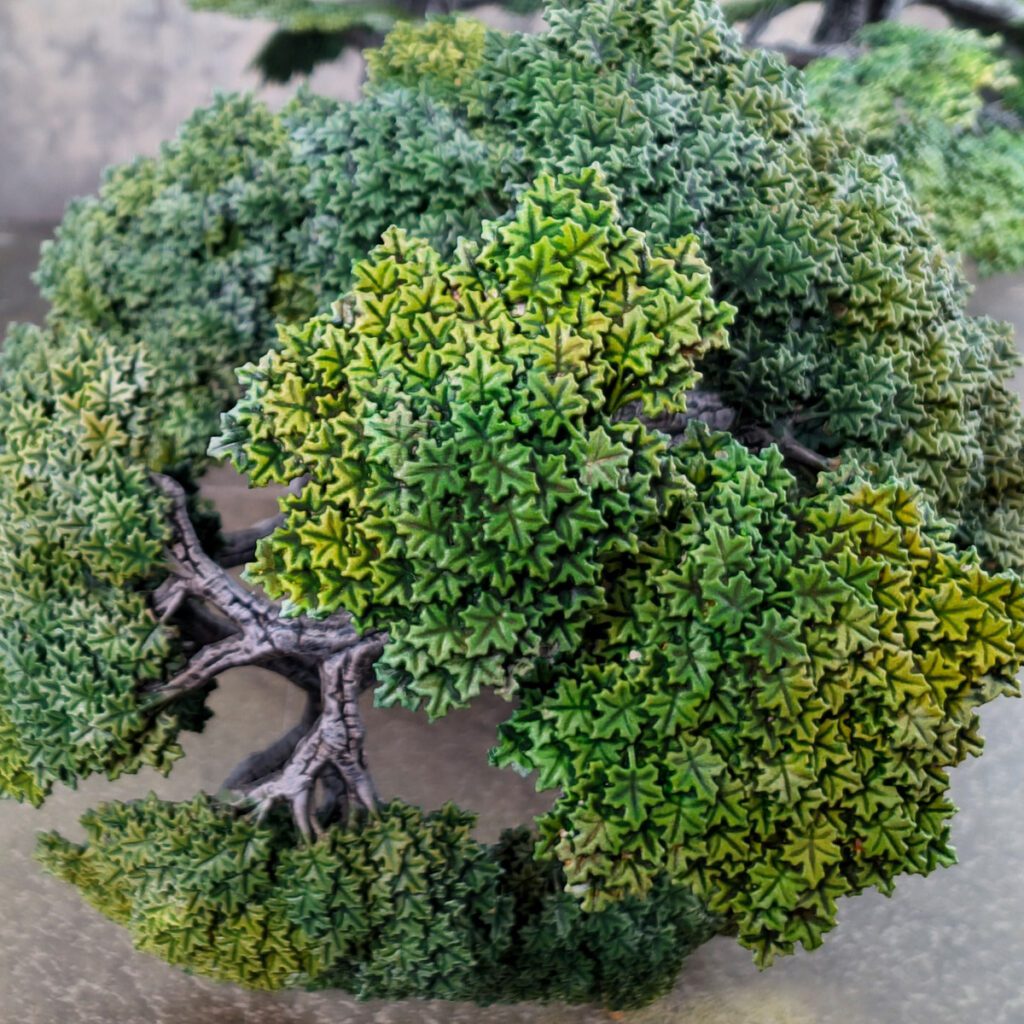
The next step is to do a medium to heavy dry-brush of Moot Green. The method to this is to not be uniform. Moot Green is a strong color and will dominate over your contrast colors. You’ll want to leaves traces of the base-coat contrast colors here and there in order to create variety and interest in your leaves.
And finally, you can push the contrast and add interest to the colors by doing a light dry-brush of White Scar. Start light with this color; less is more when it come to top layer highlights. Add a little bit more as you see the need to brighten certain areas. Be careful not to saturate too much! You can also go back and hit some surfaces with the Moot Green if you see a need to refresh your mid-tones.
Paint Colors for the Ground
- Wraithbone
- Skeleton Horde (contrast)
The earth part of the bases is a very simple process of contrast painting Skeleton Horde over the ground. The contrast paint should nicely illuminate the textures of your Zenithal primed ground.
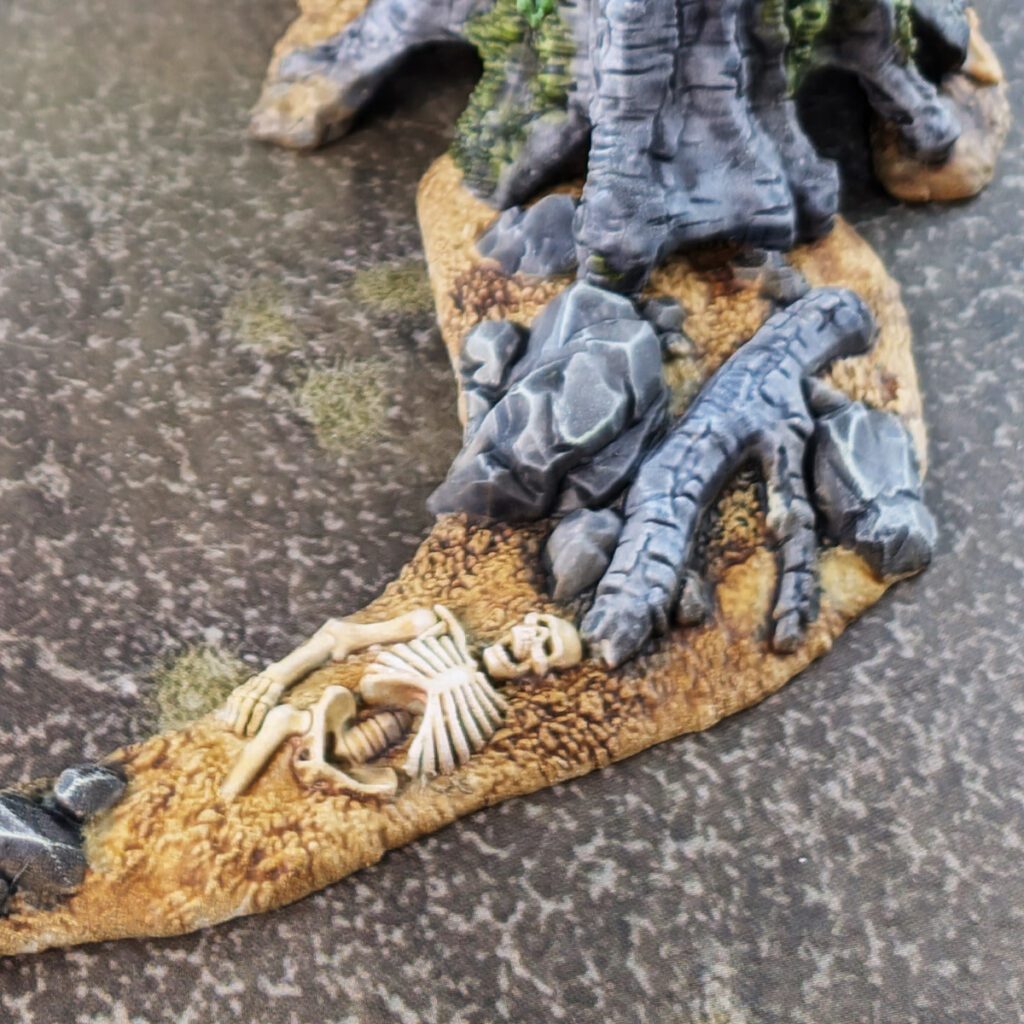
Paint Colors for the Skeletons
- Ushabti
- Seraphim Sepia
- Wraithbone
Base-coat the bones and skeletons along the bases with Wraithbone. Next, shade the bones with Seraphim Sepia. And finally, a light dry-brush of Wraithbone will bring the details of the skeletons back up.
We’re using this color scheme because the ground color is already Skeleton Horde contrast and we needed to make these skeletons brighter than the ground.
Guide to Painting Spring and Autumn Awakened Wyldwood
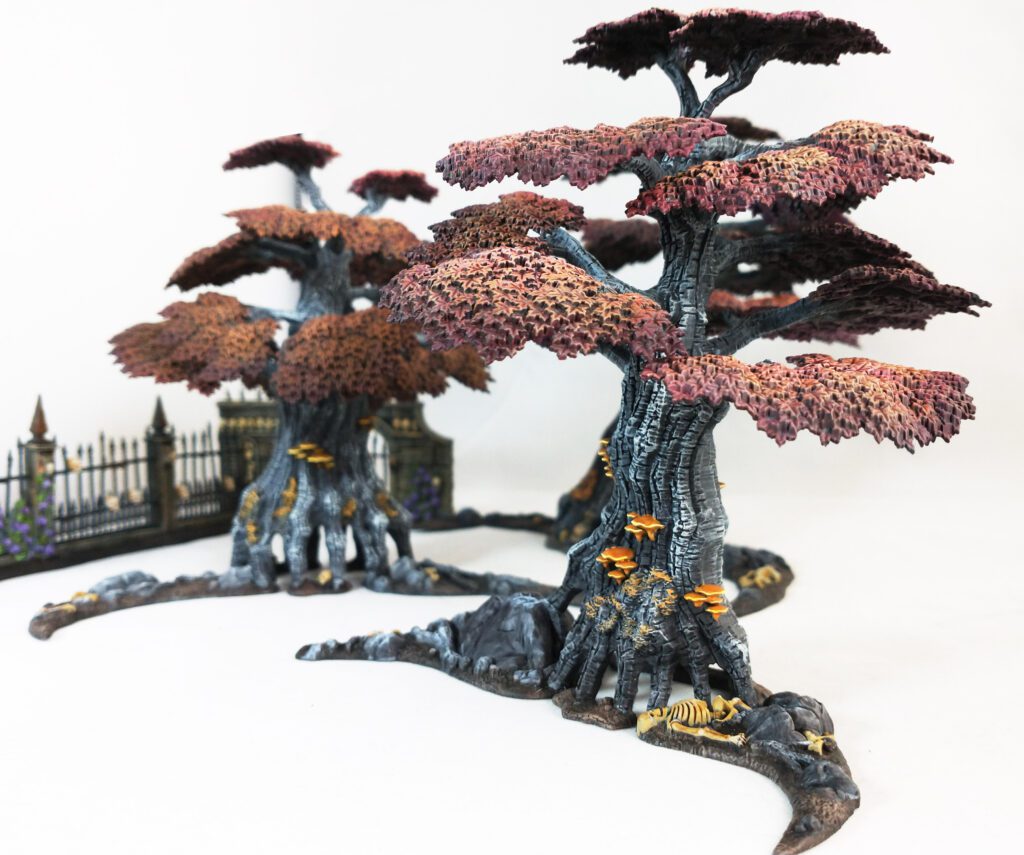
In conclusion, painting the Awakened Wyldwoods is a rewarding process that brings the magic and mystery of Sylvaneth forests to life. By carefully layering colors and using the right techniques, you can achieve stunning, lifelike terrain that will enhance your tabletop games.
Whether you’re a beginner or a seasoned painter, these steps provide a solid foundation for creating immersive scenery. Don’t hesitate to experiment with your own touches, as the Wyldwoods offer endless possibilities for creativity. Now, it’s time to let your forest grow and take root on the battlefield!
Awakened Wyldwood Shopping List
General Supplies:
- Wet Palette
- Paint Puck or Water Cup
- Citadel Medium Base Brush
- Citadel Medium Dry Brush
- Citadel Medium Shade Brush
Paint List:
- Age of Sigmar Awakened Wyldwood
- Citadel Primer Mechanicus Standard Grey
- Citadel Contrast Basilicanum Grey
- Citadel Colour Administratum Grey
- Citadel Colour Ulthuan Grey
- Citadel Colour Tau Light Ochre
- Citadel Shade Seraphim Sepia
- Citadel Colour Doron Yellow
- Citadel Contrast Guilliman Flesh
- Citadel Contrast Volupus Pink
- Citadel Colour Skrag Brown
- Citadel Colour Deathclaw Brown
- Citadel Colour Kislev Flesh or Two Thin Coats Elven Skin
- Citadel Contrast Wyldwood
- Citadel Colour Gorthor Brown
- Citadel Colour Ushabti Bone
- Citadel Colour Skeleton Legion Drab
- Citadel Colour Wraithbone
- Citadel Contrast Mantis Warriors Green
- Citadel Colour Moot Green
- Citadel Colour White Scar
- Citadel Glaze Waywatcher Green or Two Thin Coats Green Glaze
- Citadel Contrast Warp Lightning
- Citadel Glaze Lamenters Yellow or Vallejo Ink: Yellow
- Citadel Colour Zandri Dust

No responses yet