Disclosure: This post contains affiliate links. If you click through and make a purchase, I may earn a small commission at no extra cost to you. Thank you for supporting Mythic Minis Studio! For more information read my full disclosure.
The Fortified Manor of the Empire: Cornerstone Terrain for Your Warhammer Battlefield
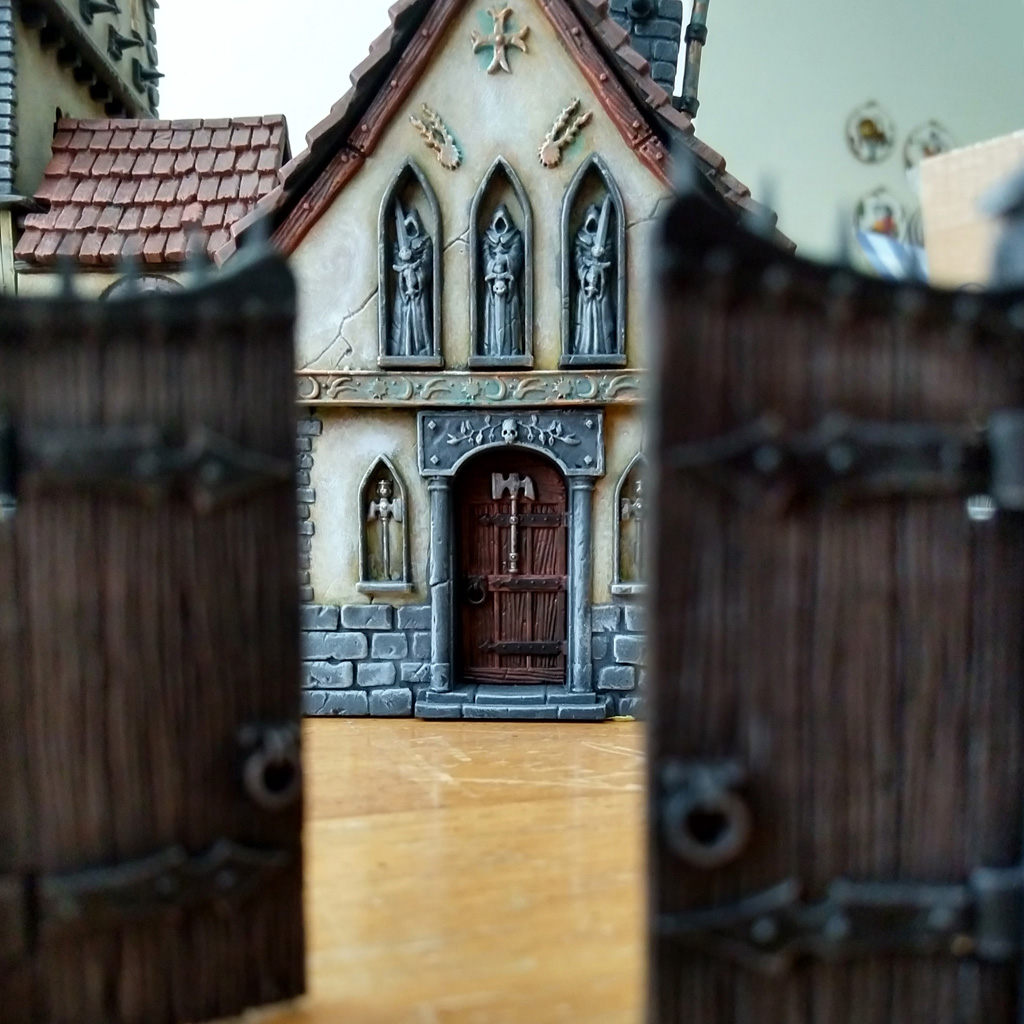
Welcome to your ultimate guide for painting the iconic Warhammer Fortified Manor. This imposing structure, a symbol of strength and resilience in the Warhammer universe, can be a centerpiece for your tabletop battles. Let’s explore the techniques and inspiration needed to bring this majestic building to life.
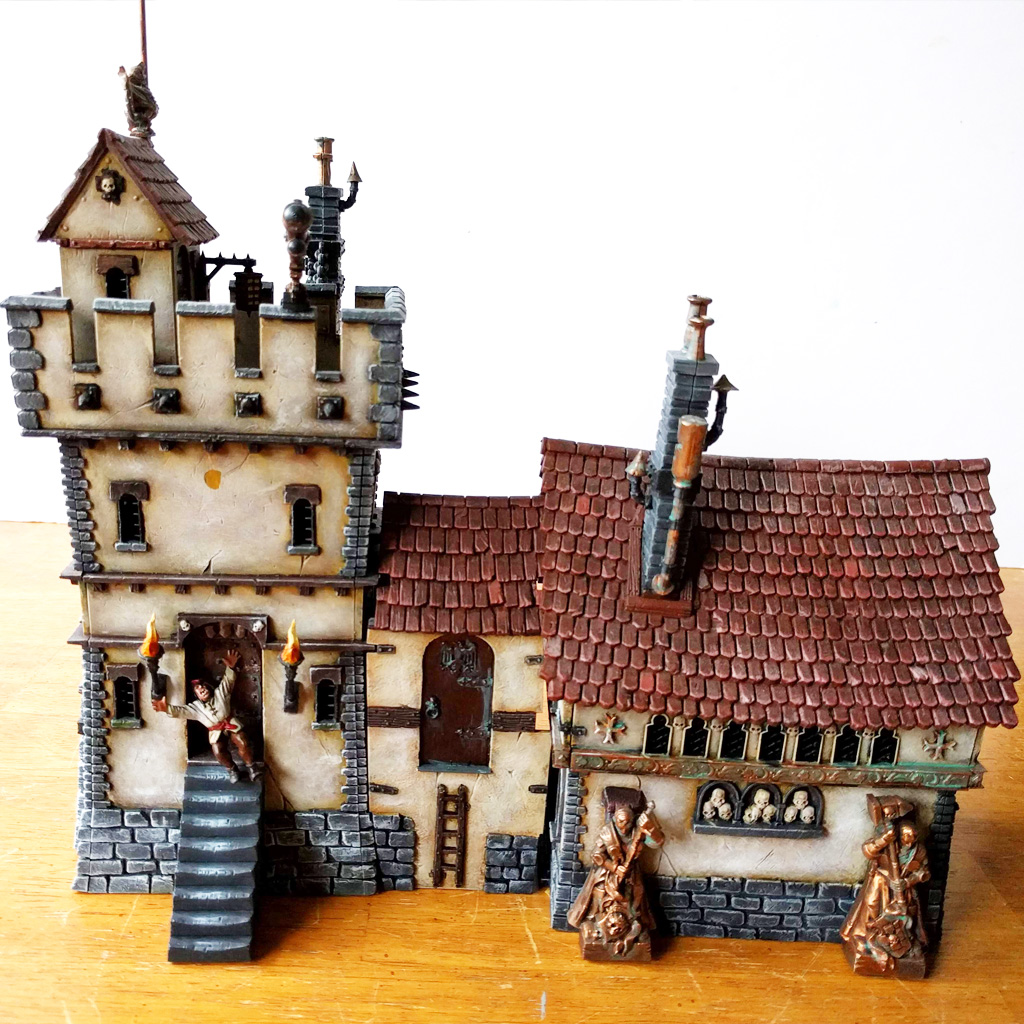
The Fortified Manor Kit Details
This multi-part plastic kit allows you to construct a detailed manor house, complete with a central structure, connecting building, watchtower, and sturdy outer walls. The modular design offers a surprising amount of flexibility. You can choose to build the manor as a single, unified structure or separate the buildings to create a more sprawling complex. The walls themselves can be positioned in various configurations, allowing you to customize the layout to fit your battlefield and scenario.
Craft Unique Terrain Rulesets for Custom Warhammer Adventures
The veil of mystery surrounding the Fortified Manor leaves us with more questions than answers. What secrets lie buried within its walls? What power lurks in the shadows, waiting to be unleashed? Only time will tell, as the wheel of fate continues to turn, and the forces of light and darkness collide in the eternal struggle for dominion over the realms of Warhammer.
The Fortified Manor is an incredible terrain piece that is super fun to assemble, paint, and create objectives and scenarios for your own tabletop games. Games Workshop has once again offered this magnificent model kit for their Warhammer: The Old World game.
Fortified Manor Painting Guide
Mythic Minis would like to thank Leif at Jester Painting Studio for creating an awesome painting guide that helped us get some ideas and direction for painting the Fortified Manor.
We’re starting at base-coats straight-away. We are assuming that you have your model built to your own personal preferences and you have primed the components. We have primed in black, but if you desire more vibrant colors, or are planning on using Contrast Paints, to your finished manor you may want to consider priming in Mechanicus Standard Grey or even Wraithbone.
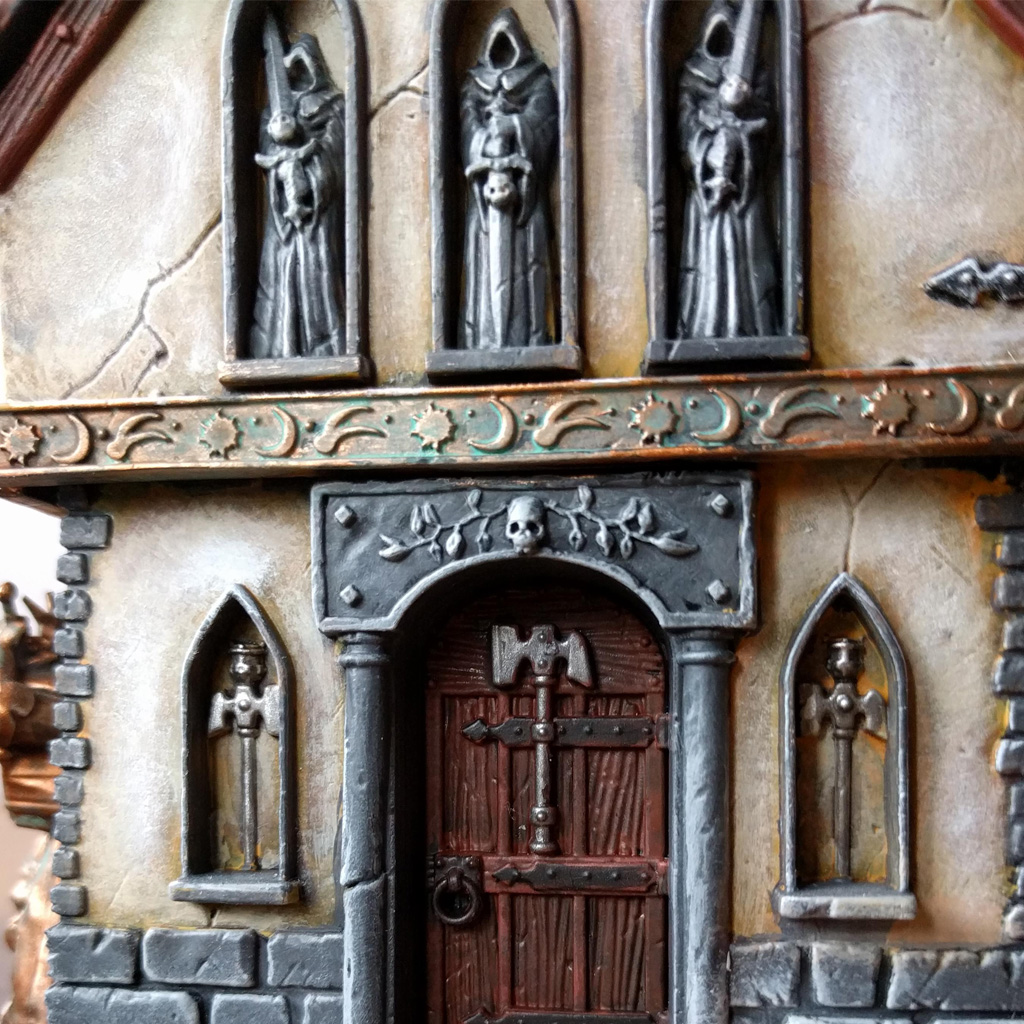
The Messy Part First: Painting the Lime Plaster Walls
In most cases, I like to use the inside-out method when it comes to planning what is best to paint first on a miniature. Sometimes, it’s just best to get the messiest parts finished first and then painting the details. It just so happens that the walls of the buildings are, for the most part, the most recessed or inside-most part of the buildings AND also the messiest part to paint.
Let’s get started on the lime-coated plaster. To get that nice aged, worn look you’ll need these paints or something close to them.
- Averland Sunset
- Agrax Earthshade
- Mournfang Brown
- Ushabti Bone
- Screaming Skull
- White Scar
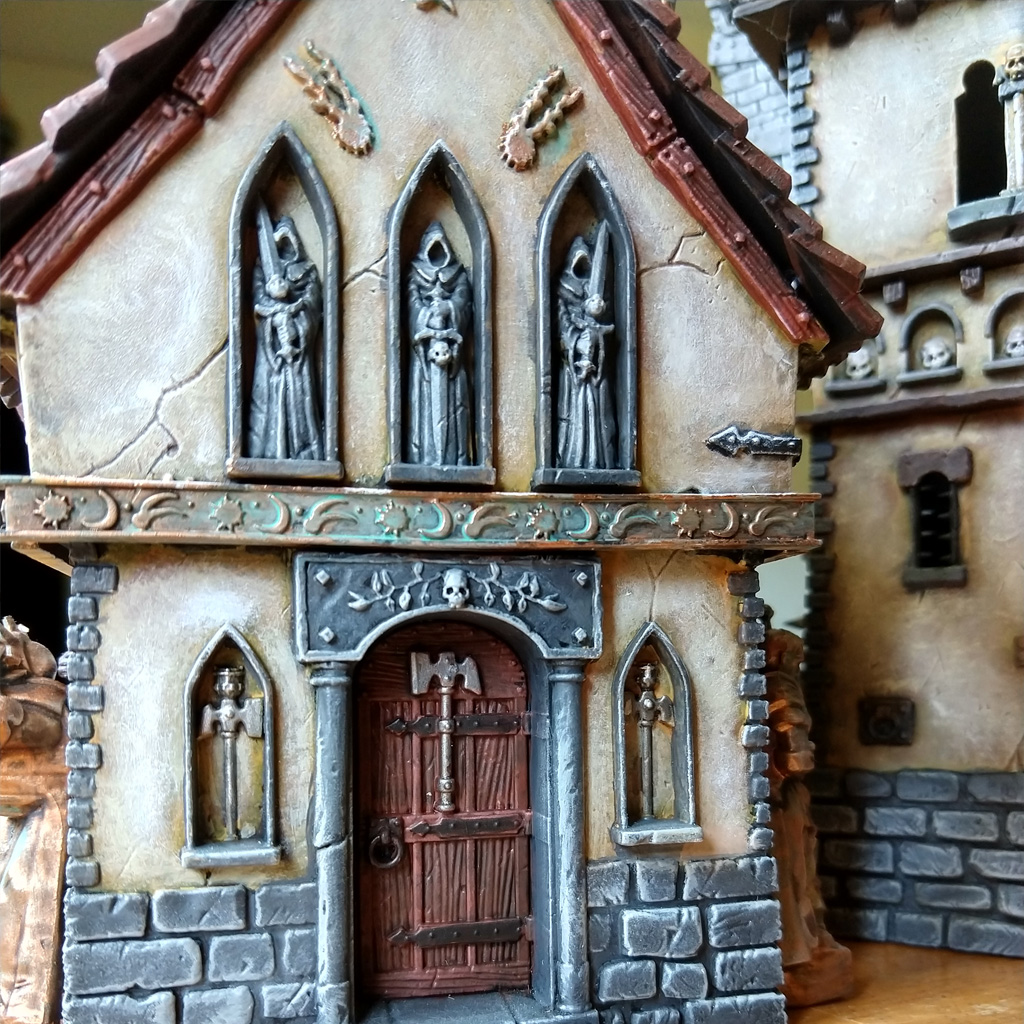
Our procedure for realistically aged and weathered lime-coated plaster walls
- Base coat all of the walls in Averland Sunset.
- Shade all of the walls with Agrax Earthshade.
- Dry-brush swirls and Stipple patches of Mournfang Brown randomly, or especially where touch points or wear spots might be located on the model.
- Perform a heavy dry-brush and stipple Ushabti all over the walls. Do not make this uniform – randomize heavy and light dry-brushing techniques. (really go Bob Ross on this!)
- Perform a lighter dry-brush in randomized areas using Screaming Skull, a lighter color.
- Finally, perform a very light dry-brush, in select locations, of White Scar.
The messy dry-brush strokes in layers of colors gives that naturally worn plaster-like texture. Around roof edges and windows the Averland Sunset and Mournfang Brown are more prominent and give an aged and weathered look.
The coat of Agrax Earthshade tones down that bright, school-bus yellow of the Averland Sunset and also gets nicely into the nooks, crannies, and cracks in the plaster.
Be sure to paint all of the plaster parts on each piece of the scenery kit.
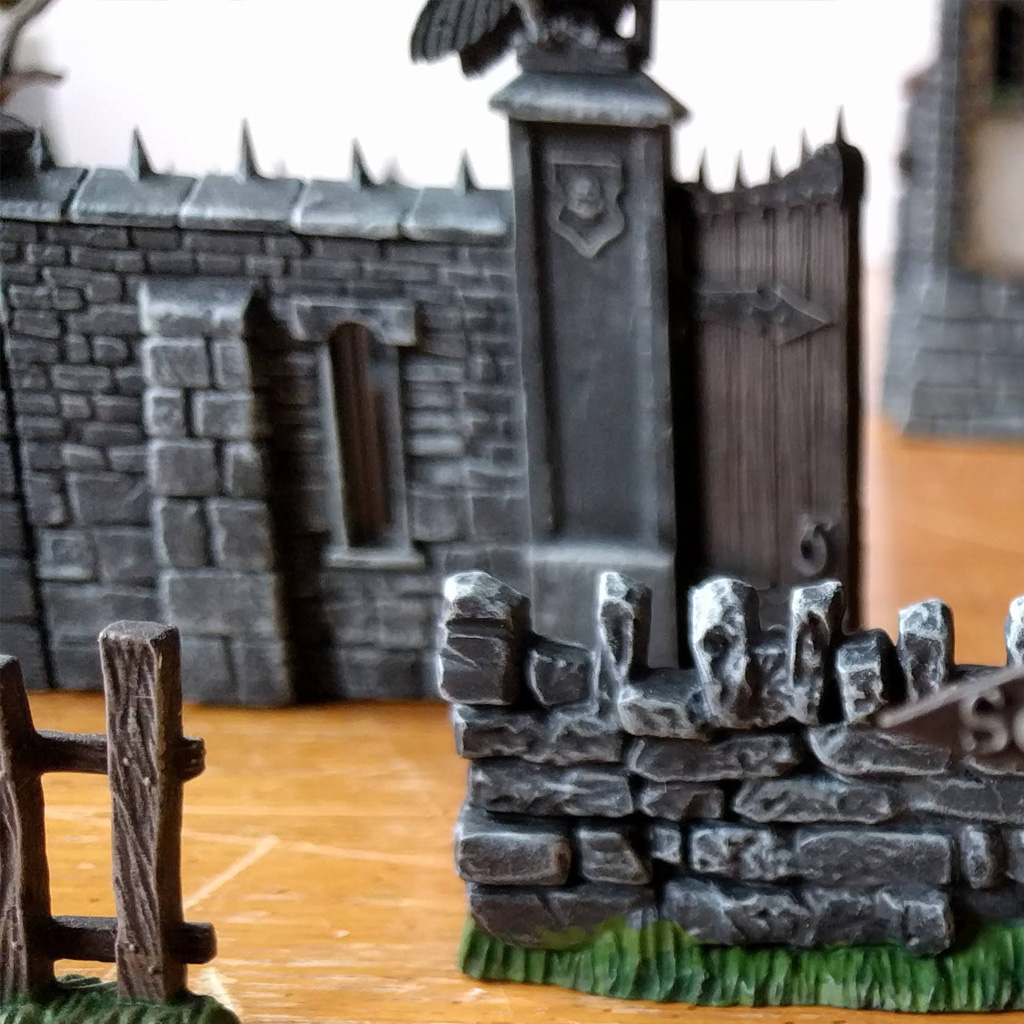
Painting Stone Foundations and Fences
Our procedure for heavy and solid looking stone foundations and walls
- Dawnstone
- Nuln Oil
- Administratum Grey
- White Scar
- Base-coat all of the stone with Dawnstone. Take care with this so as not to messy up your plaster. Also, a couple or three thinner coats of paint will look smooth instead of gloppy.
- A nice coat of Nuln Oil will sink into the recesses and give character to your walls.
- A heavy, but not too heavy, dry-brush of Administratum Grey will bring up all your block edges and imperfections.
- A final, lighter, dry-brush with White Scar will add depth and capture light sourcing giving your walls and foundations dimension and breadth.
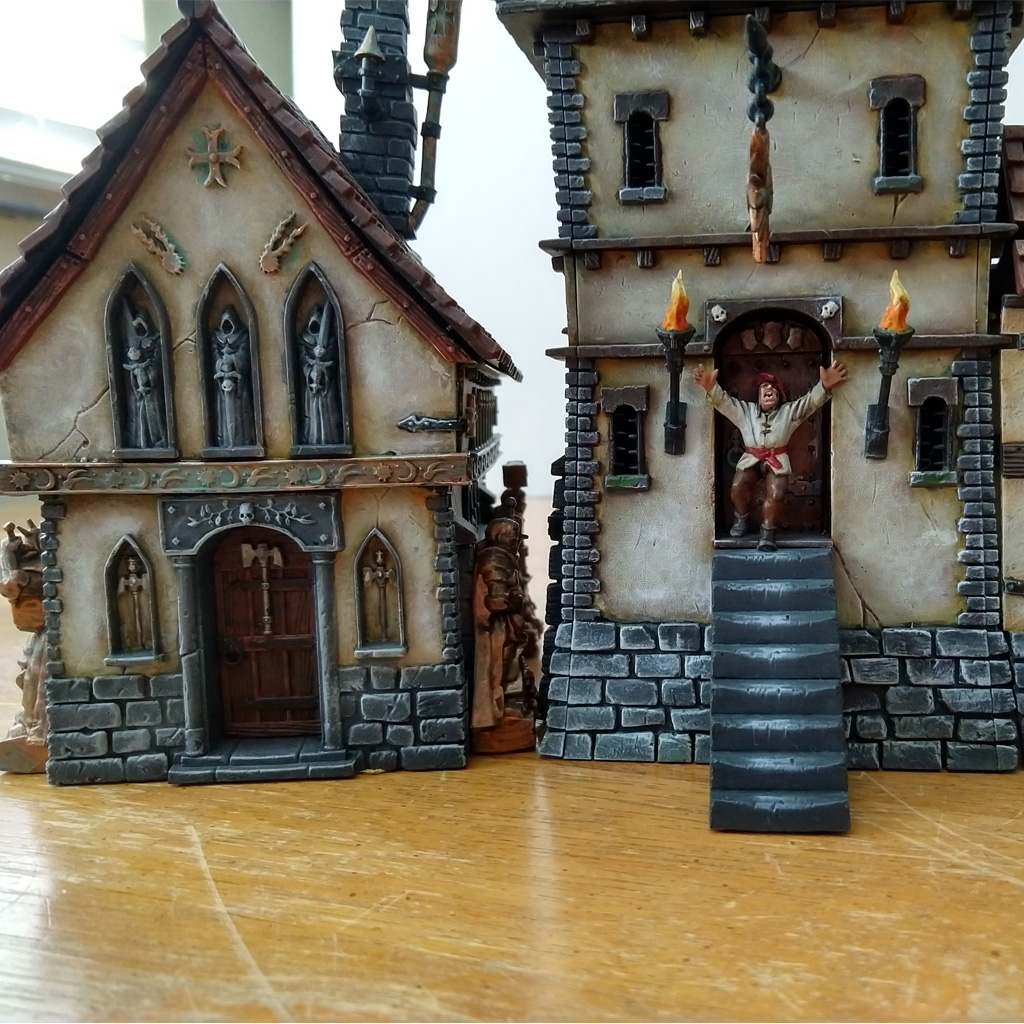
Another Variation
You’ll see in the picture above that our stones have a bluish hue to them. We base-coated the stones in Vallejo’s Dark Sea Blue color instead of Dawnstone. Here are some variations you can try to give the stones different colors and themes:
- Base-coat in a Vallejo Dark Sea Blue and then do a very heavy dry-brush in Dawnstone before applying shade.
- Shade using different colors. For example, add patches of Drakenhof Nightshade or Athonian Camoushade instead of Nuln Oil.
- You could even mix Nuln Oil into different colored shades to darken them and then apply in random patches to the stone.
- Do a very light dry-brush of greens and browns to represent dirt or moss. Remember, just a little goes a long way.
Another technique worth mentioning is regarding the pic above with the fence. The stone fence’s blocks are more worn looking, rounded and chipped. To add to that more used or more aged looked we used a sharper contrast between the base coats and the brightest highlight (White Scar). That contrast can be achieved simply by going heavier on the dry-brush for the the mid and bright highlights, reserving the deepest cracks and recesses for Nuln Oil shading over the darker base-coat paint.
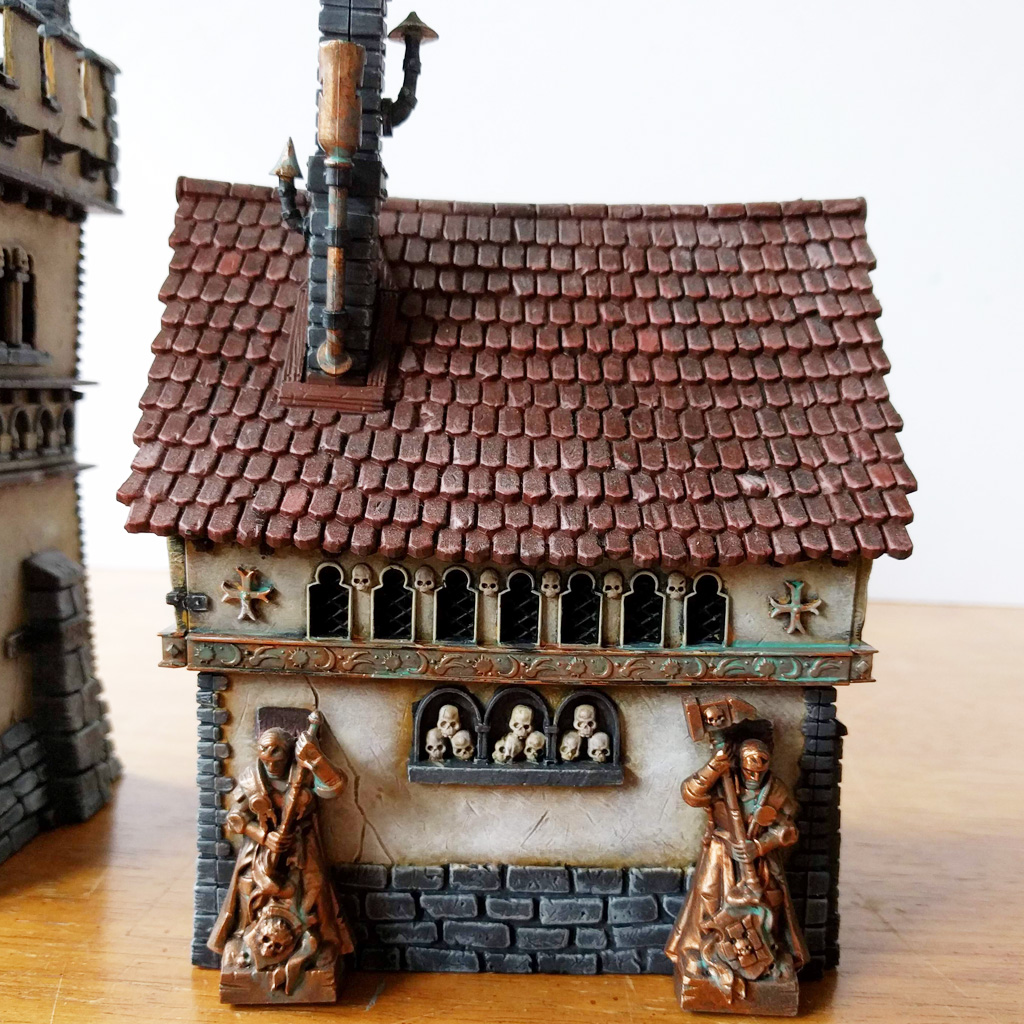
Warhammer Fortified Manor Roof Painting Guide
This section is easy, fun, and a great opportunity to play with texture and color to add variety and interest to your terrain set.
- Rhinox Hide
- Agrax Earthshade
- Doombull Brown
- Tuskgor Fur
- Ushabti
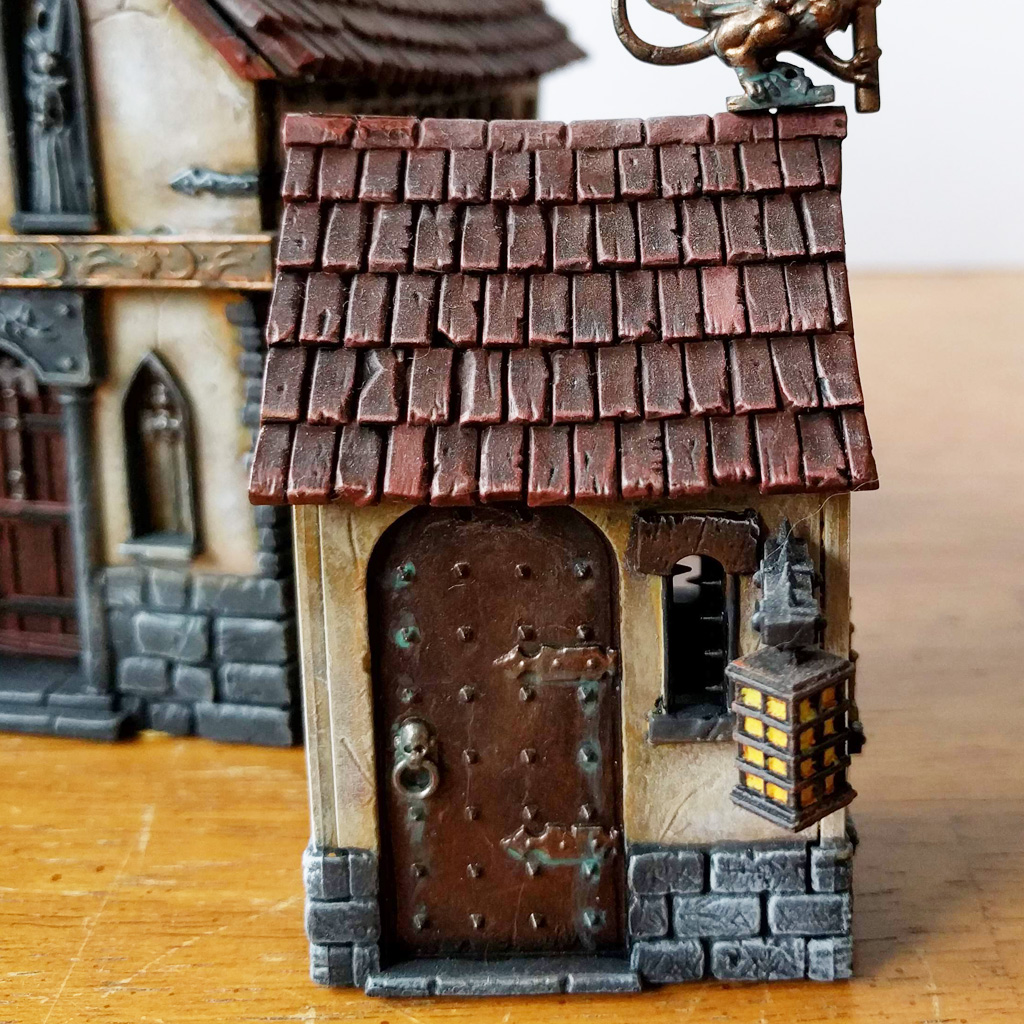
- Base-coat all roof panels with Rhinox Hide or a dark brown.
- Shade the entirety of the roofs with Agrax Earthshade.
hint: You can use other shade colors to add weathering or other variation. ex: Athonian Camoshade is a nice green-brown. - Layer Doombull Brown over the rooftops, leaving the cracks and recesses the darker, shaded, Rhinox Hide color.
- Dry-brush Tuskgor Fur over the roofs to pick up edges, sharp corners, and to add interest to roof defects.
- Highlight Tuskgor Fur over sharper edges and corners to pick up light and give more depth and dimension to your buildings. In the pictures below we even painting entire roof tiles with Tuskgor Fur.
- Dry-brush and Highlight Ushabti over the sharpest of edges and prominent corners to capture even more light and give your buildings an accentuated depth and dimension.
Metallic and Non-Metallic Metals Featuring Technical Paints
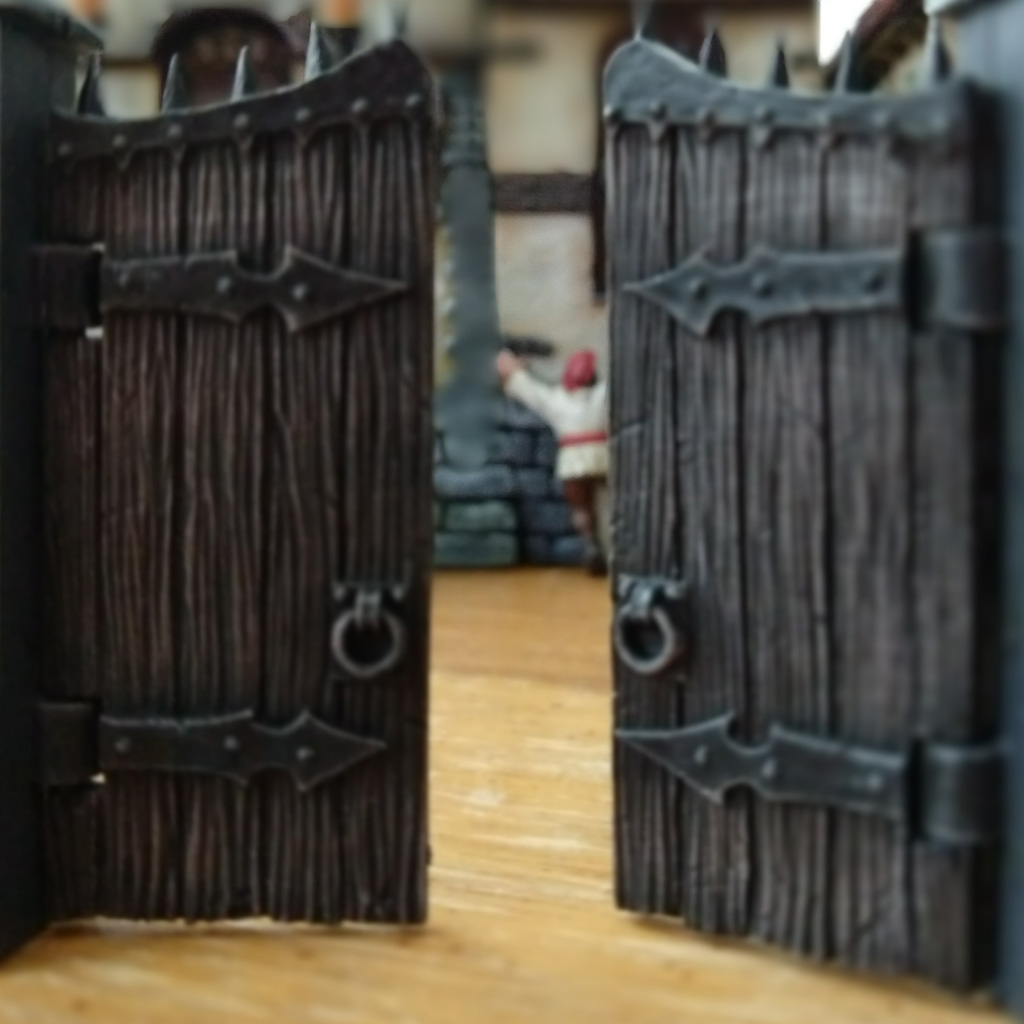
Forged Perfection: Capturing the Richness of Wrought Iron
Our first metal is the really cool wrought iron you see on the door braces, windows, and building and chimney braces. For this cool look, we’re going to use a very simple non-metal metallic look.
- Base coat each element with Abaddon black
- Shade with Nuln Oil
- Dry-brush each element with Dawnstone capturing edges, corners, and bolt-heads.
- Light Dry-brush with Administratum Grey on sharp edges and corners.
- Optional: add touches of Ryza Rust to add age and interest. Use sparingly – less is more!
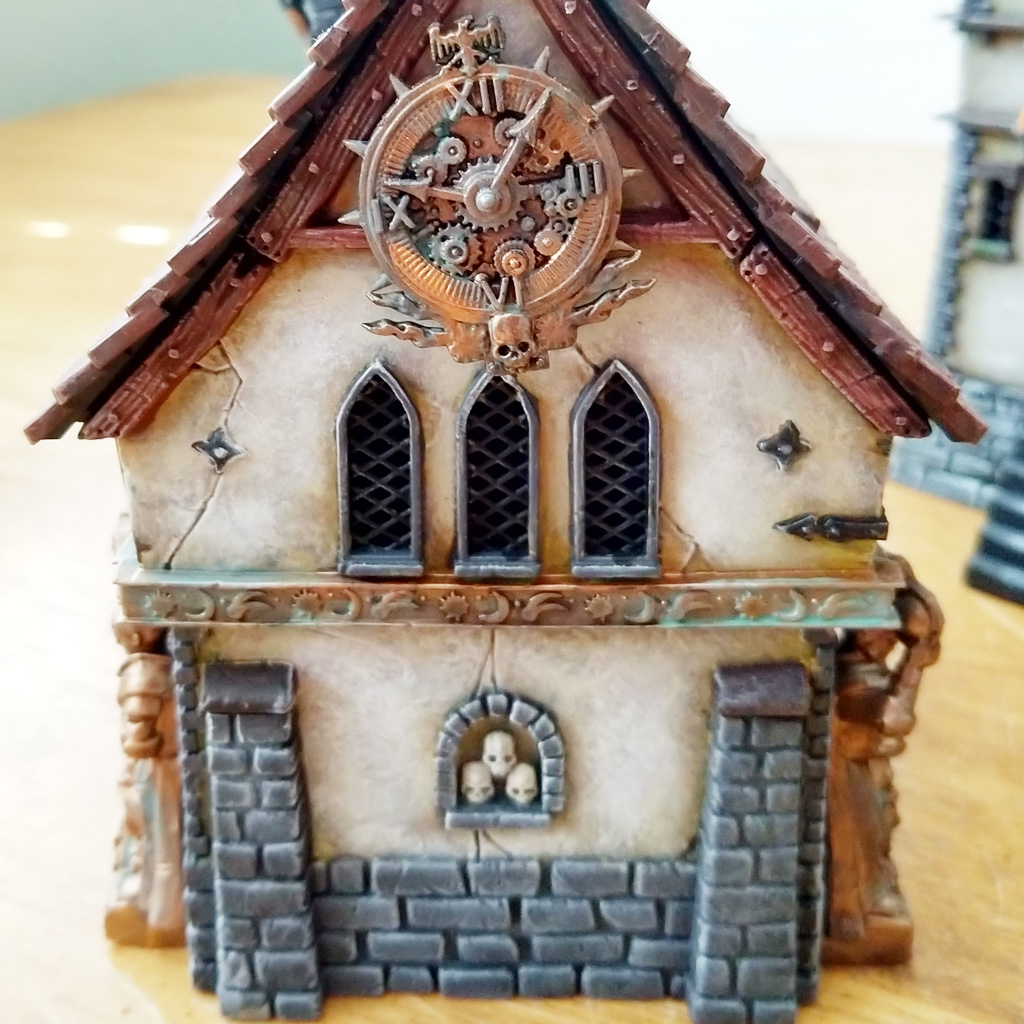
Verdigris Elegance: Evoking the Timeless Charm of Aged Copper
Copper is a very easy color to attain, and Citadel offers a very cool technical paint that adds a rustic metal petina to your statues and other metal adornments.
- Base coat all elements with Hashnut Copper
- Shade with Agrax Earthshade, Nuln Oil, or Reikland Fleshshade
This is going to give your copper a black, brown, or red-brown hue. We used Nuln Oil. - Layer Back over with Hashnut Copper to bring the color back up and leaving all recessed areas shaded.
- Add a small amount of Nihilikh Oxide. Concentrate more on the areas that would be exposed to weather. Remember, less is more for this effect.
Painting Techniques for Warhammer Fortified Manor’s Doors, Trees, Signs, and Fencing
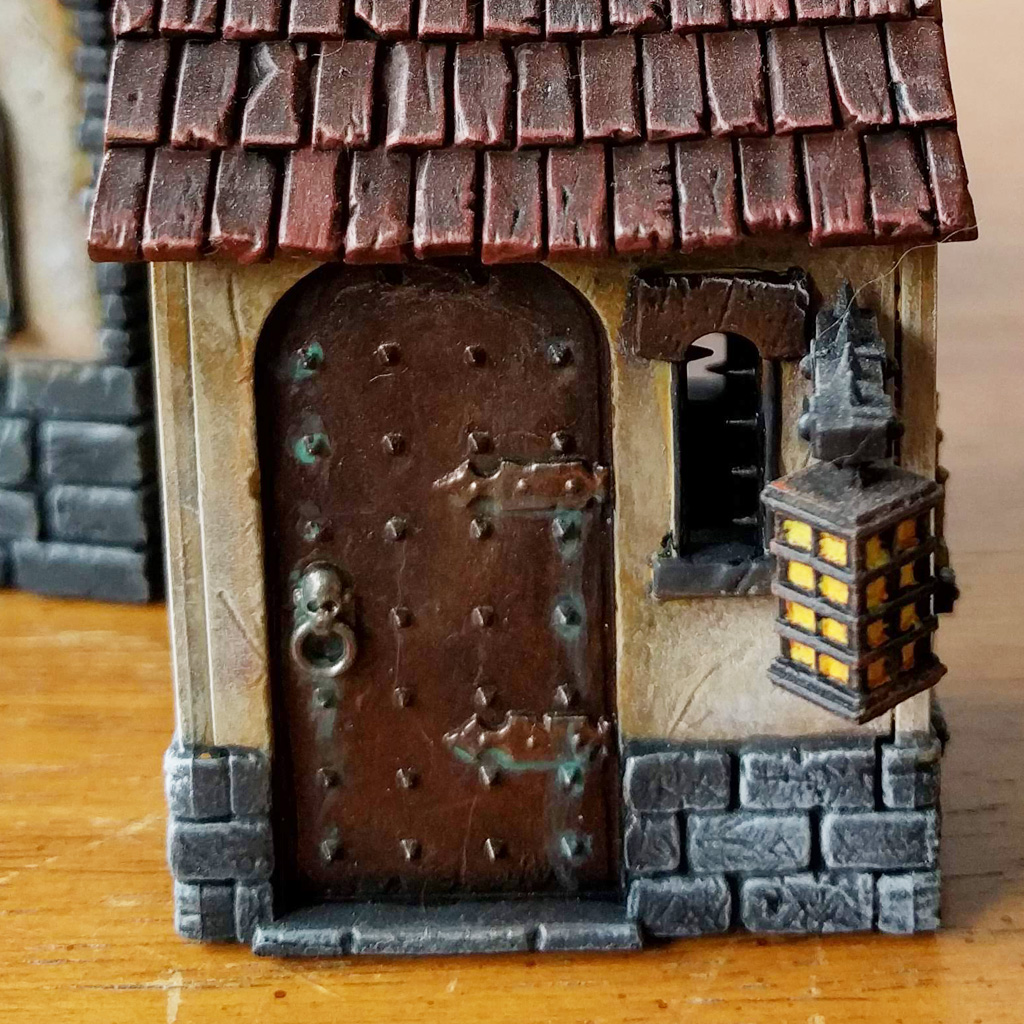
Embracing the Warmth: Achieving a Reddish-Hued Wood Finish
This particular variation of browns uses Doombull Brown to add a rich, reddish hue to your wooden doors, windows, and building panels. You could use these on the exterior fences as well to break up the colors between outdoor accessories.
The formula is simple:
- Base coat in Rhinox Hide
- Shade in Agrax Earthshade
- Layer up with Doombull Brown
- Optional: You could highlight a little with Tuskgor Fur if you want to brighten up your details. For us, we liked the dirty, antique look that presented with just the Doombull layering.
- Optional: We added a little Nihilikh Oxide to some of the metal bolts in the door. Small details help the direct the eyes of the viewer by tying in or coordinating colors.
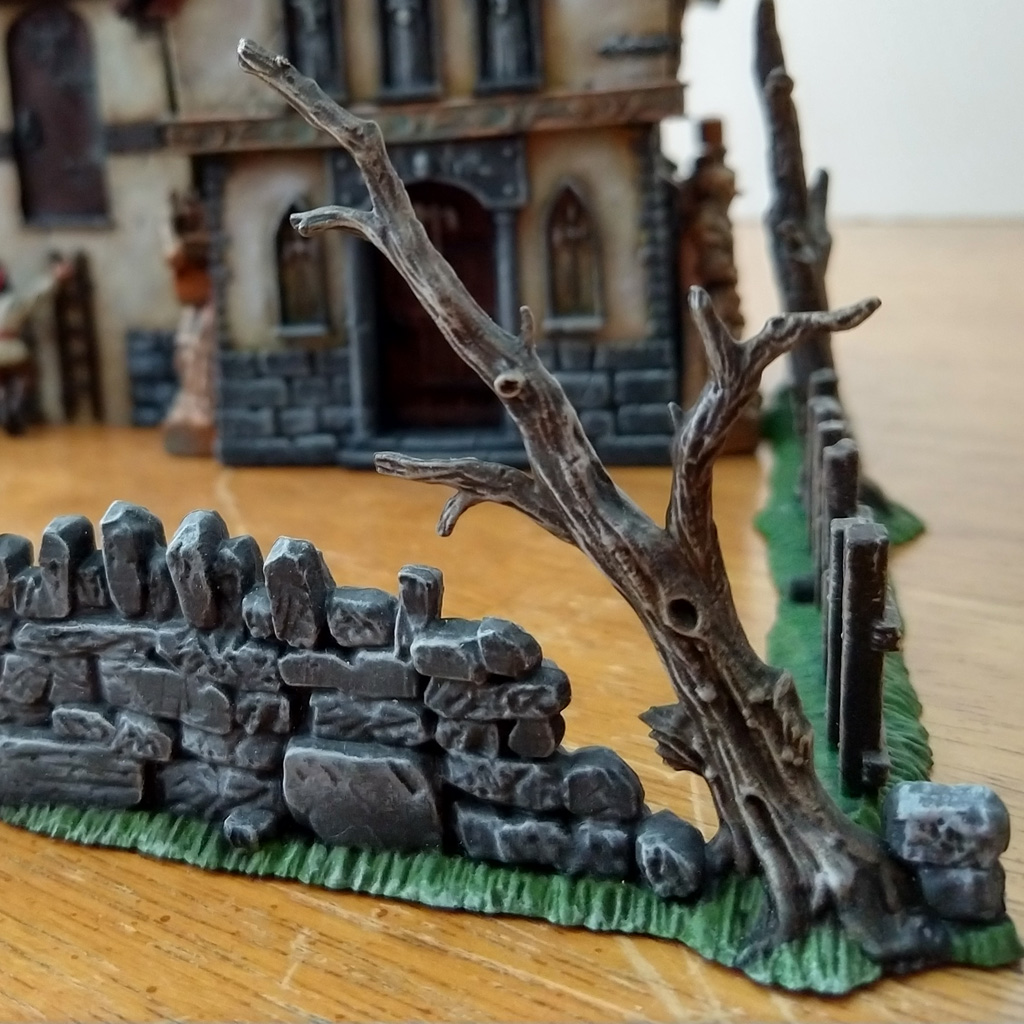
Darker Tones for Warhammer Fortified Manor’s Trees and Sign Posts
For these accessories we chose to go with a more straight-down-the-middle brown. Nothing fancy like red-browns. Something a little less manufactured looking or built more for utility than beauty. This color scheme also makes the accessories we’re going to paint look more weathered and aged.
- Base coat in Rhinox Hide
- Shade in Agrax Earthshade
- Dry-brush in Gorthor Brown – Go a little heavy with the dry-brush, but not too heavy. Medium. This adds a nice layer of color to your doors, trees, and accessories that adds character and dimension to these things.
- Dry-brush light in Baneblade Brown – just enough to catch some textures, edges and corners. This further adds to lighting and dimension on your terrain pieces.
Warhammer Fortified Manor: Detailing Accessories and Features
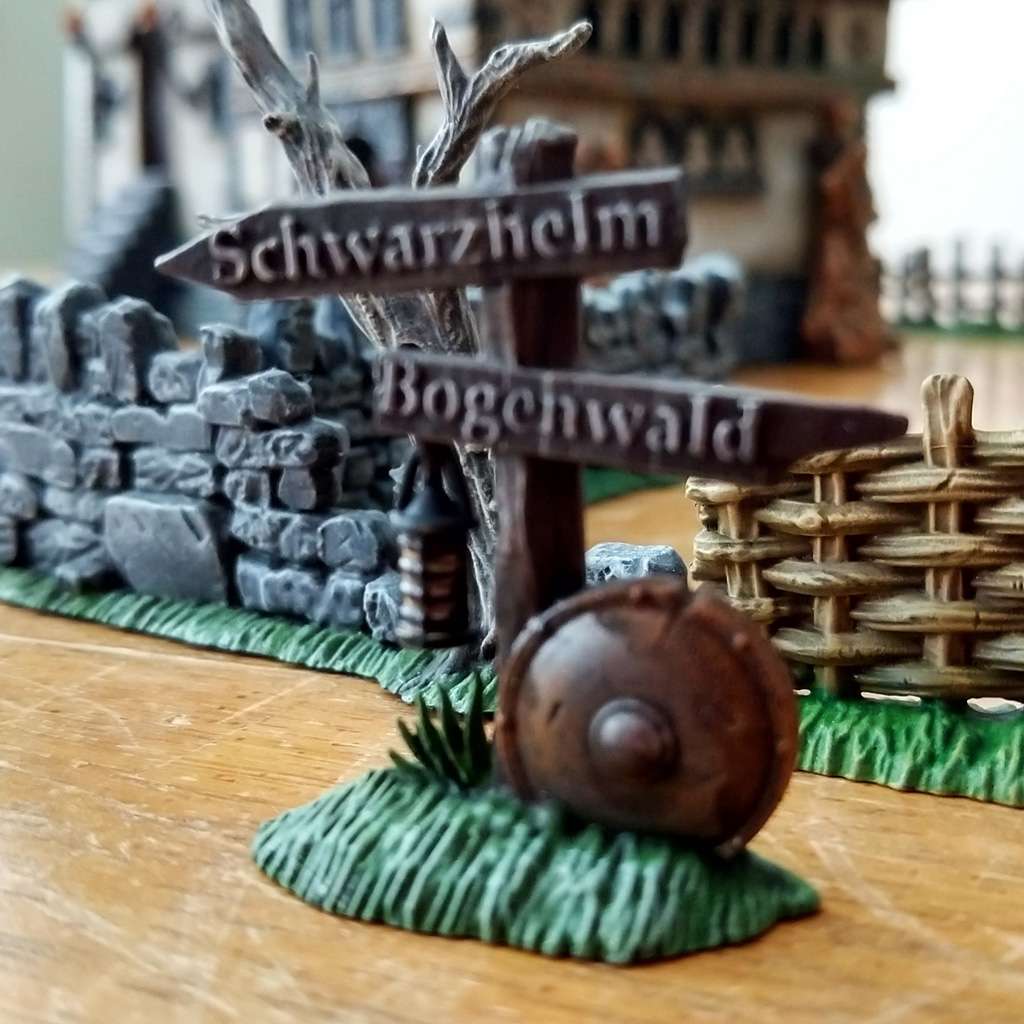
Rustic Elegance: Elevating Warhammer Fortified Manor with Artistic Detailing on Thatched Fences
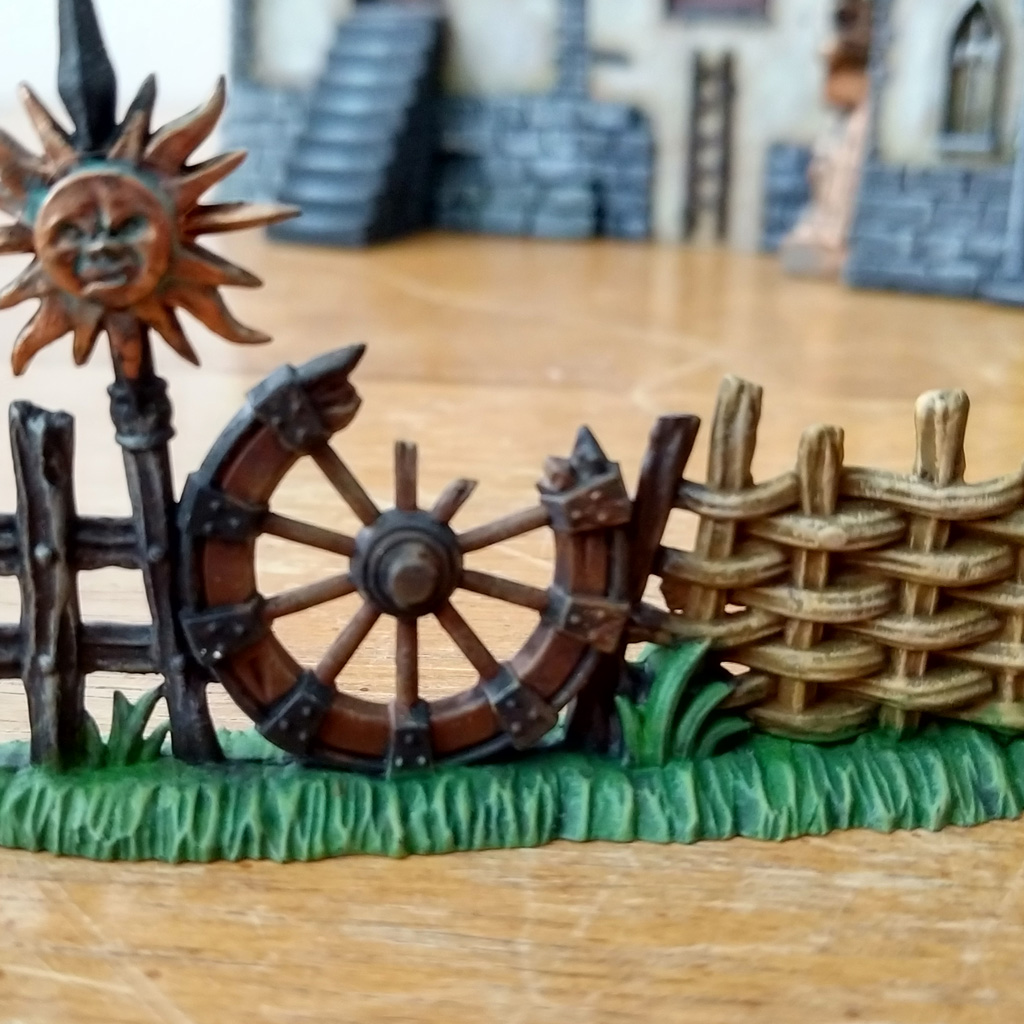
There are just a couple of these thatched fences, and they are very easy to paint with a simple base – shade – dry-brush method.
- Base coat the thatched fences with Averland Sunset
- Shade the thatched fences with Agrax Earthshade. This will not only make the details pop but also tone down the Averland Sunset.
- And finally, dry-brush Ushabti to catch the edges and details.
Perfecting the Grass Terrain for Your Warhammer Fortified Manor
We went with a nice green, inviting grass on our manor. Go with a color scheme that fits your theme.
- Base coat the grounds in Waaagh! Flesh
- Shade with Biel-Tan Green – This is a nice verde green.
- Dry-brush medium with Warboss Green
- Highlight or Dry-brush light with Skarsnik Green
Illuminating Ambiance: Enhancing Warhammer Fortified Manor with Torch and Lantern Details
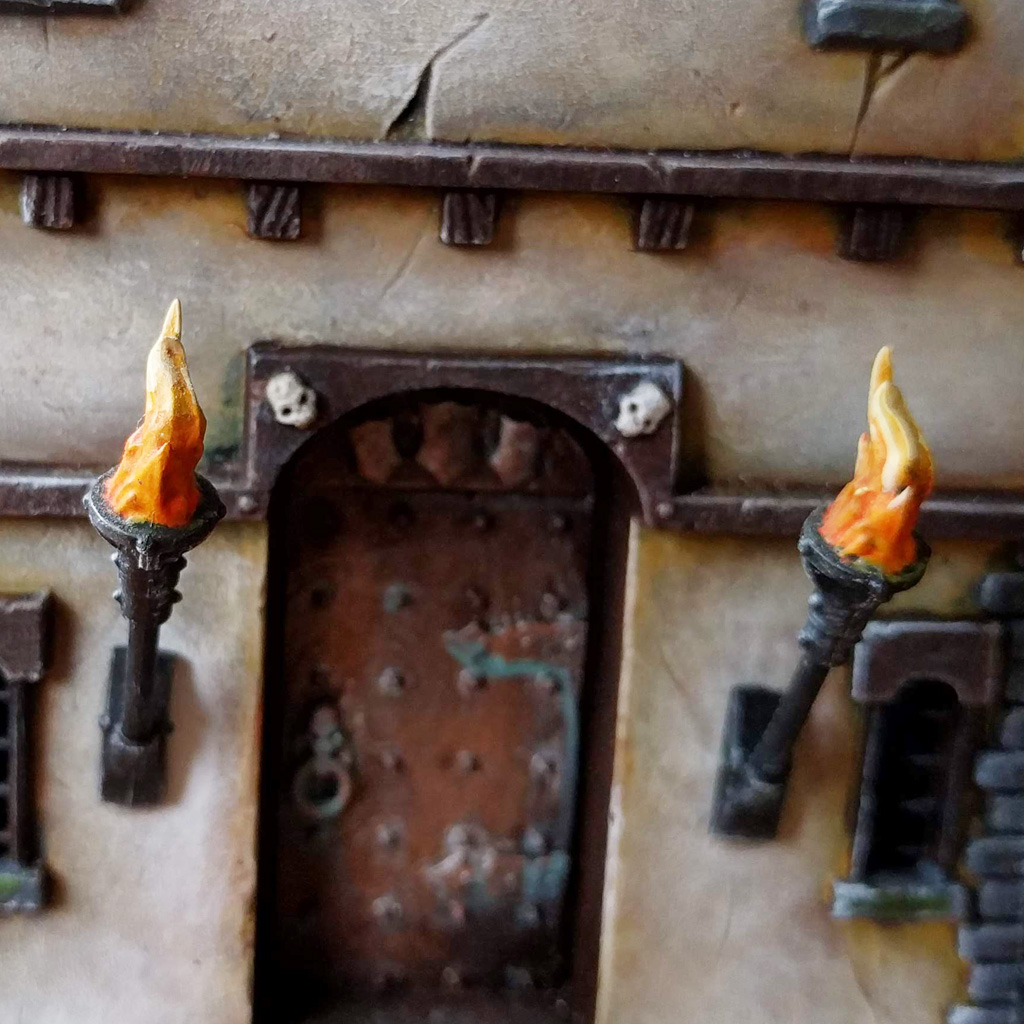
There is no fire hazard with these plastic torches.
The method we do for both the torches and the lantern is a gradient. We start with the base color and paint each subsequent color, layering on top, but with each layer and level of brightness we paint less and less of the object. Perhaps the steps can explain it better:
- Start by base coating the flame part of the torch entirely with Jokaero Orange.
- Shade the entire flame with Fuegan Orange. This will help get darker contrast into the texture of the fire and give your flame some contrast and dimension.
- Next, layer up with Troll Slayer Orange, but leave the core-center of the flame the shaded Jokaero Orange.
- Next, go a little brighter by switching to Yriel Yellow, but leave the Jokaero Orange (we’re not touching that for the rest of this process), and leave Troll Slayer Orange where it blends from the Jokaero. So, your sequence so far from the center out is Jokaero (shaded), Troll Slayer Orange, Yriel Yellow
- Now, the last step is to paint the very tips of the flames Flash Gitz Yellow.
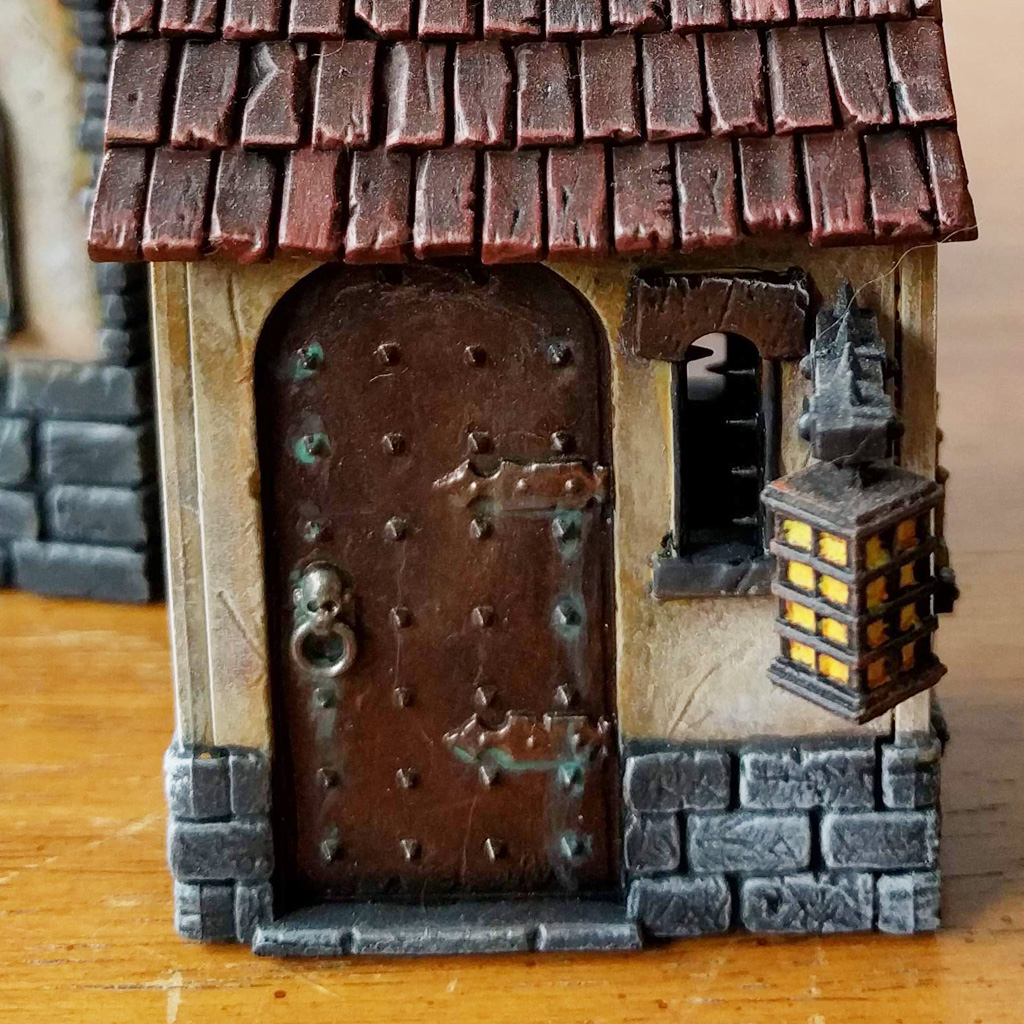
The tiny windows in the lanterns are painted in much the same fashion, using the same colors, except that instead of making the gradient from darker to lighter from the center-out, you’ll be making the gradient from left to right.
A nice trick to try would be to make the gradient go from inside-out, darkest on the inside of the windows to lights toward the outside of the windows.
- Base coat each little window with Jokaero Orange
- Shade the little windows entirely with Fuegan Orange
- Paint 3/4 of the window with Troll Slayer Orange, leaving about 1/4 of the window Jokaero Orange.
- Paint 1/2 of the window with Yriel Yellow, leaving 1/4 of the window Troll Slayer Orange and the last 1/4 of the window Jokaero Orange
- And finally, paint the last 1/4 of the window Flash Gitz Yellow.

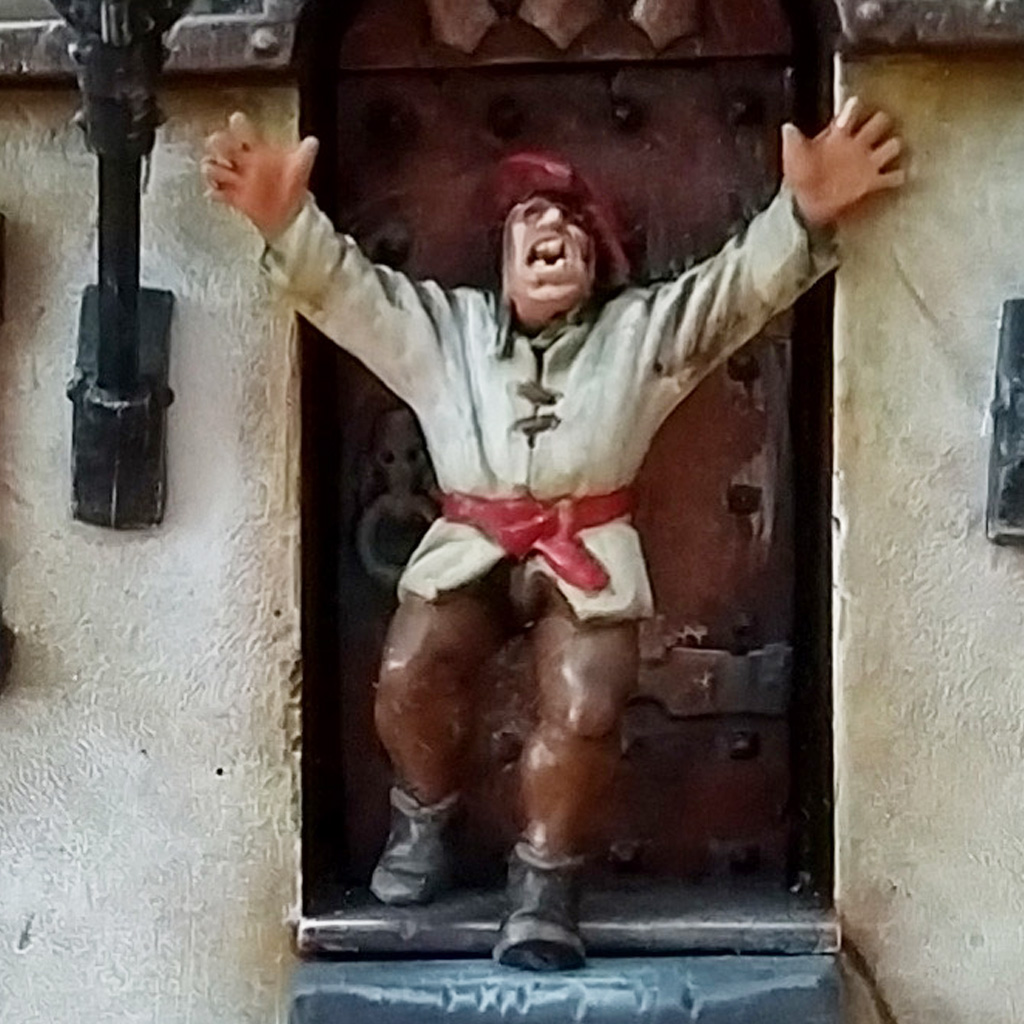
Capturing Chaos: A Step-by-Step Guide to Painting the Infamous ‘Panicking Man’ from Warhammer Fortified Manor
You know the memes, now let’s paint the figure!
Let’s start with his shirt, teeth and eyes
Nothing fancy on this guy. We’re going base-shade-layer all the way through.
- Base coat Rakarth Flesh
- Shade in Agrax Earthshade
- Dry-brush Pallid Wych Flesh
- Dry-brush White Scar
Hat and Belt
- Base coat in Mephiston Red
- Shade in Agrax Earthshade
- Layer in Evil Sunz Scarlet
Pants and Cowl
- Base coat in Rhinox Hide
- Shade in Agrax Earthshade
- Layer up with Rhinox Hide
Boots
- Base boat in Abaddon Black
- Shade with Nuln Oil
- Highlight with Dawnstone
And finally, the Panicking Man’s Skin
- Base coat in Bugman’s Glow
- Shade with Reikland Fleshshade
- Layer the skin with Cadian Fleshtone
Concluding the Journey: Achieving Mastery in the Fortified Manor Painting Guide
In conclusion, this fortified manor painting guide equips you with the knowledge and techniques necessary to bring your Warhammer Fortified Manor to life with vivid detail and striking realism. From the weathered wood of its doors and fences to the flickering glow of torches and lanterns, each element contributes to the immersive world-building of your tabletop battlefield. By mastering the art of painting the intricate details and accessories, including the iconic “Panicking Man,” you not only enhance the visual appeal of your Warhammer scenery but also imbue it with character and narrative depth. With patience, practice, and a touch of creativity, your Warhammer Fortified Manor will stand as a testament to your skill and passion for the hobby.
Fortified Manor Shopping List
- Games Workshop Old World Fortified Manor
- Spray Primer for Miniatures
- Citadel Colour Averland Sunset
- Citadel Colour Agrax Earthshade
- Citadel Colour Mournfang Brown
- Citadel Colour Ushabti Bone
- Citadel Colour Screaming Skull or Vallejo Model Paint Ivory
- Citadel Colour White Scar
- Citadel Colour Dawnstone
- Citadel Colour Nuln Oil
- Citadel Colour Administratum Grey
- Citadel Colour Rhinox Hide
- Citadel Colour Doombull Brown
- Citadel Colour Tuskgor Fur
- Citadel Colour Gorthor Brown
- Citadel Colour Baneblade Brown
- Citadel Colour Hashut Copper
- Citadel Colour Reikland Fleshshade
- Citadel Colour Waaagh! Flesh
- Citadel Colour Biel-Tan Green
- Citadel Colour Warboss Green
- Citadel Colour Skarsnik
- Citadel Colour Jokaero Orange
- Citadel Colour Troll Slayer Orange
- Citadel Colour Yriel Yellow
- Citadel Colour Fuegan Orange
- Citadel Colour Flash Gitz Yellow
- Citadel Colour Rakarth Flesh
- Citadel Colour Pallid Wych Flesh
- Citadel Colour Mephiston Red
- Citadel Colour Evil Sunz Scarlet
- Citadel Colour Abbadon Black
- Citadel Colour Bugman’s Glow
- Citadel Colour Cadian Fleshtone
- Citadel Dry Ryza Rust
- Citadel Technical Nihilik Oxide

No responses yet