Disclaimer: This post contains affiliate links. As an Amazon Associate, I earn from qualifying purchases at no extra cost to you. [Learn More]
Introduction
Dry, dusty bases are useful for far more than Star Wars miniatures. The same basic approach works for almost any desert, arid, or rocky environment, whether you’re building a sandy battlefield, a wasteland, or something inspired by a particular fictional world.
For this project, Geonosis was the inspiration. My Star Wars: Legion Separatist army is themed around the planet, so I wanted the Persuader Tank Droid to fit into the same environment as the rest of the army.
The process is straightforward and relies on inexpensive materials and a little experimentation. You can adjust the amount of texture, rock, vegetation, and color depending on the environment you’re trying to create.
Build Your Own Hobby Desk
Every miniature project starts with a workspace. These are the paints, brushes, tools, and hobby supplies I regularly use while painting miniatures for Mythic Minis. Whether you’re just getting started or looking to upgrade your hobby desk, these resources can help make painting more enjoyable and efficient.

Paints Used
Primer
Zandri Dust Spray
Shades / Washes
Agrax Earthshade
Fuegan Orange
Reikland Fleshshade
Druchii Violet
Paint colors
Ushabti Bone
Screaming Skull
Averland Sunset
Trollslayer Orange
Xereus Purple
https://mythicminis.com/wp-content/uploads/2026/09/Geonosis-or-Desert-Style-Bases.pdf
Shop the Paint List
Building the Ground
The first step is establishing the basic texture of the ground.
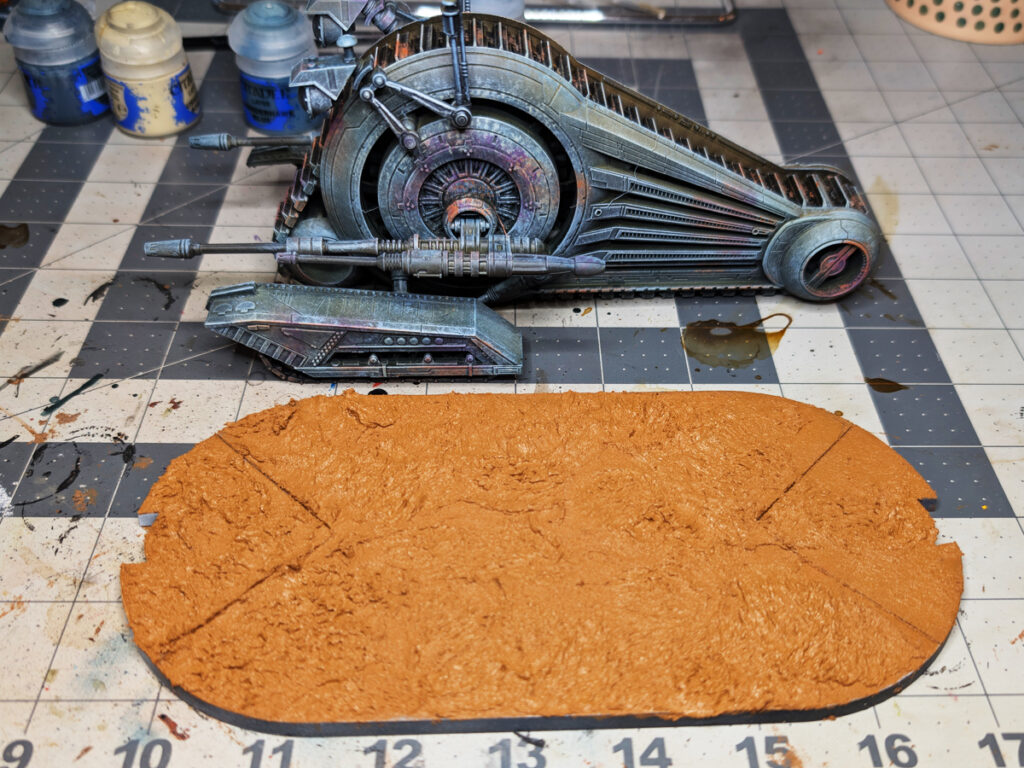
Spread Vallejo Brown Earth over the surface of the base, building it up enough to create an uneven ground surface. You don’t need to make the texture perfectly uniform. In fact, some variation will make the finished base look more natural.
Use a modeling tool to press and manipulate the texture, or try something as simple as a small ball of crumpled aluminum foil. Pressing the foil into the Brown Earth creates a random, broken texture that works particularly well for dry ground.
Let the texture paint dry completely before moving on.
Once the ground texture has set, thin some PVA glue with a little water and spread it over the surface with an old brush. You aren’t trying to create a thick layer of glue. The goal is simply to give the smaller bits of aggregate something to adhere to.
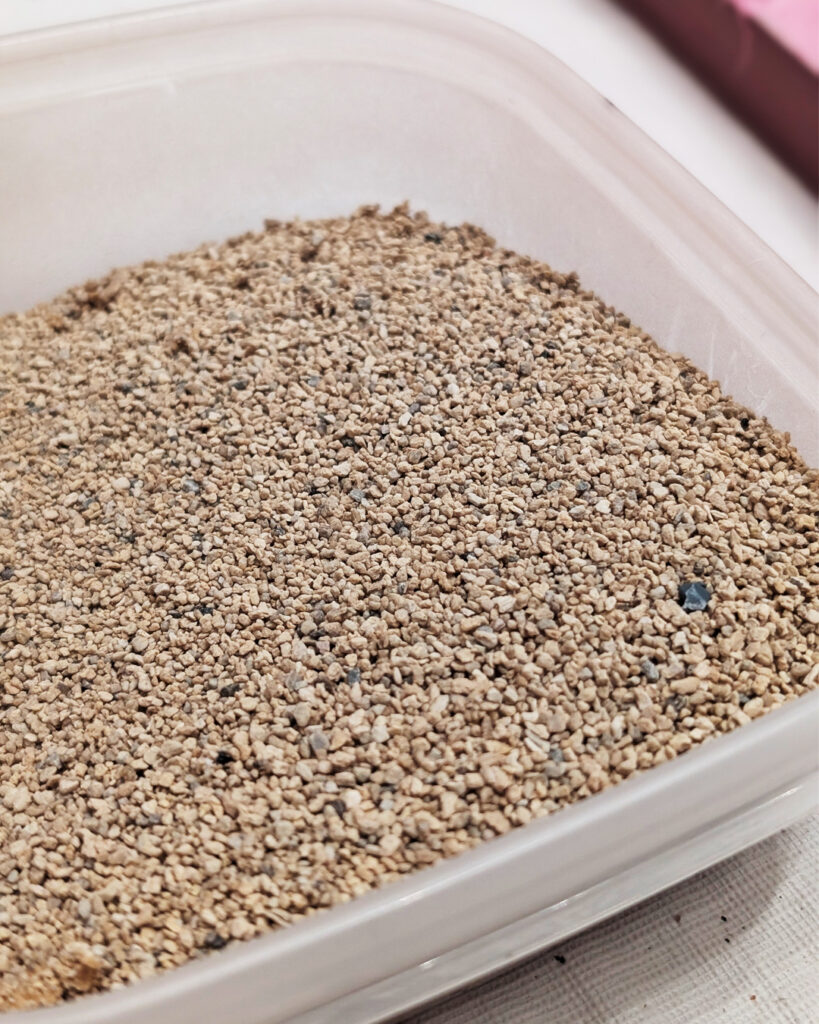
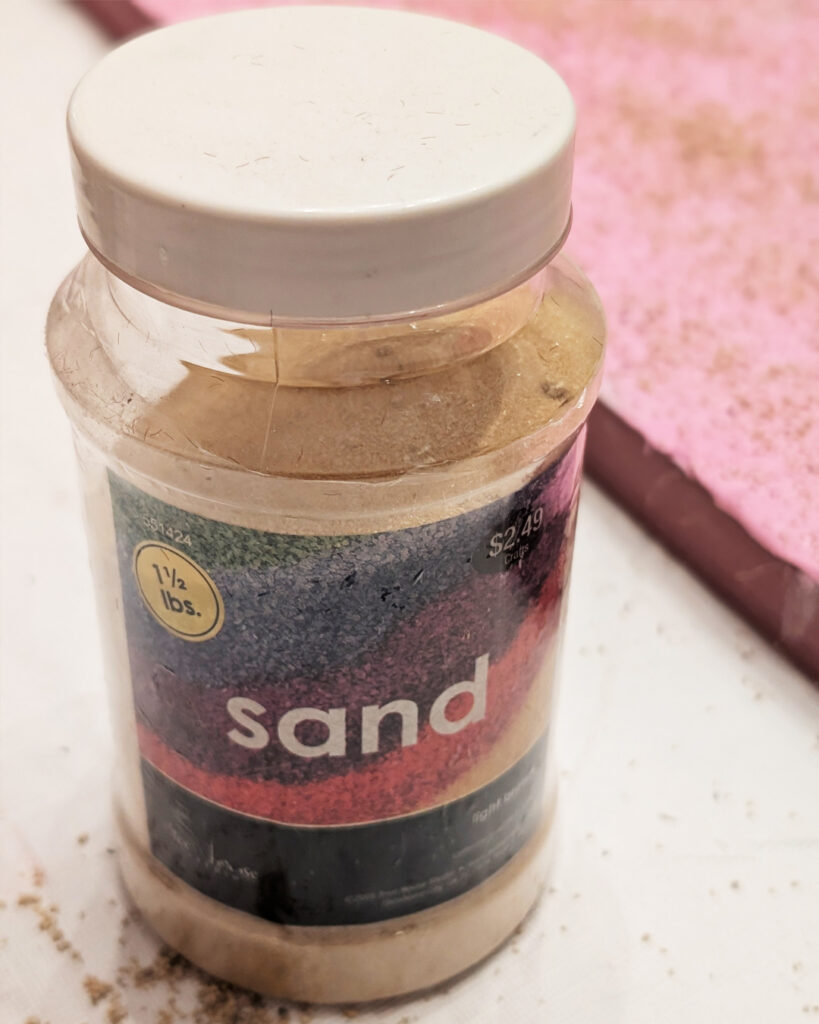
Sprinkle a mixture of fine sand and tiny rocks over the glue. Use different sizes rather than trying to make everything uniform. A desert floor has plenty of variation, and a mixture of fine particles and slightly larger grains gives the surface more visual interest.
For larger rocks and pebbles, use full-strength PVA glue to attach them individually.
You can certainly buy modeling rocks specifically for this purpose, but you don’t necessarily need to. Some of the larger stones used on this base came from outside. Small natural rocks can make excellent miniature terrain once you find pieces with an appropriate scale.
Before gluing those larger rocks into place, however, there’s one thing worth checking.
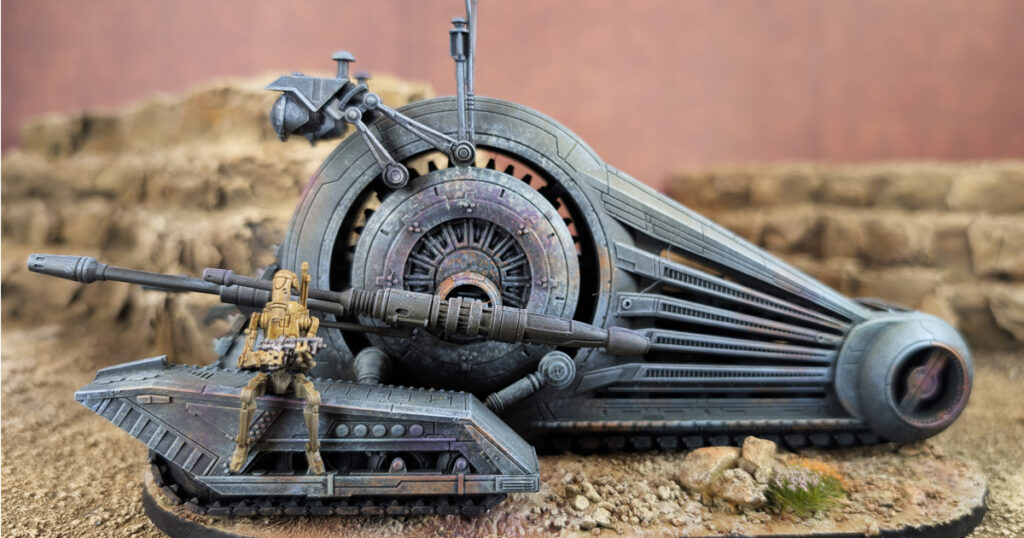
Place the miniature on the base and look at its mounting points before committing to your larger pieces of terrain. This gives you a clear idea of where you have room for rocks and other details without accidentally putting something directly where the miniature needs to sit.
It seems like a small consideration, but doing this now is much easier than discovering later that your beautifully positioned rock is occupying the exact spot where the miniature needs to be secured.
Once you’re happy with the arrangement, glue the larger rocks into place and allow everything to dry thoroughly.
Priming and Shading
Once the glue has completely dried, the entire base can be primed.
I used Citadel Zandri Dust spray to prime the entire base. This gives the ground, sand, rocks, and other materials a common starting point and establishes a warm, dusty color underneath the later layers of drybrushing.
After the primer has dried, cover the base with Agrax Earthshade. Let the shade settle into the texture and recesses of the ground, bringing back the depth that was lost when everything was unified under the primer.
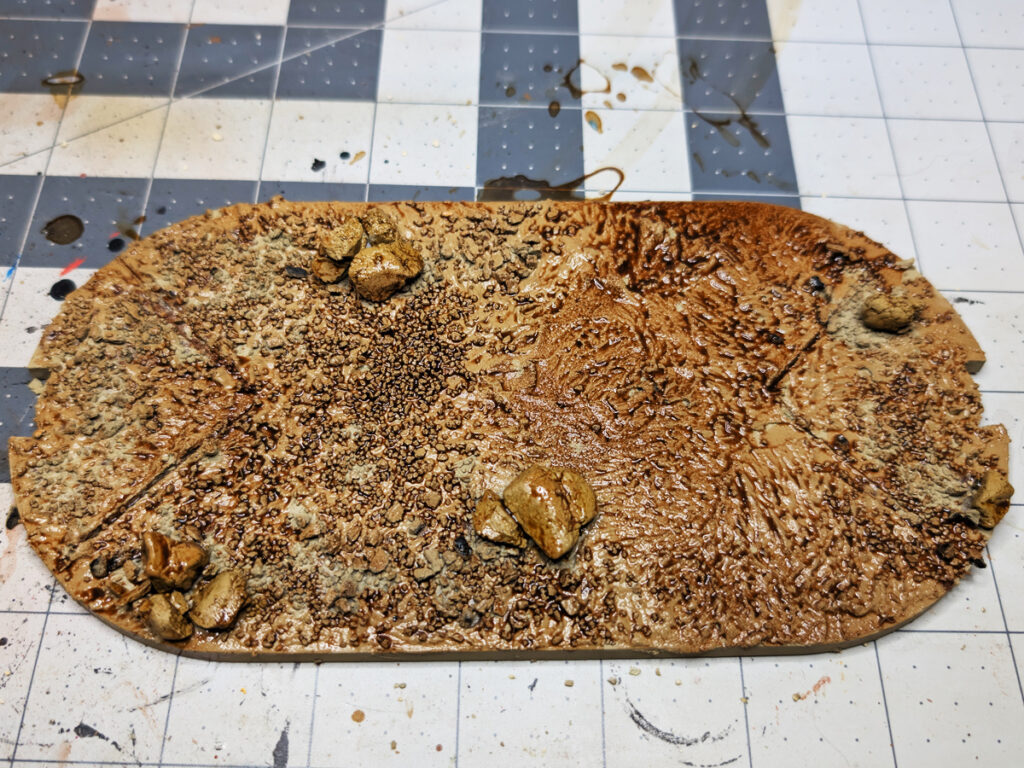
I also added a few small patches of additional washes to introduce some color variation:
- Fuegan Orange
- Reikland Fleshshade
- Druchii Violet
These don’t need to be applied uniformly. Keep them confined to small, irregular areas of the ground. The purpose is to introduce subtle variations in the underlying color that will become more apparent as the drybrushing builds up the surface.
Don’t worry if the base looks a little more colorful than you expected at this stage. Much of this will be softened and unified by the layers of drybrushing that come next.
Painting the Desert Ground
Once the washes are completely dry, it’s time to start bringing the texture back into focus.
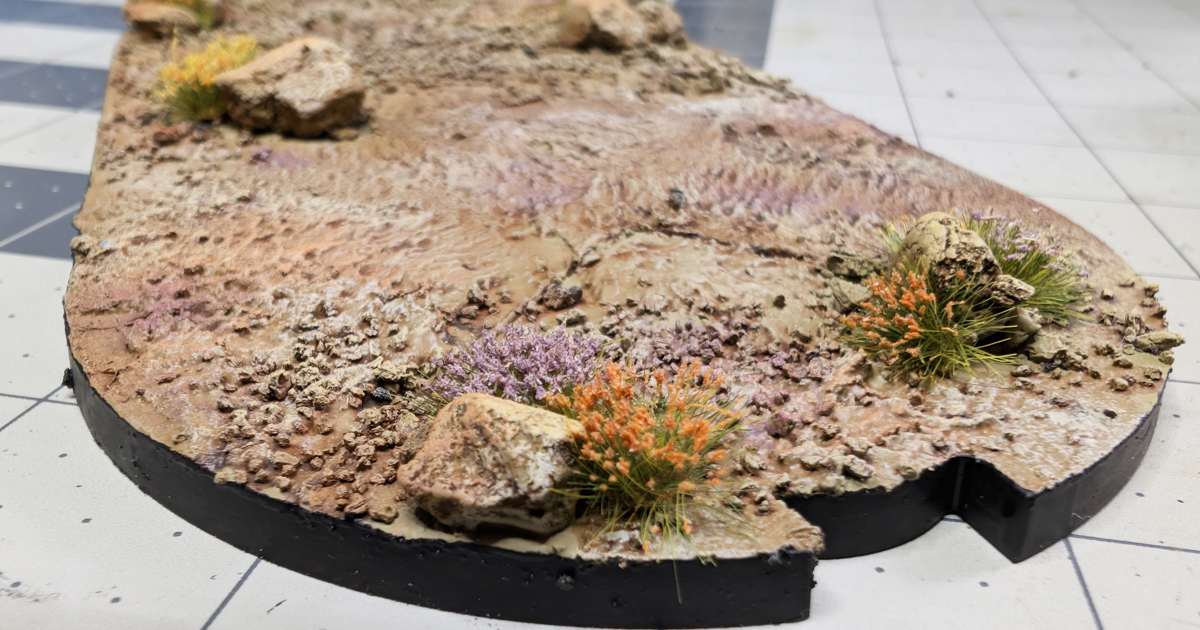
The first layer is a medium-to-heavy drybrush of Ushabti Bone. Work the brush across the entire surface, allowing the raised texture to pick up the paint while leaving the darker Brown Earth and shaded recesses visible.
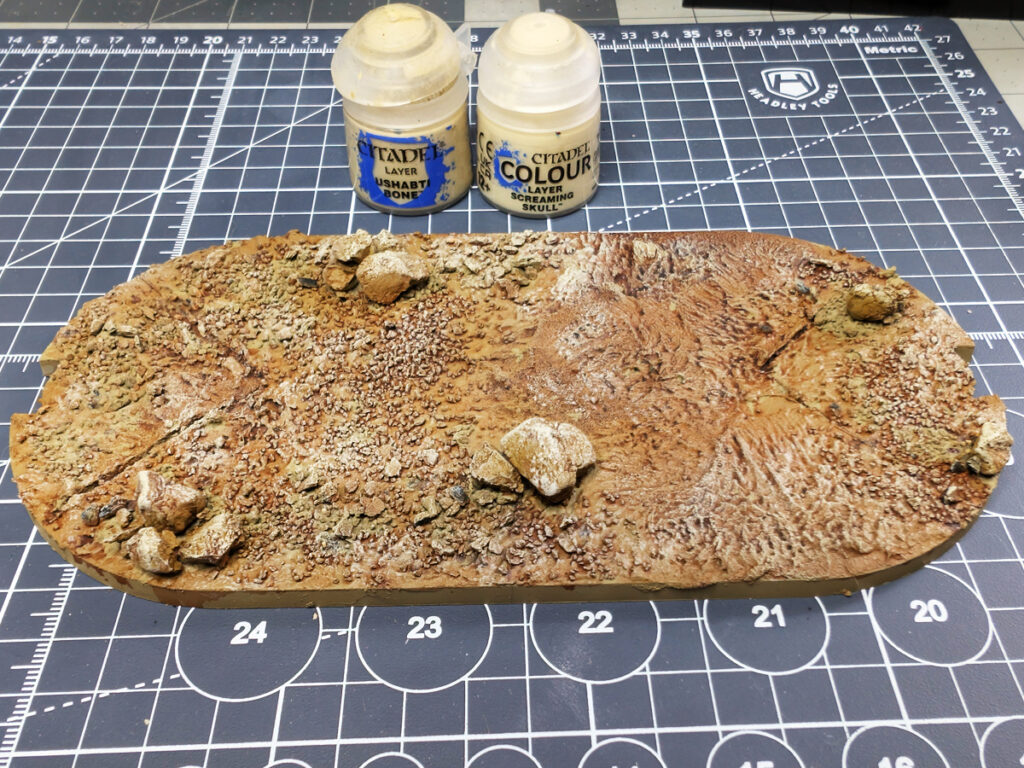
Follow this with a lighter drybrush of Screaming Skull. Concentrate on the raised areas rather than trying to cover the entire surface again. The lighter color begins to establish the dusty, sun-bleached appearance of the ground.
At this point, you already have a convincing desert base. The next few steps are about introducing subtle variation rather than dramatically changing the overall color.
For the next layer, I used Vallejo Yellow Ochre, applied as another light, selective drybrush. The goal isn’t to turn the ground yellow. Instead, pick out a few areas of the surface to introduce a warmer tone and keep the ground from looking completely uniform.
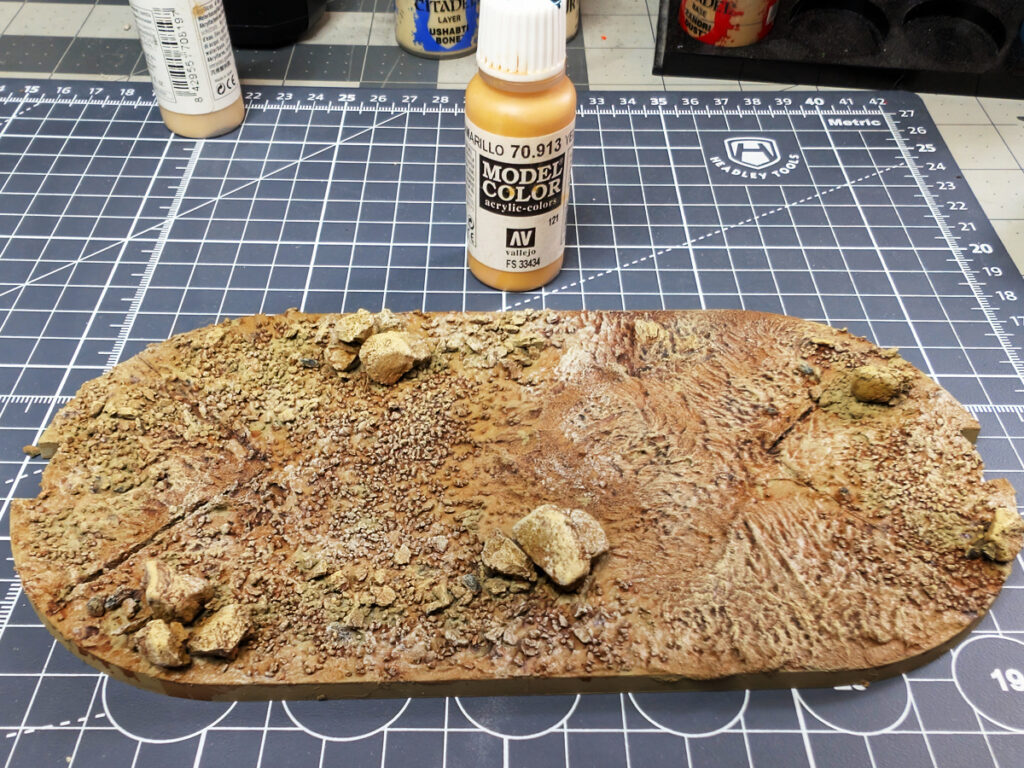
If you’re working entirely with Citadel paints, Averland Sunset is a reasonable alternative.
I repeated the same approach with Troll Slayer Orange / Fire Dragon Bright, again using only a small amount of paint and concentrating on selected areas of the ground.
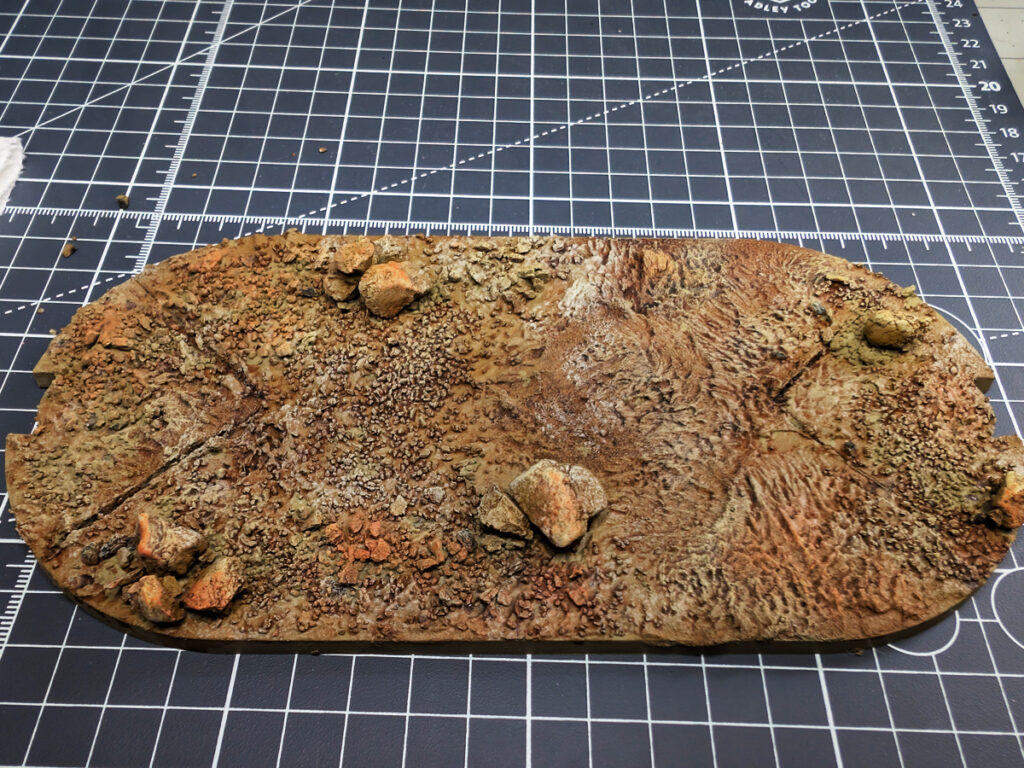
Finally, I added a small amount of Xereus Purple in the same way.
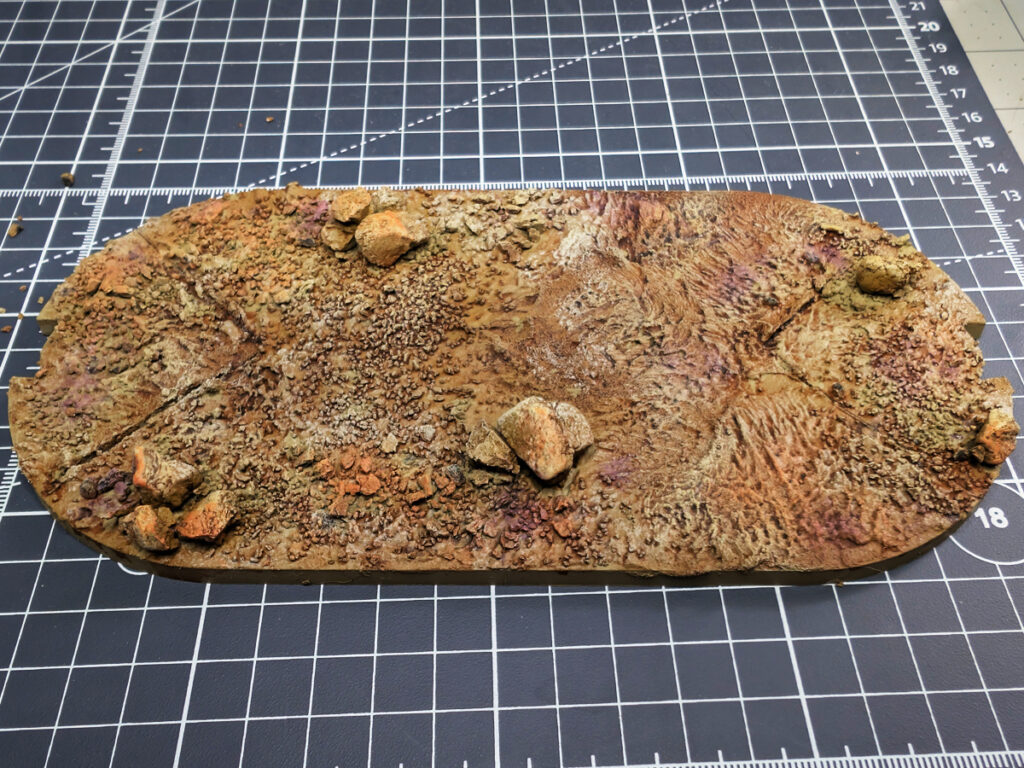
These last colors are very much a less-is-more exercise. You’re not trying to create obvious patches of yellow, orange, and purple. You’re introducing small shifts in color that make the ground more interesting when viewed as a whole.
There’s also a second reason for choosing these particular colors: they help tie the base into the miniature sitting on it. Small amounts of colors already present in the model’s paint scheme can be echoed in the environment, creating a connection between the miniature and its base without making the base compete for attention.
Adding Vegetation
With the ground painted, I added small purple, orange, and yellow flowers and tufts, concentrating them around some of the larger rocks.
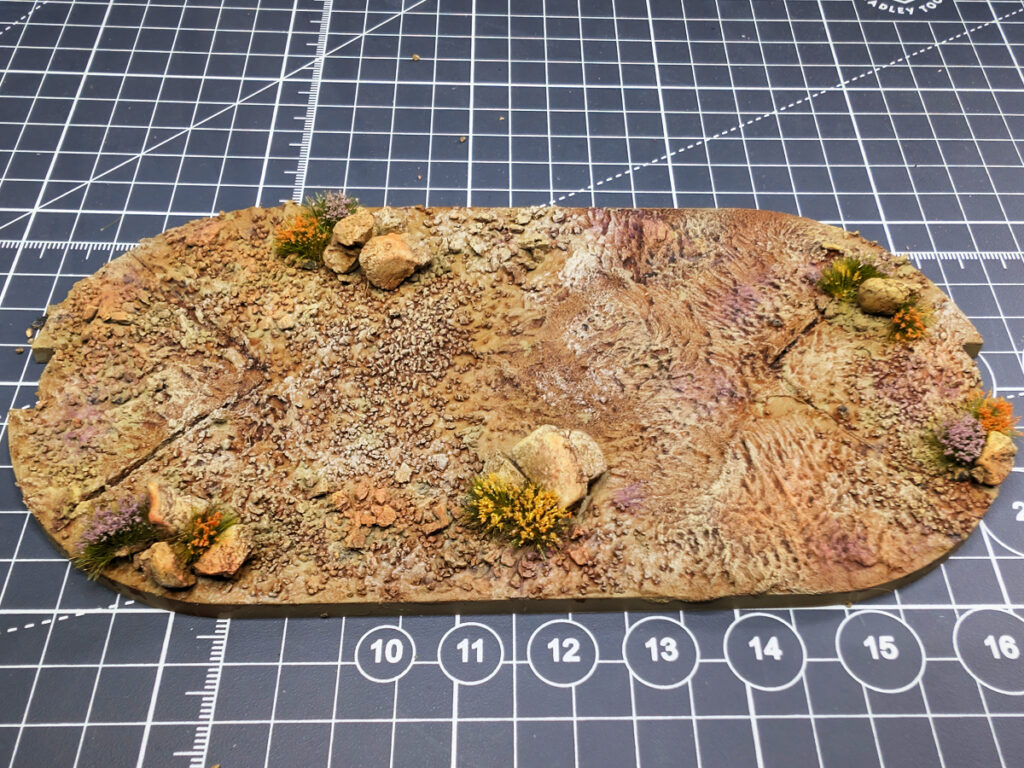
Again, resist the temptation to cover every available piece of ground. A few small clusters are enough. Placing them around rocks also gives the vegetation a natural focal point and helps break up the otherwise open surface of the desert.
The exact colors and vegetation can easily be changed to suit the environment you’re trying to create. The Geonosis palette is simply the starting point for this particular army.
Finishing the Base
And finally, there’s one step I almost always consider part of finishing a base:
Paint the rim.
I almost always use black for the rim. It gives the finished miniature a clean, consistent boundary and keeps the irregular textures and colors of the terrain contained visually.
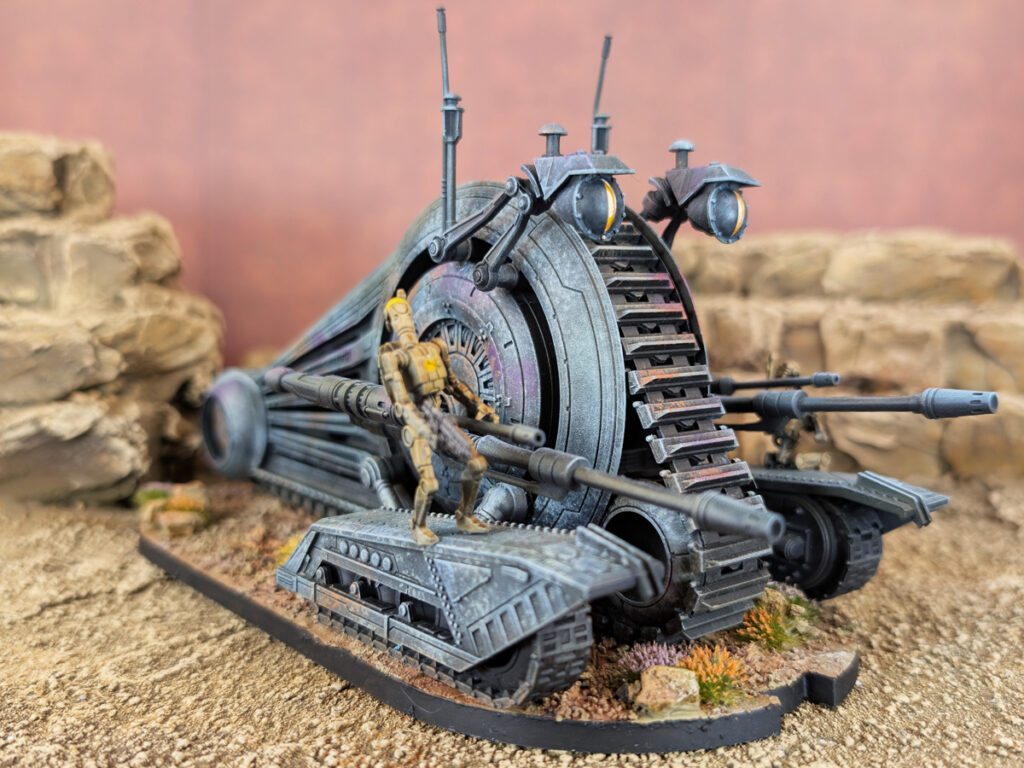
The result is a simple, flexible desert basing method that can be adapted to a wide range of miniature projects. Texture does most of the physical work, the primer and washes establish the underlying color and depth, drybrushing brings the surface texture forward, and a few carefully placed vegetation details give the otherwise barren ground some character.
You can stop at almost any point depending on how much detail you want. A simple combination of Brown Earth, sand and rocks, followed by the basic primer, shade, and drybrush stages, is enough to create a convincing dry environment. The additional ochre, orange, and purple tones simply give you another way to introduce variation or connect the base visually to the miniature.
For this project, those colors help the Persuader belong to the same Geonosis environment as the rest of my Separatist army.
Continue Your Painting Journey
Painting the Persuader Tank for Star Wars: Legion
Explore the technique behind using translucent Contrast paints—and what changes when you put them through an airbrush.