Disclaimer: This post contains affiliate links. As an Amazon Associate, I earn from qualifying purchases at no extra cost to you. [Learn More]
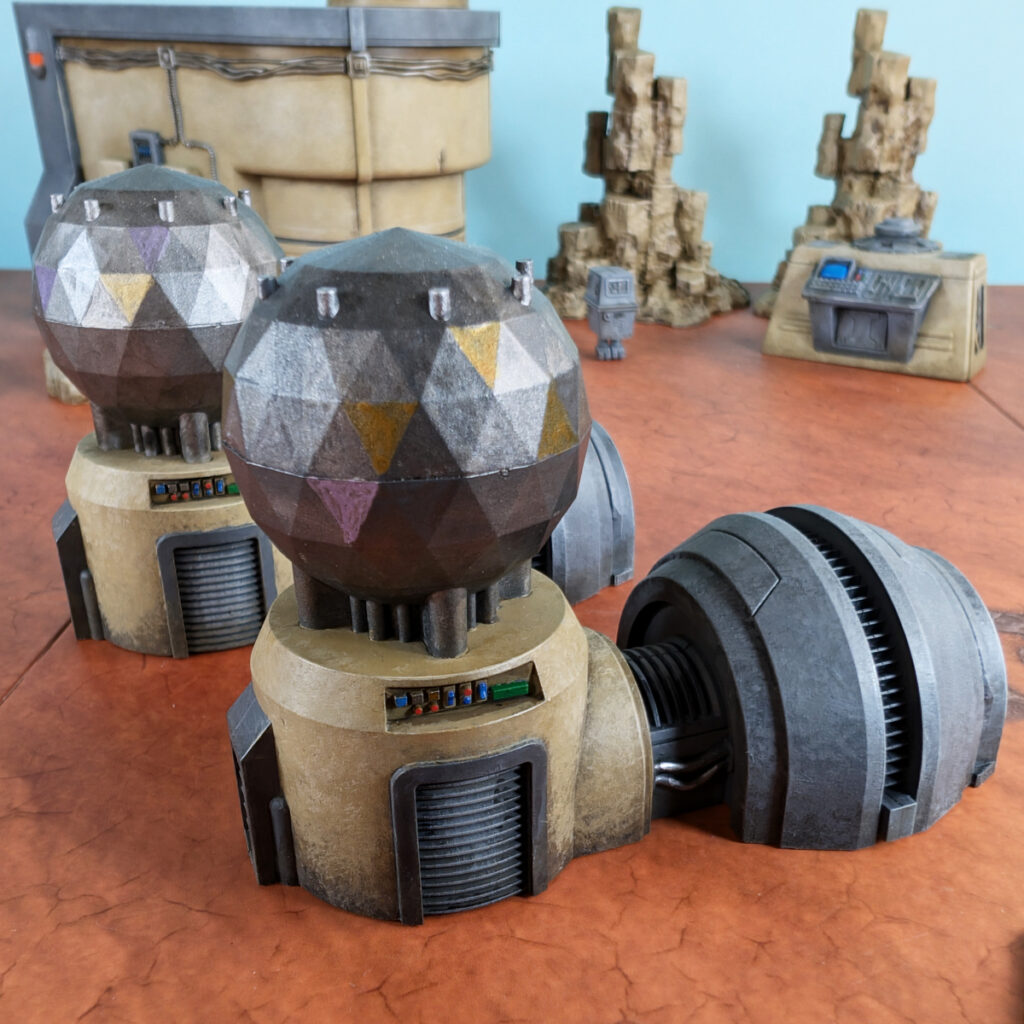
The Take Cover Terrain Kit for Star Wars Shatterpoint is the perfect canvas to unleash your creativity and immerse yourself in the galaxy’s most epic battles. In this step-by-step painting tutorial, we’ll turn these pieces into stunning, battle-ready terrain that will take your games to the next level. Whether you’re just starting out or looking to sharpen your skills, this guide will walk you through the process with practical tips and techniques.
Build Your Hobby Desk
Every miniature project starts with a workspace. These are the paints, brushes, tools, and hobby supplies I regularly use while painting miniatures for Mythic Minis. Whether you’re just getting started or looking to upgrade your hobby desk, these resources can help make painting more enjoyable and efficient.

Where to Buy Shatterpoint Terrain Model Kit(s)
Paints Used
The terrain pack can surprisingly be painted with a somewhat consolidated palette. The limited palette gives uniformity in theme and simultaneously provides enough color to enhance details on each of the numerous terrain pieces. Let’s start with these pieces that use a similar color palette:
Tech Shed / Communications Array / Control Console / Gonk Droid / Swoop Bike
Administratum Grey
Agrax Earthshade
Abaddon Black
Dawnstone
Evil Sunz Scarlet
Mechanicus Standard Grey
Screaming Skull
Stormhost Silver
Teclis Blue
Troll Slayer Orange
Ushabti Bone
Waywatcher Green
Zandri Dust
Generators
Leadblecher
Abaddon Black
Stormhost Silver
Balthasar Gold
Ironbreaker
Xereus Purple
Small and Large Rocks
Zandri Dust
Agrax Earthshade
Ushabti Bone
Screaming Skull
Shop the Painting List

The Painting Process for the Star Wars Shatterpoint Take Cover Terrain Pack
The beauty of the Take Cover Terrain Pack lies in its ability to achieve impressive results with straightforward painting techniques. With clever use of dry brushing, washes, and stippling, you can create realistic weathering effects that bring out the worn, battle-scarred look of these pieces. Strategic highlighting adds depth to edges and surfaces, making every detail pop without requiring advanced skills. These methods allow even beginner painters to craft terrain that looks like it’s been through countless skirmishes. By focusing on simple, repeatable steps, you can achieve professional-looking results that enhance the immersive feel of your Star Wars Shatterpoint games.
Priming the Take Cover Terrain Pack
I primed the majority of the terrain pieces with Zandri Dust. However, I also had a rattlecan of Mechanicus Standard Grey hanging around, so I went ahead and primed the all-grey pieces like the ladders and hit the top of the main building – the Tech Shed.
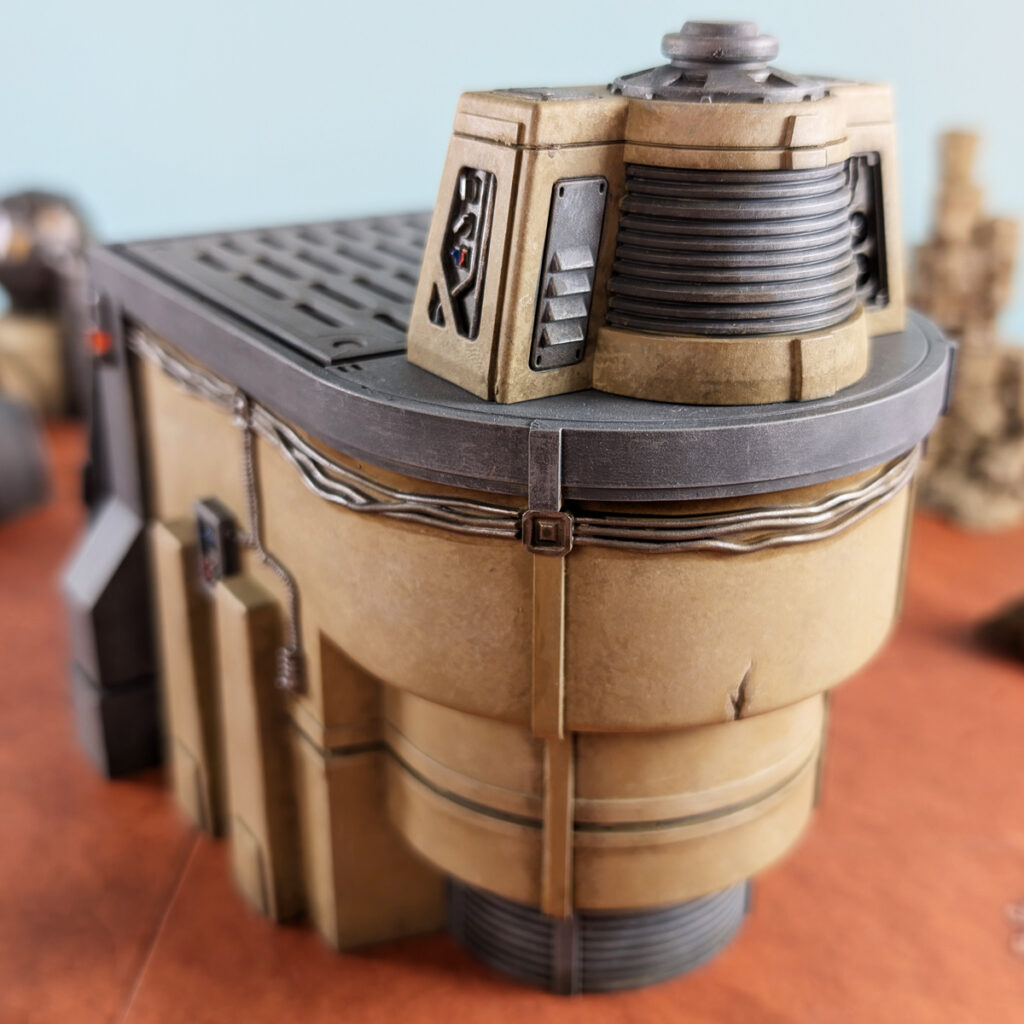
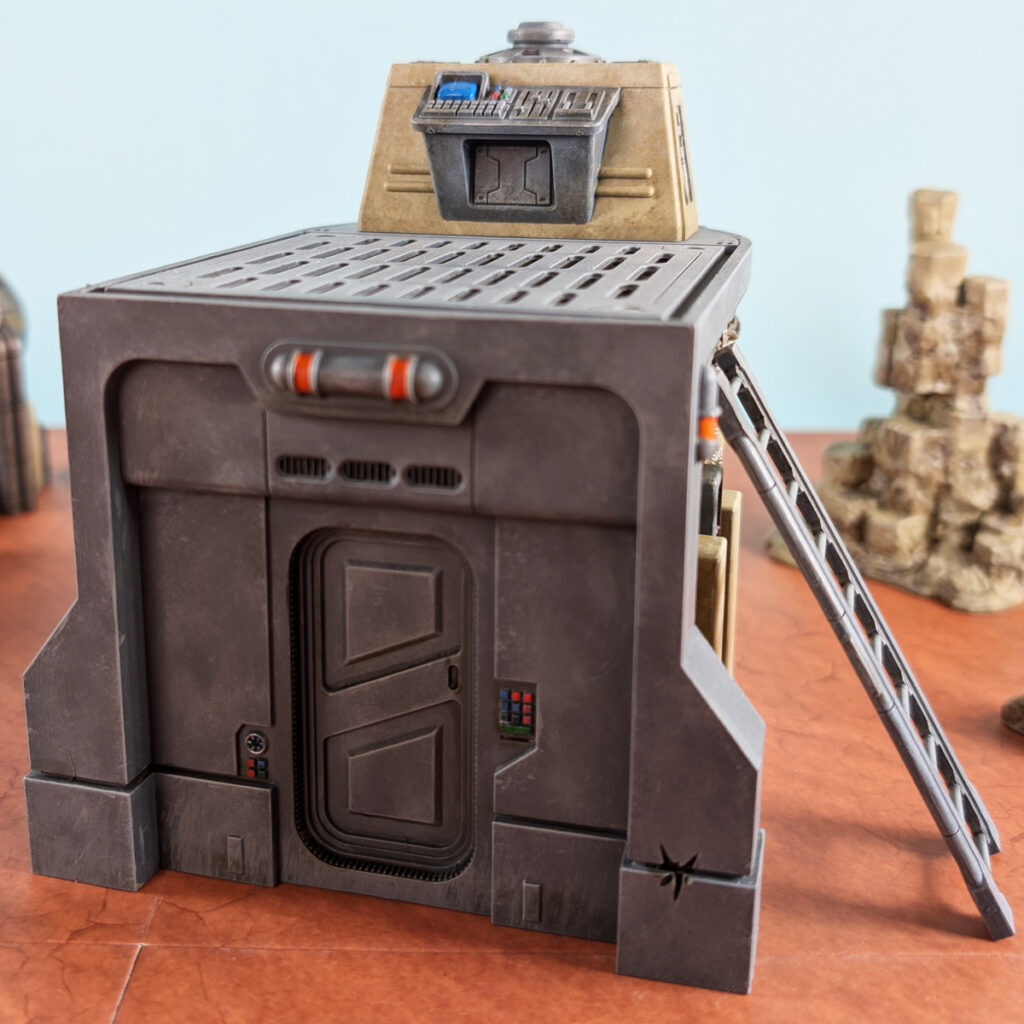
Let’s Get Started with the Tech Shed
- Zandri Dust
- Ushabti Bone
- Screaming Skull
- Mechanicus Standard Grey
- Dawnstone
- Administratum Grey
- Stormhost Silver
- Evil Sunz Scarlet
- Teclis Blue
- Agrax Earthshade
- Abaddon Black
- Troll Layer Orange
- Waywatcher Green
Basecoating
Begin by basecoating all of the tan areas with Zandri Dust. This may seem redundant because we’ve already primed in Zandri Dust, but this is a necessary step in case we need to color match to correct mistakes painting other colors. It also makes sure the basecoat is uniform.
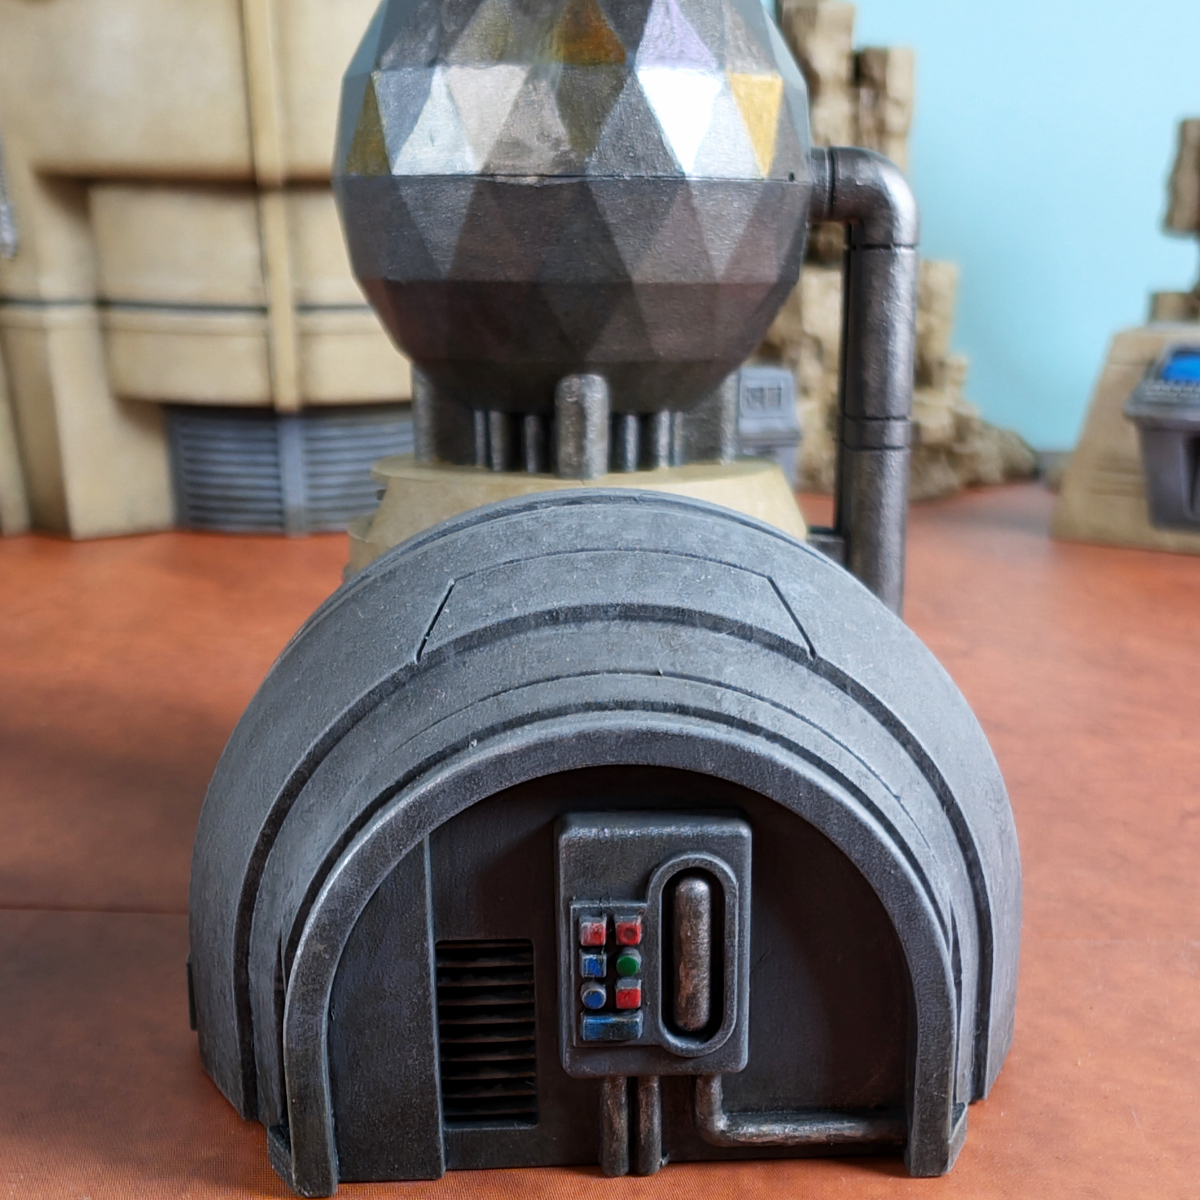
The bottom round part, roof, and entire back panel with door can be painted with Mechanicus Standard Grey.
Shading
For the grey areas, a simple wash of Abaddon Black will do the trick.
For the tan areas, you’ll want to focus shading Agrax Earthshade into the recesses between flat panels and along edges and corners in the panels. With just a little bit of Agrax Earthshade on your brush, you can lightly stipple from the edges and recesses a little bit toward the centers of flat panels. This will give a weathered and worn effect to the building.
Layering
Drybrush Dawnstone over the edges and corners of the grey areas. You can lightly stipple, similar to drybrushing but with more of a dabbing motion, over the flatter areas. This will texturize the metal.
Do the same over the tan areas with Ushabti Bone. Drybrush the edges and corners of the panels. You can also very lightly stipple over the areas you shaded to further texturize and randomize the weathering and wear on the panels.
Highlighting
Lightly drybrush the sharpest edges and corners of the grey areas with Administratum Grey.
Lightly drybrush the sharpest edges and corners of the grey areas with Screaming Skull.
You can also very lightly stipple these colors respectively to further texturize the metal panels of the Tech Shed.
Detailing
Use Stormhost Silver to basecoat all of the buttons and lights on the Tech Shed. You can also add the occasional line of Stormhost Silver along the edges of the grey areas where you may want the paint to appear worn, chipped, or damaged.
Use Troll Slayer Orange to paint the lights above the door on the rear and on the sides of the shed. You can use Evil Sunz Scarlet, Teclis Blue, Waywatcher Green and Stormhost Silver to paint the buttons whatever colors you wish.
There are also wires running along the sides of the building. Highlight these with the Stormhost Silver as well.
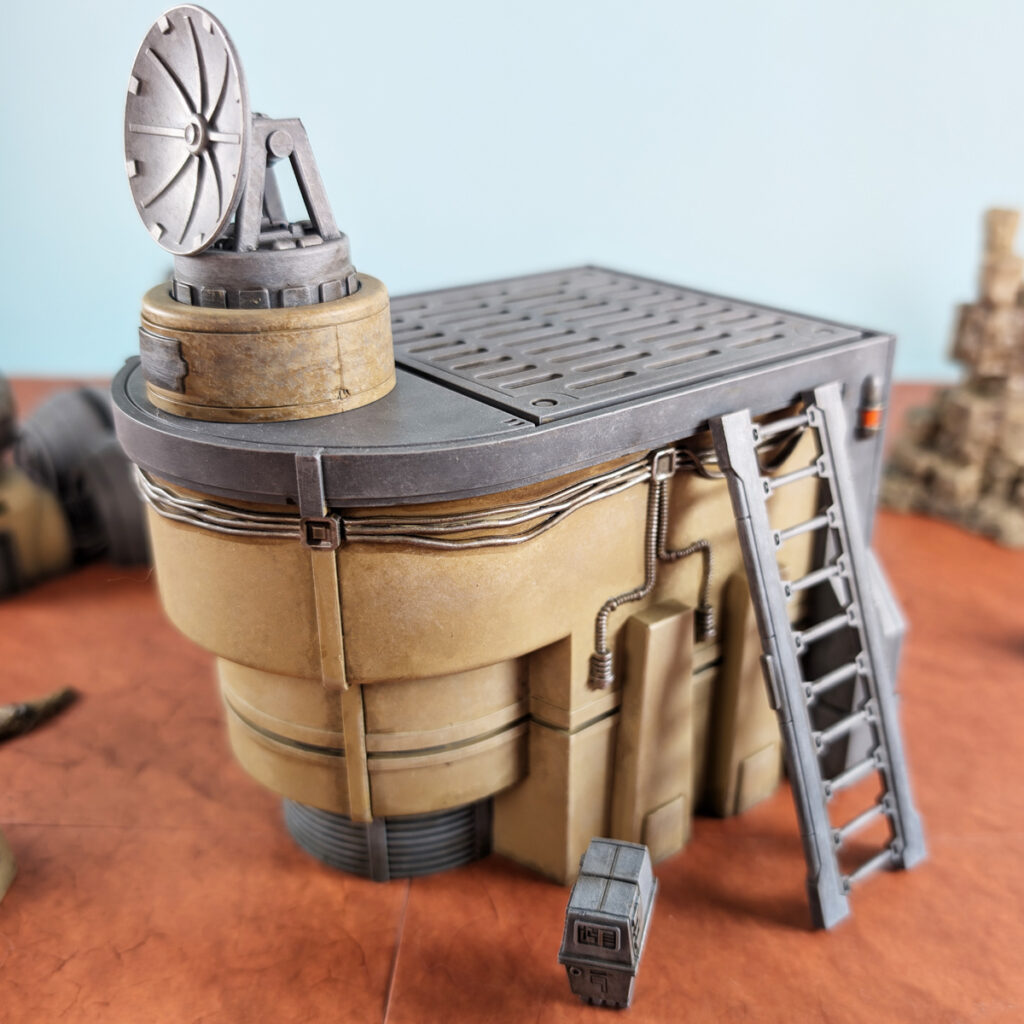
How to Paint the Communications Array and Control Console for the Tech Shed
This is a cool little feature for this terrain kit. You can swap the comms array with the control panel, or vice versa, and still use both pieces on the gameboard. It just depends on your objectives and narratives on the battlefield.
Paint the Communications Array
Use the same colors and techniques described above for the Tech Shed.
Paint the Control Panel
Again, use the same colors and techniques described above for the Tech Shed. For the control panel we’re going to push some details also similar to the Tech Shed.
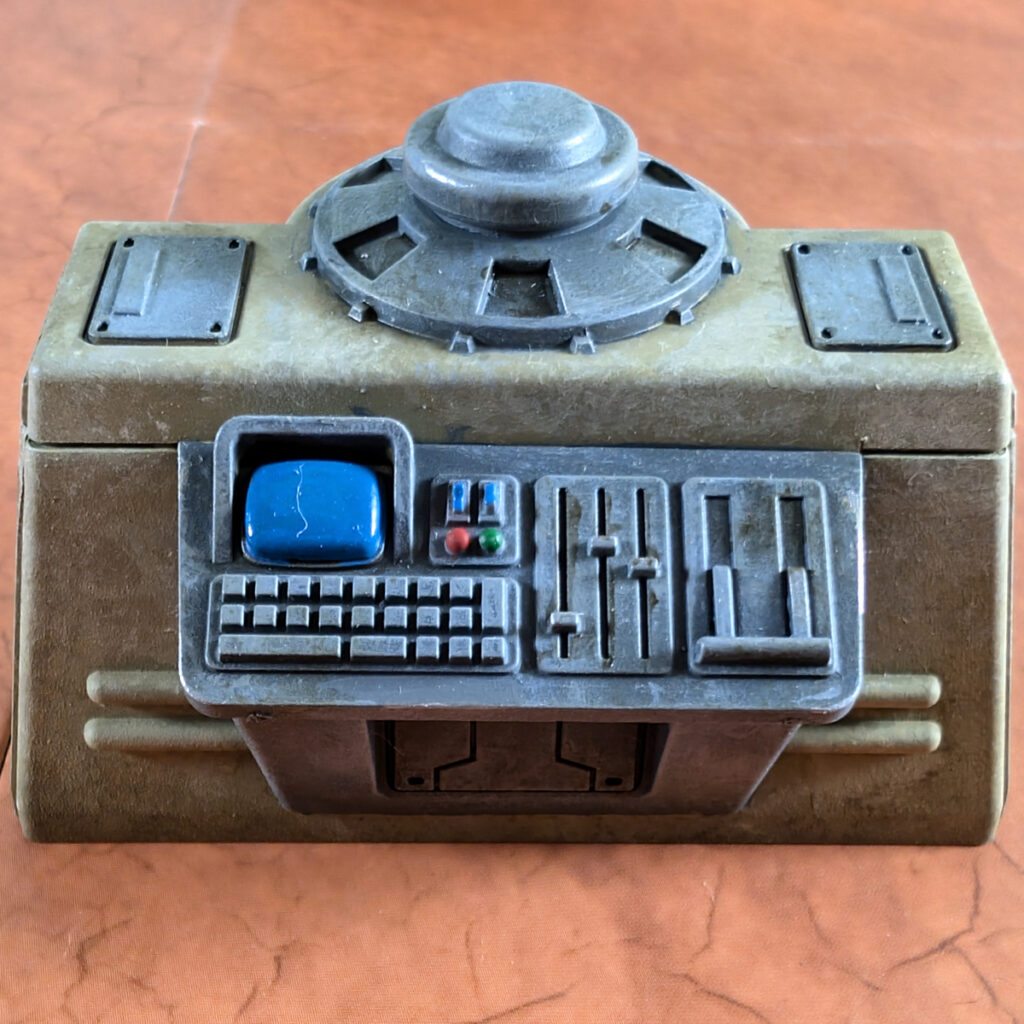
You can paint the buttons on the control console and drybrush the whole thing very lightly with Stormhost Silver to make the buttons and levers look worn and weathered.
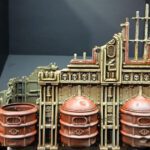
How to Paint the Generators
- Zandri Dust
- Ushabti Bone
- Screaming Skull
- Mechanicus Standard Grey
- Dawnstone
- Administratum Grey
- Stormhost Silver
- Evil Sunz Scarlet
- Teclis Blue (Citadel)
- Agrax Earthshade
- Abaddon Black
- Troll Layer Orange
- Waywatcher Green
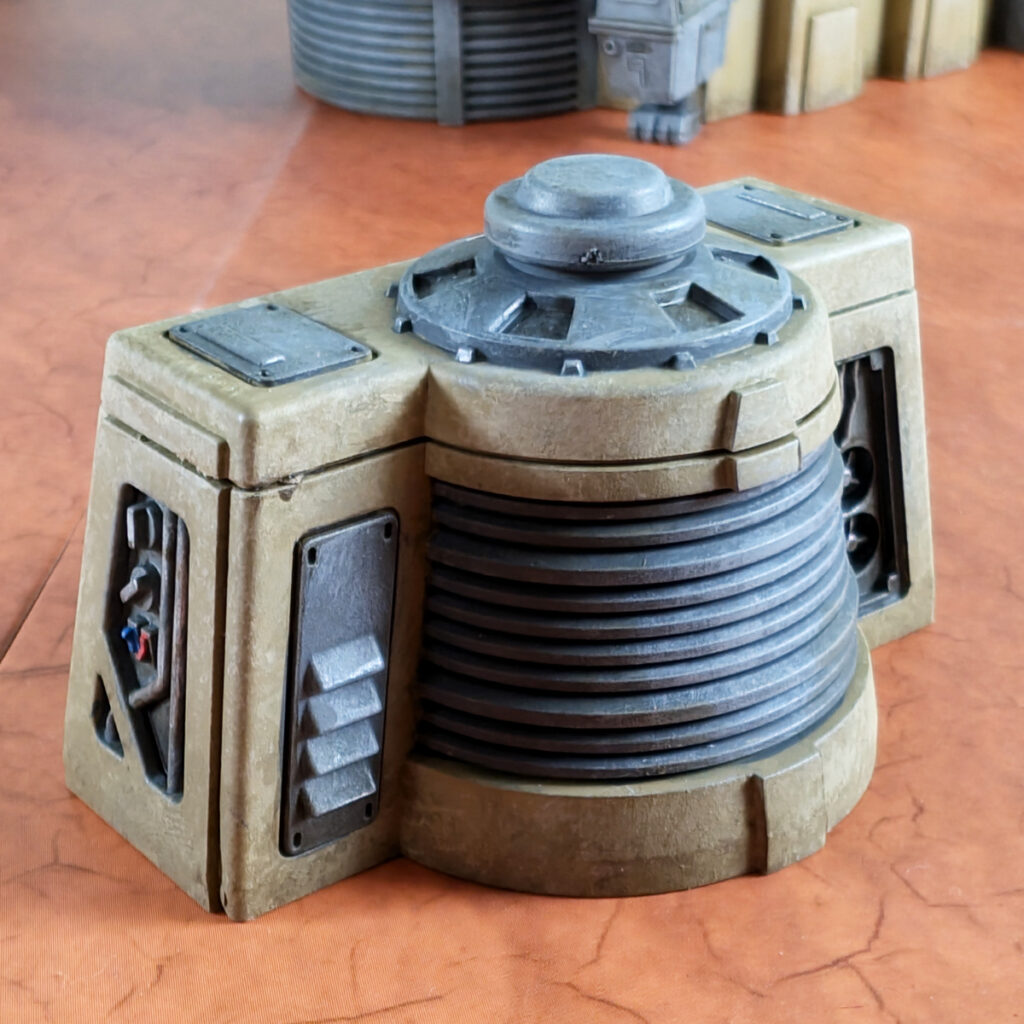
Use the exact same techniques to paint the generators as you painted the Tech Shed above. The difference here is that we’re going to leave the globes and pipes alone and do something special with those.
Painting the Conduits, Wires, and Control Panel
Conduits, wires and buttons can be drybrushed with a little Stormhost Silver to give them that old, worn metal appearance. For the buttons, a basecoat of silver will help enhance any color you want (Evil Sunz Scarlet, Teclis Blue, Waywatcher Green). You can also drybrushStormhost Silver on top of the painted buttons to give them a worn look as well.
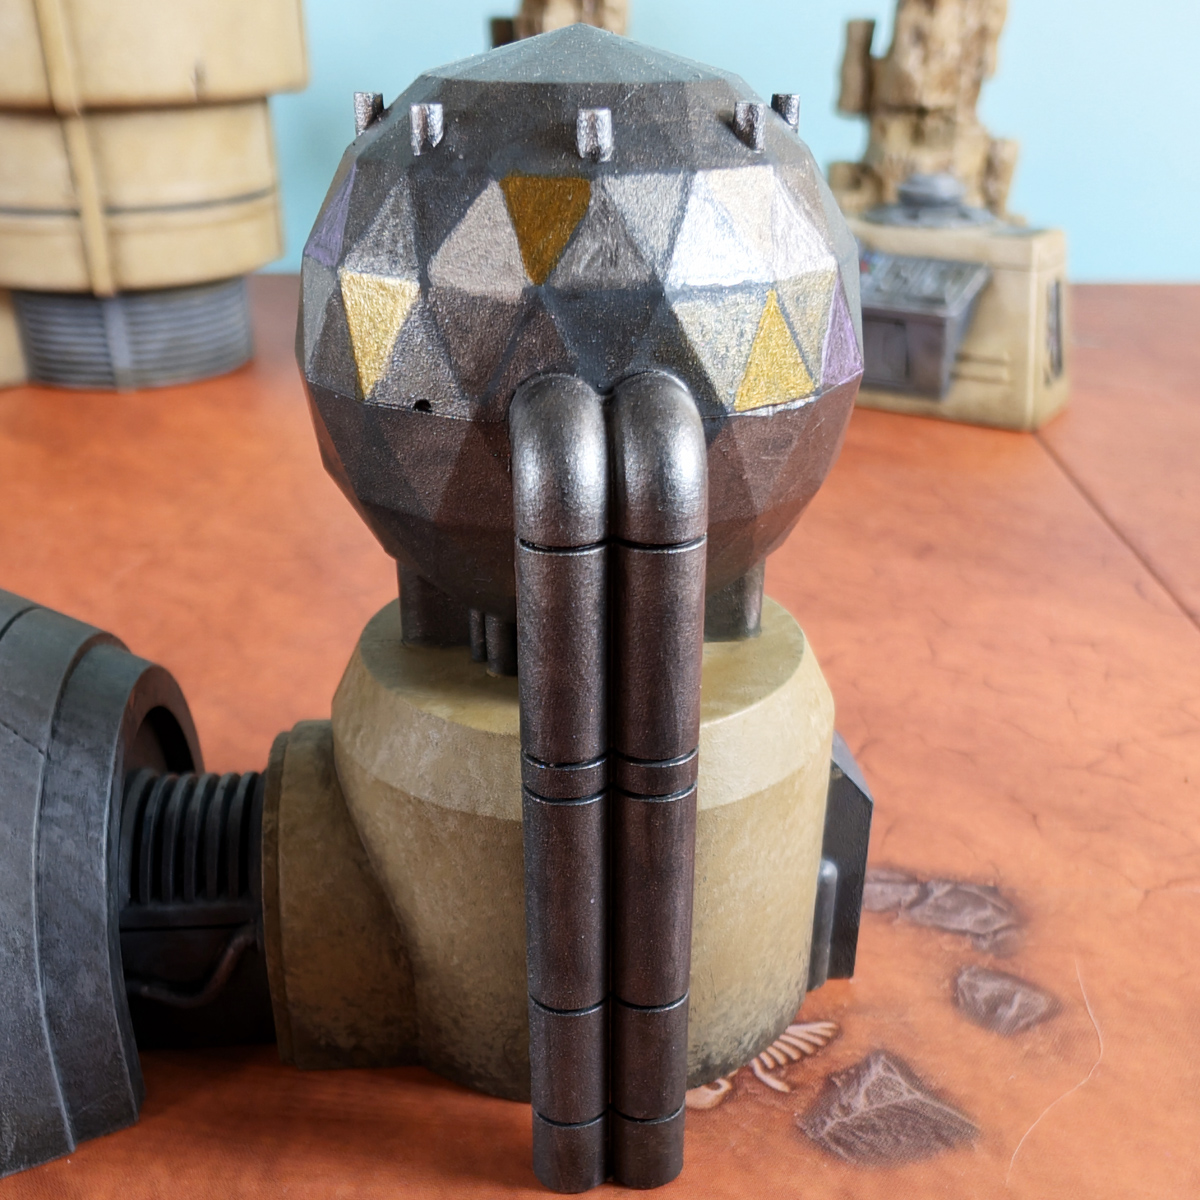
Painting the Generator Globe and Pipes
- Leadbelcher
- Nuln Oil
- Stormhost Silver
- Balthasar Gold
- Ironbreaker
- Xereus Purple /
Begin by basecoating both the globe and the pipes with Leadbelcher. Shade both the globe and pipes with Nuln Oil.
Next, with thinned colors of Balthasar Gold, Ironbreaker, and Xereus Purple. Select which triangles you want to paint which color. I picked about 3 for each color to give the illusion of reflection from sunlight on the sand (painting for a Tattooine or desert environment). You may want to be sparing with using special colors on the tiles so as not to saturate. A little goes a long way.
Finally, layer the remaining triangles and pipes with Ironbreaker.
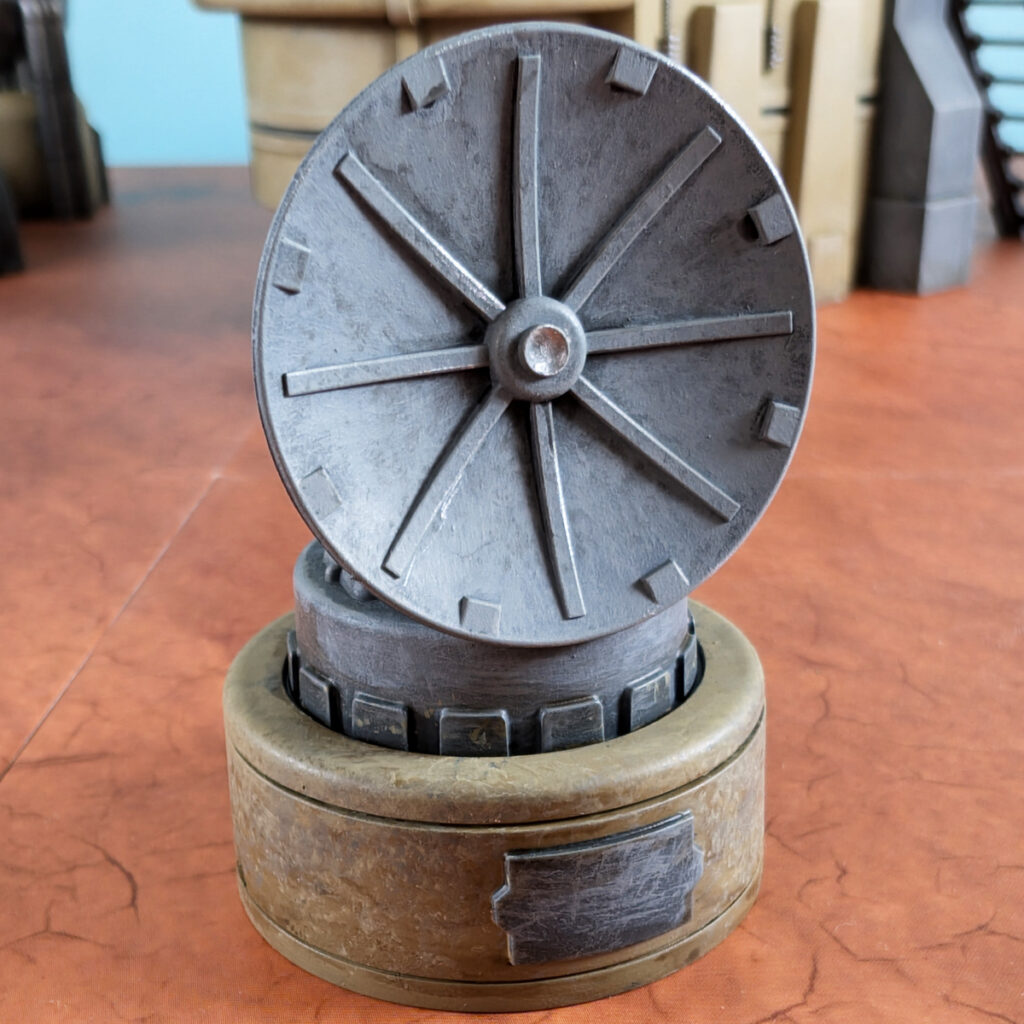
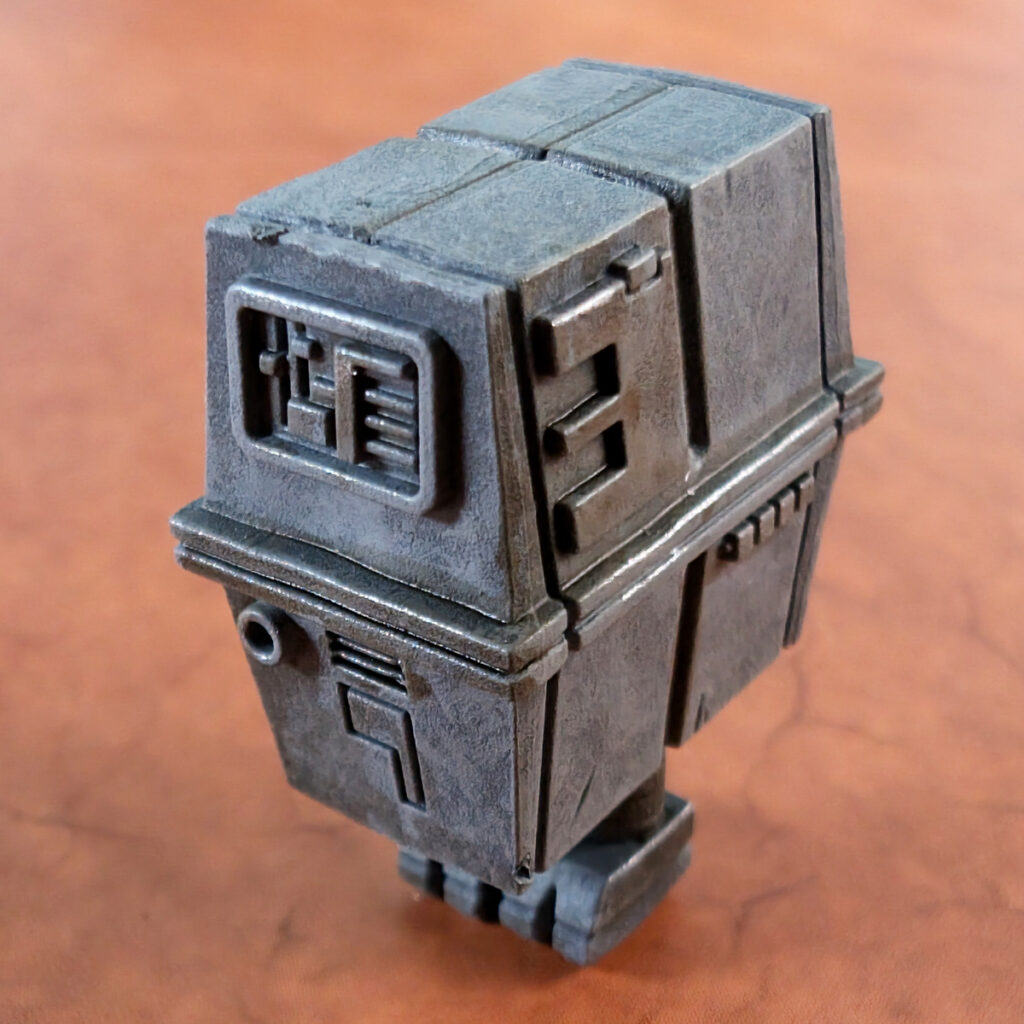
Painting the Gonk Droid
The Gonk Droid is very simple to paint. After a basecoat of Mechanicus Standard Grey, shade with Agrax Earthshade, and then simply drybrush Administratum Grey to catch the details. Your Gonk Droid is done!
If you want to push some details, you can edge highlight with some Stormhost Silver to make the paint look like it has worn away.
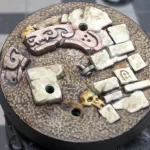
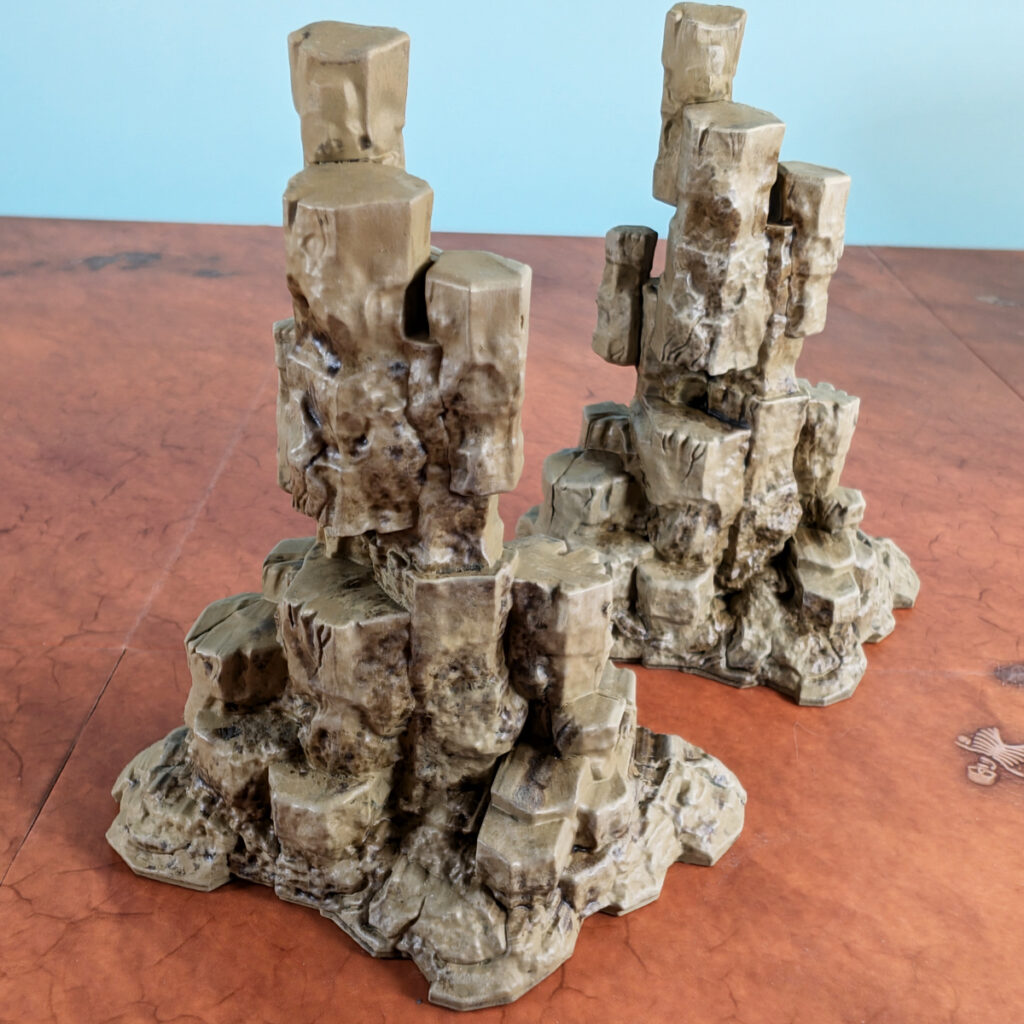
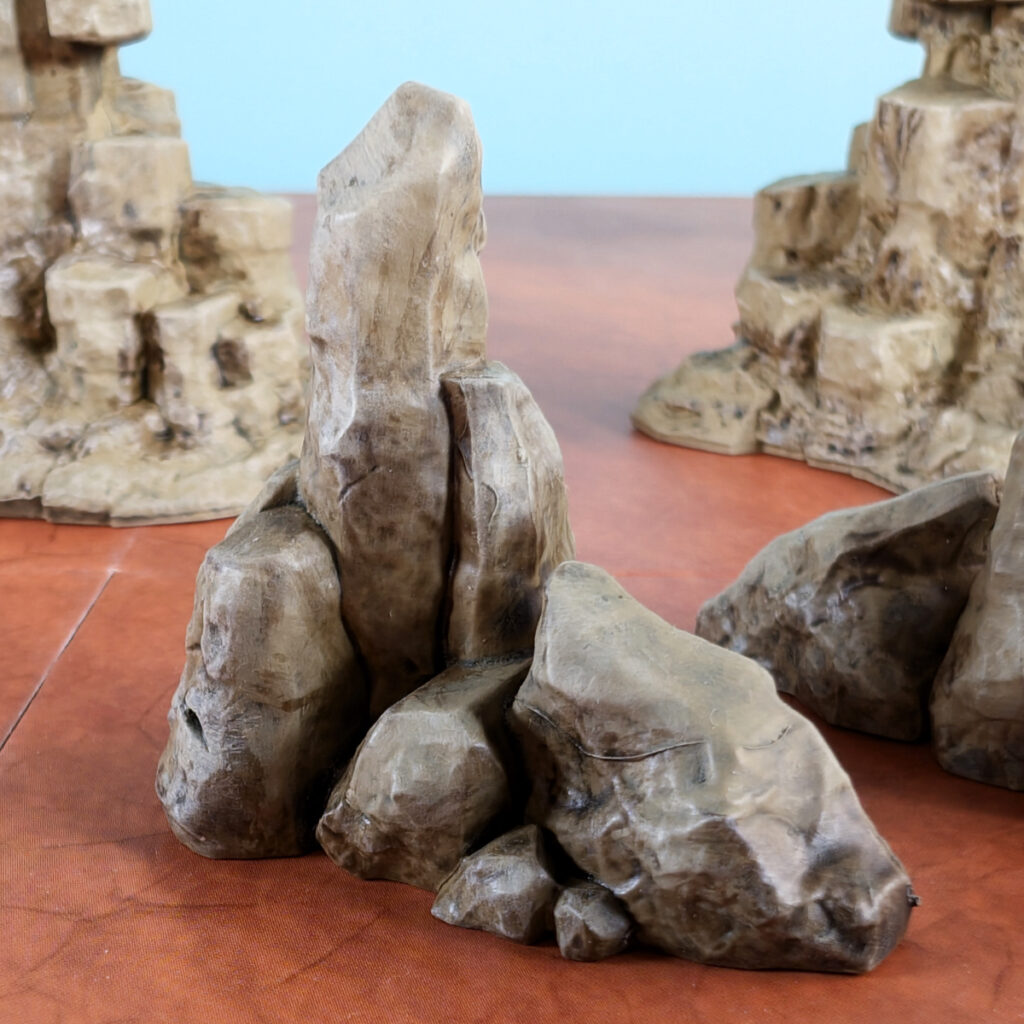
Painting the Small and Large Rocks
- Zandri Dust
- Agrax Earthshade
- Ushabti Bone
- Screaming Skull
Basecoat the rocks with Zandri Dust I especially found this necessary to make the color uniform, for the spray primer hadn’t quite gotten down into all of the recesses in the textures.
Shade the rocks with Agrax Earthshade.
After the shade has dried, do a heavy drybrush of Ushabti Bone over the edges and flat surfaces of the rocks to bring the contrast back up and remove coffee-staining.
And finally, do a light drybrush of Screaming Skull over the most prominent edges to really push the contrast.
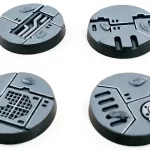
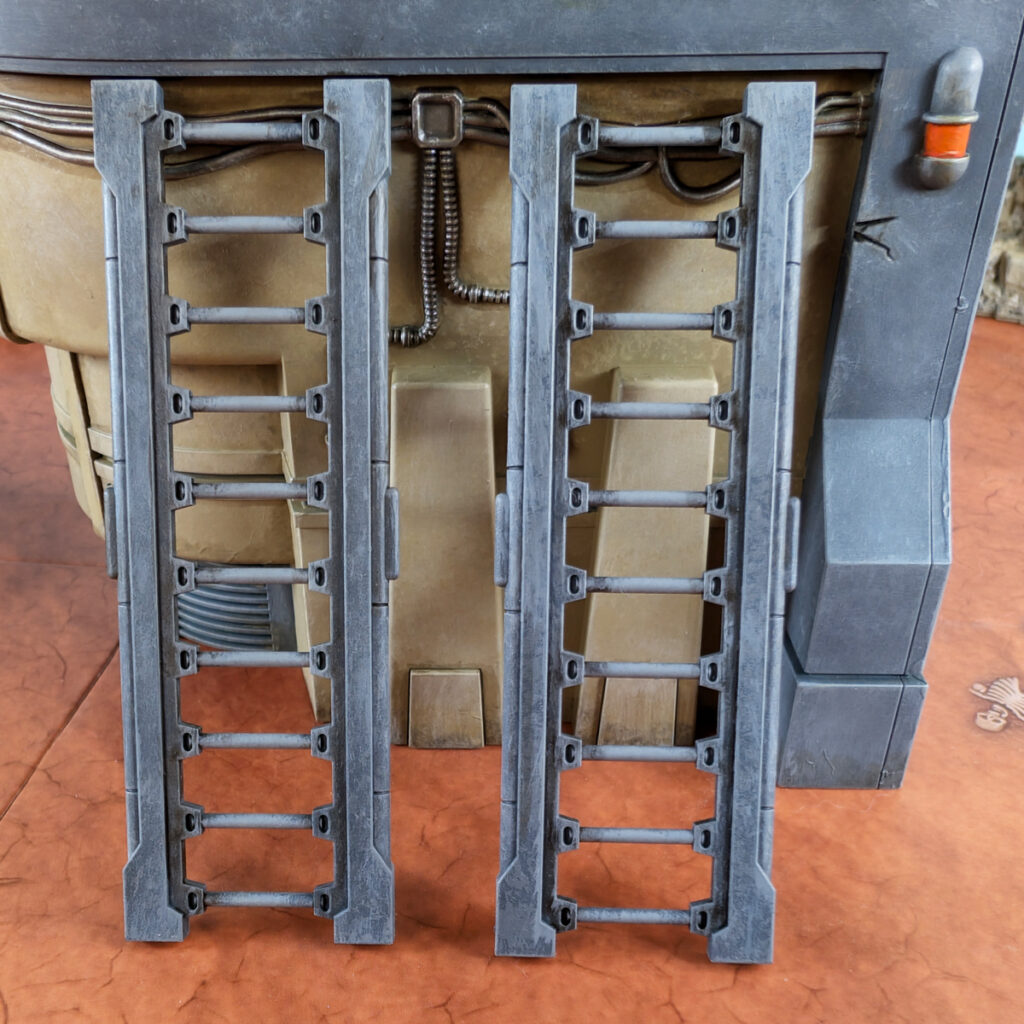
Painting the Ladders
- Mechanicus Standard Grey
- Nuln Oil
- Dawnstone
Baseboat the ladders with Mechanicus Standard Grey.
Shade the ladders with Nuln Oil.
And finally, drybrush Dawnstone along the edges and along the rungs of the ladder to give a weathered and worn appearance.
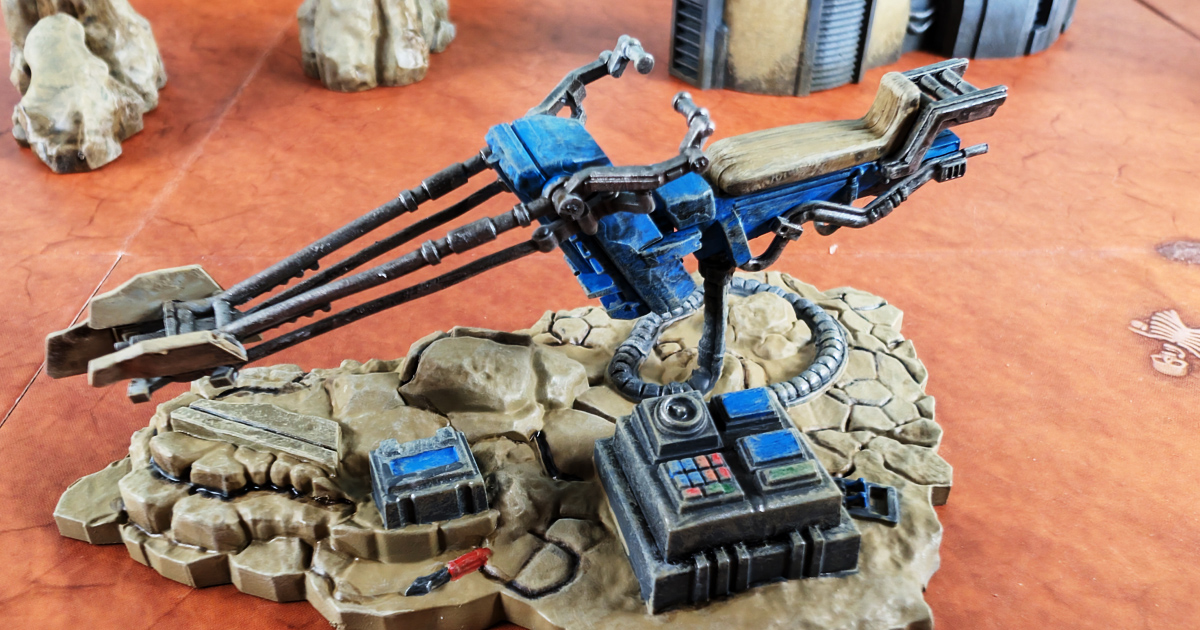
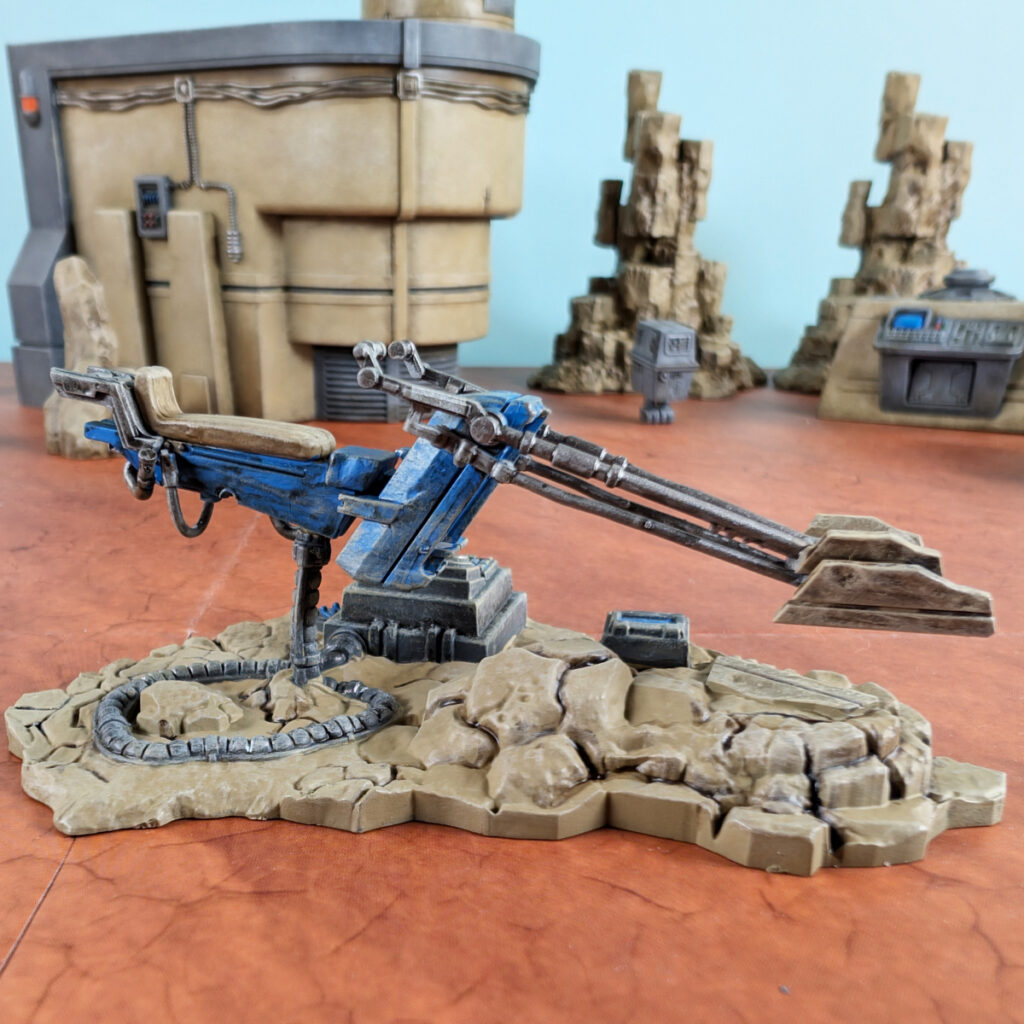
Painting the Swoop Bike
- Zandri Dust
- Ushabti Bone
- Screaming Skull
- Mechanicus Standard Grey
- Dawnstone
- Administratum Grey (TTC)
- Stormhost Silver (TTC)
- Evil Sunz Scarlet (TTC)
- Teclis Blue (Citadel)
- Agrax Earthshade (TTC)
- Troll Layer Orange (Citadel)
- Waywatcher Green (TTC)
You’ll want to basecoat this entire model to start.
Paint the rocks and tan part of the bike with Zandri Dust. Paint the control panel, tether, and metal parts of the bike with Mechanicus Standard Grey, and finally, paint the chassis of the bike with Teclis Blue.
Shade the entire model with Agrax Earthshade.
Drybrush all of the Grey parts with Dawnstone. This will texturize the metals and give it a slight non-metal metallic appearance.
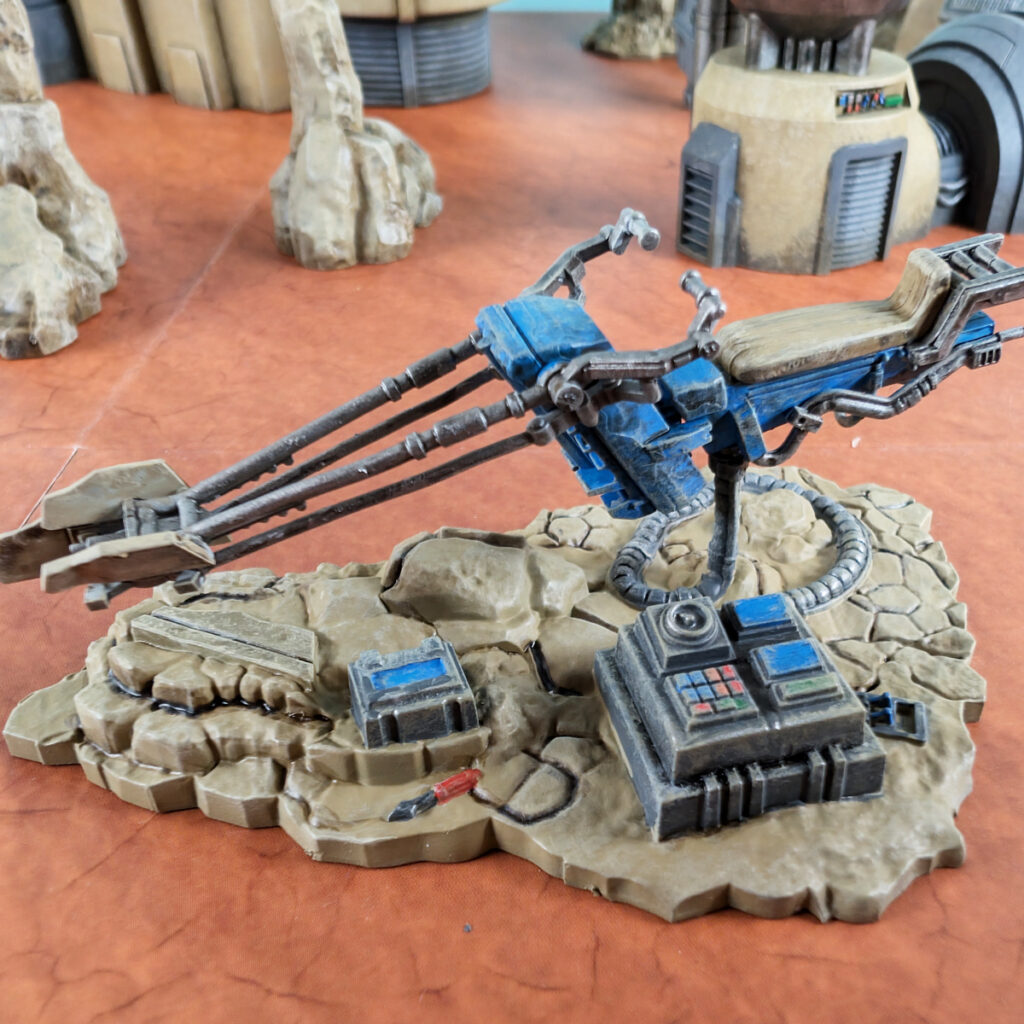
Paint the buttons, screens, and tool like the jumper cable in any variety of colors you would like. In keeping with our theme, we’re using combinations of Evil Sunz Scarlet, Waywatcher Green, and Teclis Blue.
Next, you can drybrush all of the grey parts with a very light drybrushing of Stormhost Silver. You can also hit some of the more prominent edges with and edge highlight. This will appear as exposed metal where the paint has worn away from usage or weathering. This effect also creates light glints on the model that catches the eye and makes it very readable.
And finally, do a medium drybrush of Ushabti Bone over the rocks and maybe very lightly onto the grey parts to simulate dust and grime. You can follow up with a lighter drybrush of Screaming Skull just to push the contrast on those details. Note, you want to drybrush the blue parts of the bike as well to also give it that old weathered, dusty look.
Bring the Galaxy to Your Table: Final Thoughts on Painting the Take Cover Terrain Kit
Painting the Take Cover Terrain Kit for Star Wars Shatterpoint is a rewarding journey that transforms plain pieces into immersive, story-rich elements for your games. By following this step-by-step guide, you’ll bring depth, character, and a cinematic feel to your battlefield, enhancing every skirmish and strategic decision. Whether you’re showcasing weathering effects or creating dynamic highlights, this project allows you to combine creativity with practicality, ensuring your terrain both looks incredible and plays beautifully. Now it’s your turn—grab your paints, let your imagination run wild, and may the Force be with you!
Continue Your Painting Journey
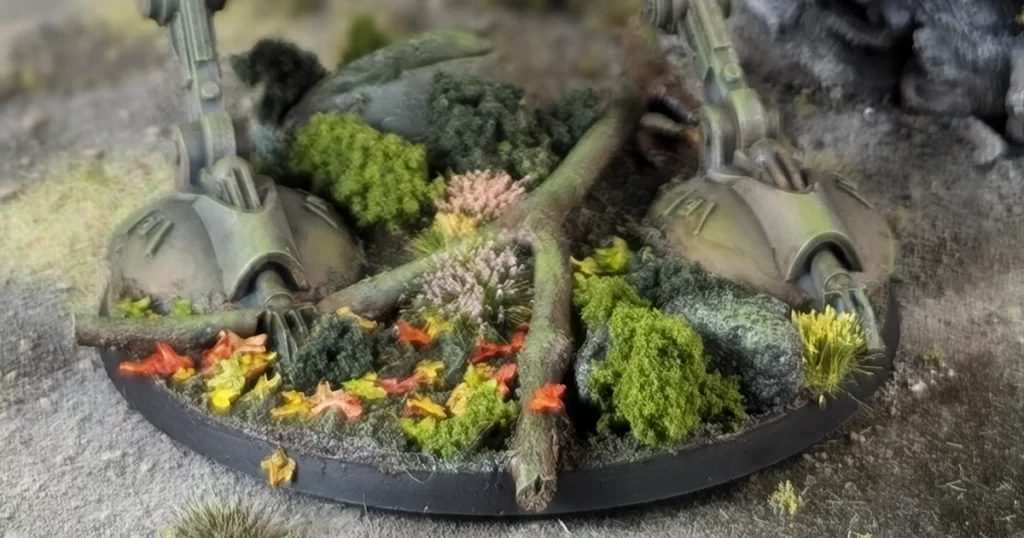
Create Forest Bases for Endor
Base your favorite Star Wars models on the Forest Moon of Endor with this basing guide.
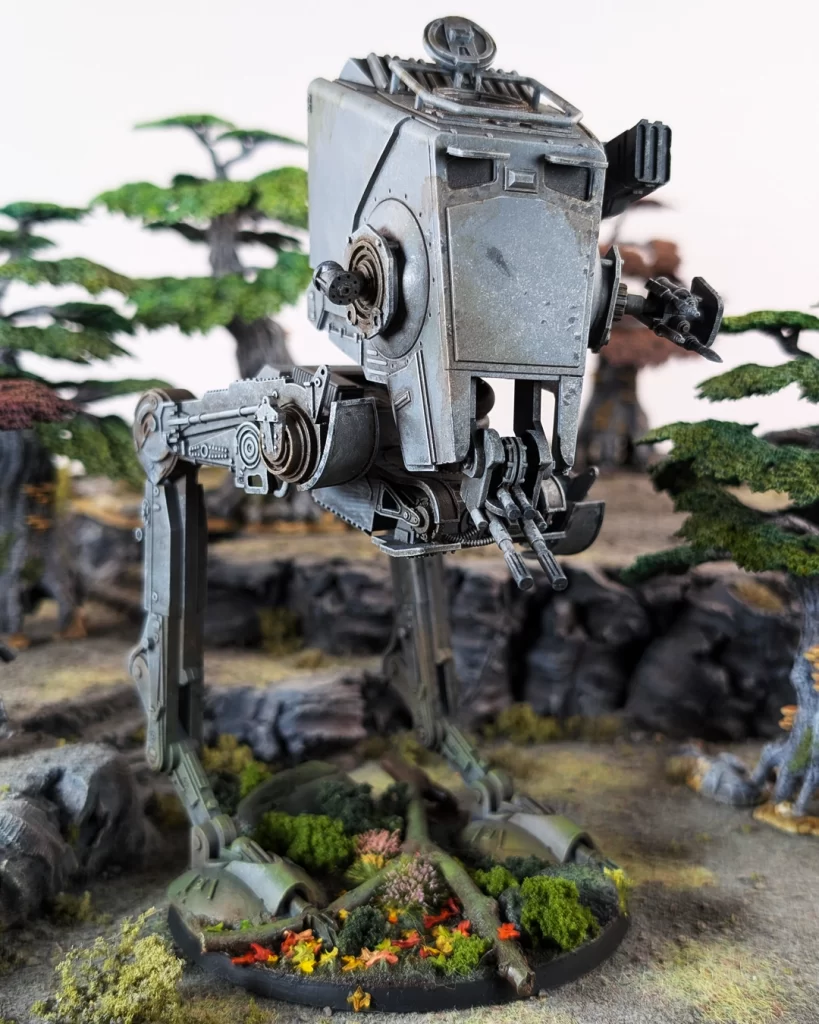
Paint an AT-ST Walker
Check out the complete guide to painting one of these iconic vehicles to the franchise.