Mythic Minis is reader-supported. When you buy through our affiliate links, we may earn a small commission—never costing you anything extra. Your support helps us keep creating helpful painting guides and hobby resources for everyone.
Introduction to Painting Spirit Hosts
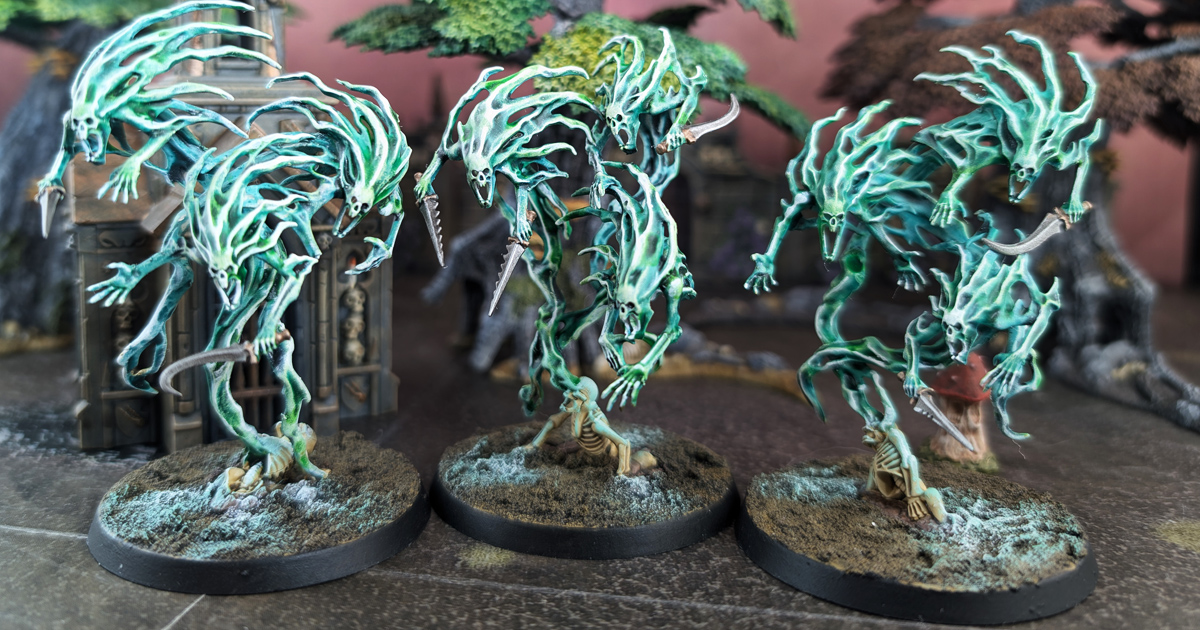
Spirit Hosts are a staple of any Death army in Warhammer Age of Sigmar, known for their ghostly appearance and ethereal forms. These models present a unique challenge for painters, offering a canvas to explore spectral effects and otherworldly hues. In this guide, we’ll dive into the techniques and color schemes to bring out the haunting presence of these undead spirits, whether you’re aiming for a classic ghostly look or something more creative. Let’s bring your Spirit Hosts to life with a painting process that captures their eerie essence!
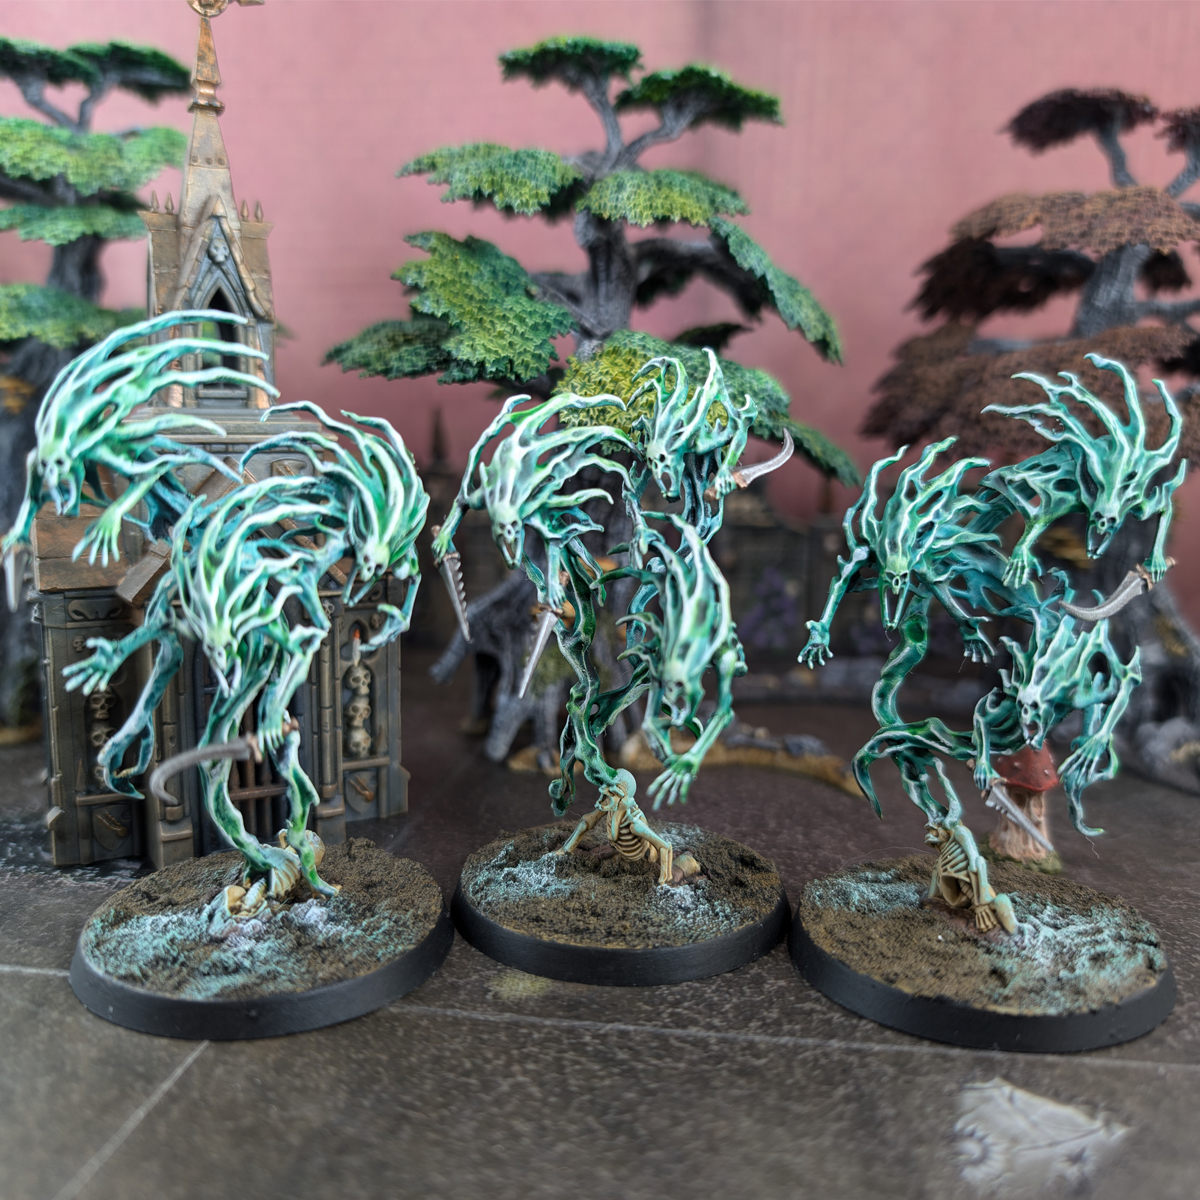
Spirit Hosts’ Battlefield Role and Strategy
On the battlefield, Spirit Hosts serve as spectral shock troops for Death armies, particularly within Nighthaunt forces. These units excel at tying up enemy units and overwhelming them through sheer volume of attacks.
Spirit Hosts also boast a considerable number of attacks, each model striking with six attacks that have the potential to deal mortal wounds on a roll of 6. This makes them a reliable choice for wearing down both elite units and large blocks of infantry, chipping away at enemy forces through quantity of hits.
In terms of strategy, Spirit Hosts are often used to screen more fragile units or to bog down enemy forces, allowing other parts of your army to maneuver. They are also great at holding objectives, as their durability combined with the Ethereal ability means they can withstand damage longer than most would expect, even against tough opponents. Positioned carefully, they can act as a disruptive force in the enemy’s battle plan while offering a strong offensive threat.
Why I Painted Spirit Hosts
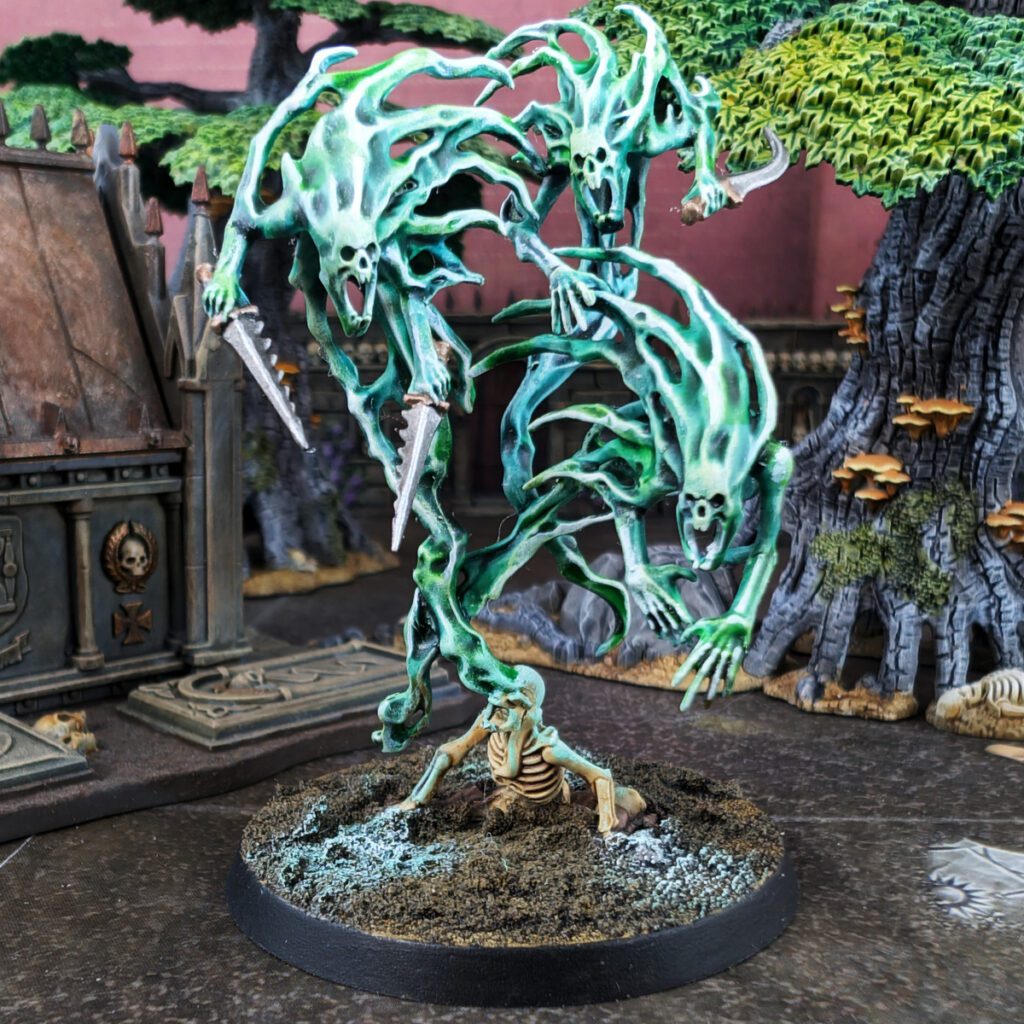
I had several goals in mind when going into painting these Spirit Hosts. After struggling with painting the Myrmourn Banshees I felt I needed a little more confidence in executing a project after a fairly long absence from the hobby.
The first goal was to become more proficient with technical paints, particularly contrast paints. After using them a little bit with the banshees, I figured out how to integrate contrast paints into a rotation. Basically, they have become a very important tool added to my hobby toolbox.
I needed to refamiliarize myself with some of the texture paints and what behaviors to expect from them as far as application, drying times, and how to augment them with shades and highlights.
And lastly, and probably as important as familiarizing myself with technical paints, this is one of the only times I have completely built and based a model before painting it. I loved it! Now, I can’t say I will always do this going forward, but I will definitely aim to build as much of any model as possible without making parts of the models difficult to paint. What was most beneficial was the base gave me something to hold onto while I painted. I never realized how much I smudge or mess up paint because of how much I touch the model. This was an important breakthrough for me.
The Painting Process for Spirit Hosts
At the time, Nighthaunt Gloom and Hexwraith Flame had hit the stores, and this was prior to the launch of the contrast paint line. Everybody was using these cool new paints to whip up a quick Nighthaunt army. Everybody but me. I hated them. I didn’t know how to use them. They were a foreign consistency and seemed streaky and messy. I didn’t like the end result.
I refused to slather this shit on my models, and continued using traditional methods of painting Nighthaunt. Now, a new approach. I still have a stigma against those two colors (although now I may have better luck with them), but it was time to start learning how to use these contrast paints. Tutorials abound online, as an entire product line was launched, and examples were available of how to make these look good.
Priming the Spirit Hosts
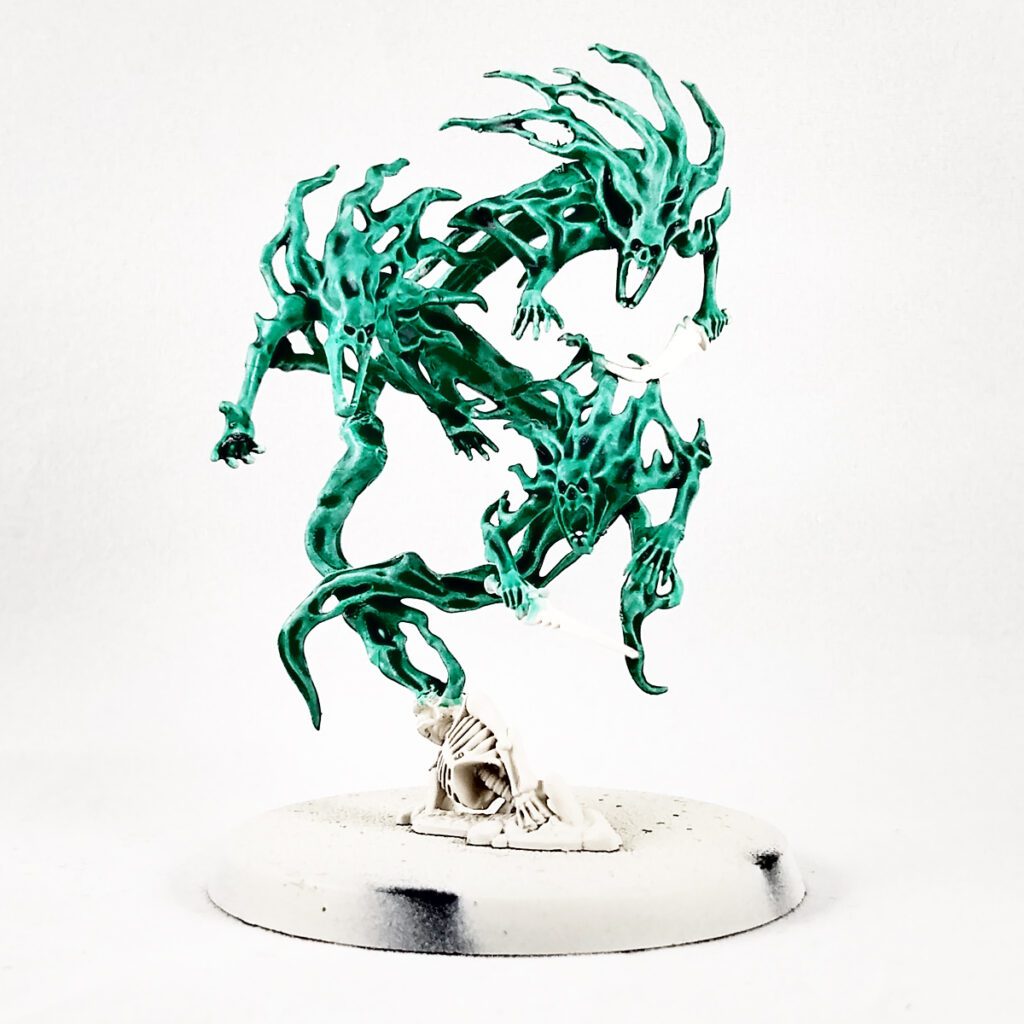
I primed the Spirit Hosts with Wraithbone spray. This is important as we are using mostly technical paints and the basecoat is imperative.
Paint Colors for Basecoat and Shade
- Nihilikh Oxide
- Coelia Greenshade
What makes painting Spirit Hosts fast and fun is the very thin paint of Nihilikh Oxide used for the basecoat. Over the Wraithbone Primer, it acts more like a stain than a paint. Slather it on!
Once the Nihilikh Oxide is dry, a healthy coat of Coelia Greenshade can be applied right over it. There are plenty of nooks and crannies on these models for the shade to settle into. Pay attention to any unwanted pooling, and perhaps thin it with a little Lahmian Medium for a smoother coat.
Layering the Spirit Hosts
- Wraithbone (base paint)
- White Scar
One might consider this a highlighting step, but we’re just adding some contrast to the color before adding a glaze. In a way, we’re going to Slapchop this thing before the term “slapchop” was coined (no claims here).
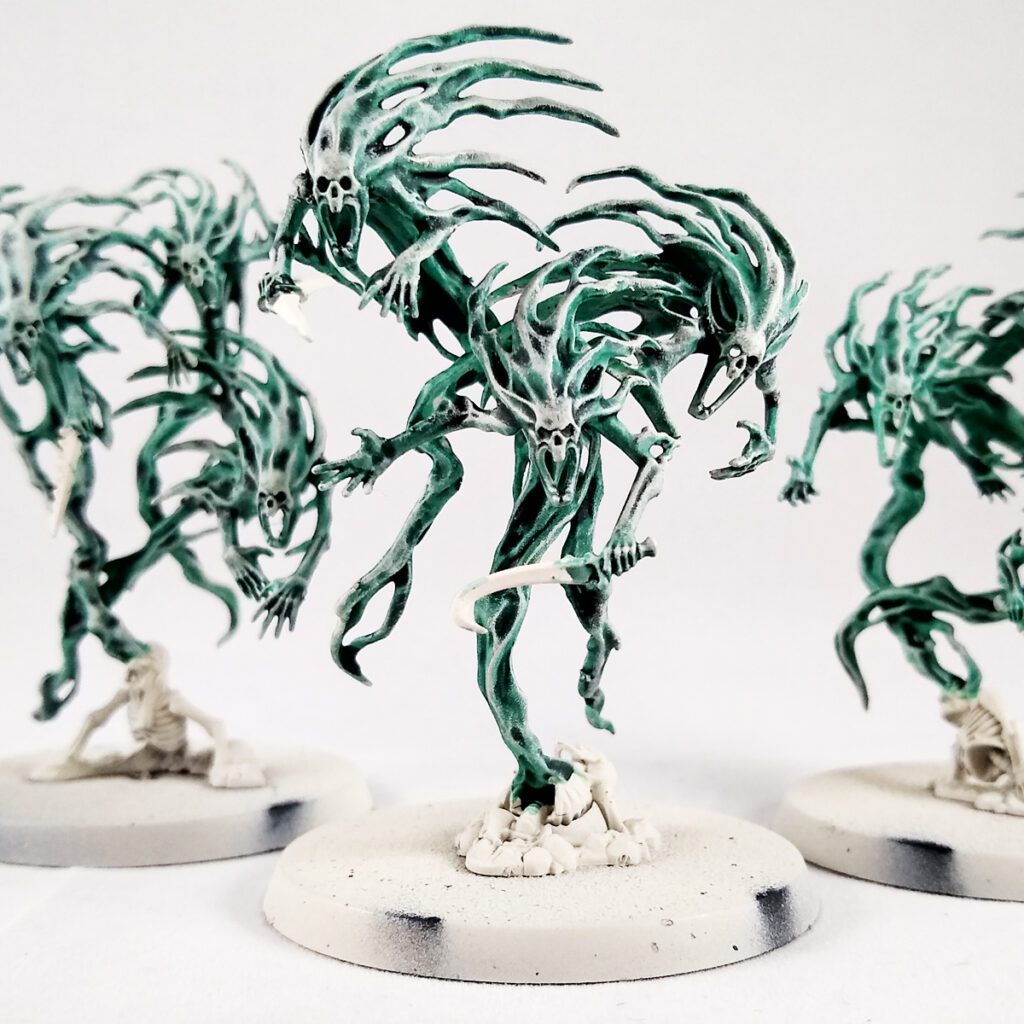
Drybrush with a medium heaviness with Wraithbone. This is a nice warm white that will lift the texture of the model and bring up the details.
Follow up with a very light drybrush of White Scar. This is a cold white and should be used very lightly just to bring up the contrast of the details ever so slightly.
Warming the Hue of the Spirit Hosts with a Glaze
- Watwatcher Green
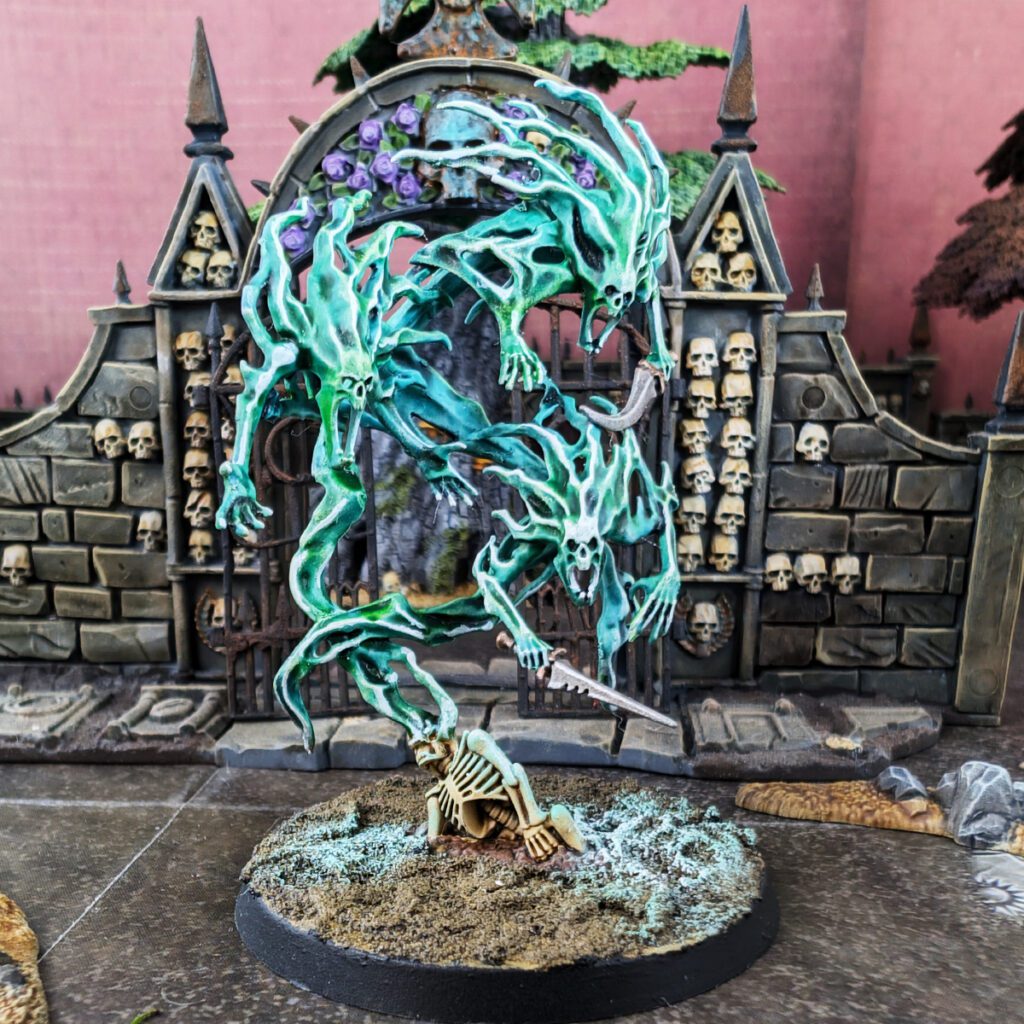
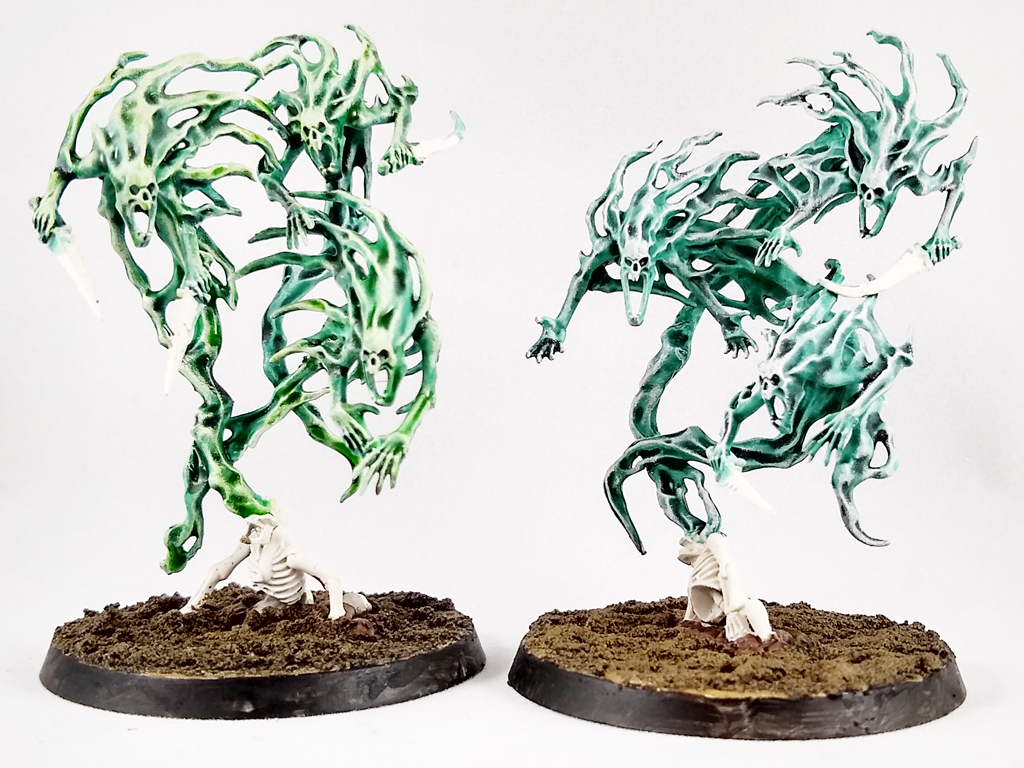
Glaze paints are almost tints – they change the color temperature and hue of the colors underneath them.
In this case we’re going from some very cold, blue greens and shifting them to warmer yellow greens.
This is a simple example of how transparent paints can work, and a great one to experiment with because the results aren’t too shocking. You may want to play with some colors on your own using contrast paints, glazes, or making your own glazes by thinning regular paints way down.
Notice the difference in color temperature from the left picture to the right (below). The warmer yellow brings out that ethereal, spectral glow you want to see in a terrifying Nighthaunt army.
Highlighting the Spirit Hosts
- White Scar
- Iron Hands Steel
- Nuln Oil
- Armageddon Dunes
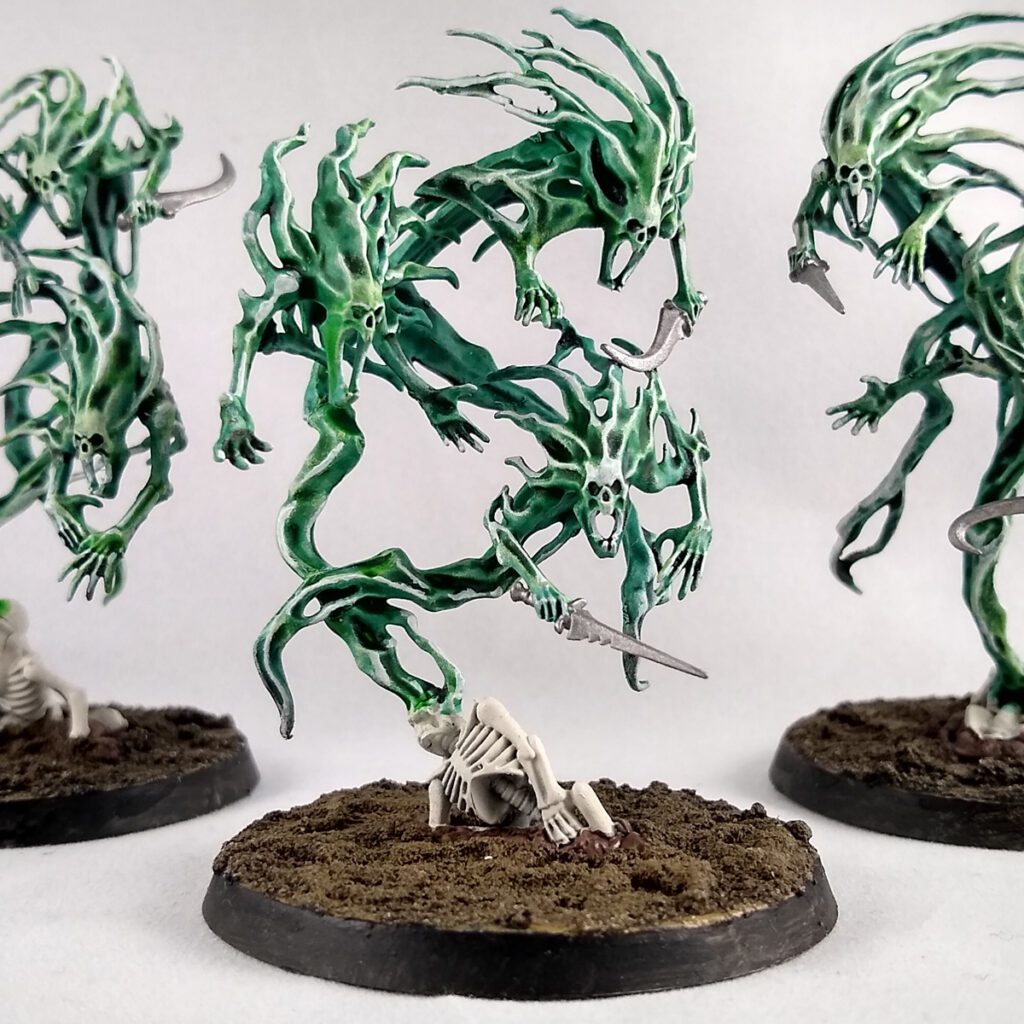
Go ahead and brighten those whites just a touch with some White Scar. Either edge highlight with a small layer brush or do a very light drybrush to bring the sharpest edges to white from golden.
In this step, go ahead and paint their daggers with Iron Hands Steel, shade with Nuln Oil, and layer back up with Iron Hands Steel.
Also, this is a good time to paint your bases. I used a texture paint, Armageddon Dunes, and left it to dry over night.
Basing the Spirit Hosts
- Skeleton Horde
- Gauss Blaster Green
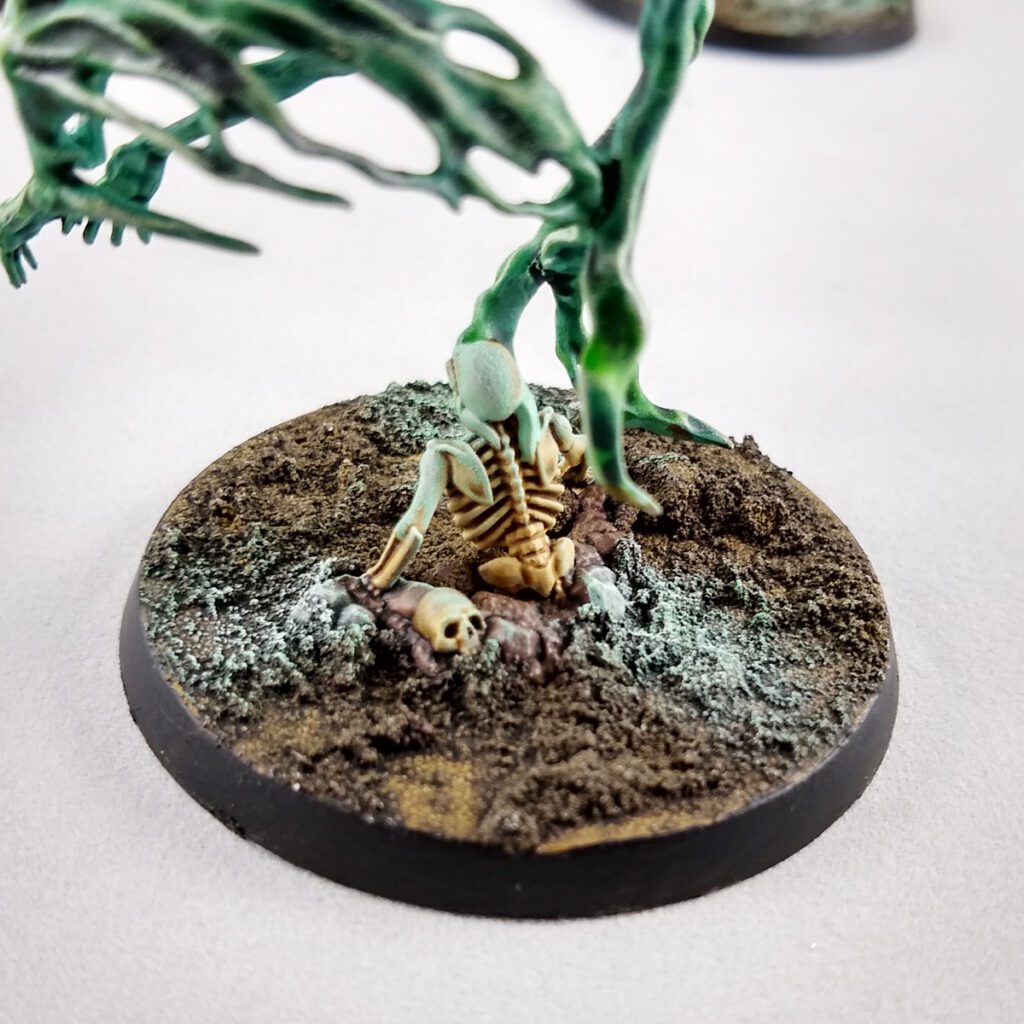
Basing these guys was super simple. After the texture paint dried overnight, just paint the skeletons (still primed Wraithbone) and the Armageddon Dunes with Skeleton Horde, a Contrast paint.
Paint your base rims black to make it neat.
And finally, when the Skeleton Horde Contrast paint is dry, drybrush a little Gauss Blaster Green on the skeleton and in small patches on the ground. This will give some OSL (object source lighting) effect as though the Spirit Hosts are emanating light.
Conclusion: Mastering the Art of Painting Spirit Hosts
Painting Spirit Hosts offers a fantastic opportunity to experiment with eerie, ethereal effects that really make your miniatures stand out on the battlefield. Whether you opt for a classic ghostly look or a more creative color scheme, the techniques covered in this guide will help you capture their otherworldly nature. With their spectral presence and battlefield utility, a well-painted Spirit Host unit can become both a visual and strategic highlight of your Death army. Now that you’ve mastered these haunting figures, your Spirit Hosts are ready to lead your forces into battle in true spectral style!


No responses yet