Disclosure: This post contains affiliate links. If you click through and make a purchase, I may earn a small commission at no extra cost to you. Thank you for supporting Mythic Minis Studio! For more information read my full disclosure.
Introduction to Painting Reikenor the Grimhaler
Painting Reikenor the Grimhaler is an exciting challenge for any hobbyist, as this model’s dynamic pose and intricate details make it a true centerpiece of the Nighthaunt range. From the spectral robes to the eerie steed, every part of Reikenor offers the chance to experiment with ghostly effects and striking contrasts. In this guide, I’ll take you through the steps to paint Reikenor the Grimhaler, ensuring that you capture his haunting presence with ease, whether you’re a beginner or an experienced painter.
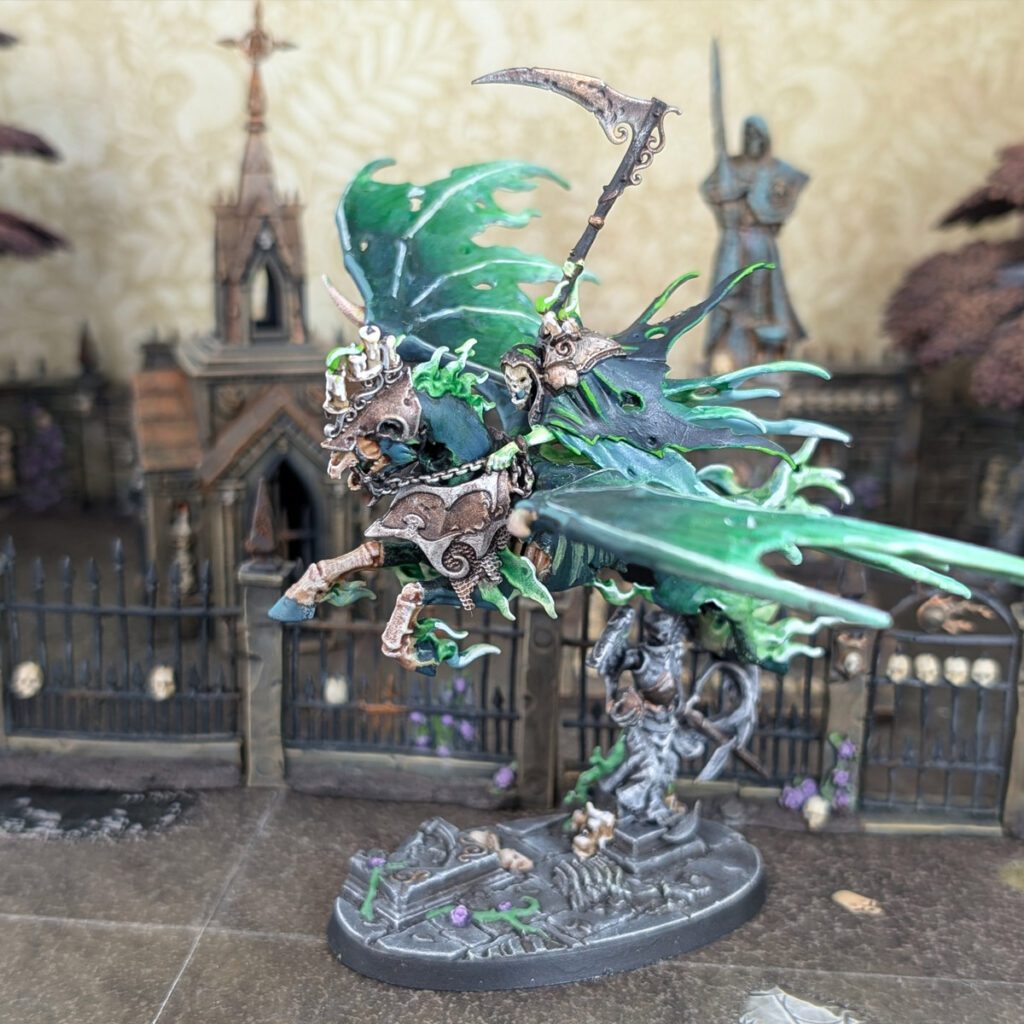
Reikenor the Grimhaler’s Battlefield Role and Strategy
Reikenor the Grimhaler plays a crucial role on the battlefield as a key support and damage-dealing unit for the Nighthaunt army in Warhammer Age of Sigmar. As a mounted wizard, he wields both magical and physical power. His primary strength lies in casting powerful spells, such as Wraithstorm, which deals mortal wounds to enemy units, making him a potent threat to both elite and horde armies.
Reikenor also has a unique ability tied to his lantern, the Corpse Candle, which allows him to either weaken an opponent or sacrifice some of his own life force to increase the potency of his spells. This makes him a flexible and tactical caster capable of manipulating the flow of battle. Additionally, as a mounted unit on a spectral steed, he boasts high mobility, allowing him to quickly reposition across the battlefield, strike at vulnerable enemies, or provide support to other Nighthaunt units.
His combination of spellcasting, mobility, and debuffing abilities makes Reikenor a valuable leader who can turn the tide of battle when used strategically.
Why I Painted Reikenor the Grimhaler
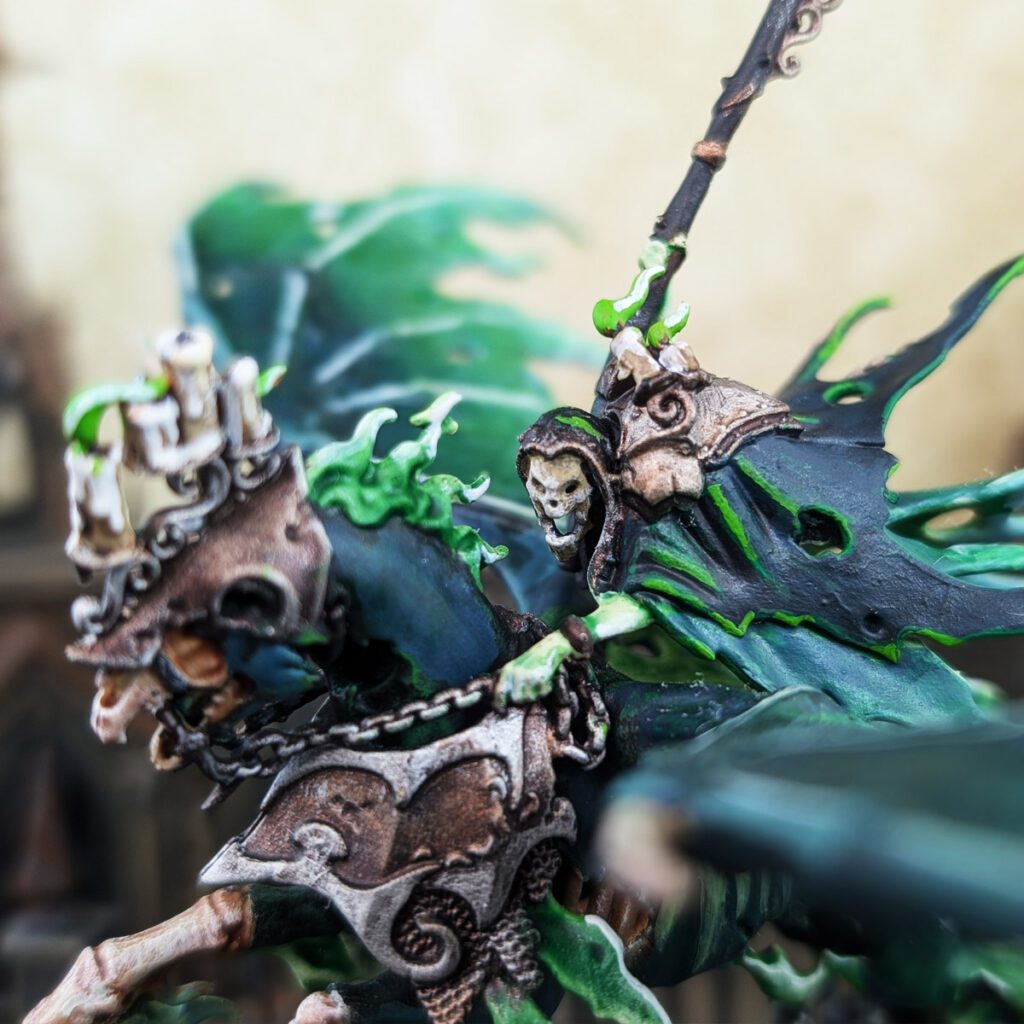
I painted Reikenor the Grimhaler as a commission job for a friend. As he fell out of the hobby he became my benefactor in many models I still possess that I was painting for him. I haven’t heard from him in years and hope he is well.
Attaining ownership of this model is a great blessing for me, especially now as I write this. I painted Reikenor about 5 years ago. Back then (and maybe still the same now) I was cutting my teeth on painting like the box art. I was only beginning to broaden my horizons and experiment with different color formulas and invent my own color schemes.
This was a phase where I was still learning how to get good at edge highlights and not feel like I was using dry-brushing as a crutch. A technique I discovered for myself was dry-brushing before highlighting because it would add layers of color and illuminate to me where my highlights needed to go.
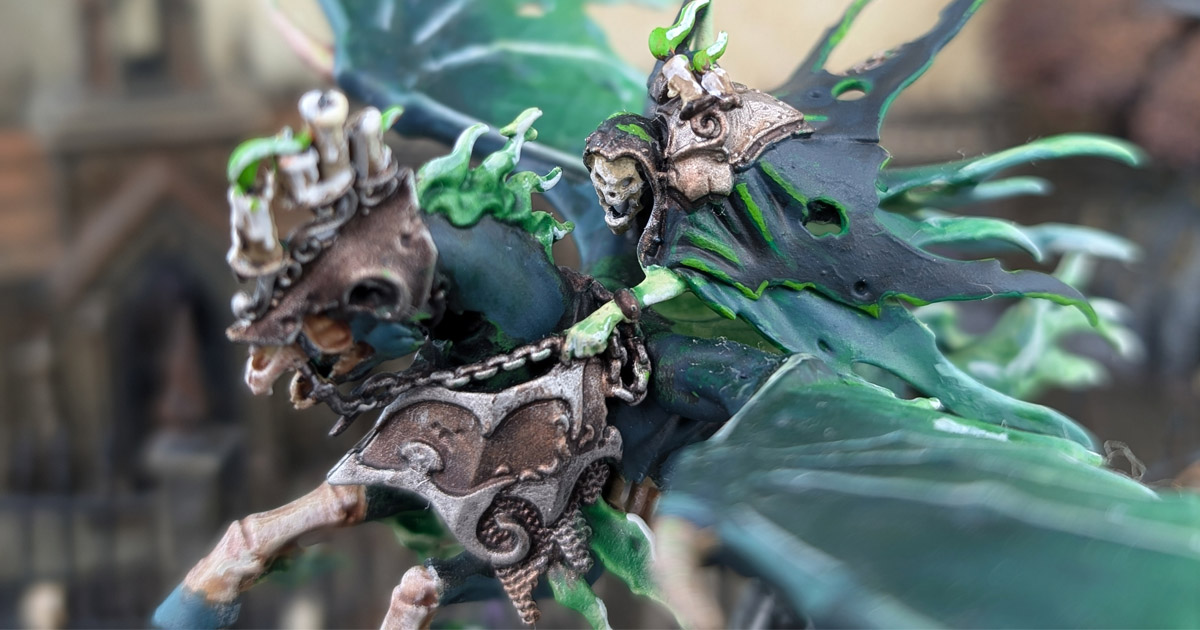
Me, thinking ‘eavy metal style was the coolest, hadn’t learned the less-is-more approach to highlighting. Or, I at least hadn’t yet learned to layer and really pushed the contrast. You can really see it in the images of this post. It’s not quite a Painterly style, but you can definitely see clumsy coloration when zooming in on the model.
The Painting Process for the Reikenor the Grimhaler
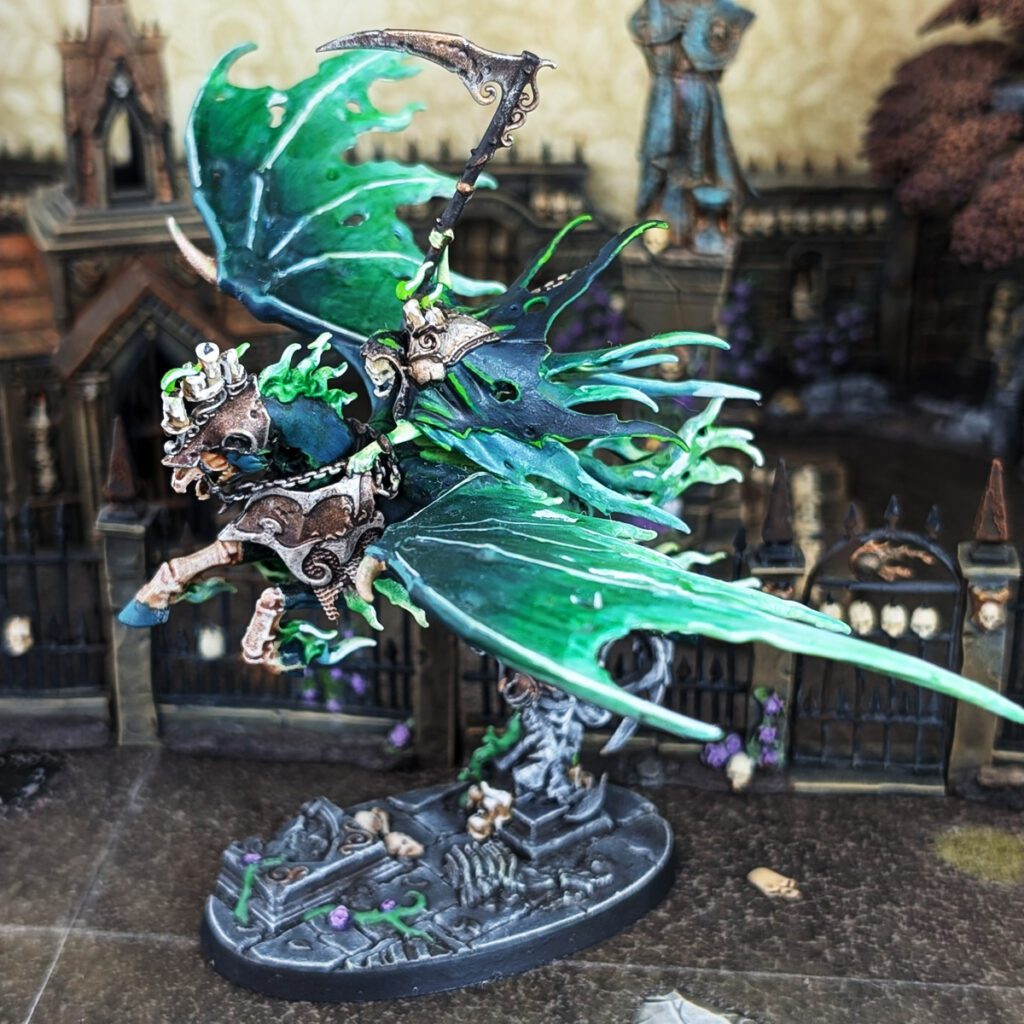
Painting Reikenor the Grimhaler took a little pre-planning because I wanted to differentiate rider from mount. Any edgelord could slather this model in Incubi Darkness or the two new contrast-like paints that came out at the time (I can’t remember what they were called, but I didn’t like them). I wanted to capture and contour some different greens in this model to make it a little easier to read the paint job.
Priming the Reikenor the Grimhaler
I primed Reikenor the Grimhaler with Chaos Black all over.
Paint Colors for the Spectral Steed
- Waaagh! Flesh
- Coelia Greenshade
- Warboss Green
- Skarsnik
- Pallid Wych Flesh
I base-coated all areas of the mount that were going to be green with Waaagh! Flesh, which means I excluded areas like the armor and front legs that I wanted to be bone.
Next, a good layer of Coelia Greenshade helps to darken the recesses, but it also helps to bring out more of the blue in the Waaagh! Flesh and a little less of the yellow. In a way it cools the color, making it less of a warm green.
The next steps involve wet-blending, something that I was still pretty new at and didn’t do the greatest job in my opinion. But, I’m not unhappy with the result. You’ll want to pick out areas where you want the color to lift to a brighter green. This will be about 2/3 of the wings (top and bottom), up the back legs, and on the spectral flames coming off of the steed.
Where you want the color transition paint a thinned version (not terribly wet or liquid) of Waaagh! Flesh, and quickly load your brush with Warboss Green and paint into the wet Waaagh! Flesh creating a mix and transition of the two colors.
The next step involves the same process using the Skarsnik closer to the edges of the model. So wet blend Skarsnik into the Warboss Green on the back 1/3 of the wings, on the flames of the back legs, the flames of the mane and tail, and the flames coming from the front legs and flames coming from under the front chestplate.
The final step for this is to paint a layers and/or highlights of Pallid Wych Flesh on the very tips of the flames and wings.
Painting the Reikenor Figure
- Incubi Darkness
- Nuln Oil
- Kabalite Green
- Moot Green
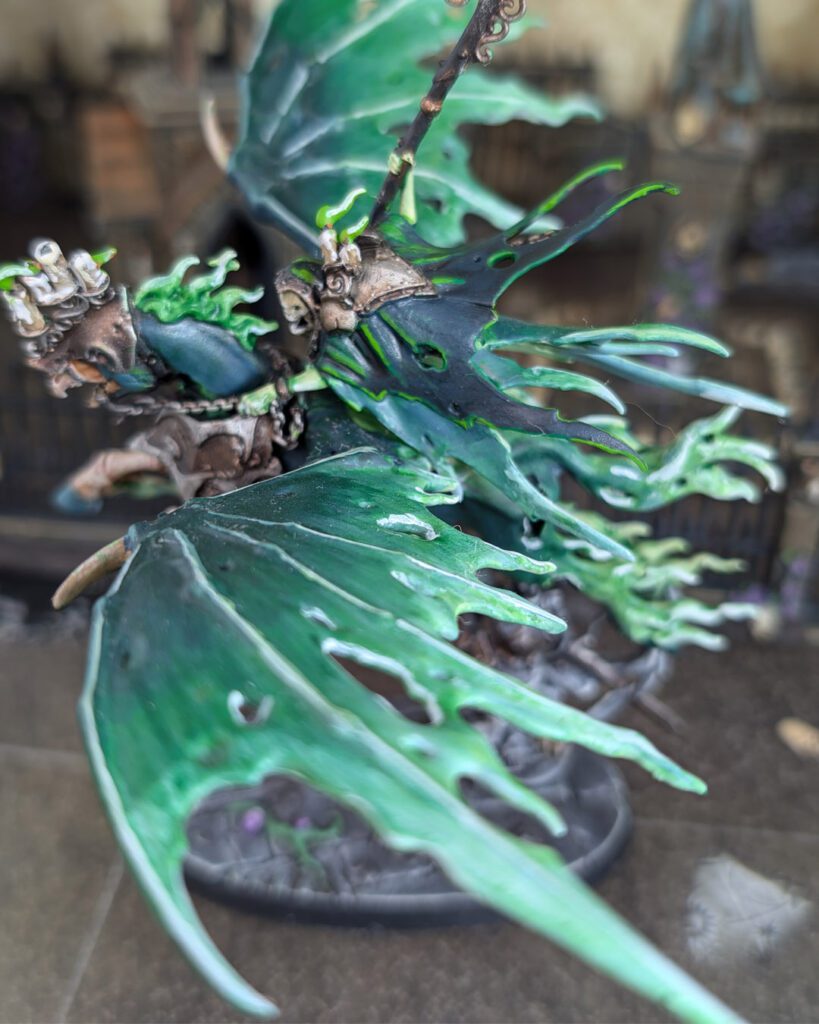
This formula very much uses the same pattern as Venom Green (for Drukhari) except we’re going to use Moot Green instead of Sybarite Green for the highlights. This will give it more of a spectral feel, Moot being a warm color and Sybarite being cold.
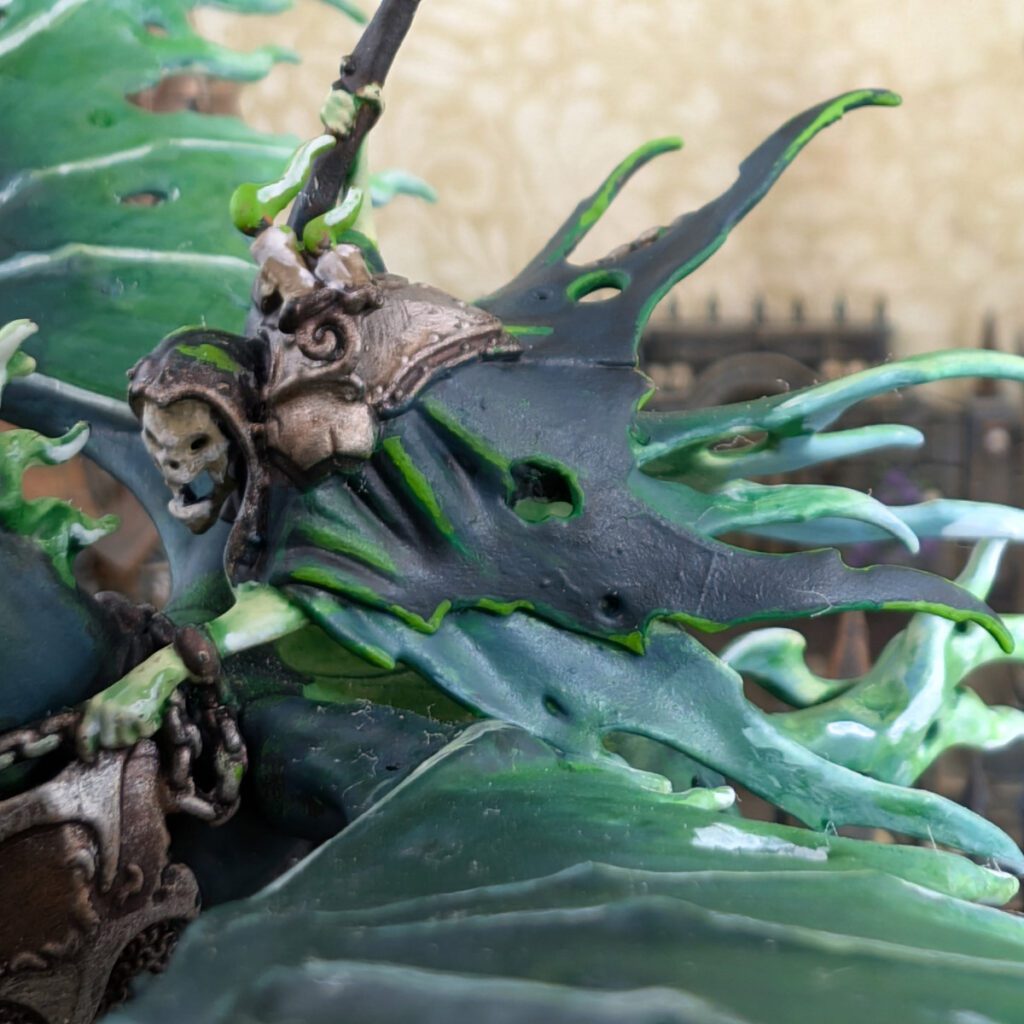
Base-coat Reikenors shroud with Incubi Darkness. Give it a good shade of Nuln Oil. I included the shaft of his weapon in this process.
Next, highlight the top robe with Kabalite Green along the edges, and layer Kabalite Green on his under-robe.
Highlight the top robe with Moot Green, getting the edges, tips, folds, and the interior of the holes of his shroud.
For the under-shroud, I went back to Warboss Green for an added layer of color and Skarsnik for highlights. This helps bring the rider and the spectral steed together into a cohesive figure.
Painting the Bronze Weapon and Armor
- Balthasar Gold
- Agrax Earthshade
- Sycorax Bronze
- Nihilikh Oxide (optional)
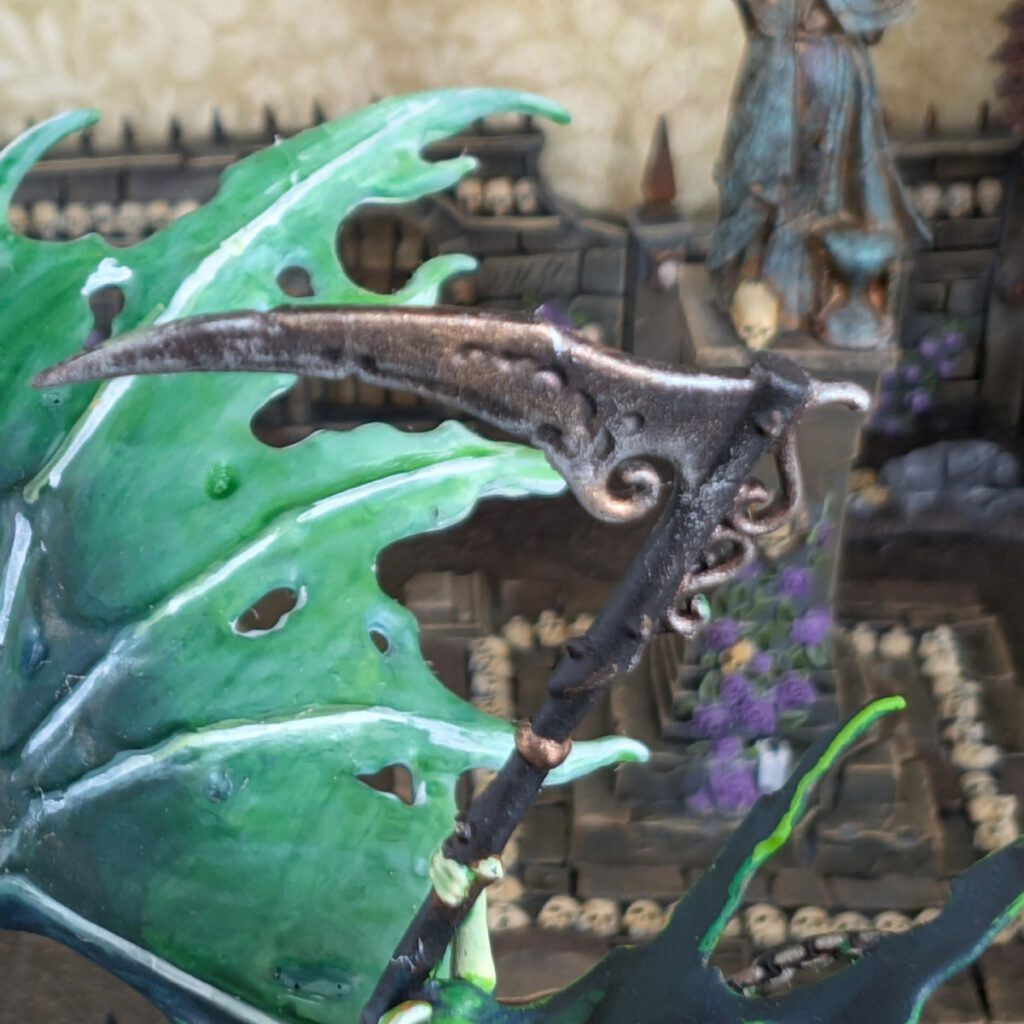
There are bronze armor plates on both horse and rider, the blade of Reikenor’s Scythe, on the sword and shield of the statue of the base, and there is some filigree on the base if you want that metallic as well.
Base-coat these areas with Balthasar Gold. Shade with Agrax Earthshade.
Add a thin layer of Sycorax Bronze to bring the color back up.
Finally, you can add a little Nihilikh Oxide to these bronze areas if you want to add a weathered/spectral look to the metallic areas.
Painting the Metal Armor of Reikenor the Grimhaler
- Leadbelcher
- Reikland Fleshshade
- Stormhost Silver
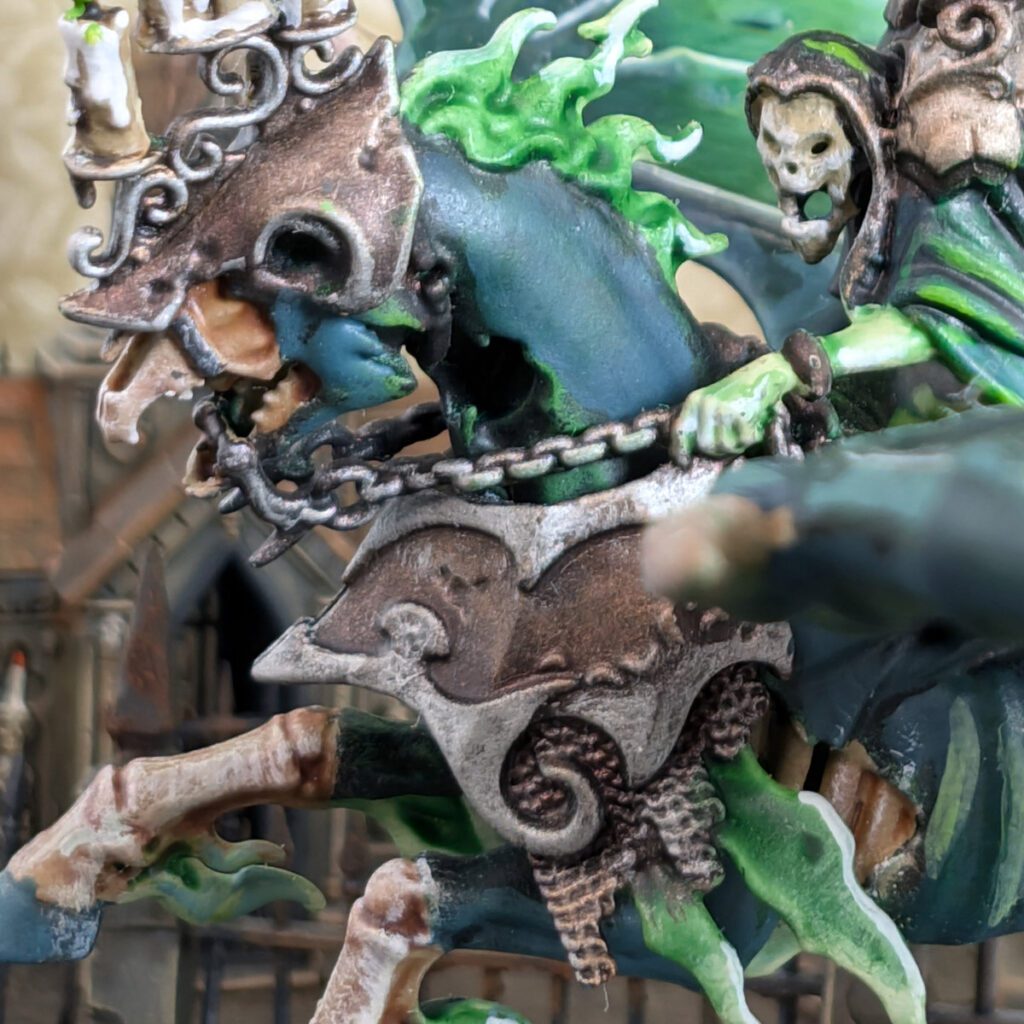
I painted the filigree on the horse’s and Reikenor’s head, the outer plates of the horse’s armor, and the chain reigns with this metallic silver recipe. Typically, I use a black or brown shade for metal armor, but I thought the red-brown of the Reikland Fleshshade would look nice next to bronze, and it would contrast nicely with the greens of the rest of the model.
I even added just a touch of highlight of Stormhost Silver to the scythe and filigree at the top of the weapon shaft.
Painting the Bones
- Zandri Dust
- Seraphim Sepia
- Ushabti Bone
- Screaming Skull
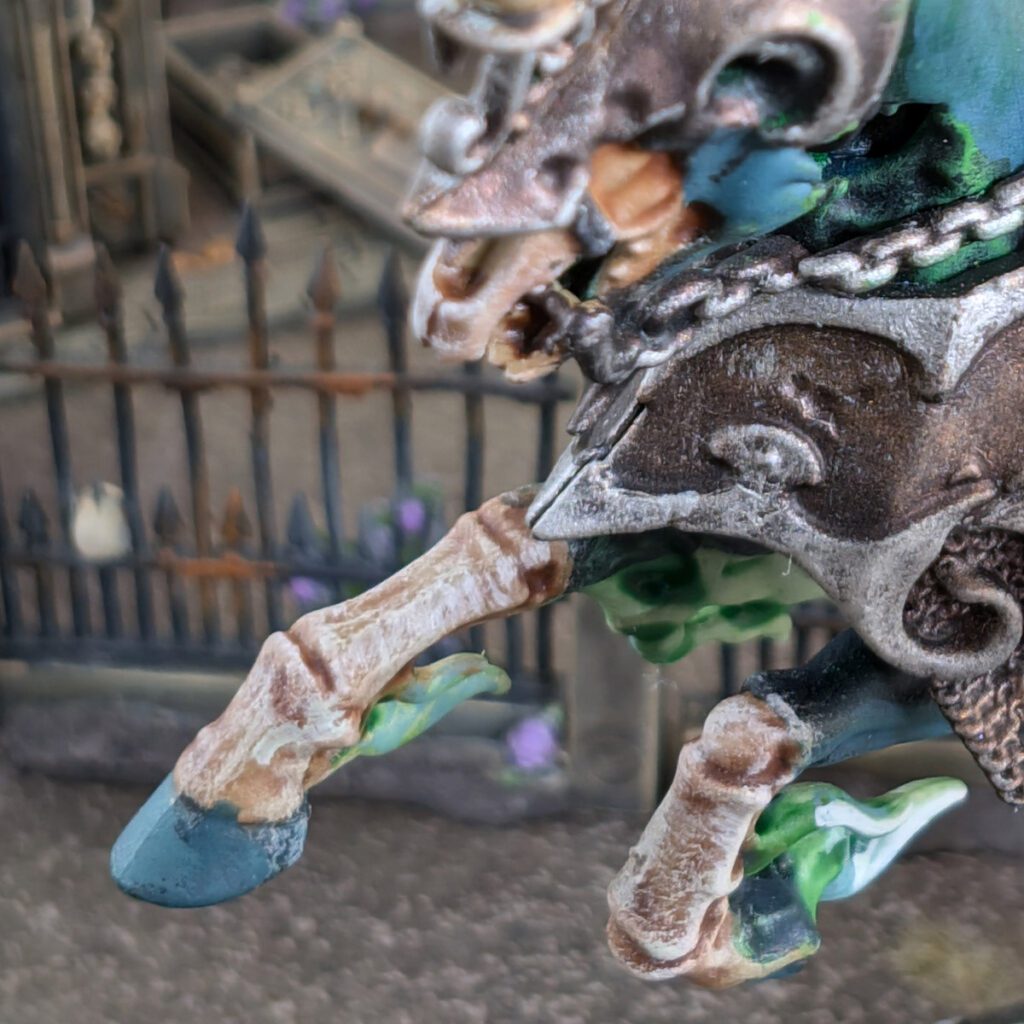
I used the traditional bone color to paint all the bones on the model. I have a thing for Sepia on bones, but you can use Agrax or Reikland for the shades if you wish.
Bones are Reikenor’s skull, the horse’s skull, the horse’s legs, and don’t forget those ribs down there!
Base Zandri Dust, Shade, layer Ushabti Bone, Highlight with Screaming Skull.
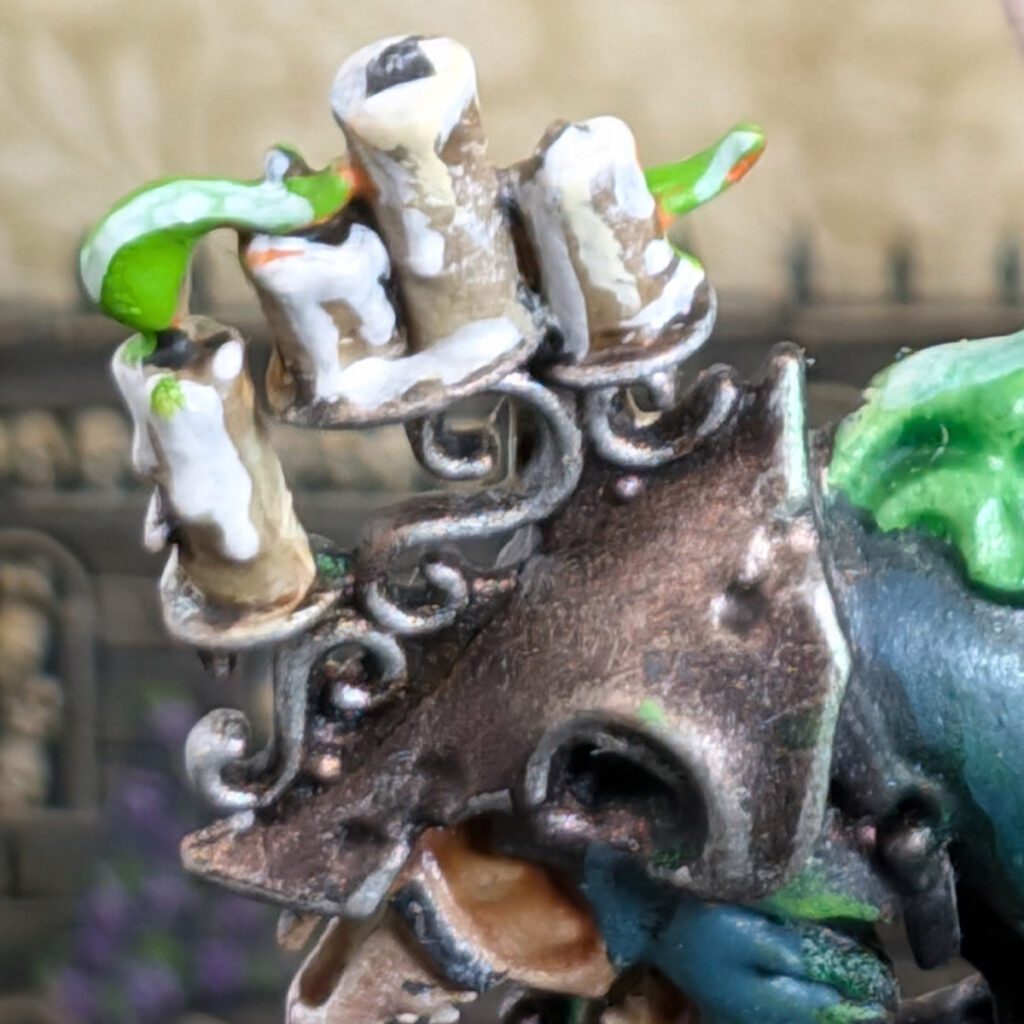
Painting the Candles
- Rakarth Flesh
- Agrax Earthshade
- Pallid Wych Flesh
- Abaddon Black
- Moot Green
- Waystone Green or Lamenter’s Yellow (optional)
Base-coat the candles with Rakarth flesh and shade with Agrax Earthshade.
Highlight the candles with Pallid Wych Flesh.
The wicks can be painted Abaddon Black and flames base-coated with Moot Green.
An optional glazing of Waystone Green or even Lamenter’s Yellow over the Moot Green flames will add to that spooky, spectral flavor.
Finally, highlight Pallid Wych Flesh on the tips and edges of the Moot Green Flames.
Remember, candles are down on the base near the statue as well!
Painting the Base of Reikenor the Grimhaler
- Mechanicus Standard Grey
- Nuln Oil
- Dawnstone
- Administratum Grey
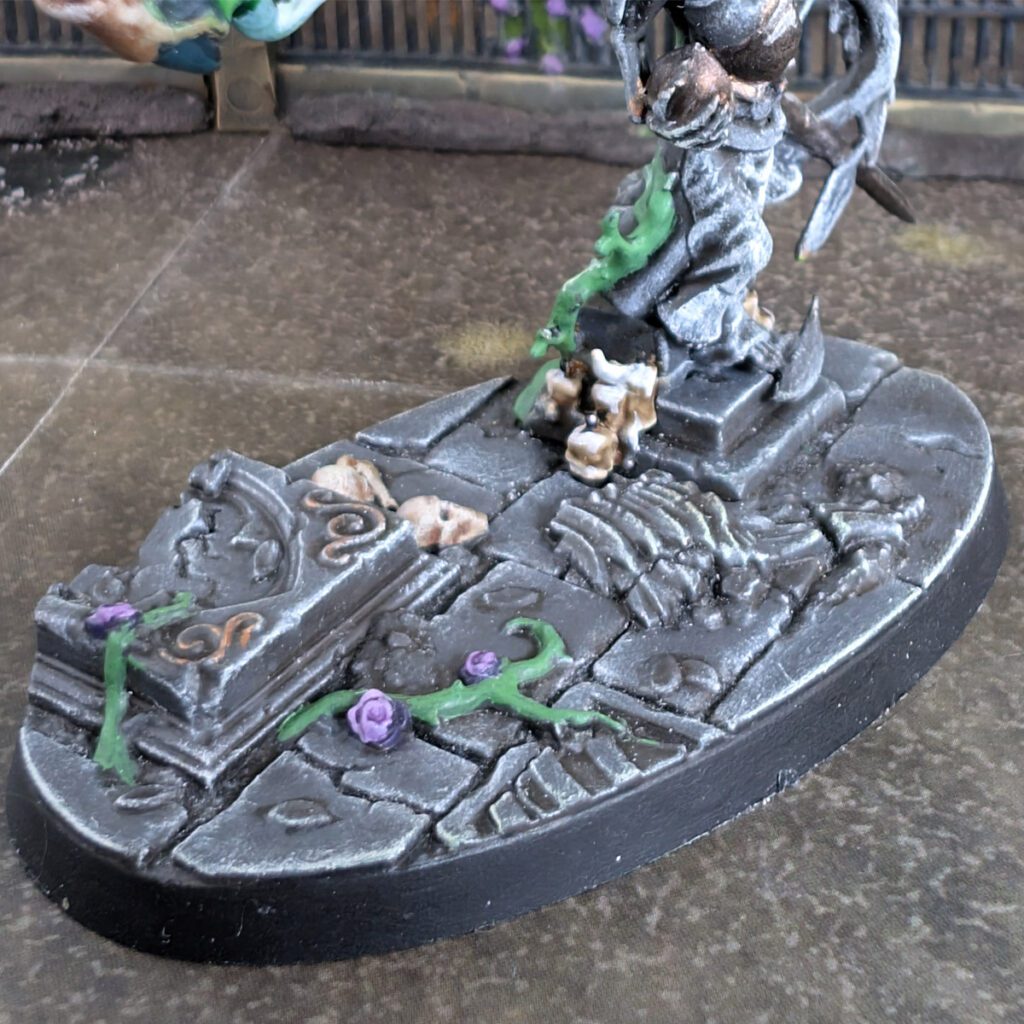
The stone tiles and statue of the base are super simple. Just base-coat everything in Mechanicus Standard Grey and shade with a nice coat of Nuln Oil.
Next, do a medium to heavy dry-brush of Dawnstone all over the base and statue.
And finally, a light dry-brushing of Administratum Grey will pick up the details and top-most edges.
For details, you can use the bronze or metal armor recipe above for the sword and shield on the statue. Also, there are some vines and flowers on the base. If you want to paint those as actual flowers (instead of stone decor) you can use Nagaroth Night and Xereus Purple for the flowers, and you can use the same Warboss Green and Skarsnik for the leaves.
Painting Reikenor the Grimhaler: Complete Guide to Achieving a Spectral Masterpiece
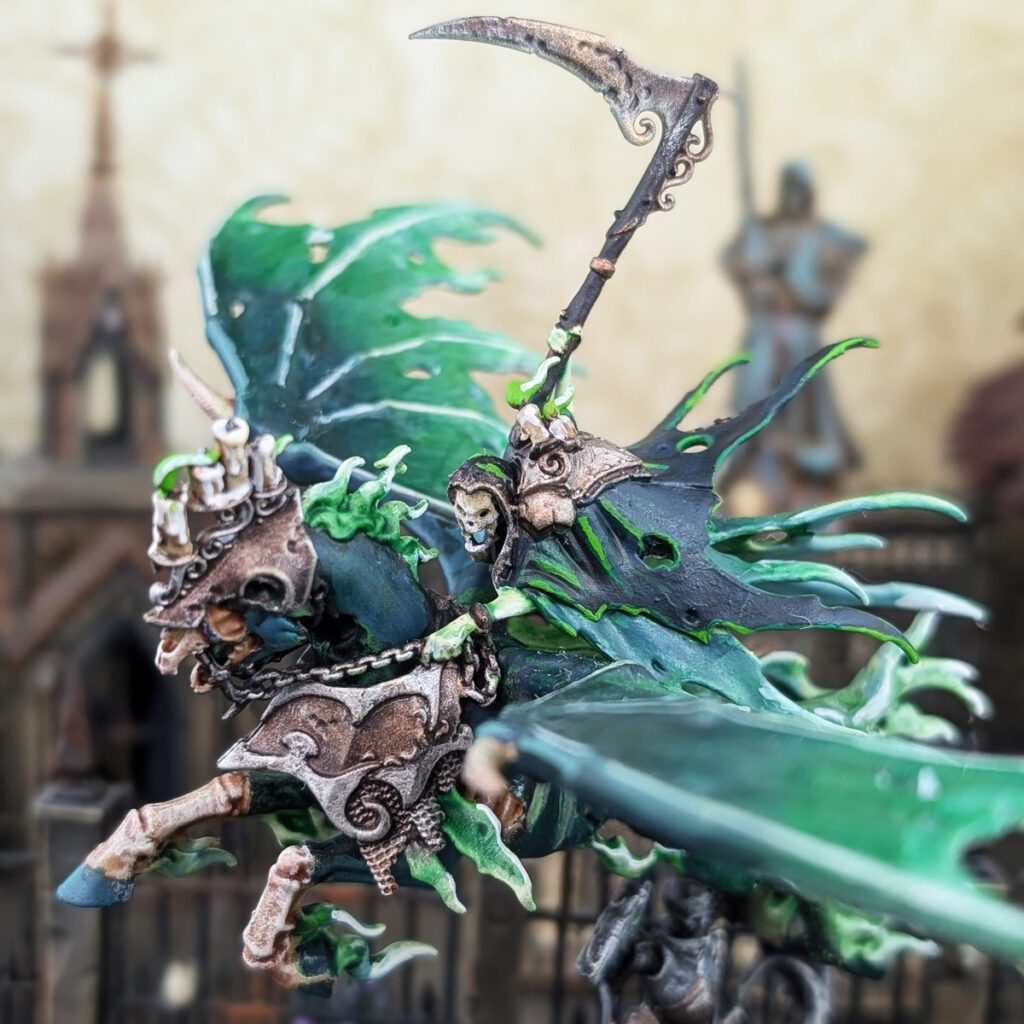
In conclusion, painting Reikenor the Grimhaler is a rewarding experience that allows you to bring out the ghostly essence and menacing details of this iconic Nighthaunt model. By following the techniques outlined in this guide, you can achieve a striking blend of ethereal hues and ominous contrasts that will make Reikenor stand out on the battlefield. Whether you’re adding him to your army or showcasing him as a display piece, this project offers plenty of opportunities to refine your skills and experiment with spectral effects. With patience and practice, your Reikenor will truly embody the haunting terror he represents in the Mortal Realms.
Reikenor The Grimhaler Shopping List
General Supplies:
- Wet Palette
- Paint Puck or Water Cup
- Citadel Medium Base Brush
- Citadel Medium Dry Brush
- Citadel Medium Shade Brush
Paint List:
- Citadel Chaos Black Primer
- Citadel Colour Waaagh! Fleshf
- Citadel Colour Warboss Green
- Citadel Colour Skarsnik
- Citadel Colour Pallid Wych Flesh
- Citadel Colour Incubi Darkness
- Citadel Shade Nuln Oil
- Citadel Colour Kabalite Green
- Citadel Colour Moot Green
- Citadel Colour Balthasar Gold
- Agrax Earthshade
- Sycorax Bronze
- Nihilikh Oxide (optional)
- Citadel Colour Leadbelcher
- Reikland Fleshshade
- Citadel Colour Stormhost Silver
- Citadel Colour Zandri Dust
- Seraphim Sepia
- Citadel Colour Ushabti Bone
- Citadel Colour Screaming Skull
- Citadel Colour Rakarth Flesh
- Agrax Earthshade
- Citadel Colour Pallid Wych Flesh
- Abaddon Black
- Citadel Colour Moot Green
- Waystone Green or Lamenter’s Yellow (optional)
- Citadel Colour Mechanicus Standard Grey
- Nuln Oil
- Citadel Colour Dawnstone
- Citadel Colour Administratum Grey
Shade List
- Citadel Shade Coelia Greenshade

No responses yet