
Mythic Minis is reader-supported. When you buy through our affiliate links, we may earn a small commission—never costing you anything extra. Your support helps us keep creating helpful painting guides and hobby resources for everyone.

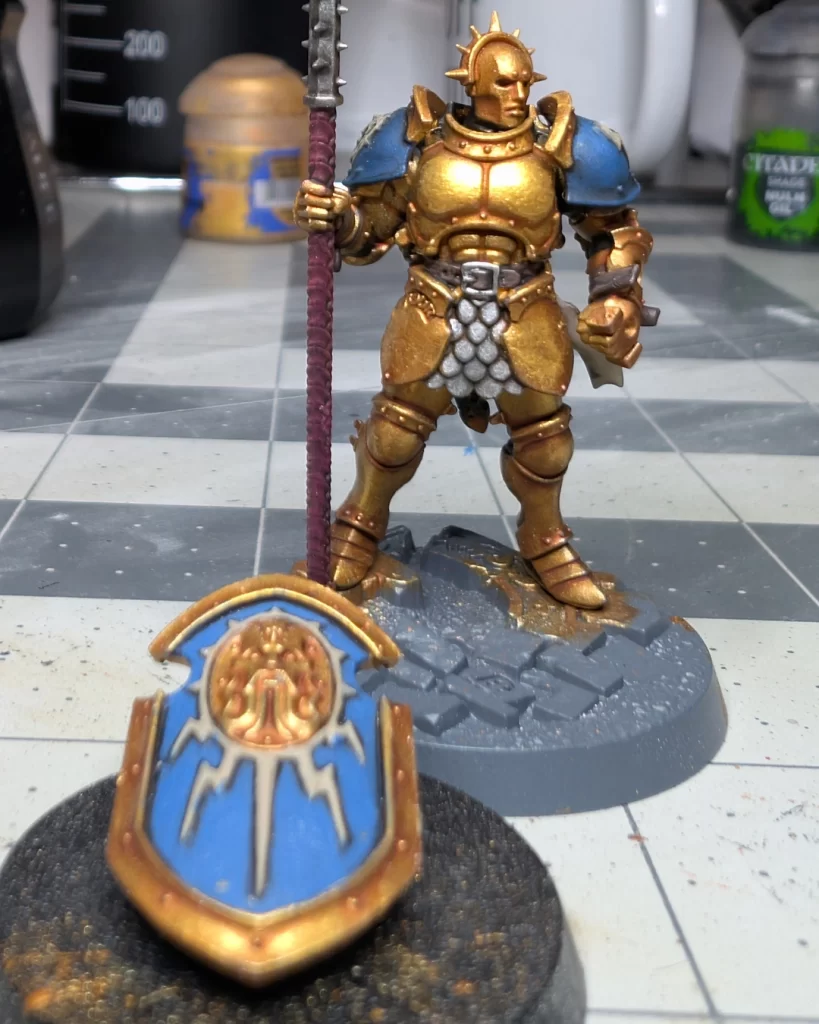
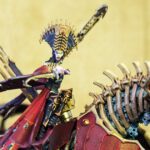
Stormcast Vindictors are the shield-and-spear core of the Stormcast Eternals, sworn defenders who form the first line in battle. Their gleaming armor, bold heraldry, and disciplined stance make them an ideal showcase model for both new painters and veterans refining their techniques. In this guide, we’ll walk through a step-by-step process to get your Vindictors looking striking on the tabletop, with a paint recipe that balances speed, clarity, and a touch of extra detail for close-up display.
Before diving into the steps, you can grab a free PDF download of the full paint list used in this guide. Print it for a handy reference you can keep next to your painting desk, so you don’t have to scroll back and forth while working. The list includes every paint by name, and a basic hobby supplies list should you need replenishment or a new tool.
Priming and Basecoats
Start by priming your Vindictor with Mechanicus Standard Grey. This neutral primer gives a solid foundation for both metallics and colors to sit evenly, without being too bright or too dark. For ease of painting, keep the shield as a sub-assembly rather than attaching it to the model right away—this will save you time and frustration when reaching the armor, straps, and emblem details behind it.

Once primed, lay down your first basecoats across the model:
- Retributor Armor — all armor plates
- Leadbelcher — spear blade and socket, scale skirt, belt buckle
- Dryad Bark — belt and armor straps
- Kantor Blue — shoulder pads and sword sheath
- Screamer Pink — spear haft
- Rakarth Flesh — parchment, shoulder emblems, and shield emblem
- Abaddon Black — boots and under-clothes (visible in joints: elbows, backs of knees, shoulder joints, and around the neck)
Be sure to rotate the miniature and check the back for details—Stormcast models often have straps, clasps, and rivets tucked out of sight at first glance. Taking the time to hit these early with basecoats makes the later shading and highlighting stages much smoother.
Shading with Washes

With the base colors down, it’s time to add depth and definition. Apply Nuln Oil over every part of the model except the gold armor. This gives a strong contrast and sharpens the details, especially around the joints and recesses. I chose Nuln Oil over Agrax Earthshade here because it creates a darker, more dramatic shadow rather than the warmer, more natural tone that Agrax provides.
For the gold armor, use Reikland Fleshshade instead. This wash enriches the metallic tones, giving the plates a warmer depth and a subtle patina-like finish. Where Nuln Oil might make gold look flat or dirty, Reikland enhances it with a hint of reddish warmth, making the armor look vibrant and alive while still showing age and character.
Layering the Colors
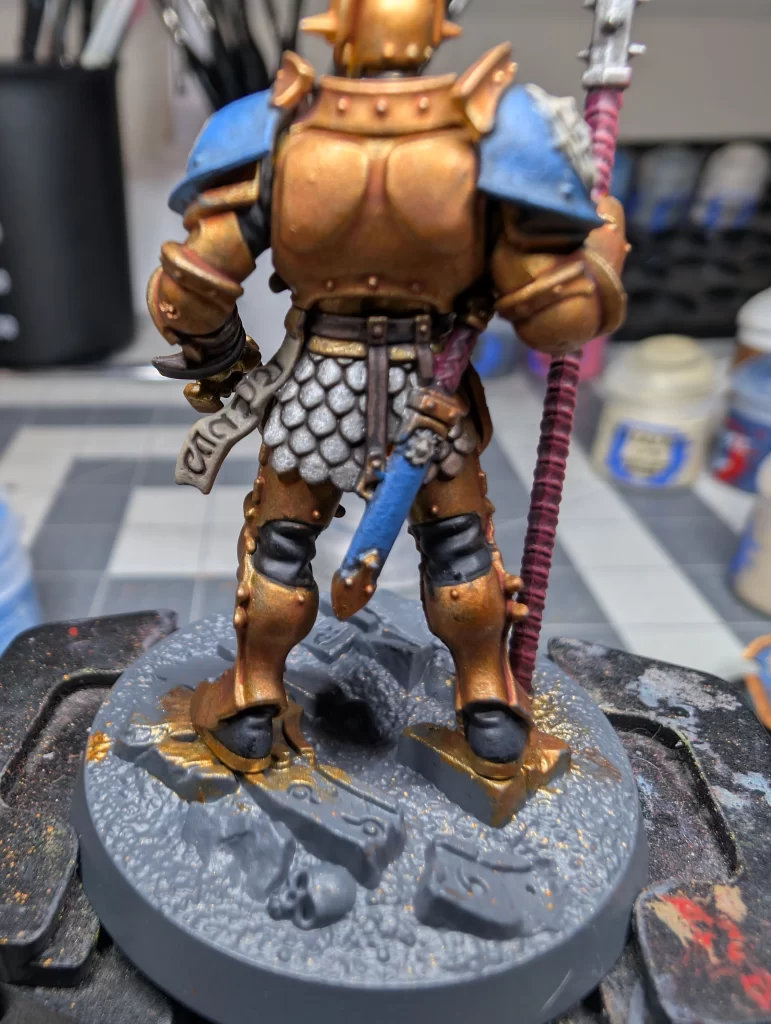
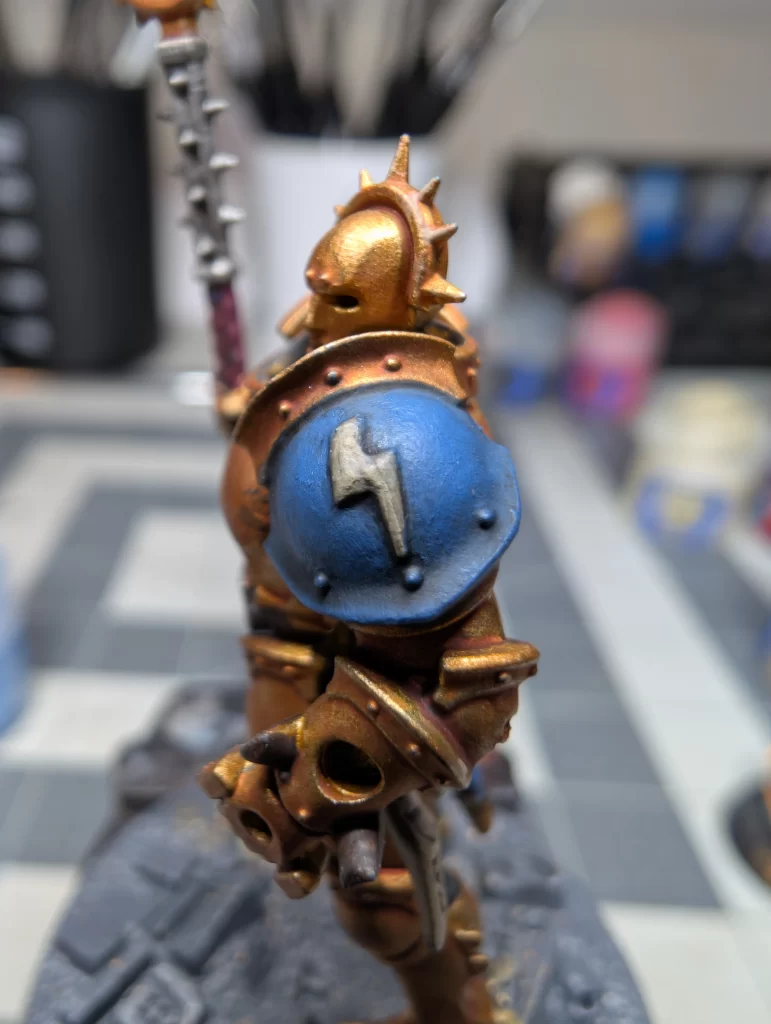
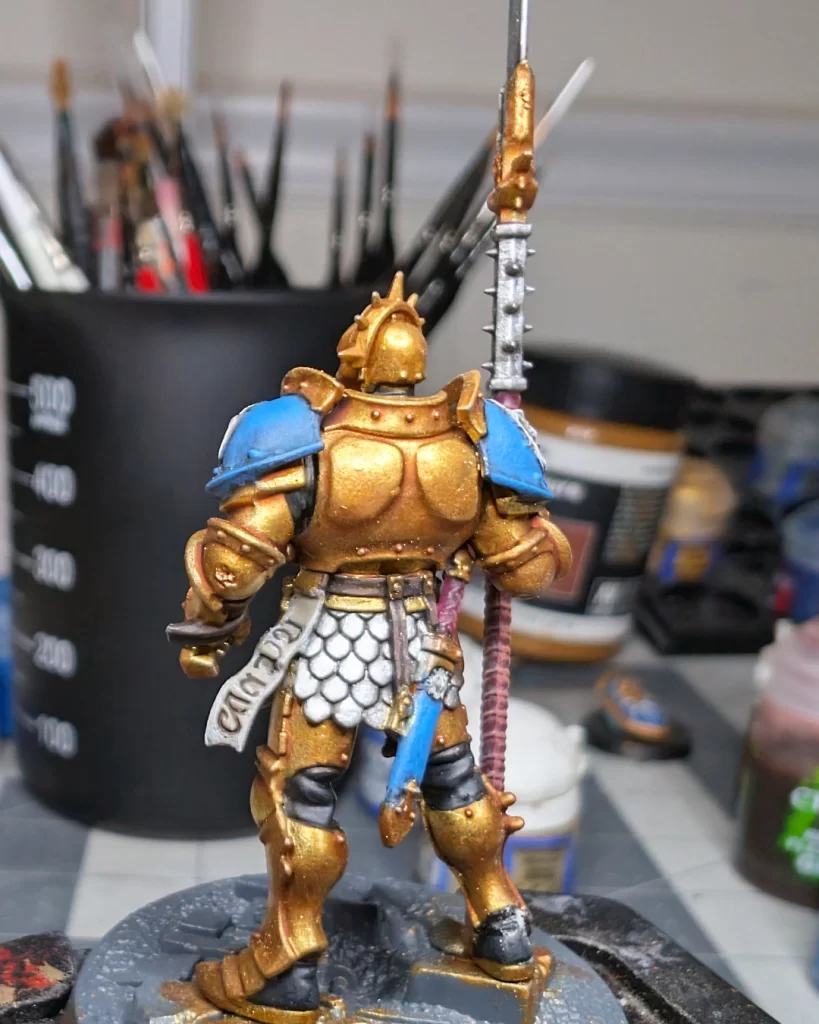
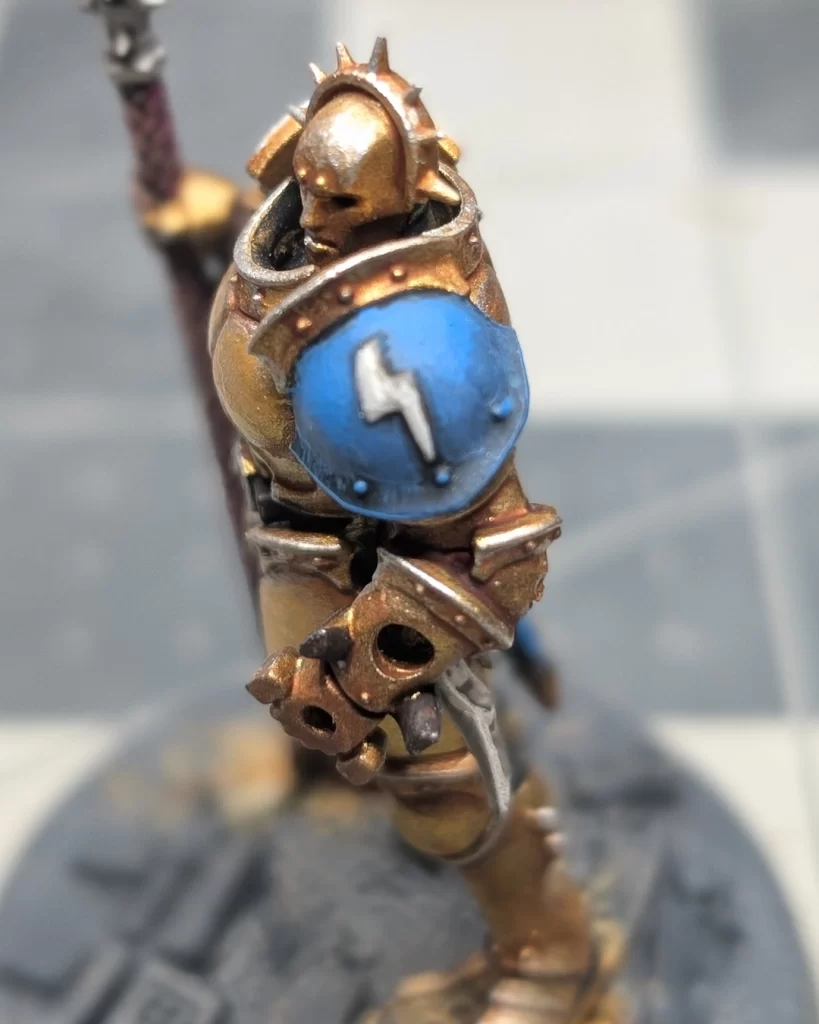
With the shading complete, it’s time to bring the model back to life with layers. This stage is where the Vindictor’s details start to pop, so I’ve included three images to help you follow along: the front of the model with the shield, a view of the back, and a close-up of the shoulder pad to highlight the layering on the blue and the lightning bolt emblem.
Here are the main layers to apply:
- Gorthor Brown over the Dryad Bark (belt and straps)
- Alaitoc Blue over the Kantor Blue (shoulder pads, sword sheath)
- Karak Stone over the Rakarth Flesh (parchment, emblems)
- Auric Armor Gold over the Retributor Armor (main armor plates)
- Runefang Steel over the Leadbelcher (spear, scale skirt, and metallic accents)
Take your time with Auric Armor Gold in particular. It’s a naturally transparent paint, which makes it an excellent tool for practicing brush control. Thinning it slightly, loading your brush evenly, and applying it in multiple passes will teach you how to build up rich, smooth layers without obscuring details. Think of it as a hands-on lesson in one of the core skills of miniature painting.
Adding Highlights
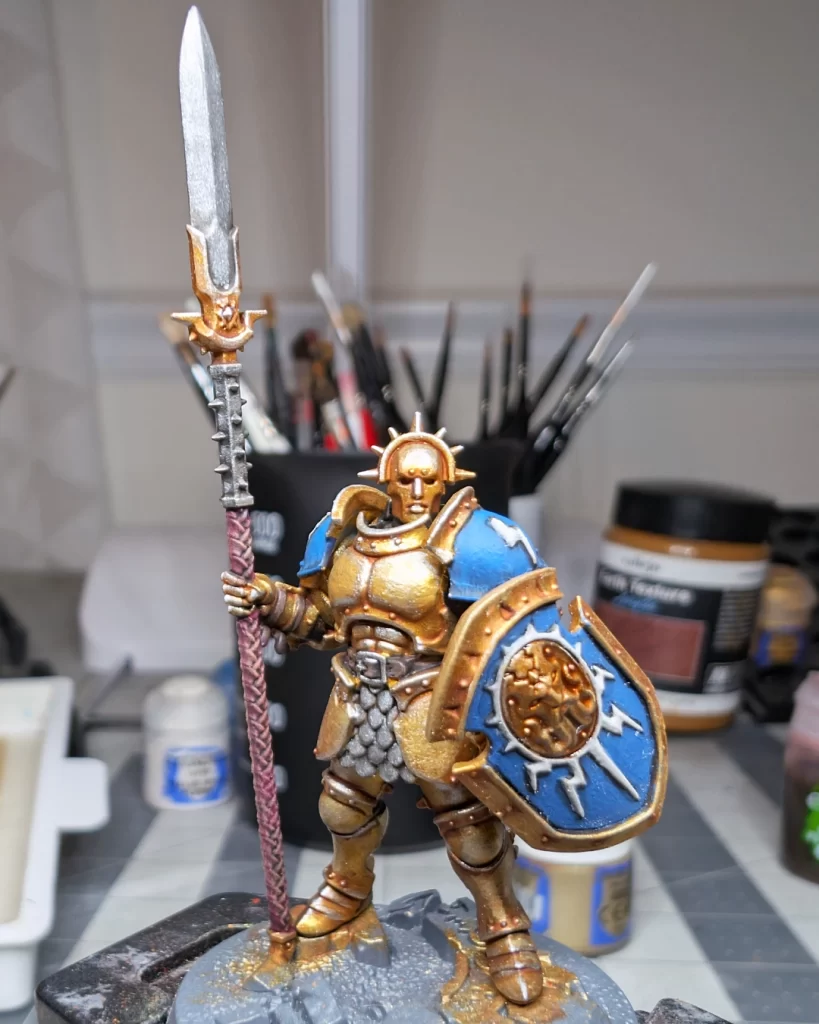
Highlights are where the model really starts to shine, catching the light and showing off the edges of the sculpt. With the layers dry, carefully pick out these final touches:
- Teclis Blue — edge highlight the Alaitoc Blue areas like shoulder pads and the sword sheath, with extra attention on the lightning bolt emblem.
- Stormhost Silver — highlight silver areas such as the spear blade, scale skirt, and buckles. You can also apply small edge highlights to the corners and tips of the gold armor panels to simulate reflected light and give the armor a polished finish.
- Cadian Fleshtone — use sparingly on the weapon handles to give them a warmer contrast against the darker Screamer Pink base.
- Pallid Wych Flesh — add a dab on the parchment and white details, keeping it subtle so it looks like light catching on worn edges.
At this stage, it’s more about restraint than coverage. Keep your brush tip sharp, and focus on corners, raised edges, and spots where natural light would hit first. Small, precise highlights create the illusion of depth and help the Vindictor stand out on the tabletop without overwhelming the overall scheme.
Refining Gold with Silver Underlayers
For an extra level of realism on the armor, try a two-step highlight. First, place small touches of Runefang Steel or Stormhost Silver on the brightest points of the gold—edges of shoulder plates, helmet ridges, and the tops of knee guards where light would naturally strike. Once that’s dry, glaze over those silver spots with a thin layer of Auric Armor Gold. The result keeps the armor looking golden but emphasizes the brightest reflections, creating a subtle light-sourcing effect that makes the plates look more polished and dynamic.
No responses yet