Mythic Minis is reader-supported. When you buy through our affiliate links, we may earn a small commission—never costing you anything extra. Your support helps us keep creating helpful painting guides and hobby resources for everyone.
Creating stunning scenic bases for your Age of Sigmar miniatures can take your army to the next level—especially when it comes to the heroic Stormcast Eternals Vindictors. In this tutorial, I’ll walk you through a step-by-step guide on how to paint scenic bases for your Age of Sigmar models, with a specific focus on a Vindictor-themed battlefield base. Whether you’re painting for display or gaming, this guide will help you craft immersive and dynamic bases using easy-to-follow painting techniques and Citadel (or compatible) paints.
Why Scenic Bases Matter in Age of Sigmar
Scenic bases aren’t just about aesthetics—they help set the scene for your miniatures. For Stormcast Eternals, I wanted their bases to reflect the broken ruins of battlefields and ancient realms they fight across. Scenic bases ground your model in the lore of the Mortal Realms, while also creating visual contrast that enhances your paint job and elevates your army on the tabletop.
What You’ll Need – Scenic Basing Supplies
To follow this Vindictor base painting tutorial, you’ll need:
- Primer:
- Base Paints:
- Shade Paints:
- Layer Paints:
- Metallics:
- Contrast Paints:
- Technical Paints:
- Brushes:
Step-by-Step Painting Process
Below are the steps I followed to paint the scenic base for my Vindictor model. (See accompanying photos for each stage.)
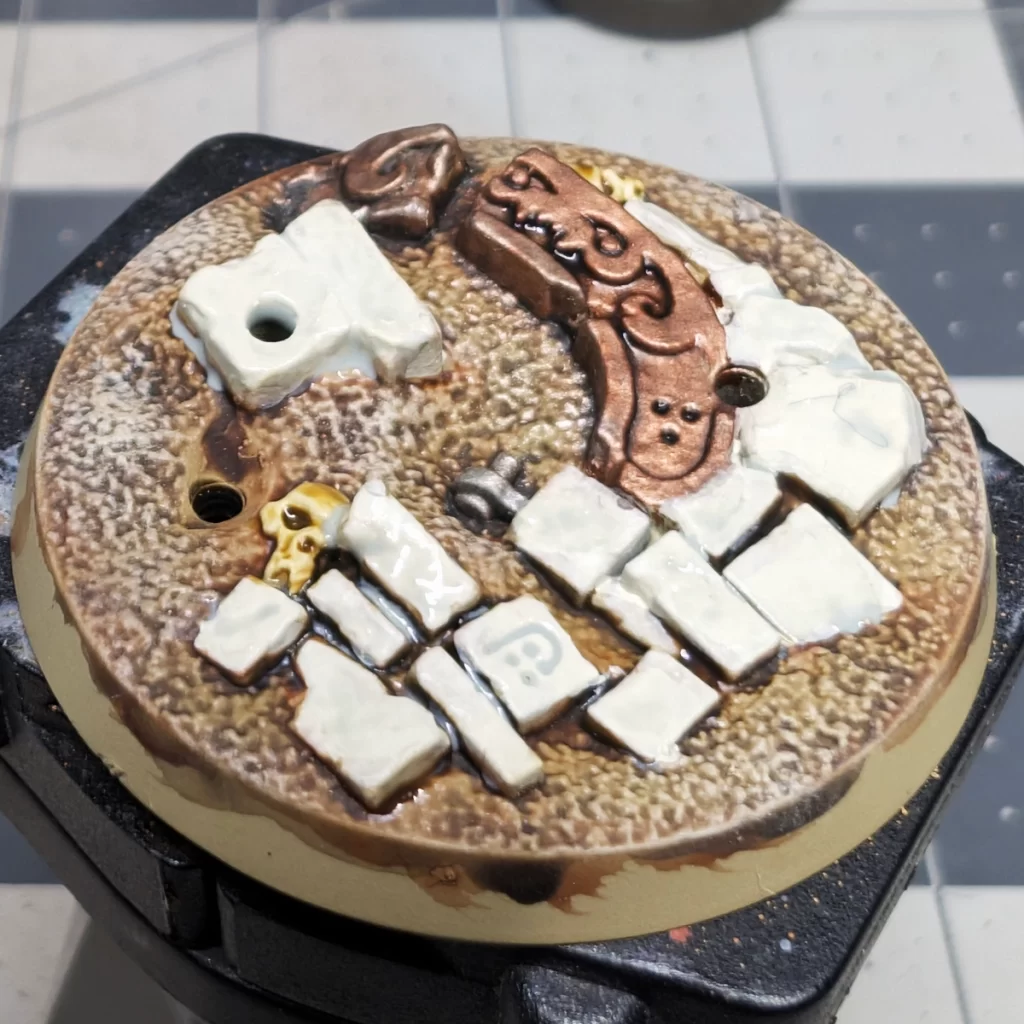
Step 1: Assemble and Prime
The cool thing about this base is that it’s already sculpted. The only thing I had to come up with was a color scheme, which I already had a basic theme from the terrain pieces from the Extremis Edition Realmscape Expansion.

I primed with Zandri Dust because that was going to be my ground color.
Tip: Typically, use a black primer when your base will include metallics, deep shadows, or earthy tones. The reason why I used Zandri Dust in this situation is because I knew I wanted to use Contrast Paints over the stone blocks and skulls. Those elements required a Wraithbone basecoat for the Skeleton Horde and Apothecary White I was going to be using. Wraithbone covers over Zandri Dust better than it would Chaos Black.
Step 2: Basecoating the Ground
I used Zandri Dust to basecoat the entire ground area. This creates a warm, dry soil look that works great with the golden armor of the Vindictors. You’ll always want to consider going over your primer color with the same base color because the color isn’t quite identical, but in this case a little variety in the earth color is welcome. I’ll use Zandri Dust base color for touch ups.
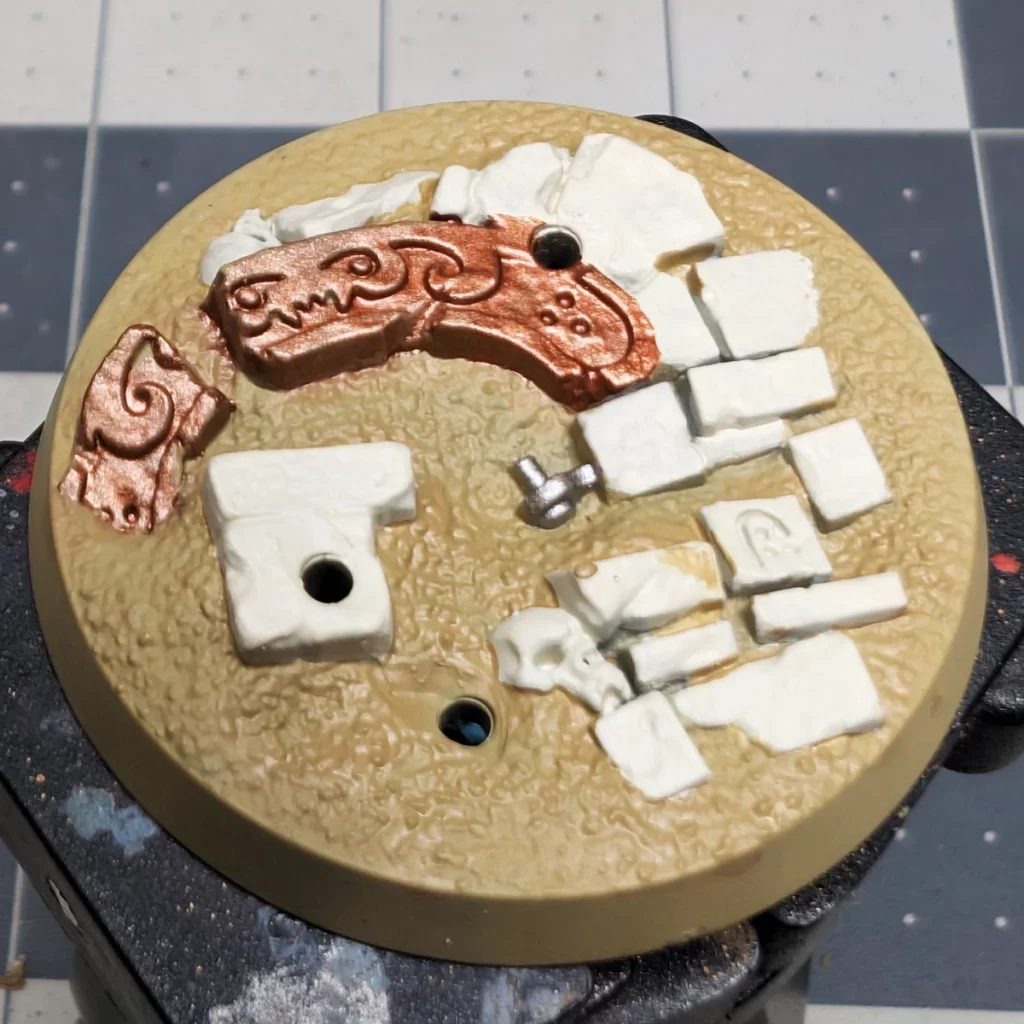
- Stone blocks and skulls are painted with Wraithbone as an undercoat for future contrast colors.
- The sculpted piece of metal I wanted to look like a piece of a broken statue or archway, so I based it with Balthasar Gold to bring it up to a cool Mesopotamian style Bronze color.
- The last detail is a screw, which I’m going to color tin, as tin may have been a popular metal in this Bronze Age ruin. For that, a simple coat of Leadbelcher.
Step 3: Shading and Washing
To create depth, I applied Agrax Earthshade liberally over the entire base, except for the stone blocks. This helped bring out the texture and added a sense of weathering to the scene.
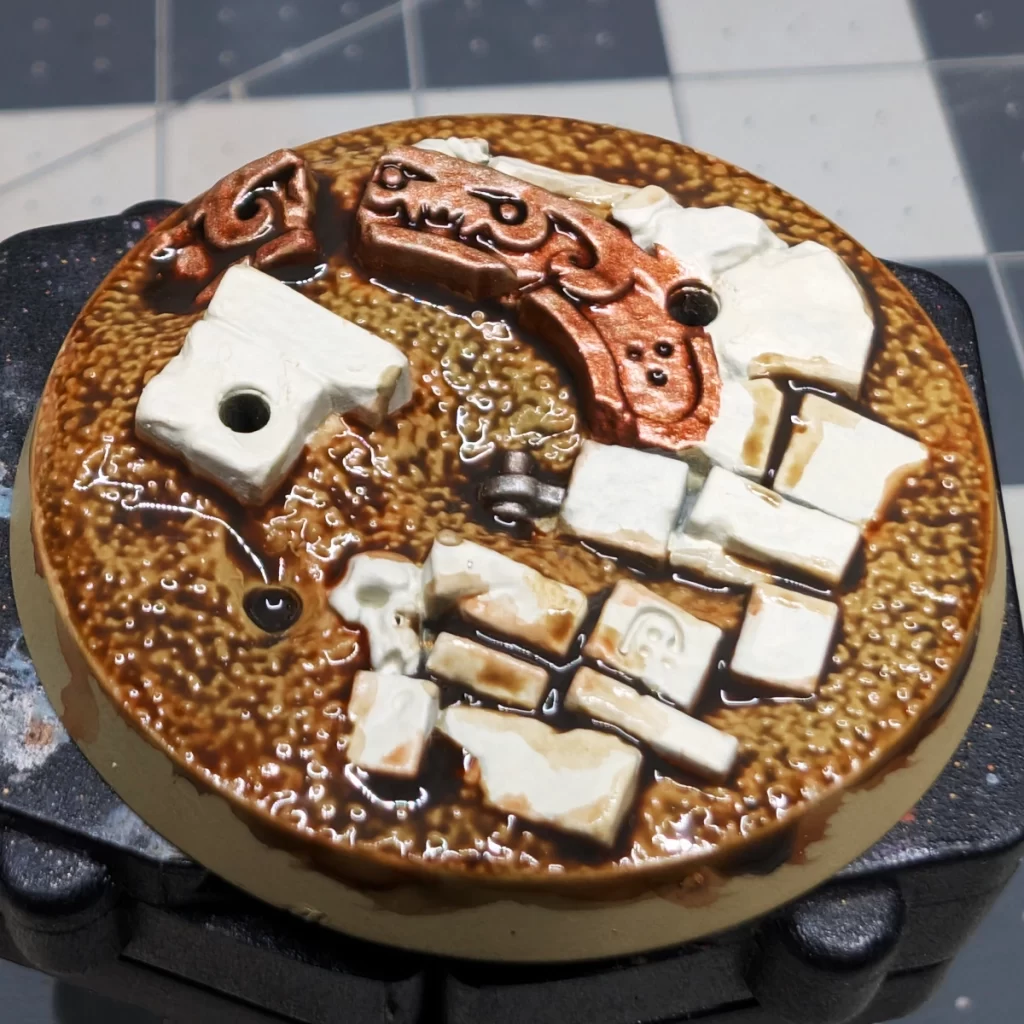
Tip: I tried to be neat around the white stone blocks, but don’t worry if it pools a bit around debris—it enhances the natural look of dirt and shadow. Some of this I did touch up a little as we’ll see in the next step.
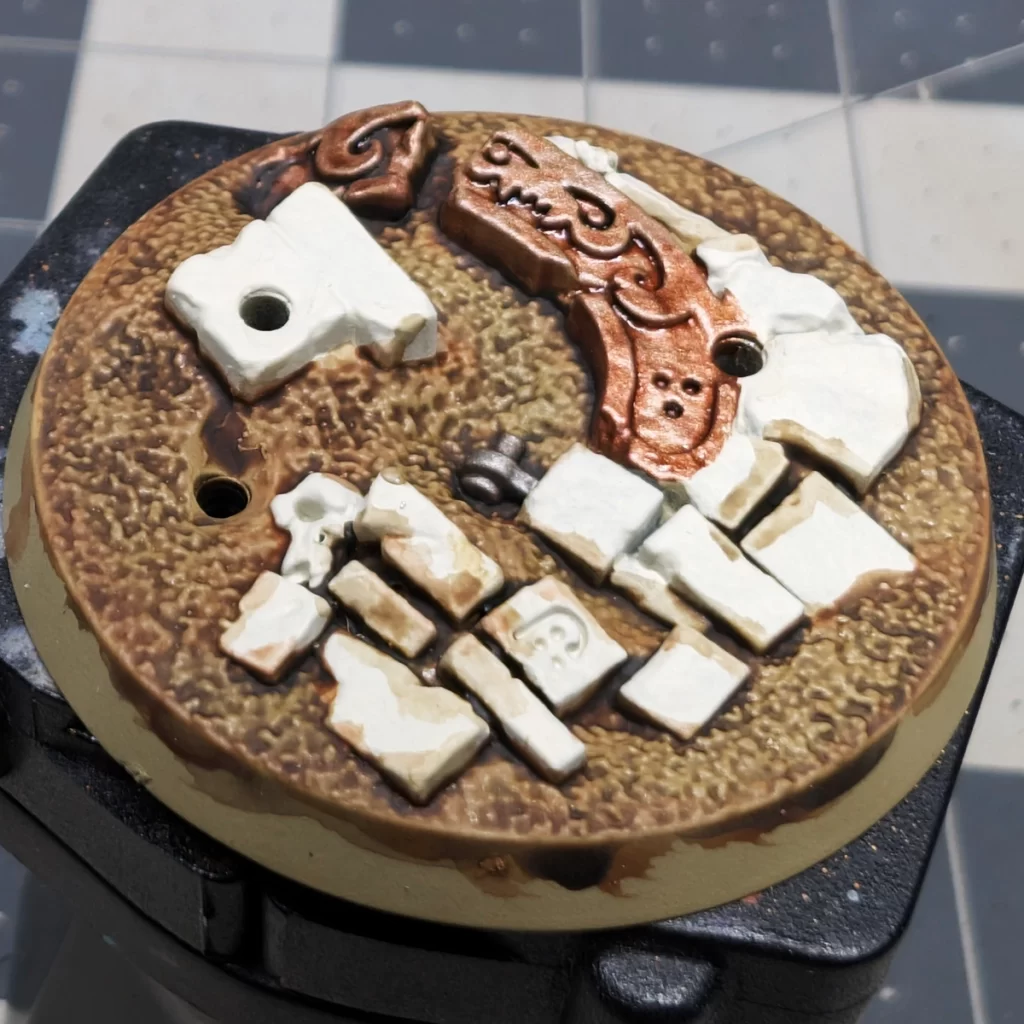
Step 4: Dry-brushing for Definition
After the wash dried, I used Ushabti Bone for the first dry-brush layer on the earth, focusing on raised areas and rocks. I followed that with a final light dry-brush of Screaming Skull to give variety and interest to the sandy texture.
- I touched the prominent featured of the bronze piece with Sycorax Bronze and added a dab of Agrax Earthshade into some of the detail to dirty it up just a little to add age and contrast.
- To layer the screw is just a simple dab of Leadbelcher to bring the color back up on the raised surface of the bolt.
- The white stone blocks I touched up in some areas with Wraithbone and then painted them over with Apothecary White contrast paint.
- I continued with contrast using just a dab of Skeleton Horde on the skulls.
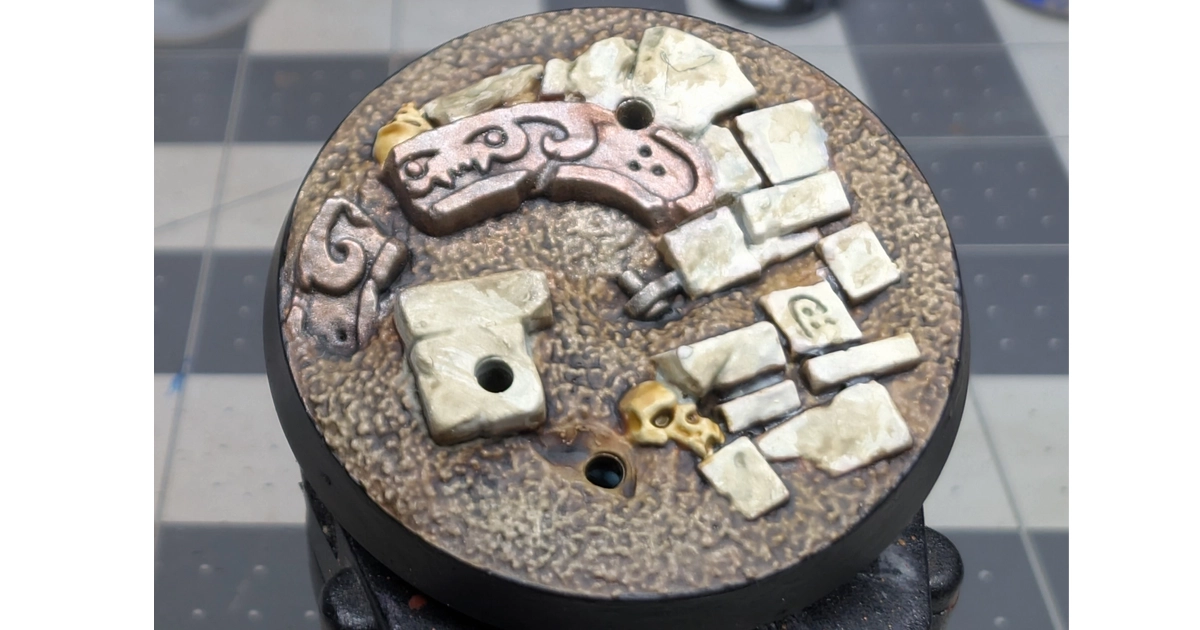
Step 5: Highlight to Push the Contrast
Before getting into the highlights, I noticed I wasn’t satisfied with the Apothecary White. When dry, it would certainly add a little shadow contrast and a slight marbling effect, but it looked too clean for a ruin. the color temperature was also too cold and didn’t match the rest of the theme of the base.
The solution to this was to very, very lightly stipple a thinned (with water) bit of Skeleton Horde contrast over the rocks to dusty them up a little, thus changing their color temperature while keeping the shadows and marbling. I thought it turned out pretty good!
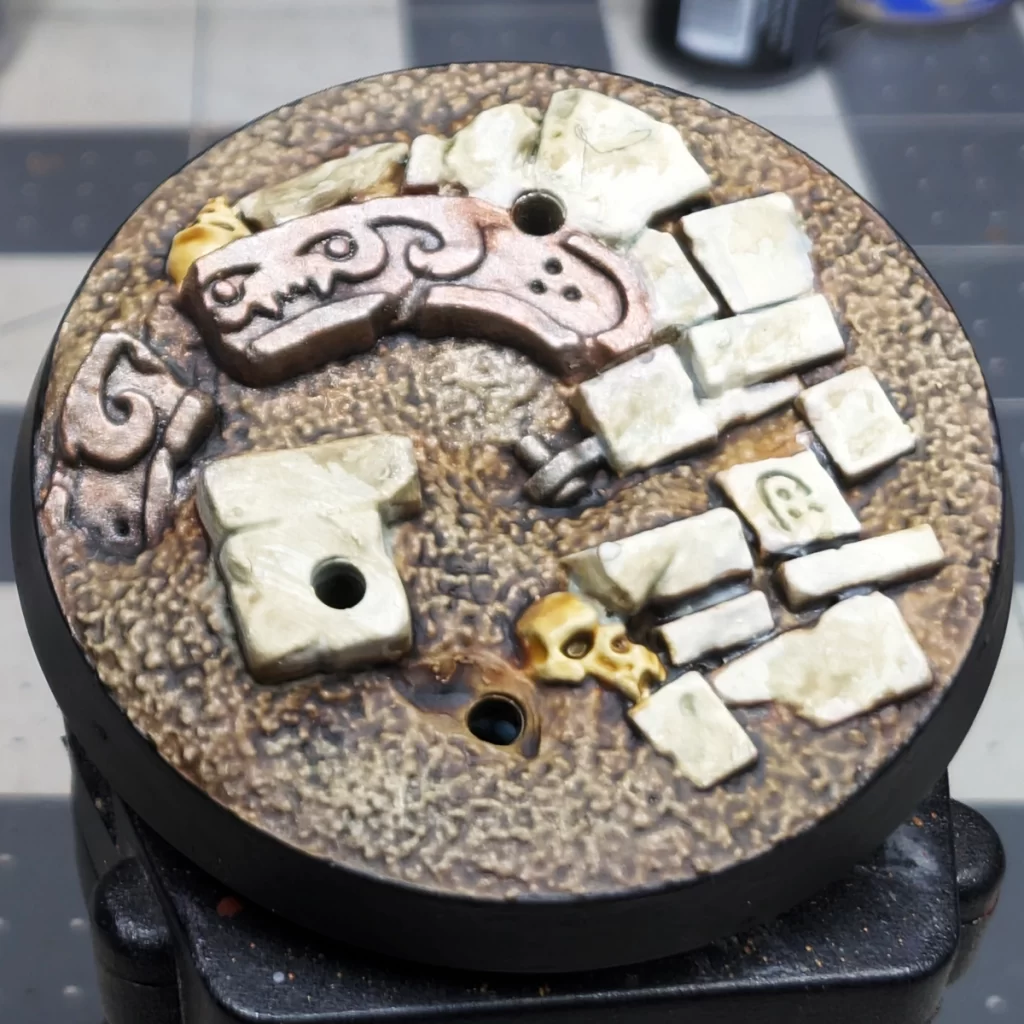
- Very lightly touch some of the highlights on both the bronze and tin with a some Stormhost Silver.
- Naturally, paint your base rim! I used Abaddon Black.
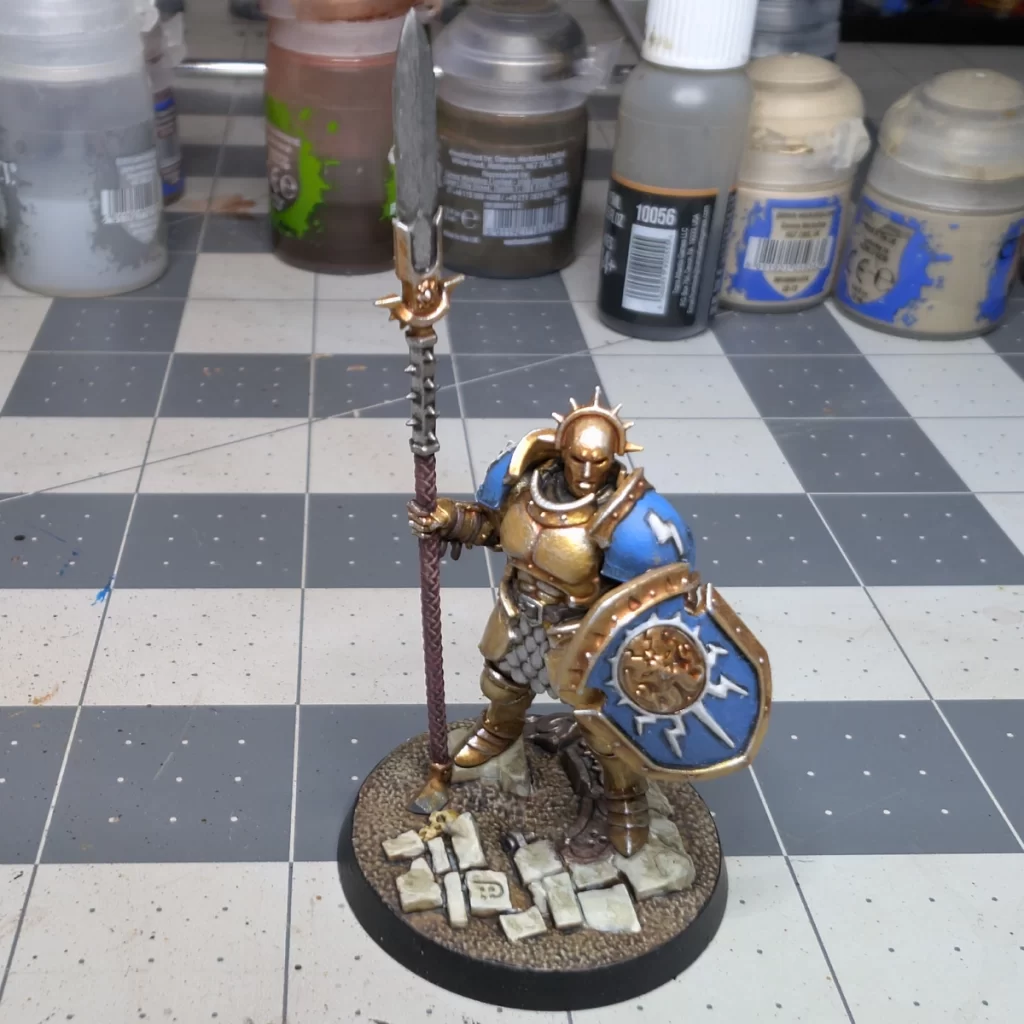
Final Thoughts: Matching Base to Model
The key to a great scenic base is making sure it complements—not overshadows—your model. Since Vindictors wear shining gold and blue armor, I kept the base in muted earth tones for contrast. The result is a base that looks grounded in the Mortal Realms but doesn’t distract from the heroic centerpiece.
That brings us to the end of this scenic base painting tutorial.
If you’ve been following along with the Get Started Painting Miniatures for Age of Sigmar series, we’ve covered everything from priming and dry-brushing to adding fine details and final touches. The goal was to give you a repeatable process you can adapt to fit any battlefield theme—whether you’re building a windswept plain, a storm-wracked ruin, or a sacred mountaintop. With your bases finished, your models now stand in a setting that enhances their presence on the tabletop and ties your army together visually. Thanks for following along—be sure to check out our other tutorials for more ways to bring your miniatures to life, one layer at a time.
Like the look of this base? Check out our Realmscape Painting Guide.

No responses yet