Mythic Minis is reader-supported. When you buy through our affiliate links, we may earn a small commission—never costing you anything extra. Your support helps us keep creating helpful painting guides and hobby resources for everyone.
Introduction
The towering AT-ST walker is one of the most iconic vehicles in the Star Wars universe, and on the tabletop it’s just as imposing. Whether you’re adding it to your Star Wars: Legion Imperial army for tactical firepower or simply building it as a display piece, painting this model is a chance to capture that rugged, battle-worn feel of Imperial machinery. In this guide, we’ll walk through each step of bringing your AT-ST from bare plastic to a weathered war machine—covering everything from base colors to chipping effects, washes, and subtle details that make it look ready to stomp across the battlefield.
What You’ll Need
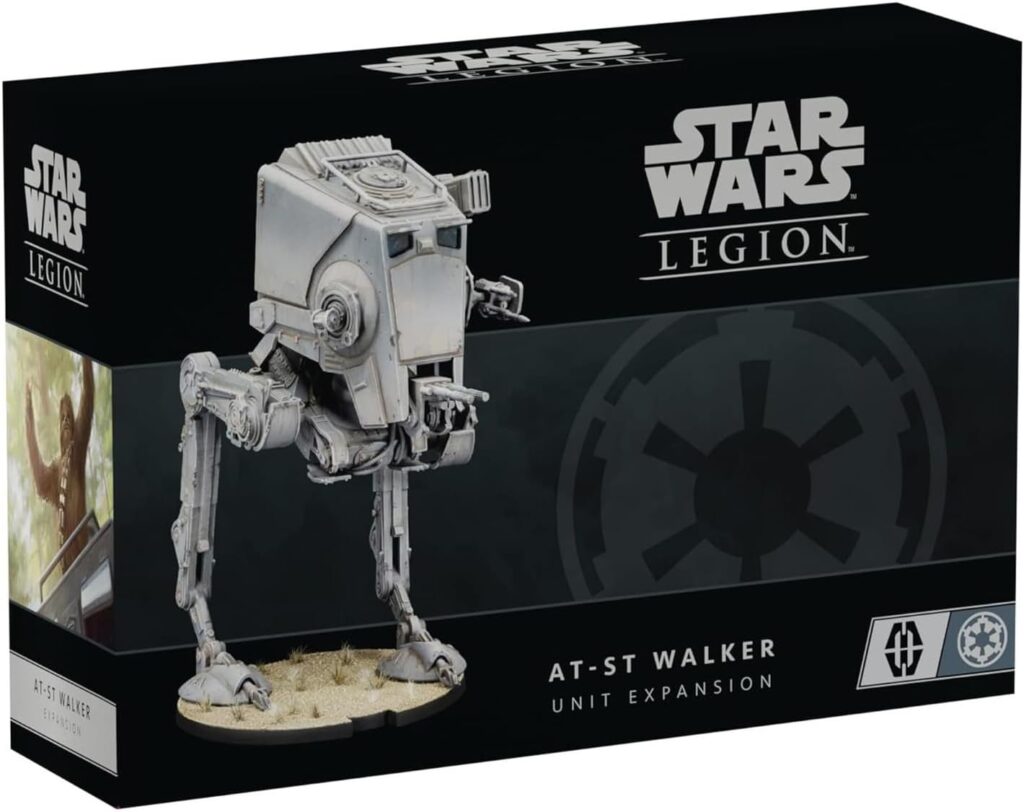
AT-ST Walker Unit Expansion Kit
Command the battlefield with the Empire’s towering scout walker. This detailed, poseable kit comes with multiple weapon options and game components—ready for assembly, painting, and deployment in Star Wars: Legion.
Recommended General Painting and Hobby Supplies
We’ve compiled a list of paints, washes, and technical paints for you to follow along and use for this painting guide. Included is a list of basic hobby tools and any specialty supplies you may need to complete this project.
Download the AT-ST Walker Paint and Hobby Supply List here!
Building and Priming
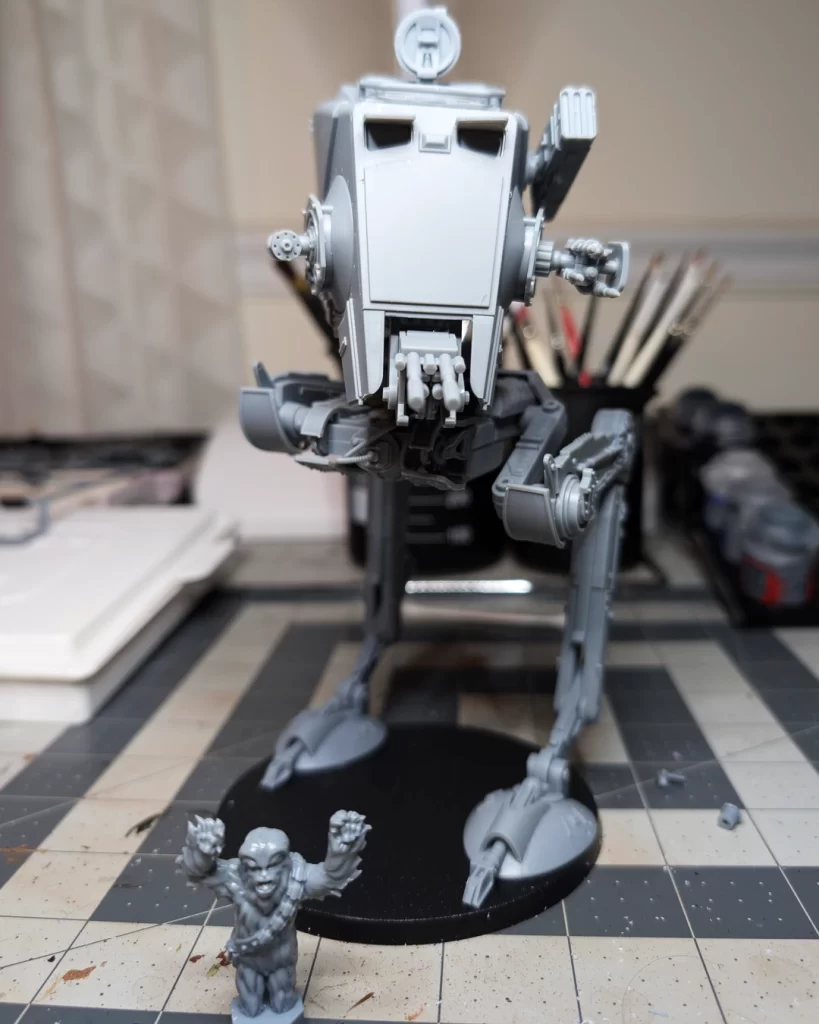
This Walker model kit has changed a little bit from the previous version. Whereas the older kit was highly customizable with the pose, this kit has a tongue-and-groove system with the leg and platform pieces that can make the build rigid. The nice part about this kit is that the default pose is great. I decided not to make any special customizations.
Instructions for the build can be found through a QR code on the insert inside the box, but they can also be found online here: AT-ST Walker Assembly Instructions.
Optional Build Step
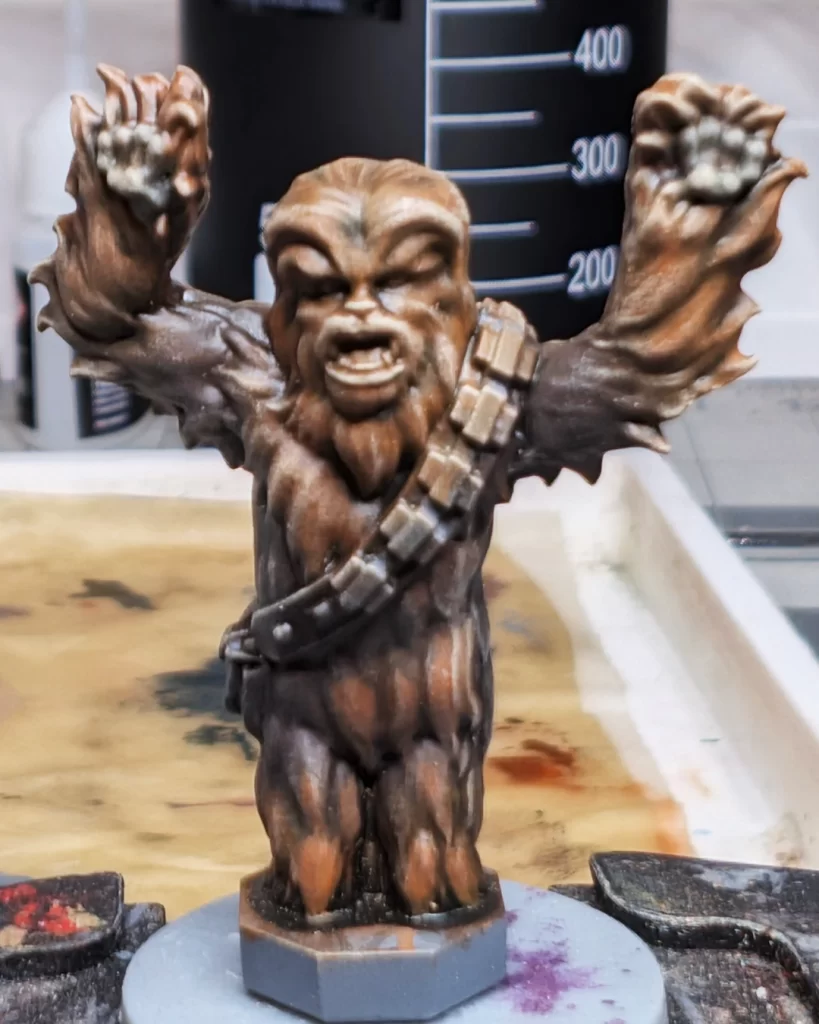
The AT-ST Walker is piloted by General Weiss, but there can be instances where Chewbacca hijacks the vehicle and becomes the pilot. For this particular build, I only painted Chewbacca as the pilot because my client is a huge Chewbacca fan!
Priming in Mechanicus Standard Grey
Mechanicus Standard Grey from Citadel is the perfect primer for your walker. Not only is this going to be our primer coat, but this is also going to be the base coat for our model.
If you’re new to priming, check out our post How to Prime Your Miniatures for a Smooth Paint Job.
Base Coat for the AT-ST Walker
This is a non-traditional base coat because we already have our primary color of Mechanicus Standard Grey. Instead, we’re starting with a low-level highlight on all of the edges, using Dawnstone, and some different brush techniques to texturize the metal.

Using a medium drybrush, hit all of the edges of the model with Dawnstone. Feel free to go be a little heavy handed with this step because we’ll go back and soften mistakes with Mechanicus Standard Grey later.
Use a stippling and swirling motion on the flat surfaces to texturize and pit the metal.
This step may work best with an older drybrush that has dandelioned, or you can try using dome-tipped style drybrushes.
Finish the entire model with this drybrushing step.
Tip: because this can take a little time, it may be best to rotate 2-3 medium drybrushes to keep them clean and allow them to dry.
Applying Wash to the AT-ST Walker
We’re going to use two different colors of shades, Agrax Earthshade and Athonian Camoshade. The goal is to create contrast with the model’s details along with creating a base coat for the weathering details we’ll get to later.
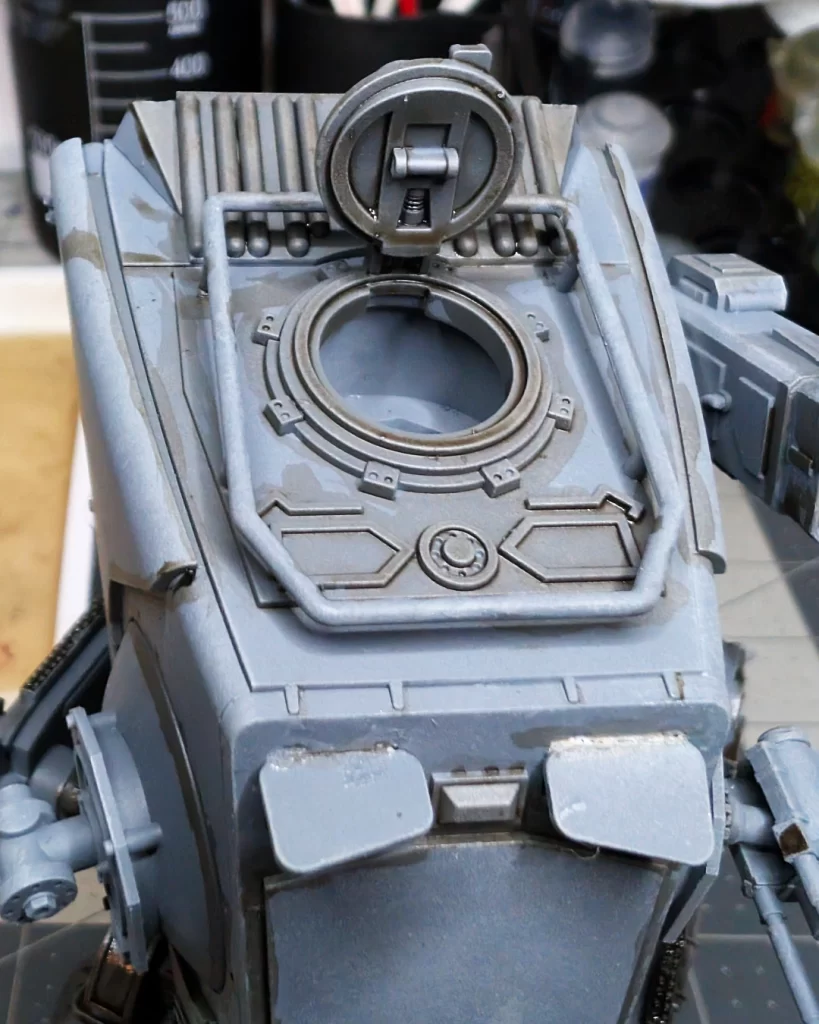
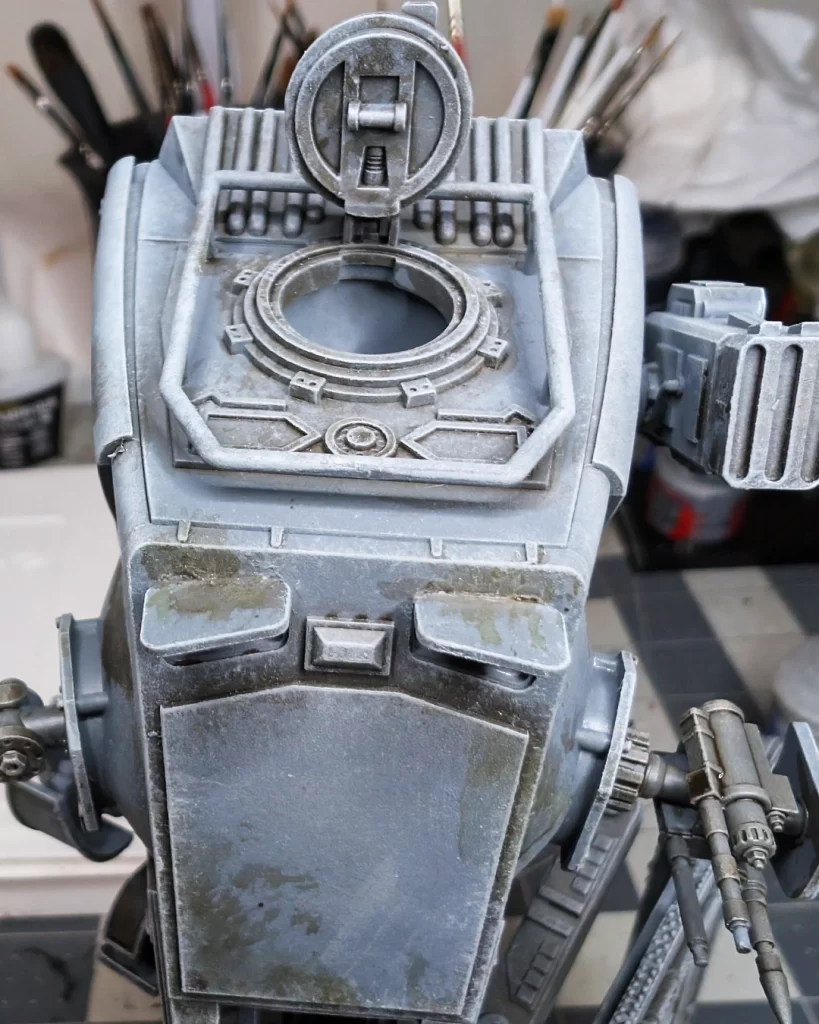
Be a little more precise with lines and details on the top cabin. It’s okay in some places to be a little messy because we’re going to soften some of the mistakes in a few steps with some spot drybrushing of Mechanicus Standard Grey.
The top of the cabin is going to be subject to a lot of weathering, so we can make a little mess up here and it will work out great. Here, I’ve outlined the details on the top to put some contrast into the recesses, but I’ve also just smudged Agrax Earthshade that will act as a staining basecoat later.
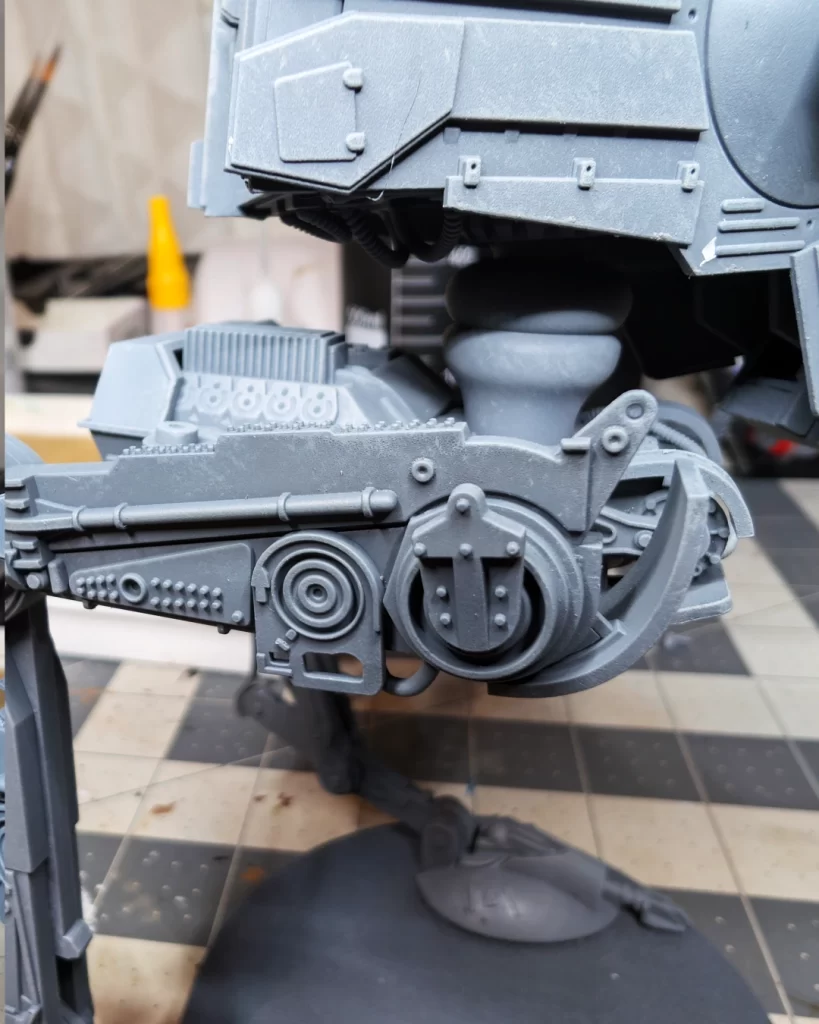
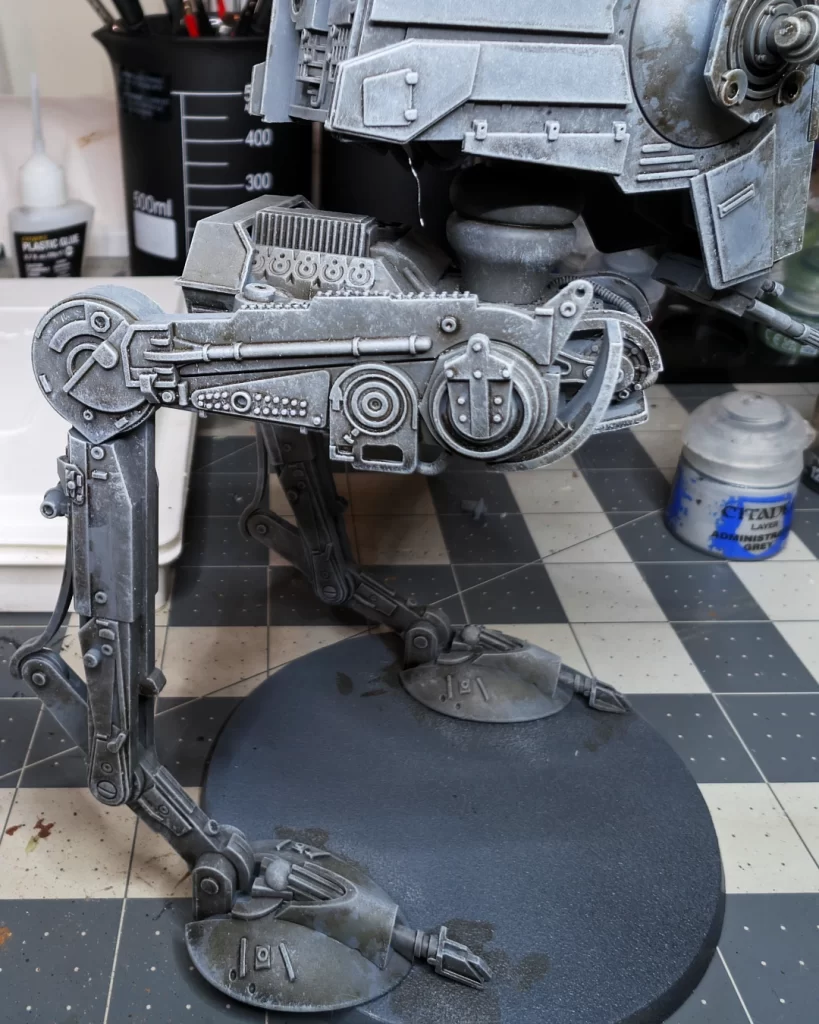
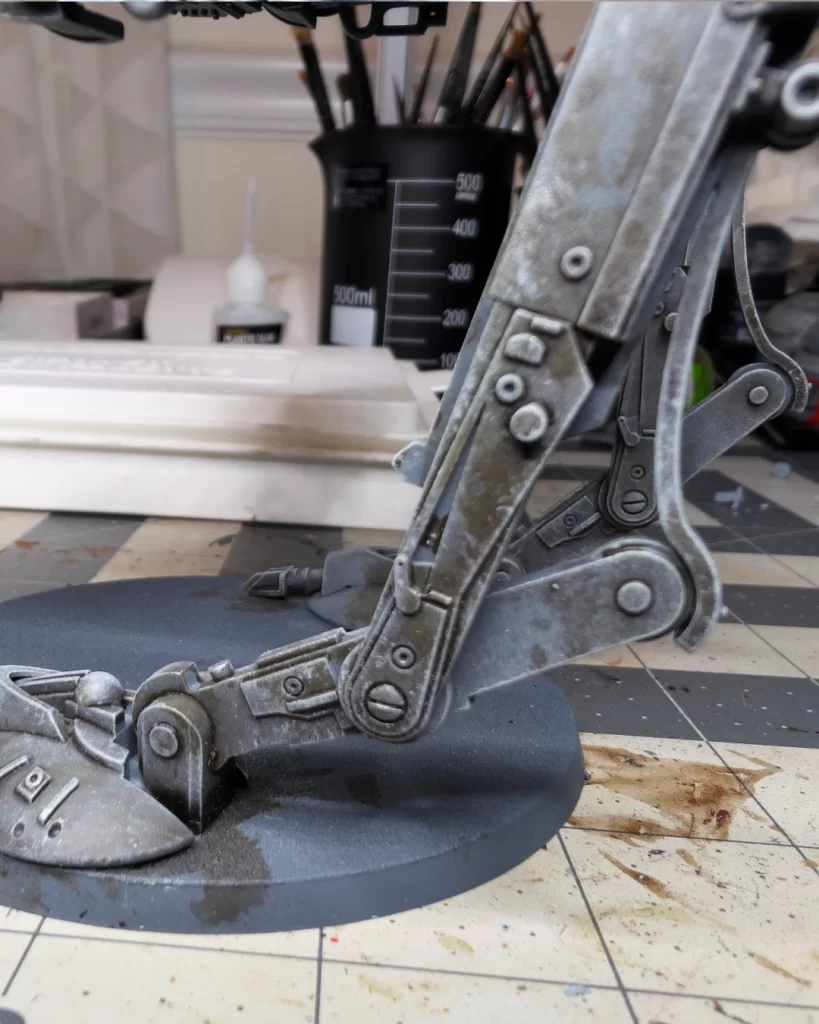
The platform is where most of the machining and movement is going to be, and the legs are exposed to the elements the most. I’m painting this AT-ST for the Forest Moon of Endor, so it’s going to be a little bit of a mess.
Applying a Second Wash Color
The next step is to add a second color of shading, Athonian Camoshade, to contribute further and make dynamic the staining and weathering to the AT-ST.
Randomly add patches of the brown-green shade to the most prominent areas of the model that might see weathering or be affected by the Endor forest terrain. Imagine the AT-ST walking through thick trees and shrubs. It may be a damp and humid environment.
On the sides of the cab we have some splotchy staining as well where the walker may have crashed through wet trees, ripping off branches. The green staining is going to trail down onto the platform and upper legs as well. This will help provide a base coat and contour color from weathering and staining highlights we’ll put on the model in the next steps.
Using the Athonian Camoshade in the lower areas of the model will be a stained base coat for when we apply layers of the terrain to the base and legs. Imagine the walker crushing through young trees and thick bushes and brush as well. We’ll have a separate tutorial on how to make the forest base, but we’re thinking ahead and incorporating our future base onto the model.
Layering for Smooth Color Transitions
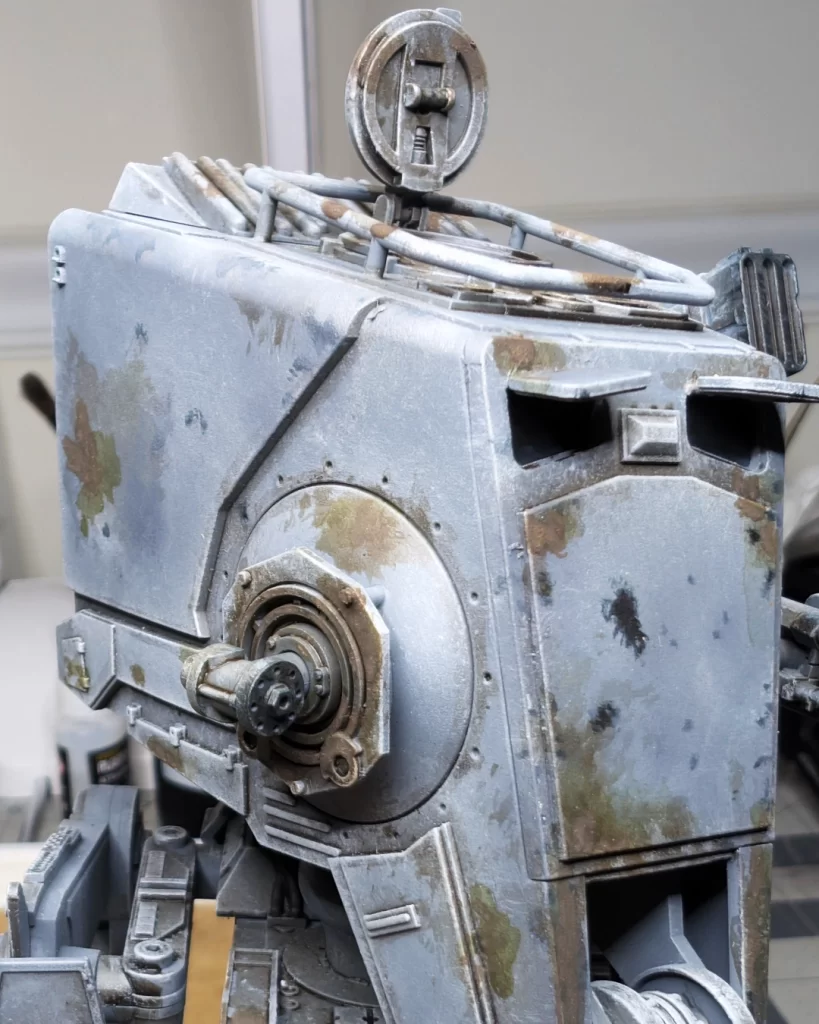
At this stage, we’re going to go back to drybrushing like we did in the base coat stage in order the soften and blend all of the shading to make it look more blended and natural. For colors, we’re going back to Mechanicus Standard Grey, which we’ll use primarily to soften and blend the shaded areas. We’ll also use Administratum Grey, a very light color, to highlight some of the features and edges of the walker.
Using a combination of heavy edge drybrushing and stippling we can keep the weathered staining effect and also bring back the metal color to enhance the details of the machining.
For the flat surfaces we go to swirling and stippling drybrush technique. This helps to relieve some of the hard staining edges, leaving the staining as a base for weathering, and making the mud look more natural.
This method is a good opportunity to correct any shade pooling or overuse. After the model was dry I thought I went too heavy on the feet. Using light to medium pressure I cleaned up the staining and brought the metal color back through the shading.
Layering to Add Contrast
In this step, we’re using a lighter grey, Administratum Grey, to do an edge drybrush on all the details to help make the details on the model pop and to make the finished model readable.
Drybrushing in a light grey, here we use Administratum Grey, is a quick and effective way to pick out the raised edges, panel lines, and textured surfaces on a vehicle, giving it definition and a more realistic, worn appearance. This technique is perfect for accentuating sharp armor plates, rivets, and surface details, especially when using a slightly lighter shade of the base color or a metallic tone for weathering.
Beginning the Highlighting and Detail Process
The foundation of our paint job is complete, and we’re ready to finish the weathering and add details to the model.
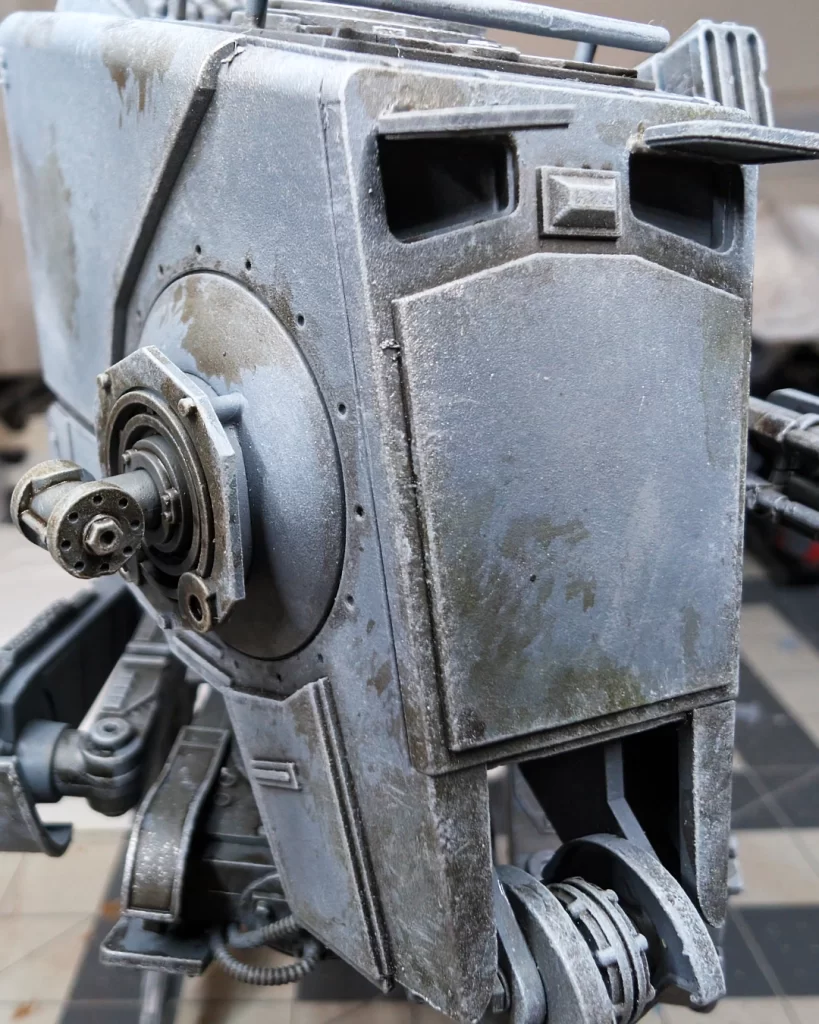
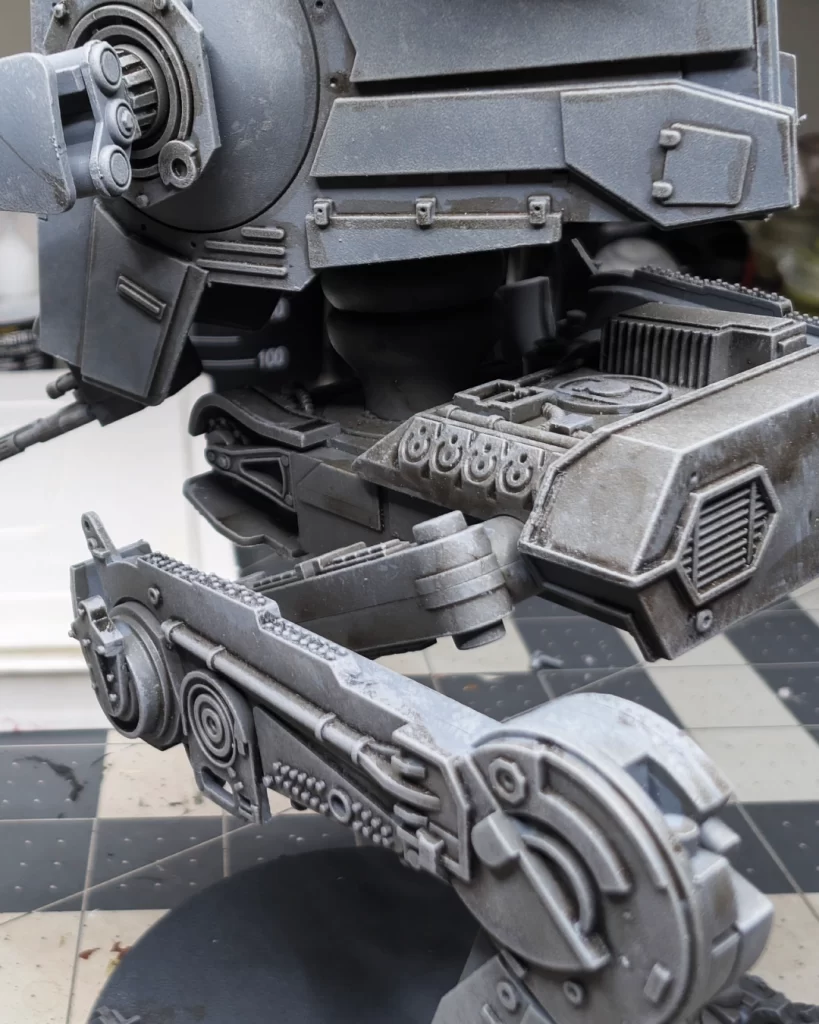
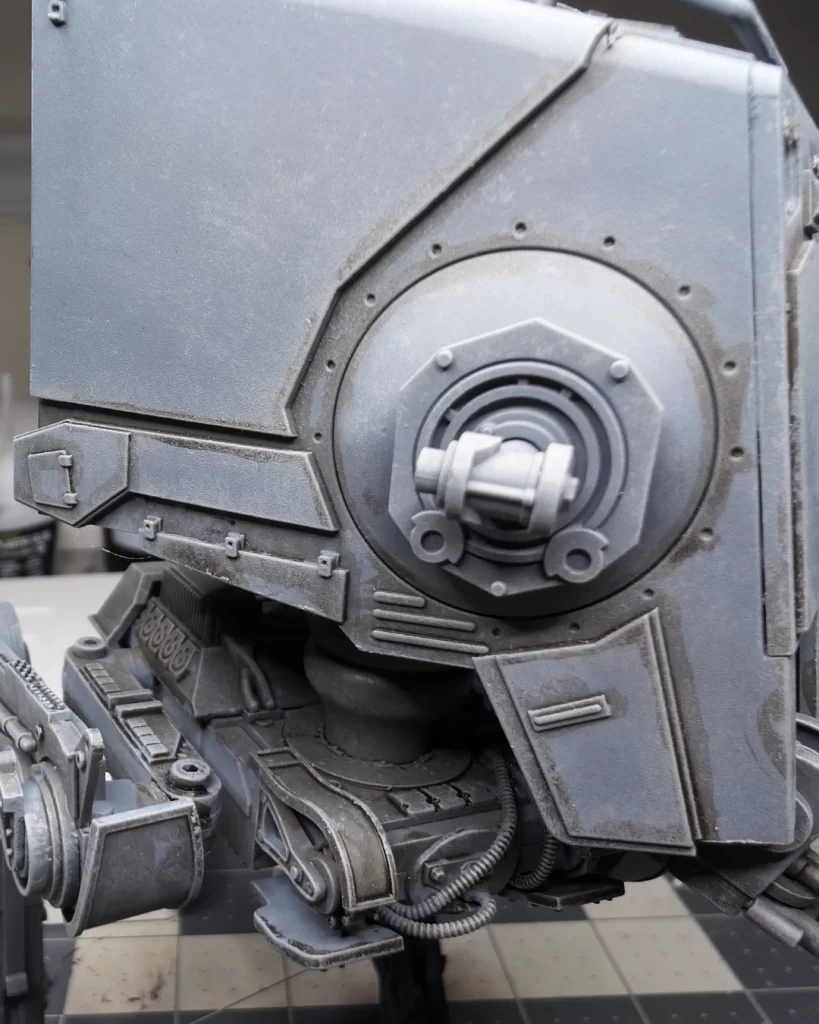
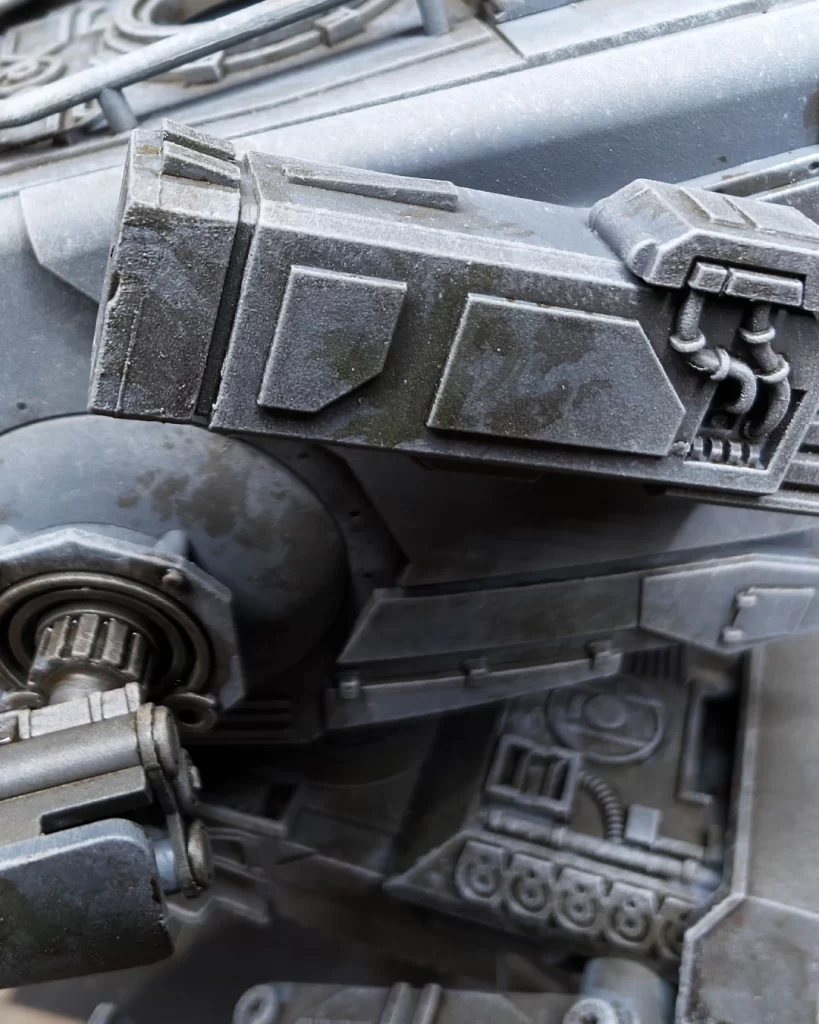
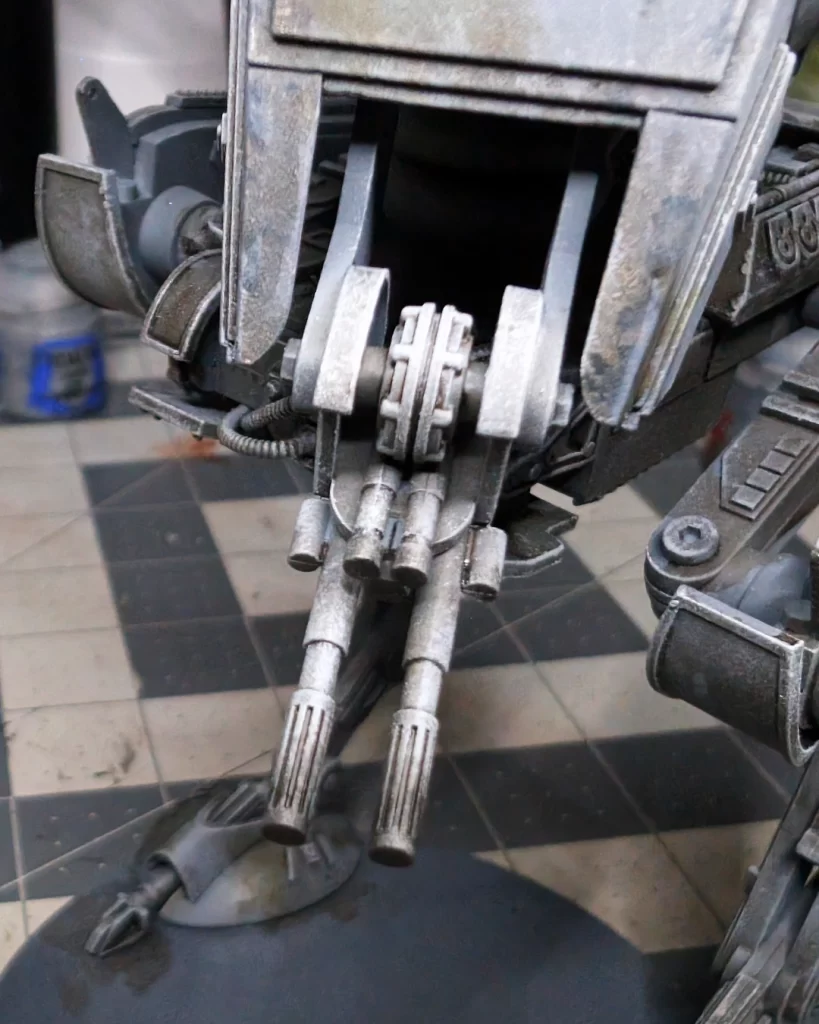
Use Leadbelcher, or any medium to dark silver on edges and corners to add some wear on the model. I may have gone a little heavy on this example – less is more when adding these effects. For this method you can use a sponge, or you can use a dandelioned drybrush.
Continuing the Highlighting and Detail Process
Similar to how we add brightness to raised details by highlighting with bright colors, we do the same with darker colors and recesses to push contrast.
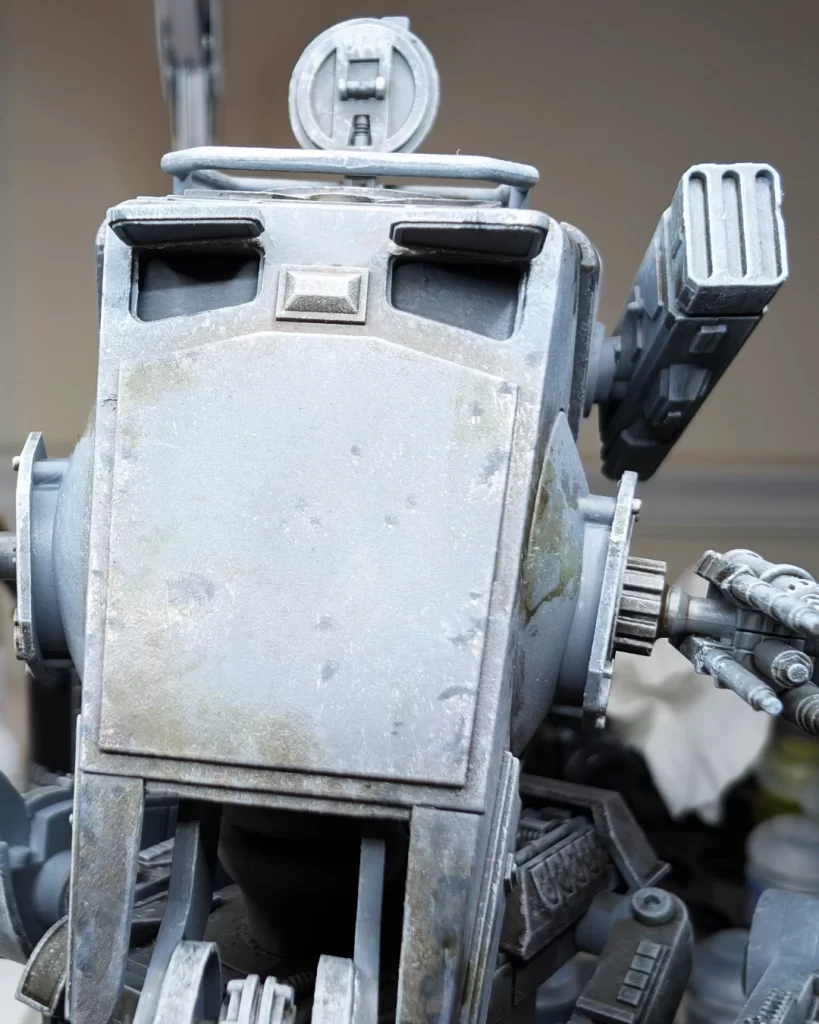
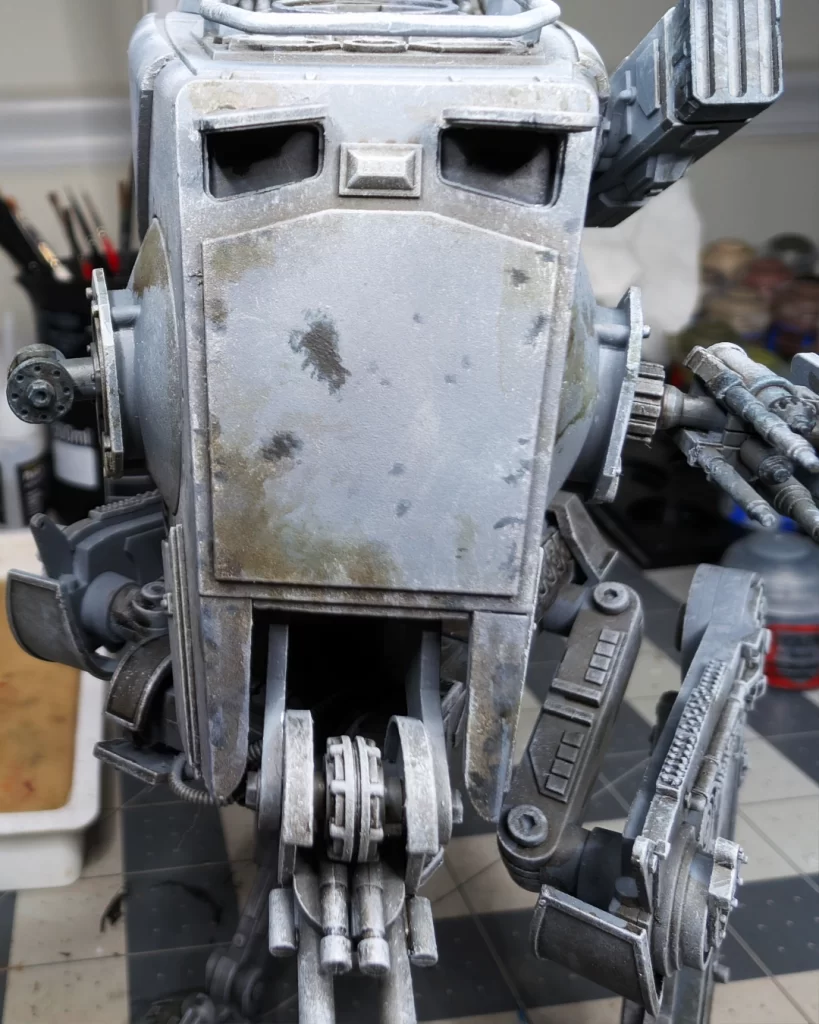
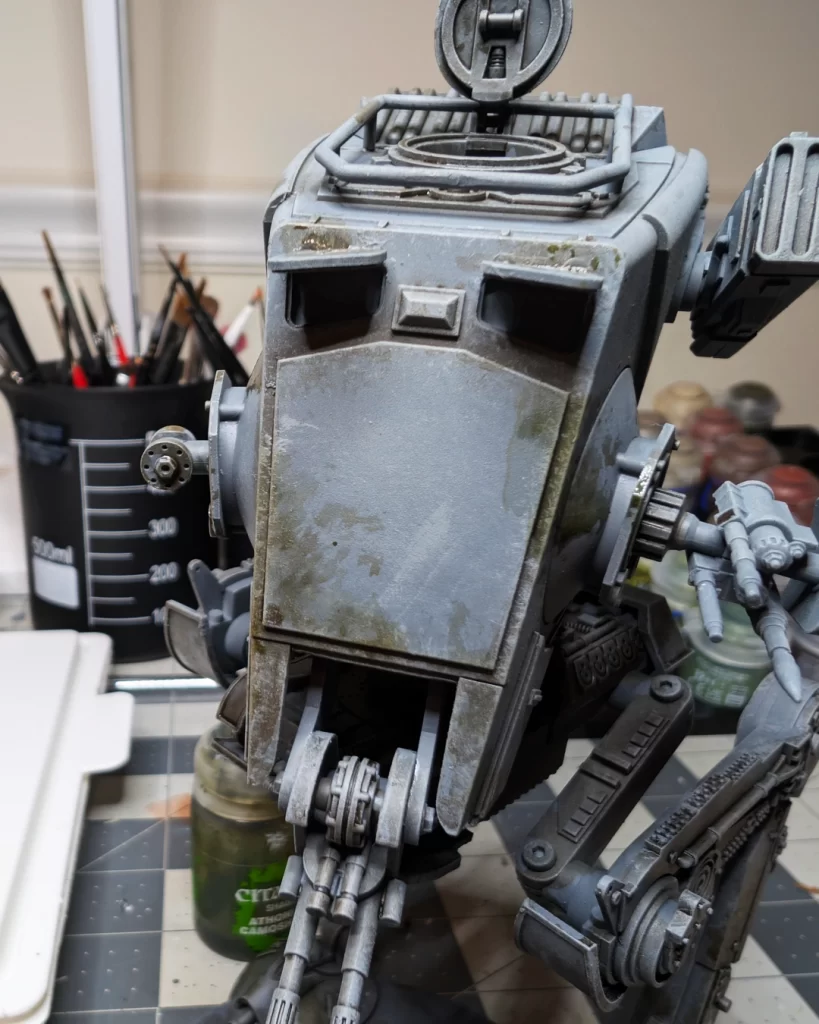
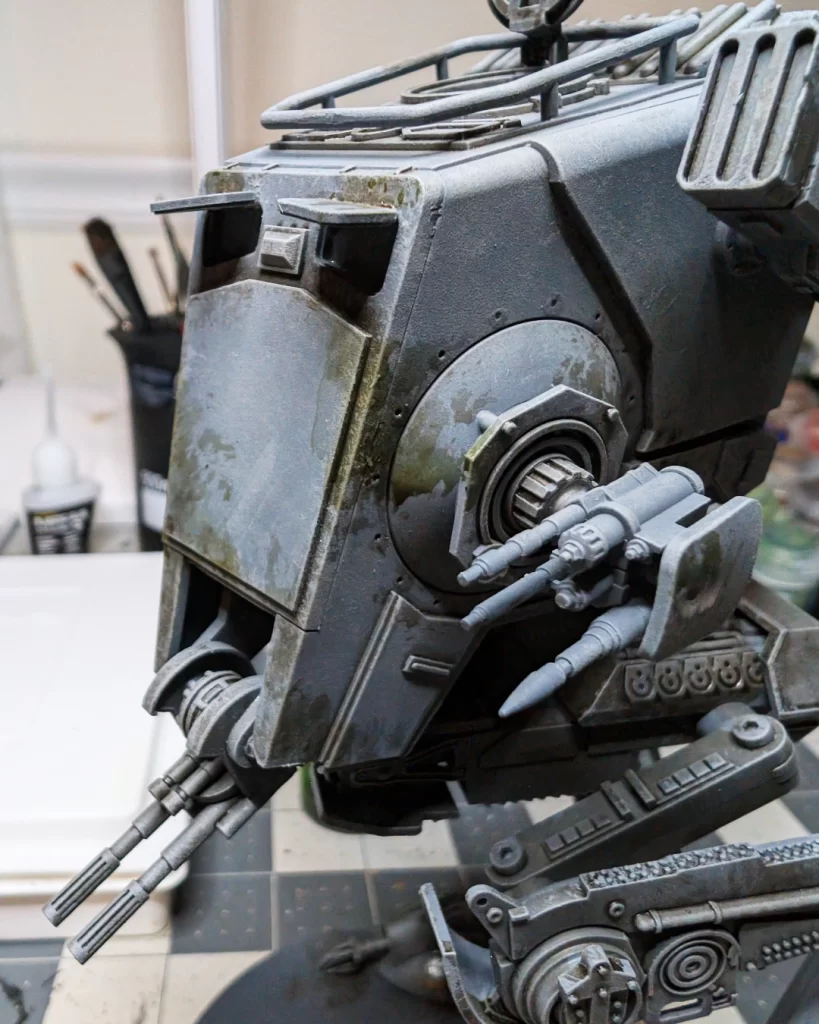
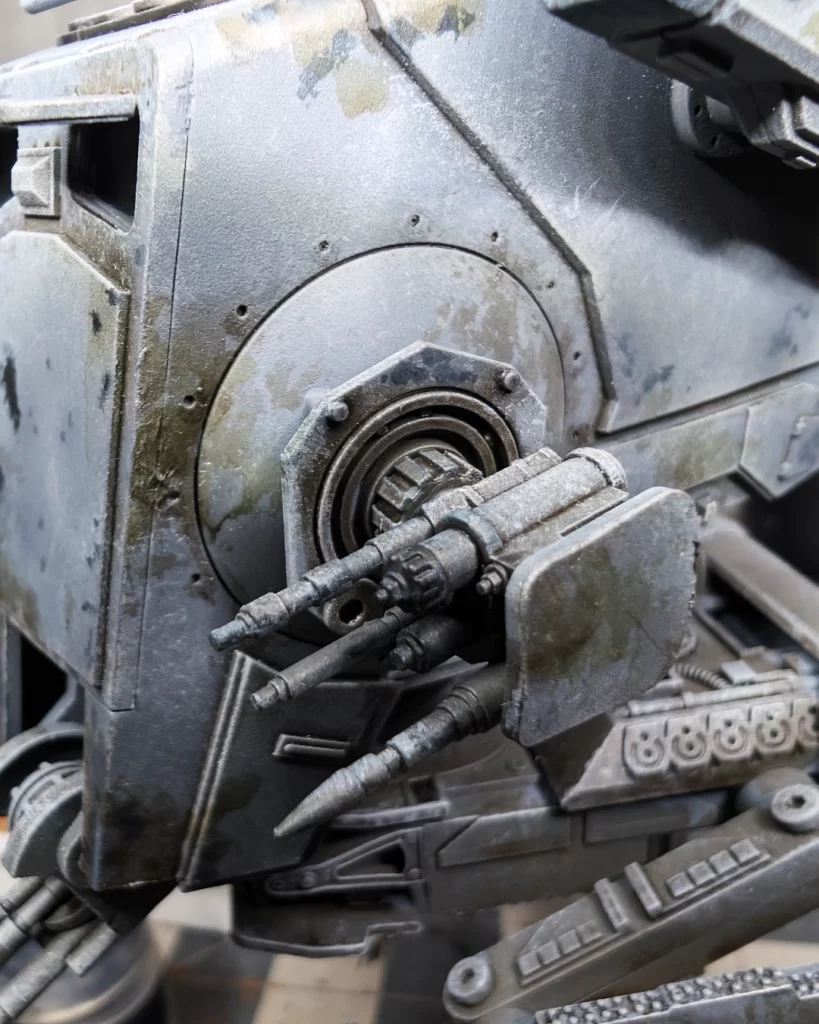
In this step, I used Corvus Black to paint the windows. In pictures 2 and 3 I added some rough splotches to look like scorch marks from blaster fire. Also, anywhere there is a prominent spot of the leadbelcher we added in the previous step, I added a small splotch of the corvus black to give that larger “chip” more depth and dimension.
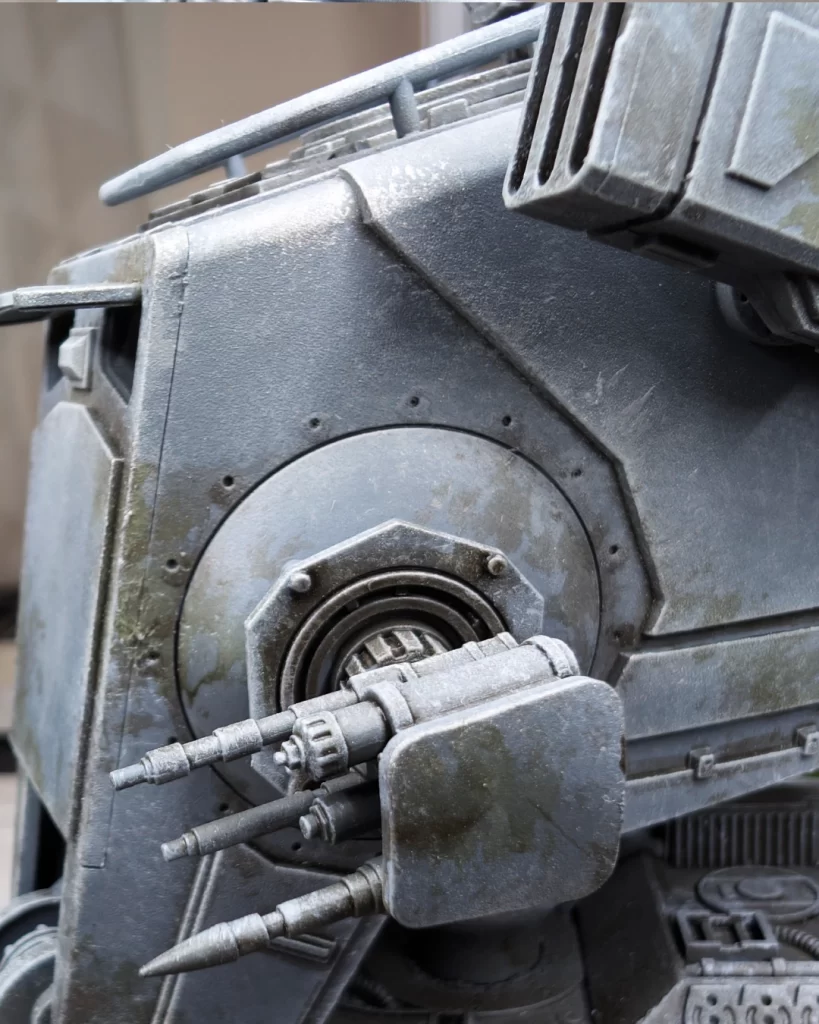
In this step, you may want to very lightly drybrush or glaze corvus black onto the twin blaster cannons on the front, the concussion grenade launcher, the mortar launcher, and the twin light blaster cannon. This will be the beginnings of our “scorched” looking effect from the weapons firing.
Developing the Details
We’re going to go a little darker with our details in this step with some Abaddon Black.

Lightly drybrush and stipple black around the tips of the various weapons on your walker. Corvus black foundation underneath, from our previous step, will provide a nice dark to light color blend to prevent over-saturation.
In the third picture I painted a light layer of Abaddon Black towards the center of the windows. Similar to how your windshield wipers clean the center of windows, imagine the pilots hastily wiping the viewports from dust, muck, and smoke the windows accumulate.
Final Highlight – Completing the Weathering
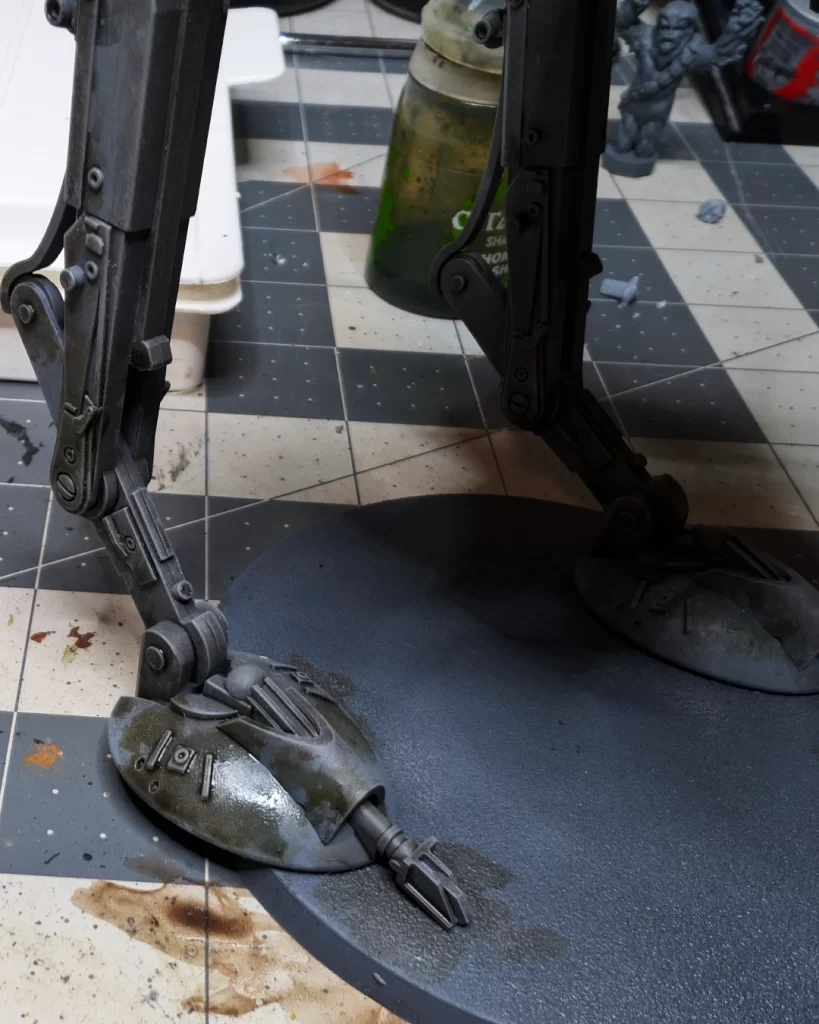
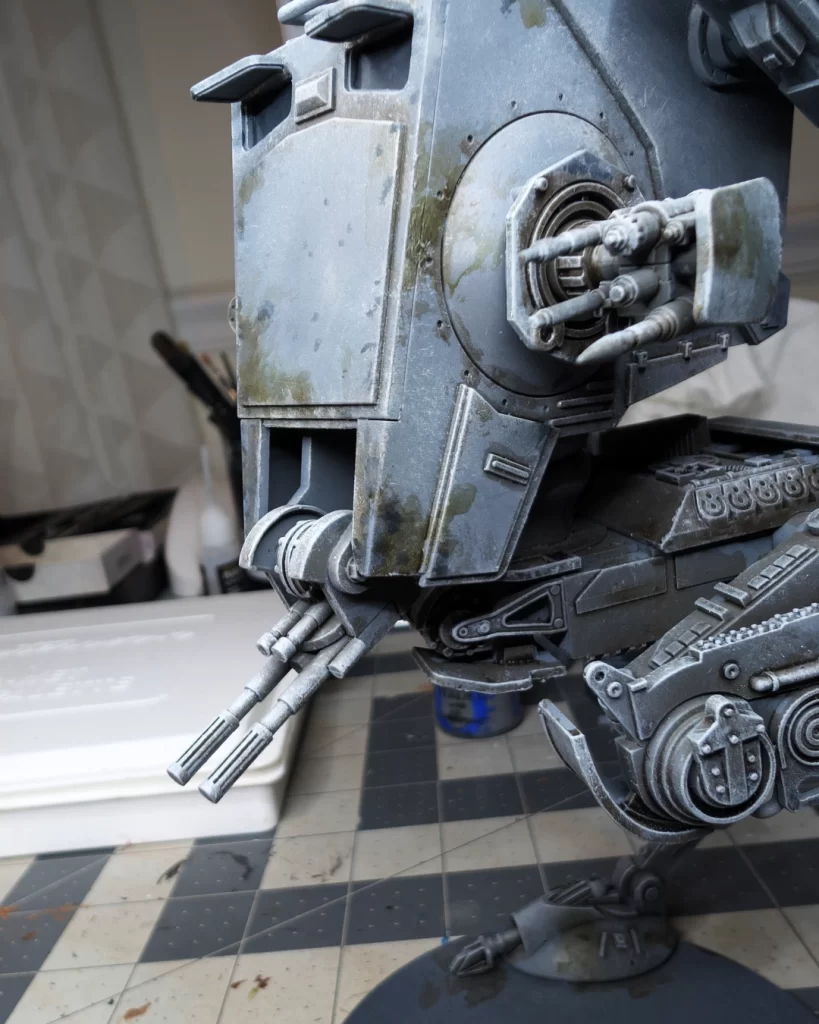
In this final step, use a gritty technical paint, such as Typhus Corrosion, to add grease, grime, and rust to strategic areas on the model.
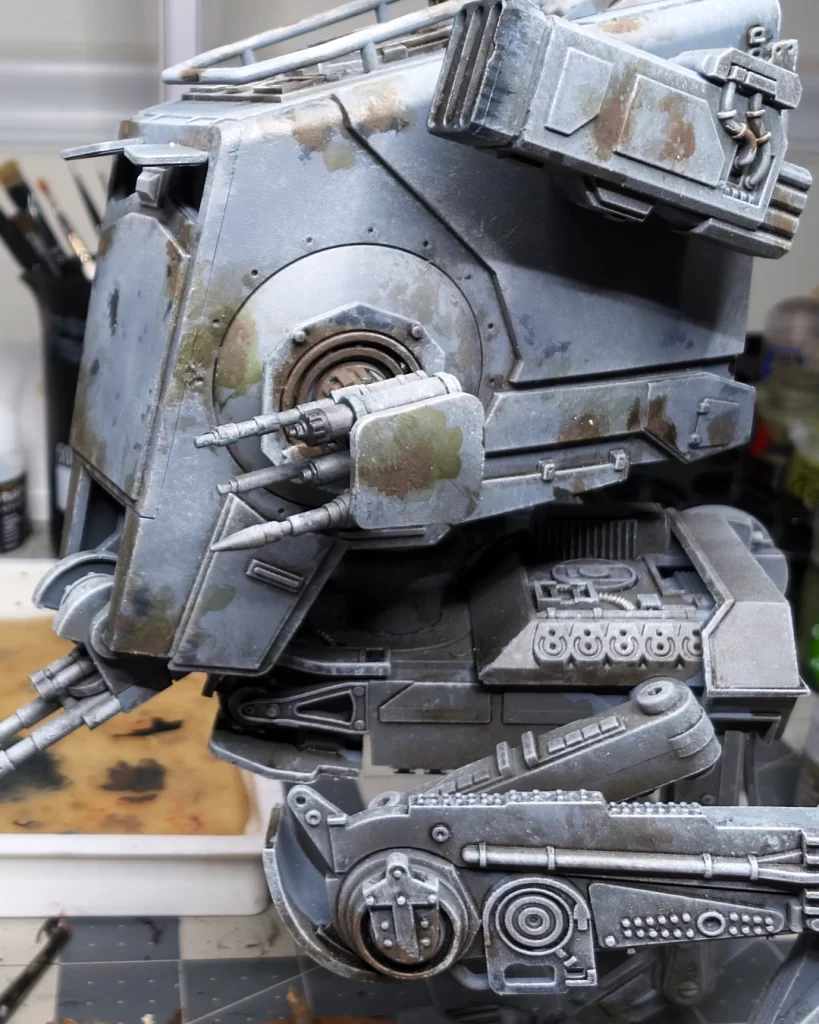
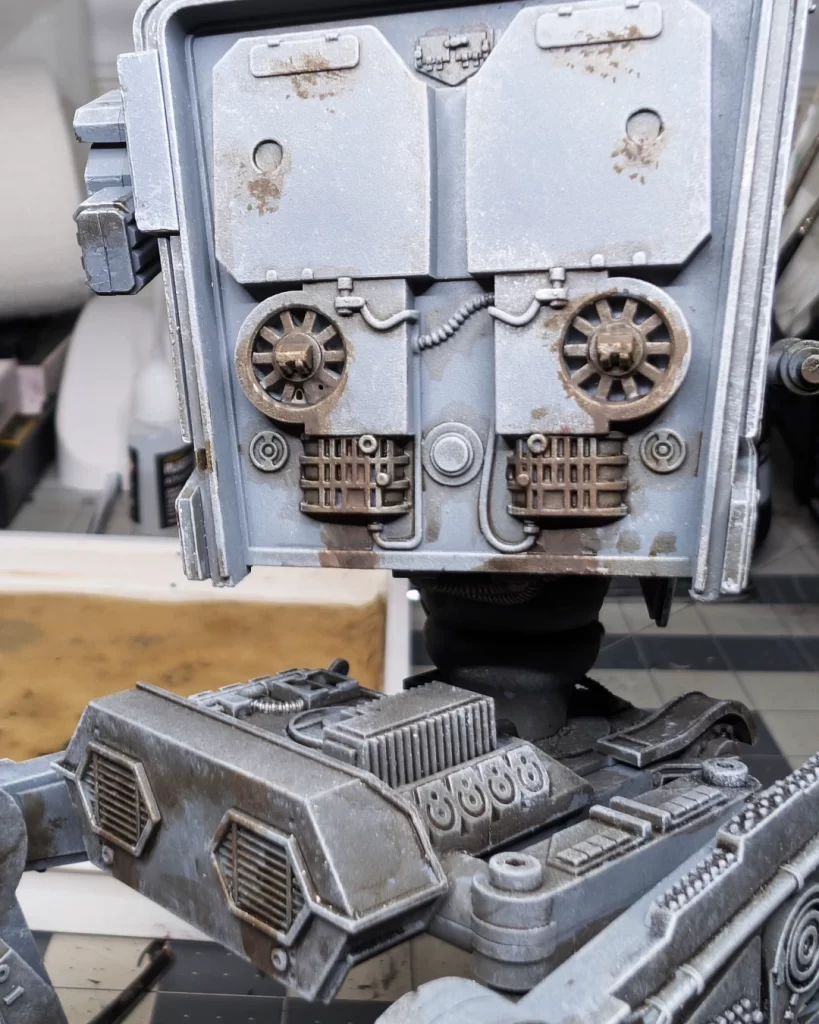
Apply the Typhus Corrosion lightly at first, building it up. It’s one of those effects where less is more. As in the photos, I tried to apply the grime to rotating machinery, gears and vent fans, and exhaust ports.
An option to do after this step is lightly drybrush Ryza Rust, or any kind of orange color, to places where you would want to indicate some rust.
As always, you can go back and clean up the model with some drybrushing and stippling of Mechanicus Standard Grey and Dawnstone if you’re not happy with some of areas you’ve painted.
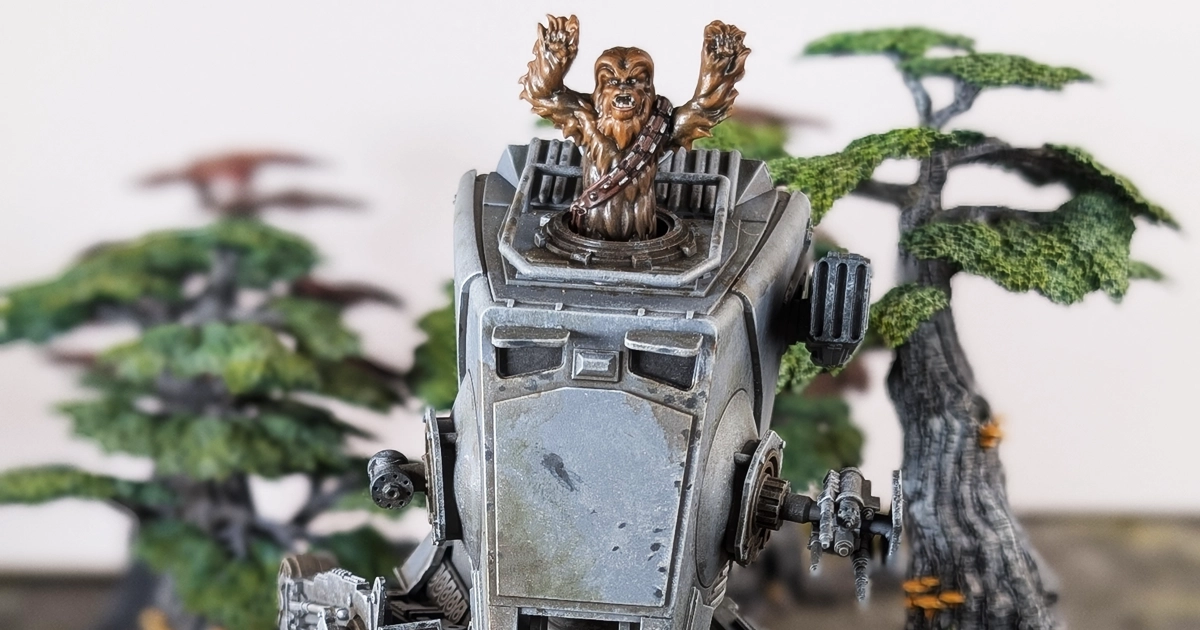
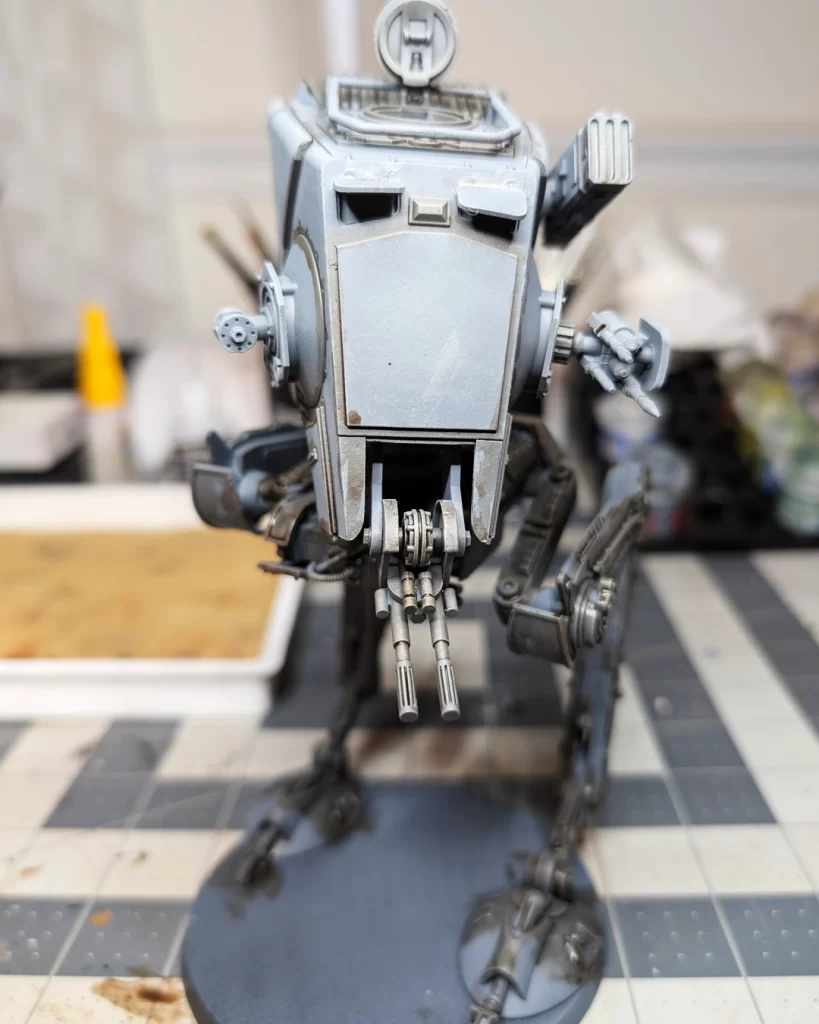
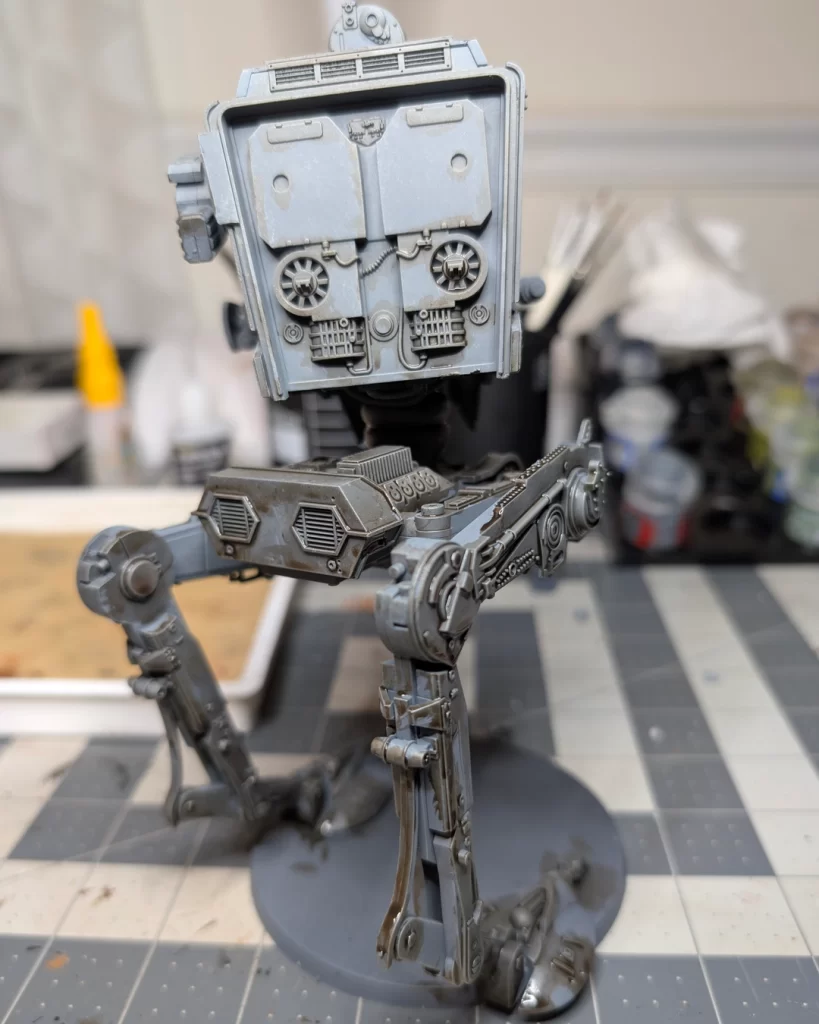
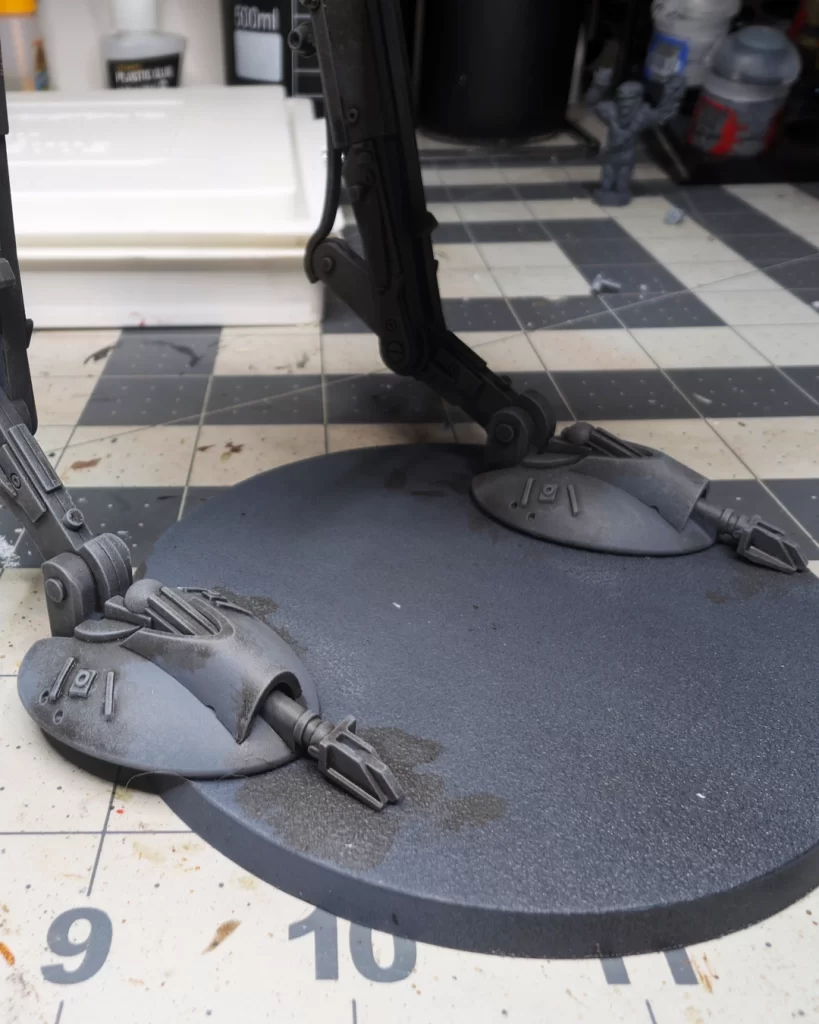
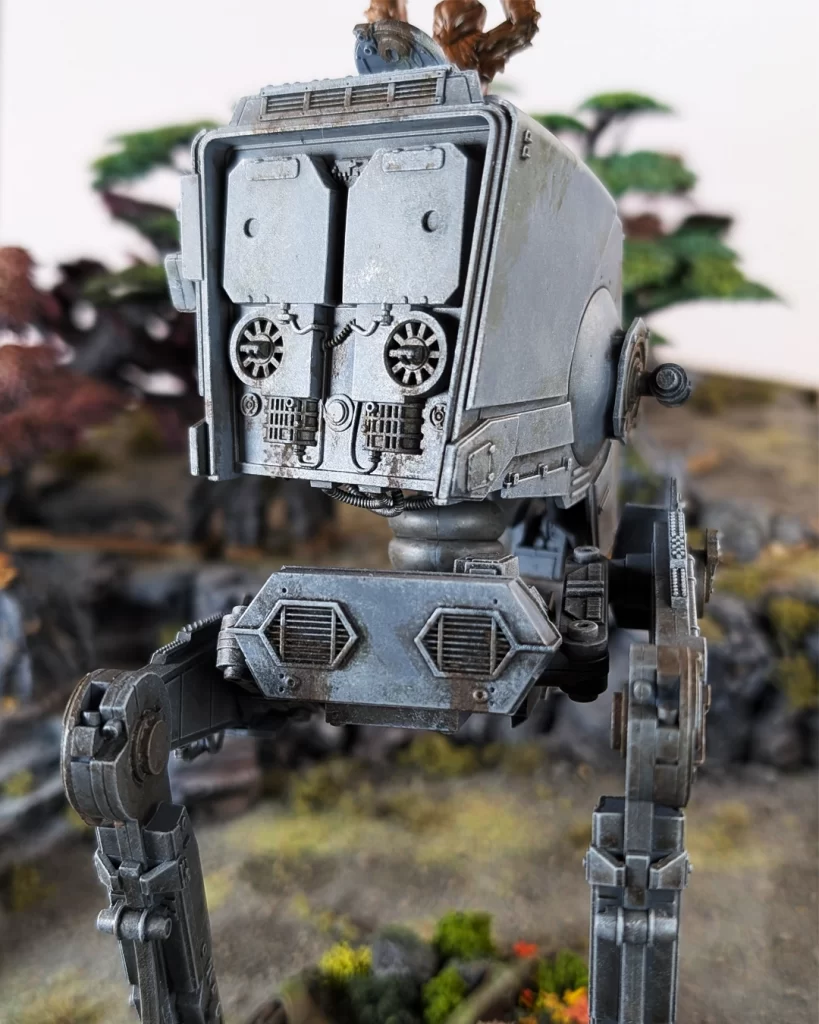
Finished AT-ST Walker Vehicle
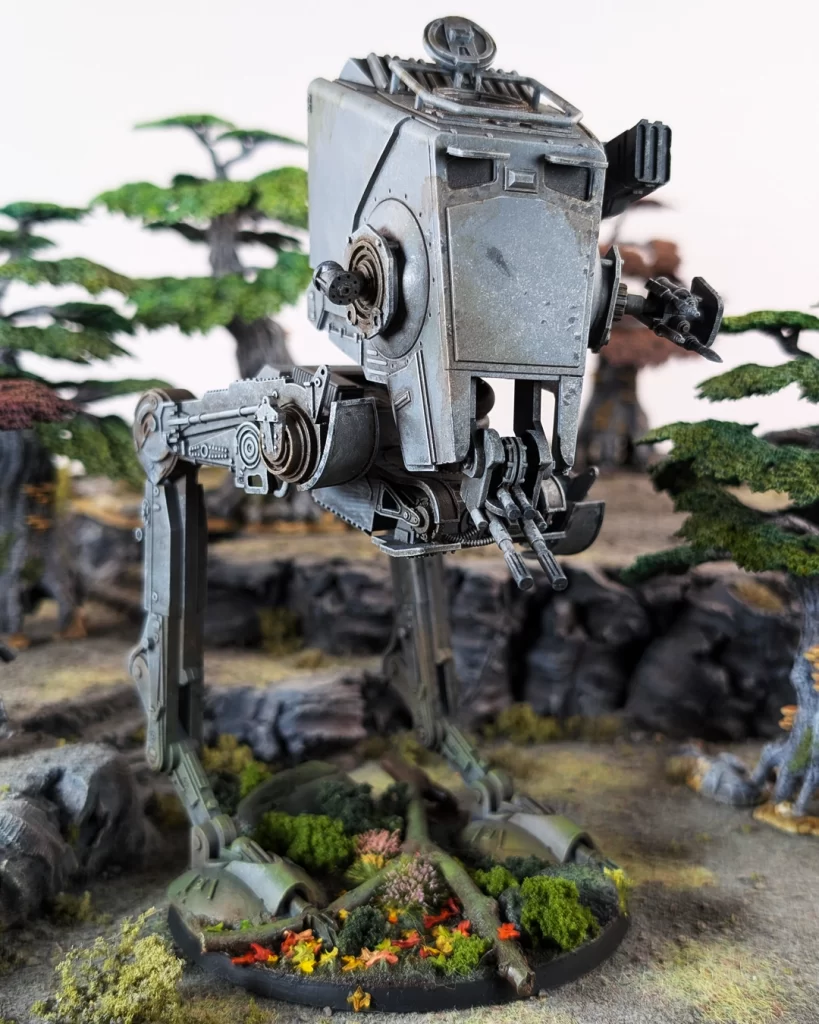
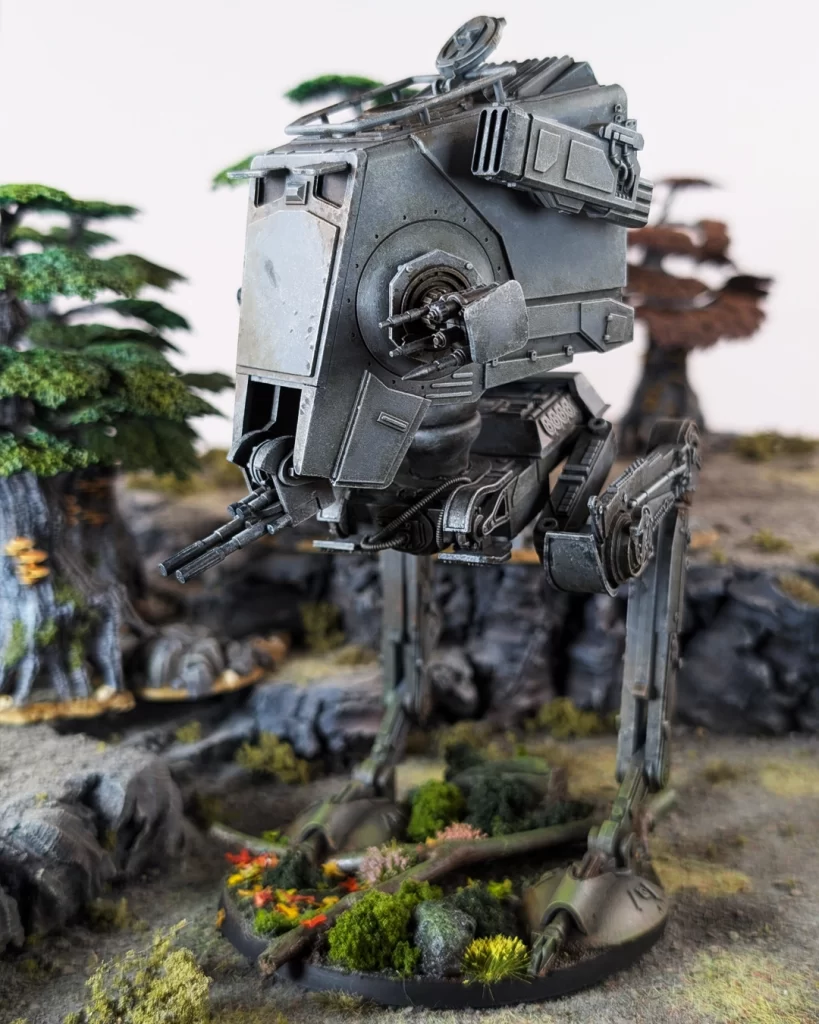

Our finished AT-ST. In the next steps of this guide we’re going to paint Chewbacca as our pilot. I didn’t paint General Weiss because this was a commission paint job for a Chewbacca fan who is not interested in playing the game.
Also, in this photos above our AT-ST has been fully based in our Forest Moon of Endor theme.
*** Do Not Varnish the Model Yet – if you’re going to follow our Forest Moon of Endor Basing Guide
Our finished AT-ST. In the next steps of this guide we’re going to paint Chewbacca as our pilot. I didn’t paint General Weiss because this was a commission paint job for a Chewbacca fan who is not interested in playing the game.

Painting the AT-ST Pilot – Chewbacca
As an added bonus, here’s a painting guide on how to paint Chewbacca. Paint colors used in this part of the tutorial can also be found in the AT-ST Walker Paint and Hobby Supply List.
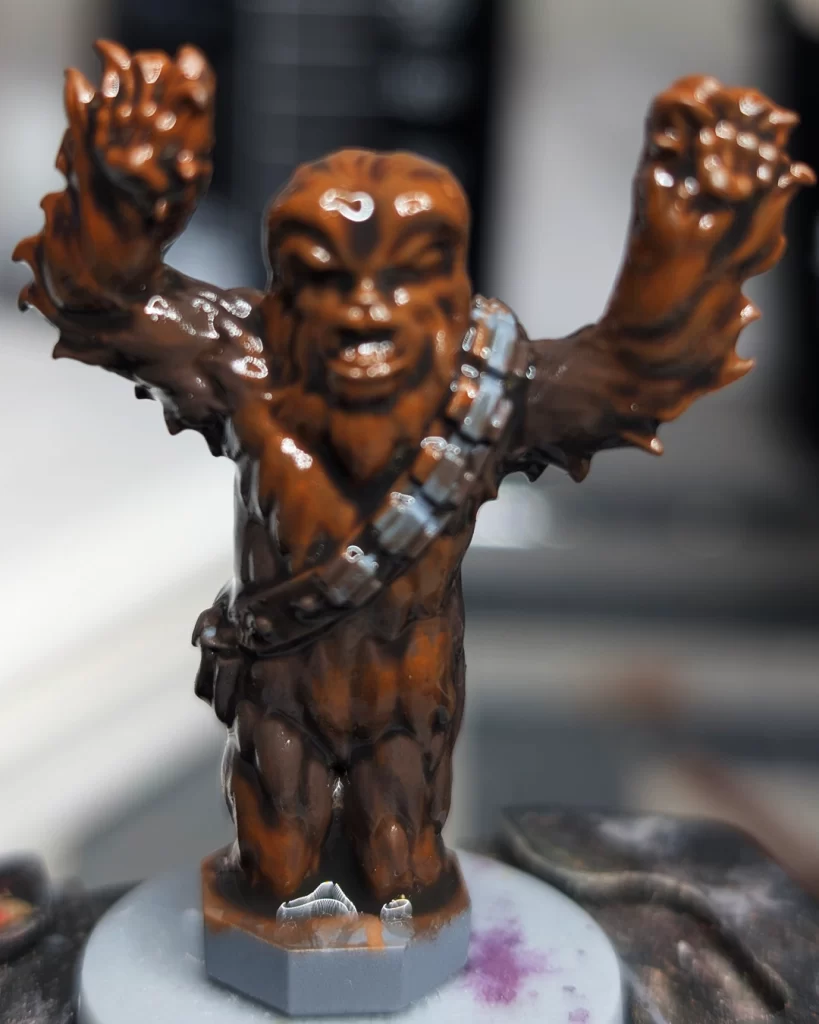
Basecoats For Chewbacca
Our basecoats include four colors: Dryad Bark, Mournfang Brown, Doombull Brown, and Leadbelcher.
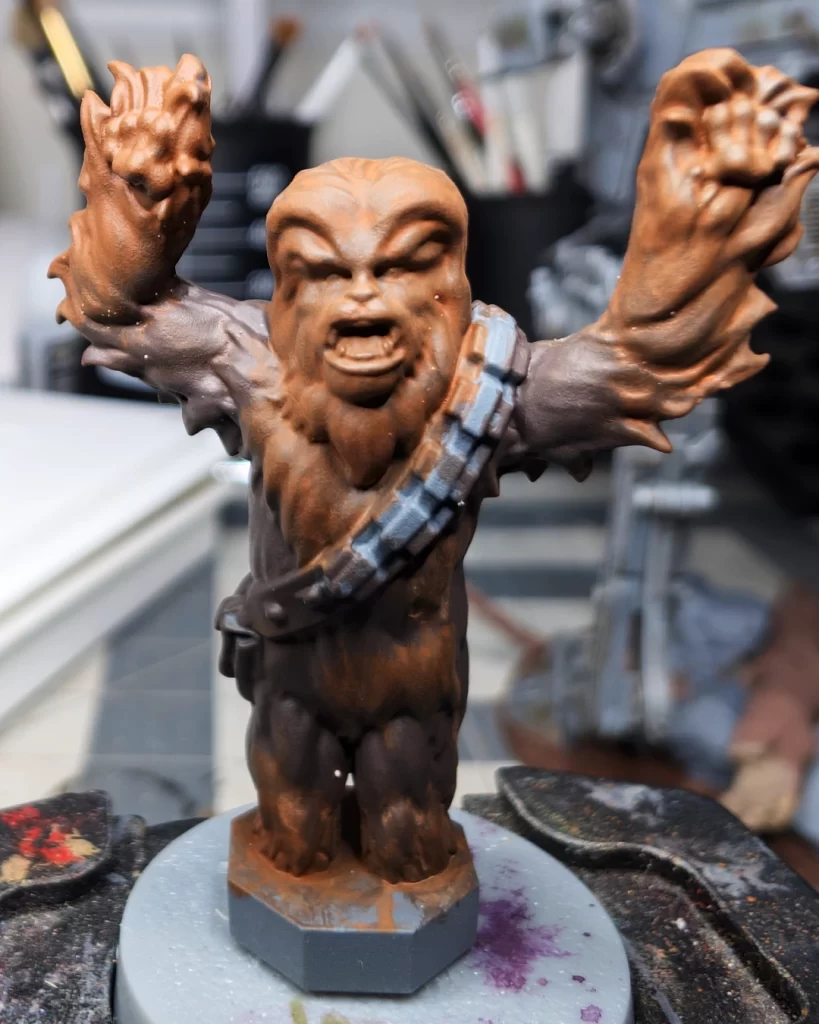


Begin by basecoat all of Chewbacca’s fur with Dryad Bark. You don’t have to avoid the satchel or the strap, but I find neatness is good for practice, especially when mistakes don’t matter.
On Chewbacca’s legs, forearms, head and around his neck use a lighter brown, Mournfang Brown, and you can blend the lighter color into the Dryad Bark by wetting your brush and lightly dragging some Mournfang into the Dryad bark while the paint is still wet. We’re not going for a full wet-blend necessarily, but it’s a good way to blend to the fur up a little.
The satchel and strap can be based in its entirety with Doombull Brown. You’ll want to be neat here so that you don’t mess up Chewbacca’s fur.
And the last basecoat step is to paint the ammo magazines and the metal snaps on the satchel with leadbelcher or a dark silver.
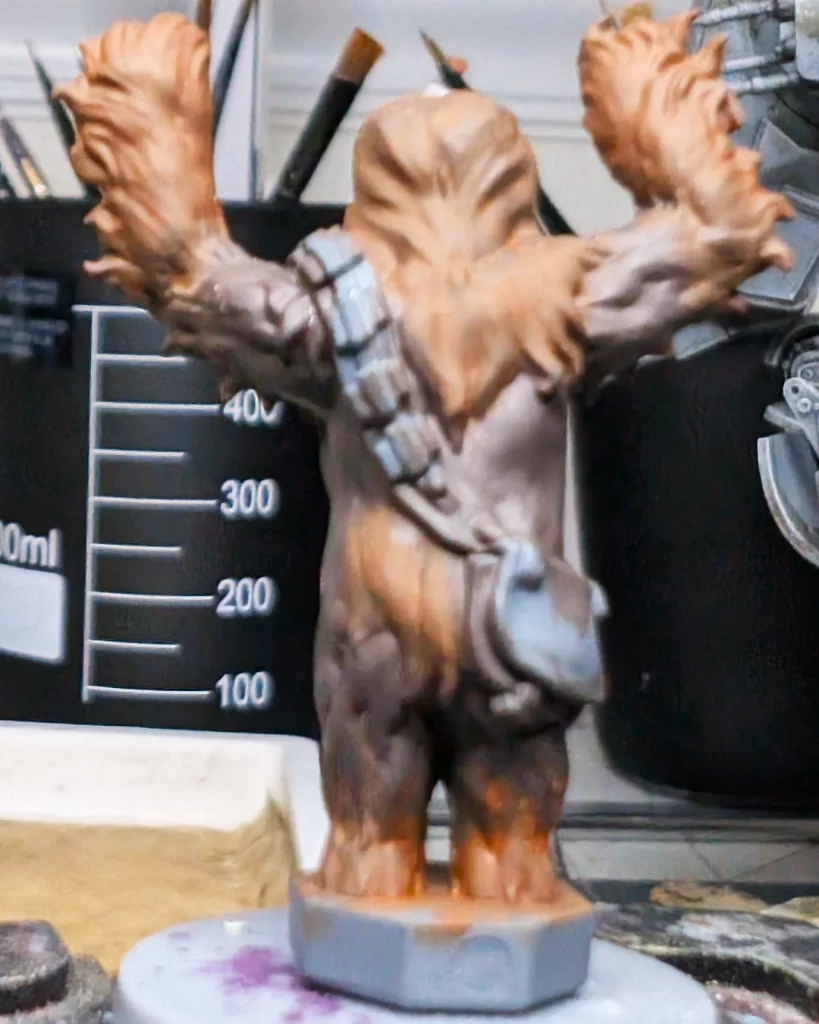
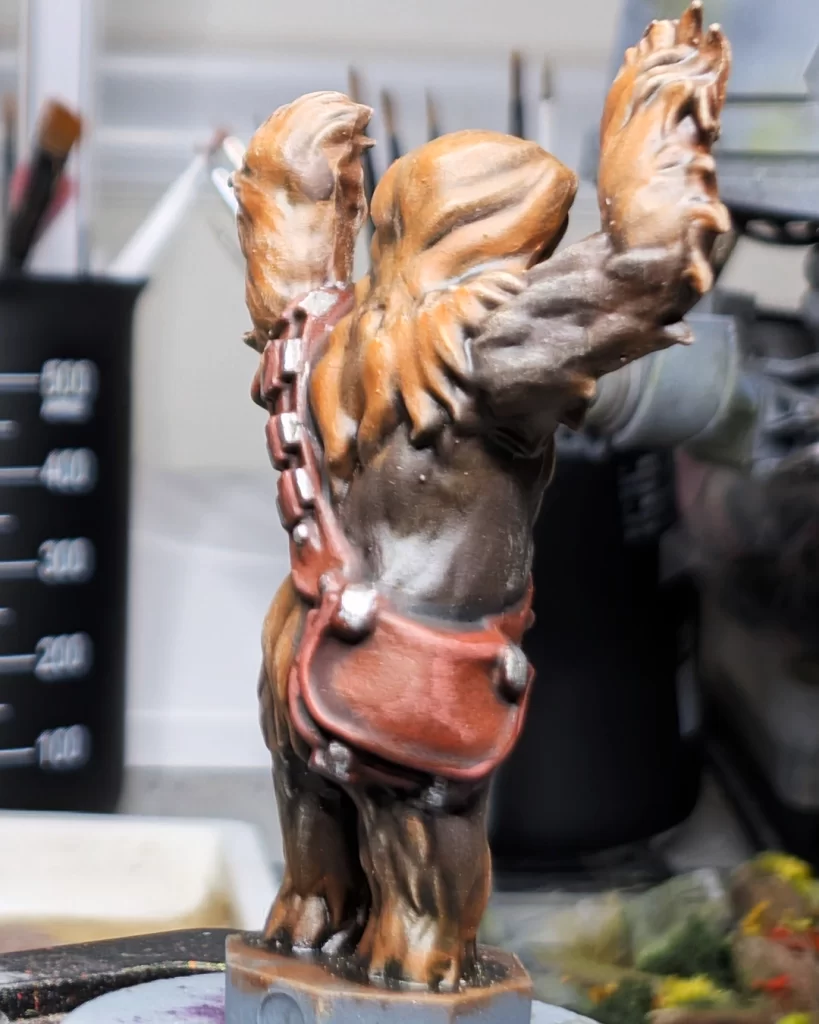
Two Washes For Chewbacca
Following very basic washing techniques using both Agrax Eartshade and Nuln Oil.

The first wash is Agrax Earthshade, a brown shade that will add natural contrast to the recesses in Chewbacca’s fur. Be careful not to get this shade on the satchel or strap.
On the satchel and strap use Nuln Oil. While it’s a black wash, it does behave a little differently by settling only into the recesses of the object painting and thus yields less coffee staining on the raised and flatter surfaces. The black color is traditionally used for metals and machines and works splendidly for the metal bits on the satchel and also makes the leather look treated.
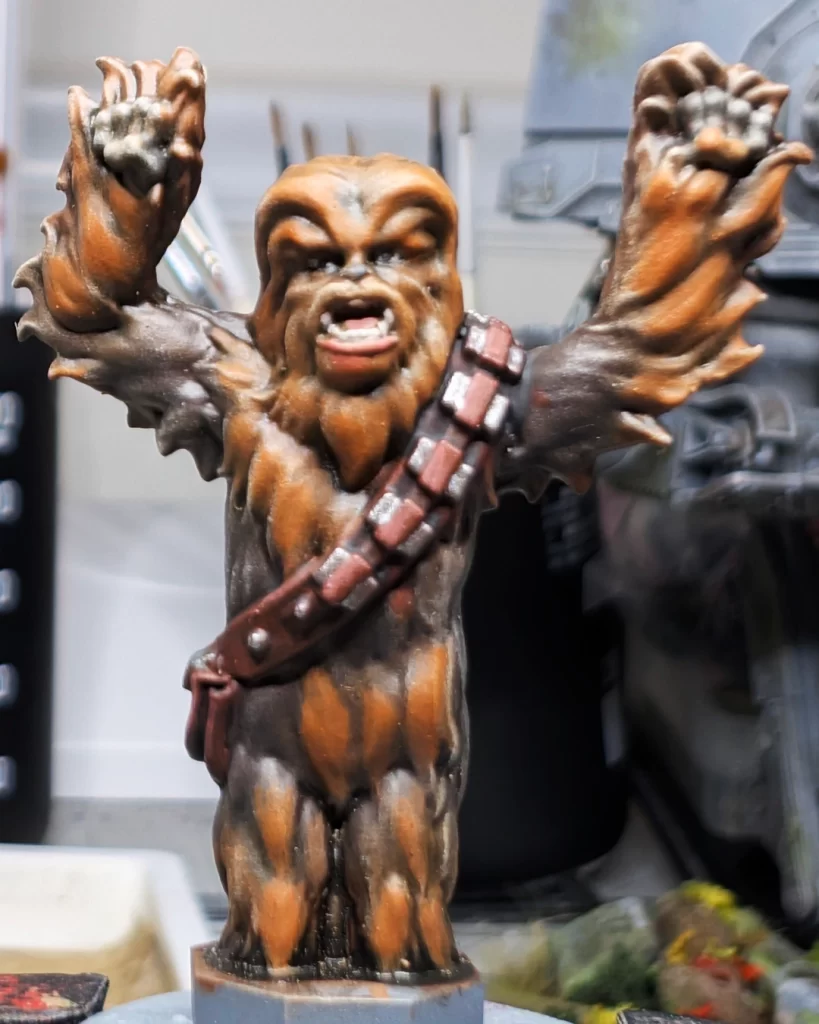
Layering Chewbacca’s Fur
In the layering step I used two techniques. I started by drybrushing the fur, and then I went to a small layer brush to bring up the color on the more prominent fur surfaces. We’re using Baneblade Brown and Skrag Brown in this step.
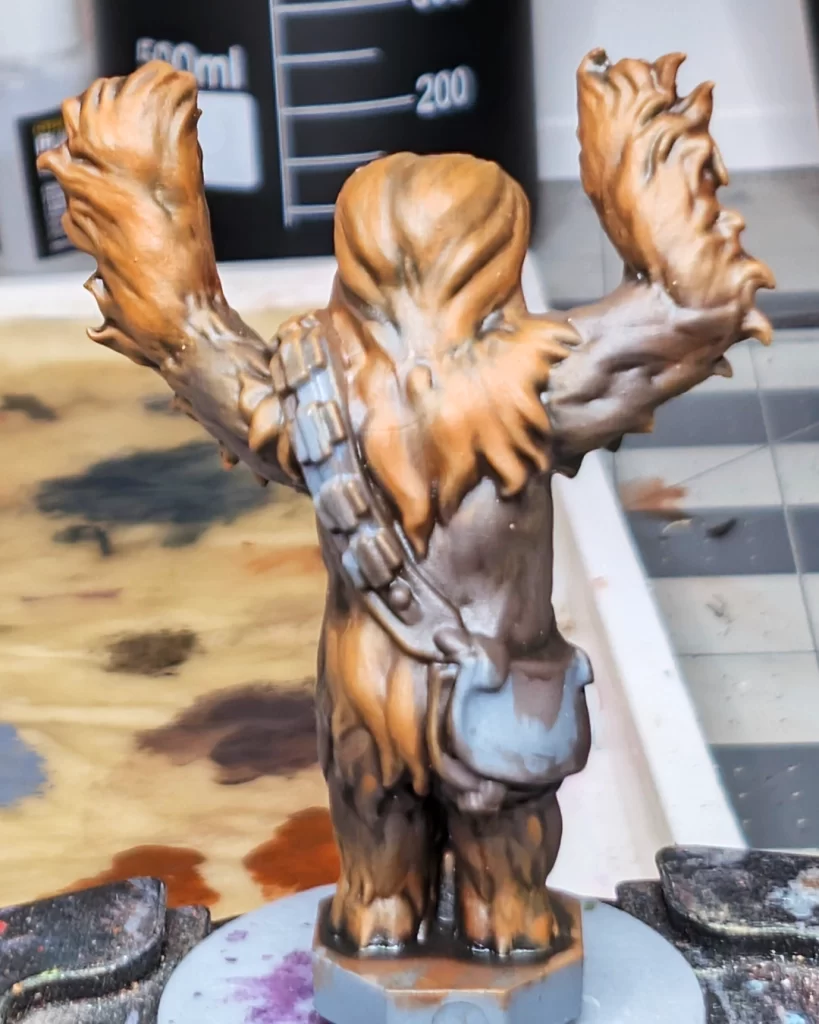
I started the layering process by using a medium dome-tipped drybrush on the fur. I used very light pressure to get the feel for how the paint was going to apply. These rounder-tipped brushes with heavy bristle density can fill in areas with color fast, so always test by starting with light pressure first.
I used Baneblade on the Dryad Bark (darker) parts of the fur, and I the I followed up with Skrag Brown on the Mournfang (lighter) parts of the fur. It’s okay if you get a little Baneblade on the lighter parts of the fur, in fact, it can turn into a happy accident and add layers and color blending to the overall fur appearance.
The next step is to use a small layer brush for both colors and apply layers to the more prominent and raised parts of the fur. Give extra attention to Chewbacca’s head as that will be a focal point.
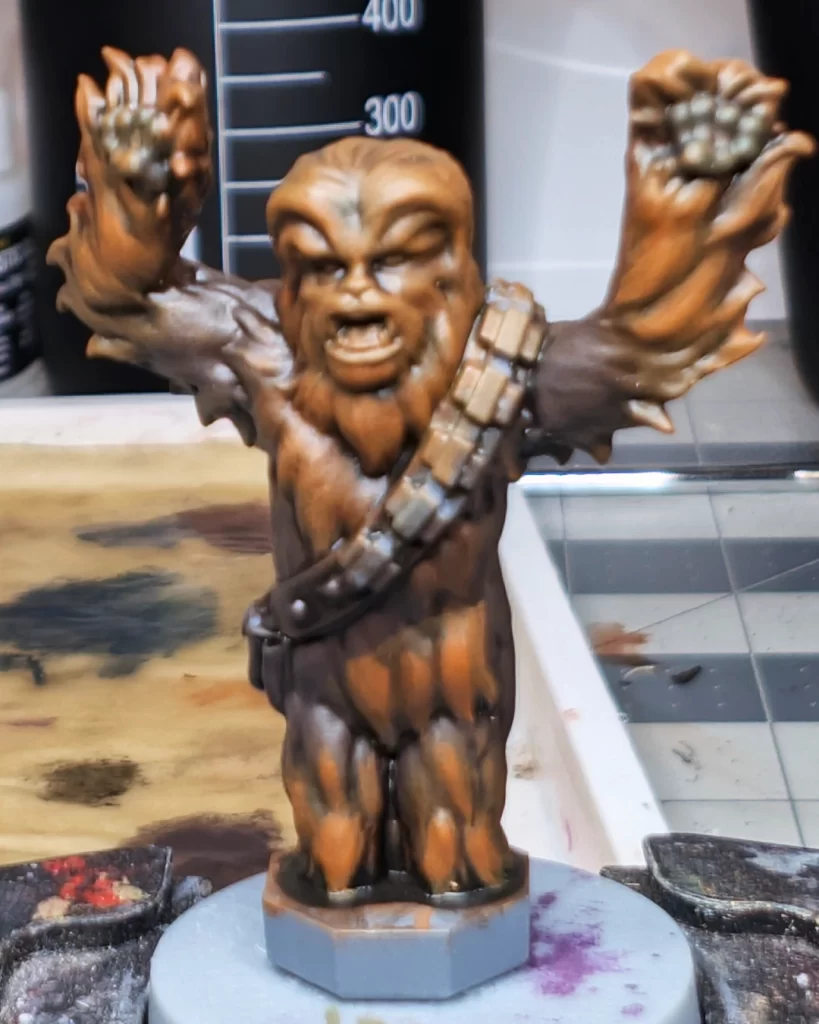
Highlights on Chewbacca
In these highlight steps we’re using Karak Stone, Tuskgor Fur, and Runefang Steel.
The first highlight is a drybrush, which can be a little messy, so we’re going to start with this before we do other highlights and details to make mistakes easier to clean up. With a small drybrush, very lightly drybrush Chewbacca’s fur with some Karak Stone. This will bring out some of the very top details and push contrast on Chewbacca’s fur.
Next, using a small layer brush or a detail brush, highlight your top-most edges and details of the leather part of the satchel using Tuskgor Fur. Also, layer in a little highlight on the leather straps holding the ammo magazines.
And finally, a simple edge highlight on the ammo magazines, buttons, and snaps on the satchel with brighten up that metal. For this, I used Runefang Steel, but you can use any bright silver.
On to detailing Chewbacca.
Finishing Chewbacca’s Details
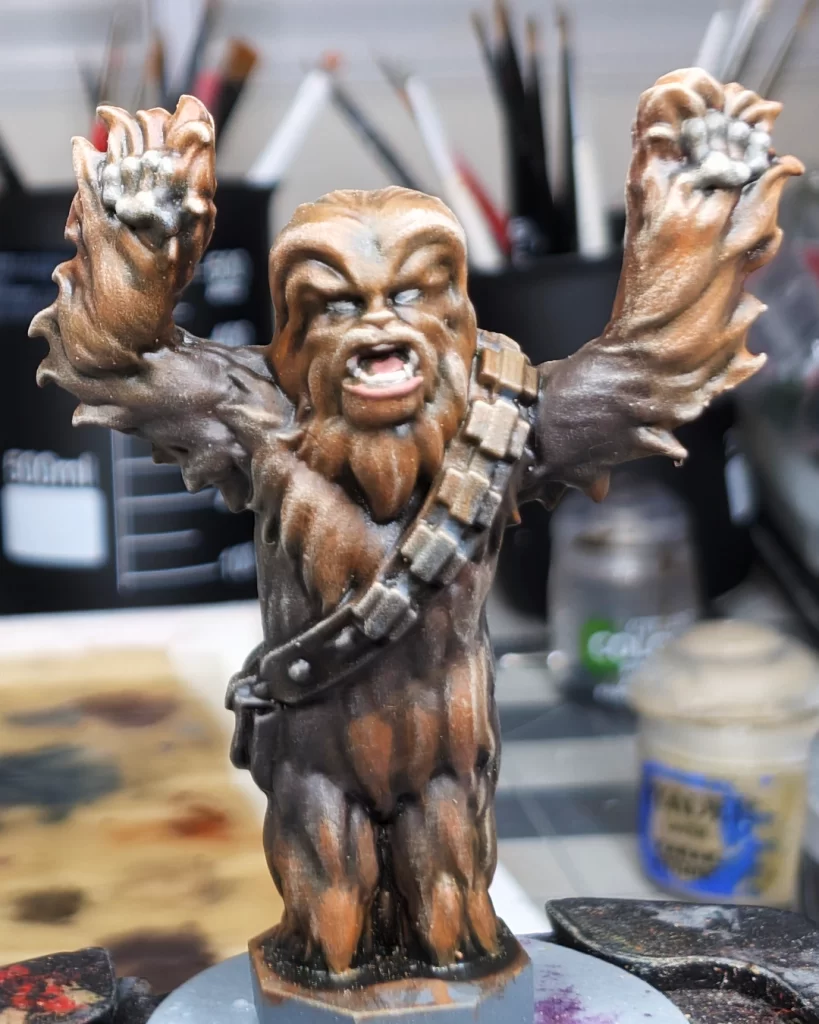
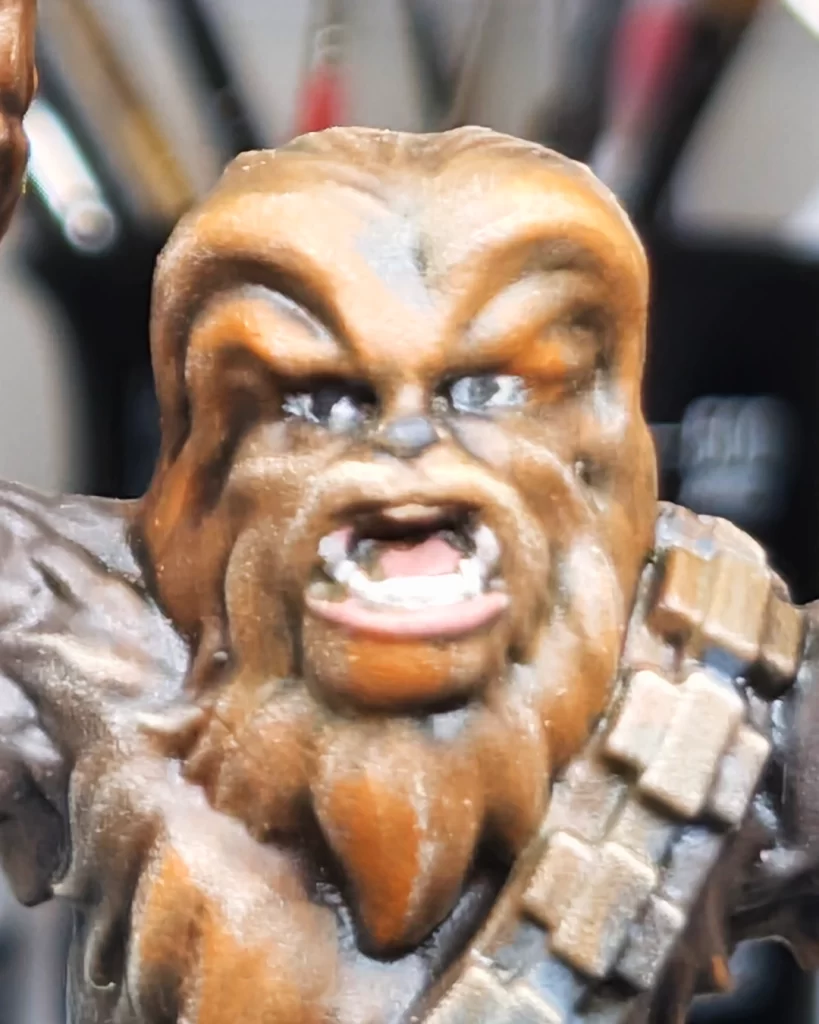
The first step in details is to use Flayed One Flesh to paint Chewbacca’s eye sockets and teeth. Use a small layer brush or a fine detail brush – whichever is most comfortable for you. Use a magnifier if needed. Follow up with some Bugman’s Glow to paint Chewbacca’s tongue and lower lip. The eye sockets are going to be the foundation for Chewbacca’s eyeballs in the next step.
Next, paint two tiny dots as Chewbacca’s eyeballs using Abaddon Black. This may take you a couple of tries to get right. Take your time – breathe! You can correct mistakes by painting Flayed One Flesh back over the eye sockets and starting over, but be warned that more attempts is going to cause gloppy paint and possible detail loss.
The last step is to put a dot of Abaddon Black on Chewbacca’s nose. Highlight this with a tiny dot of medium grey – Mechanicus Standard Grey will do just fine.
Your Chewbacca is finished and ready to pilot the AT-ST Walker!
Your AT-ST, Finished and Fearsome
That concludes our guide on How to Paint the AT-ST Walker for Star Wars Legion.
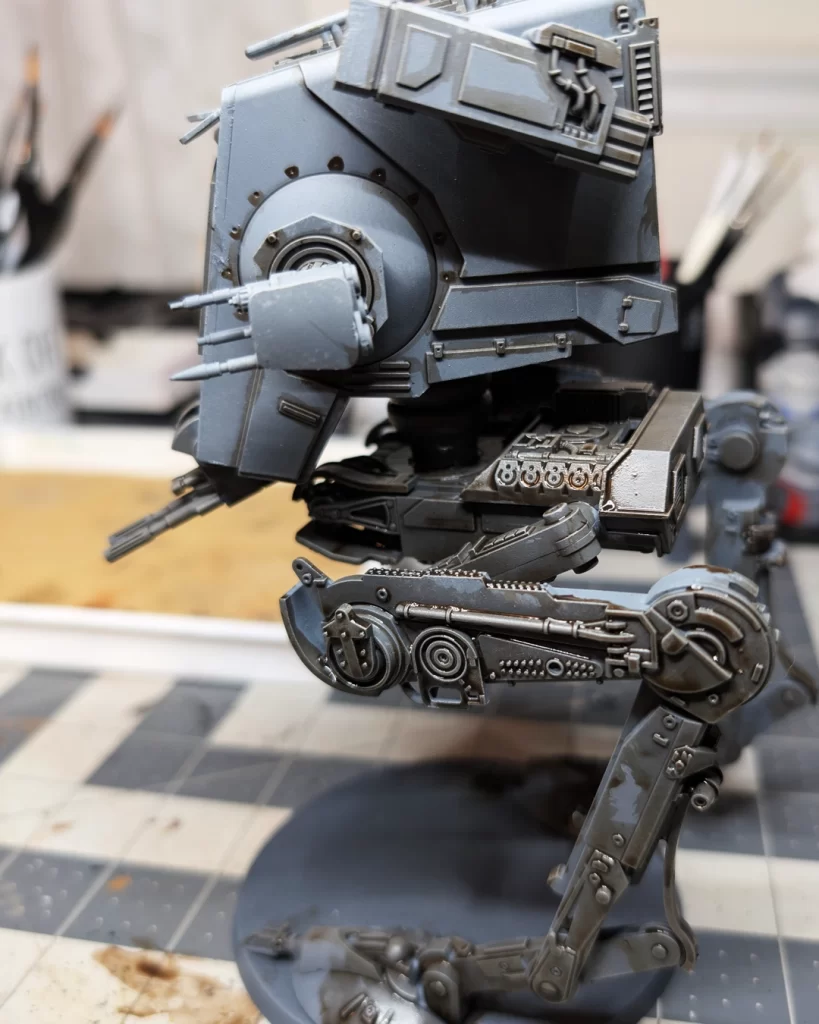
We modified the fundamental base-shade-layer-highlight method by using variations of drybrushing, swirling, and stippling techniques to texturize and highlight the basecoat metal of the vehicle. We used washes and a couple of select methods and colors to add contrast and begin the weathering process, and we blended those to make them look more natural. Lastly, We repeated the same techniques, using brighter colors, to push contrast and put highlights on the details to give our AT-ST focal points and make it a more readable model.


Next Steps
Now that your AT-ST is painted and ready for battle, it deserves a base that matches the iconic Endor setting. Check out our step-by-step guide on creating lush Endor forest bases—complete with moss, foliage, and earthy textures—to give your walker the cinematic backdrop it deserves.
No responses yet