
Mythic Minis is reader-supported. When you buy through our affiliate links, we may earn a small commission—never costing you anything extra. Your support helps us keep creating helpful painting guides and hobby resources for everyone.
If you’re looking to recreate the lush, mossy look of Endor for your miniatures, this tutorial will walk you through the entire process step by step. To make things even easier, I’ve put together a downloadable Paint & Supply List PDF with all the colors, brushes, and basing materials I used. Grab the file before you start so you’ll have everything on hand to build your own forest bases without any guesswork.
Get the Endor Forest Bases Paint & Supply List here.
Bringing Endor to the Tabletop
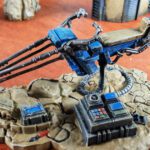
Endor’s lush forests and mossy ground are a perfect backdrop for your Star Wars miniatures, and with just a few simple basing techniques, you can capture that cinematic feel right on your models. Whether you’re fielding Rebel strike teams or Imperial patrols, these bases add an extra layer of immersion and storytelling to your games. By layering texture, color, and natural details, you can transform a plain plastic base into a miniature slice of Endor’s wilderness that ties your army together and makes every figure feel like part of the battle.
Securing the Basing Materials
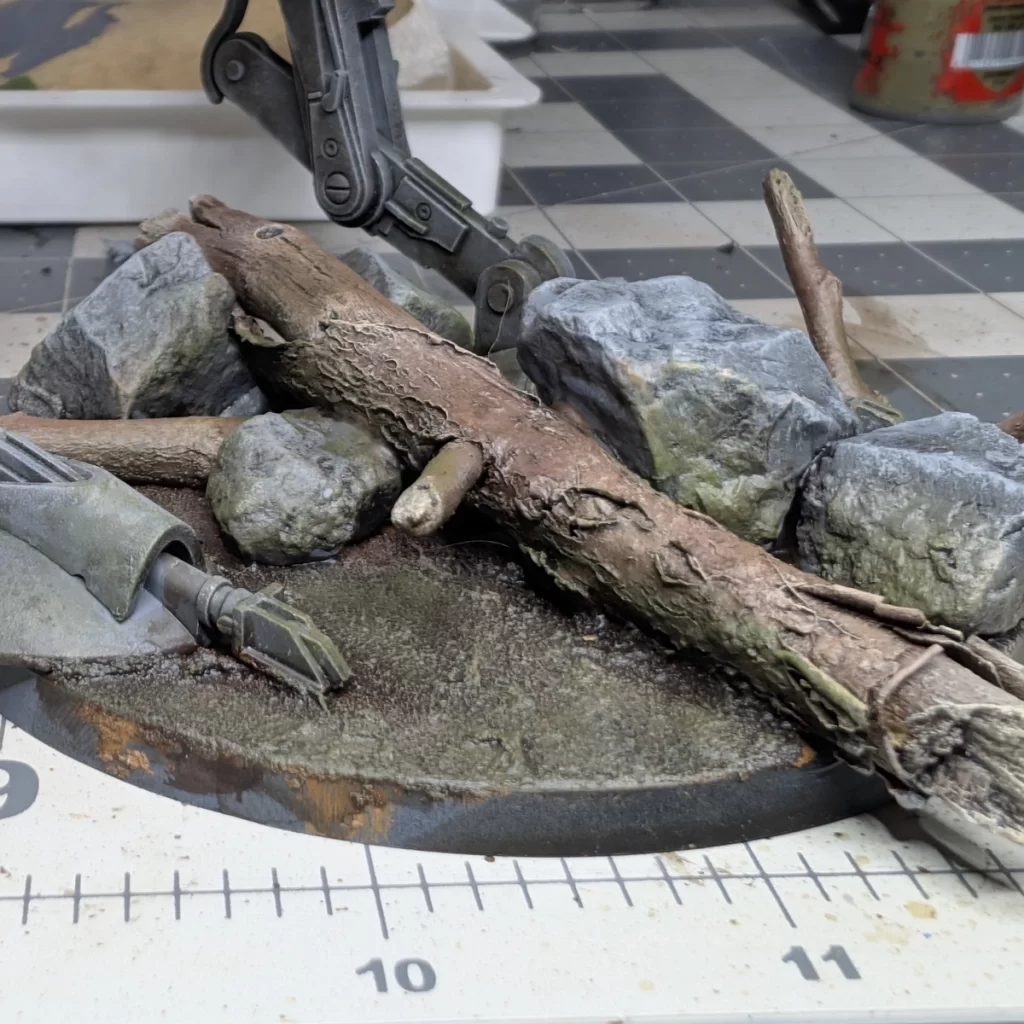
Hunting for rocks and sticks in nature can be part of the fun. I happen to find my materials in my yard and around my neighborhood. Be sure any materials you bring in from nature are clean and dry before using. You can also use materials designed specifically for modelling if you either don’t have access or prefer not to use items from nature.
Check out our Endor Bases Paint and Materials List for shopping ideas for where you can purchase these items online.
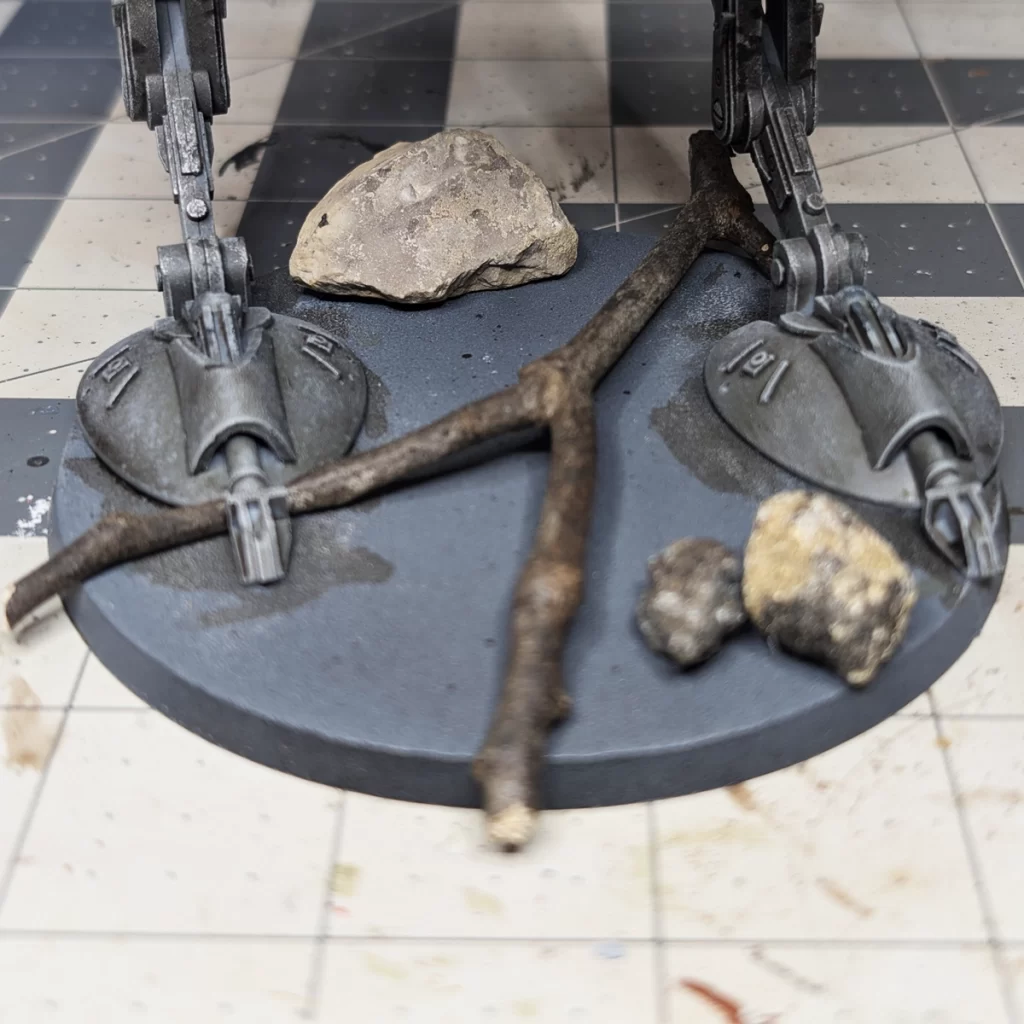
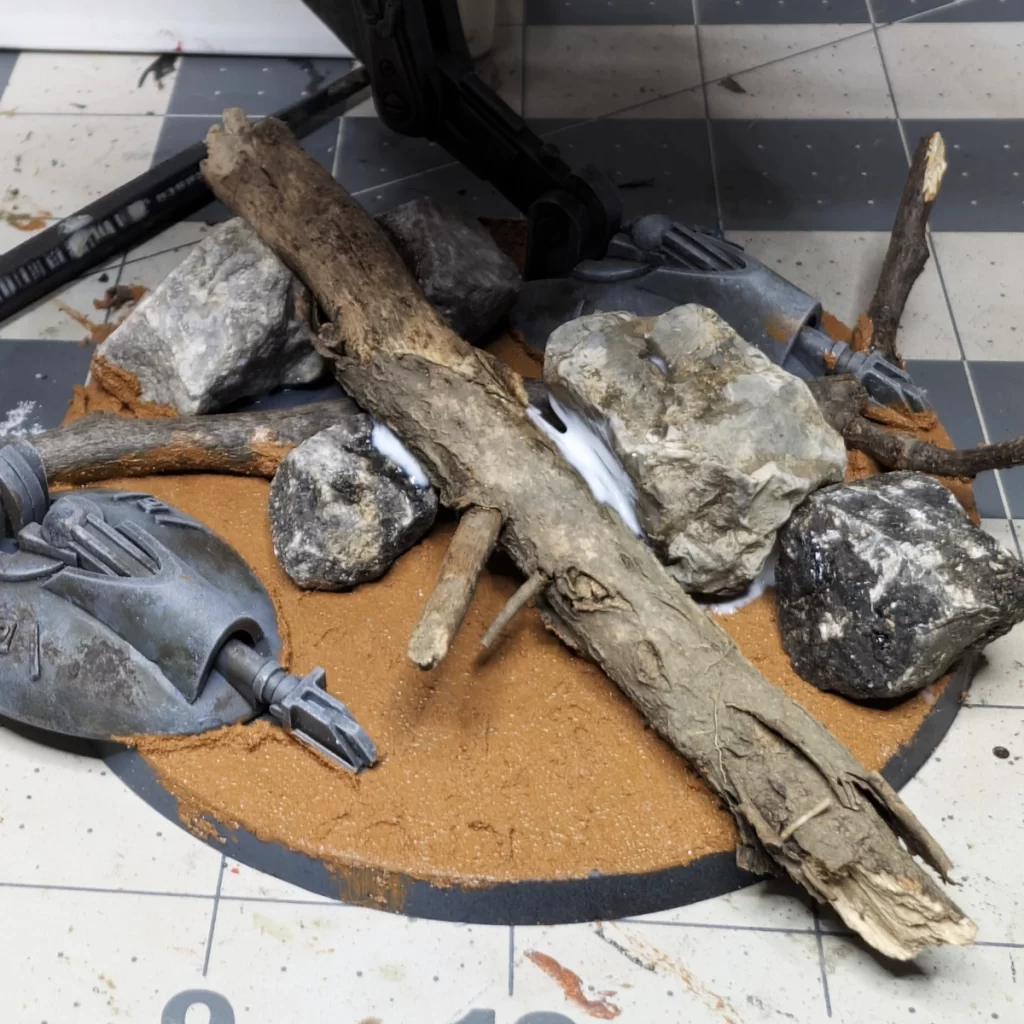
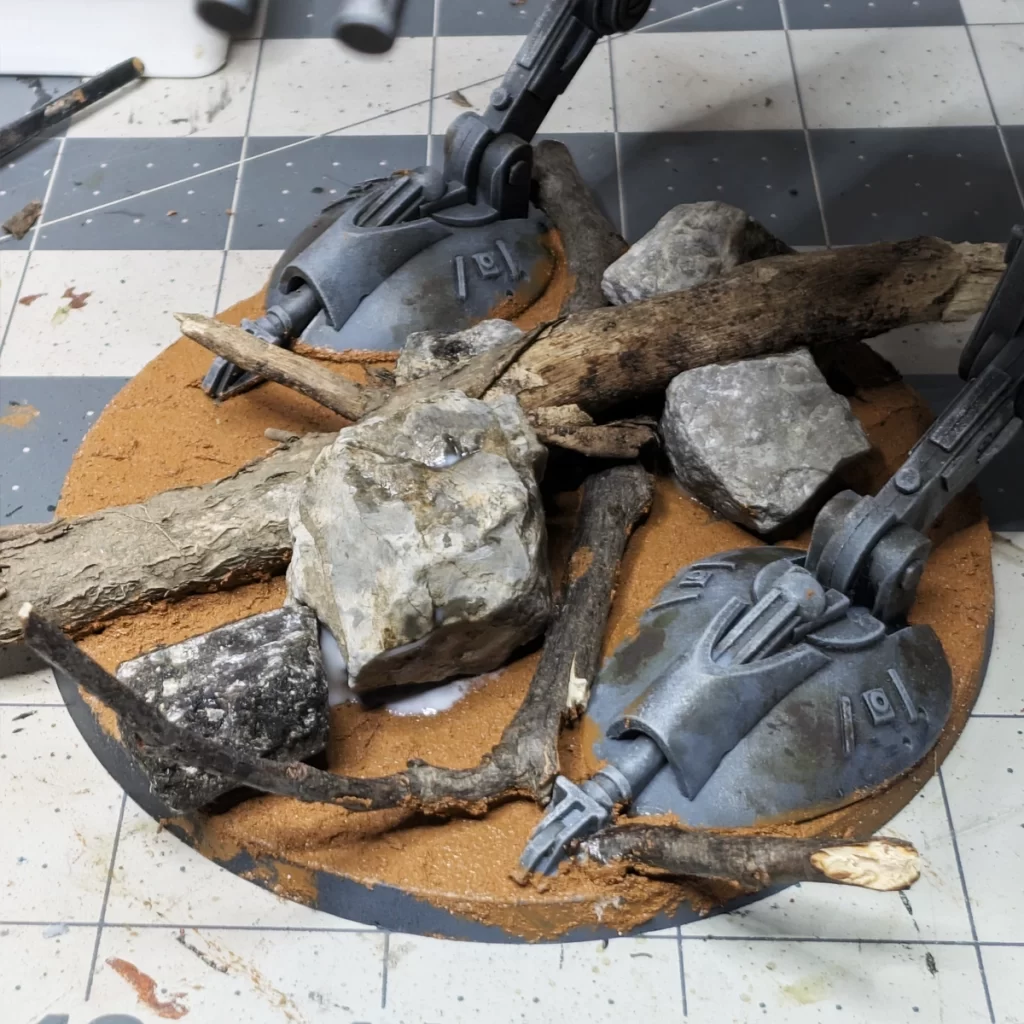
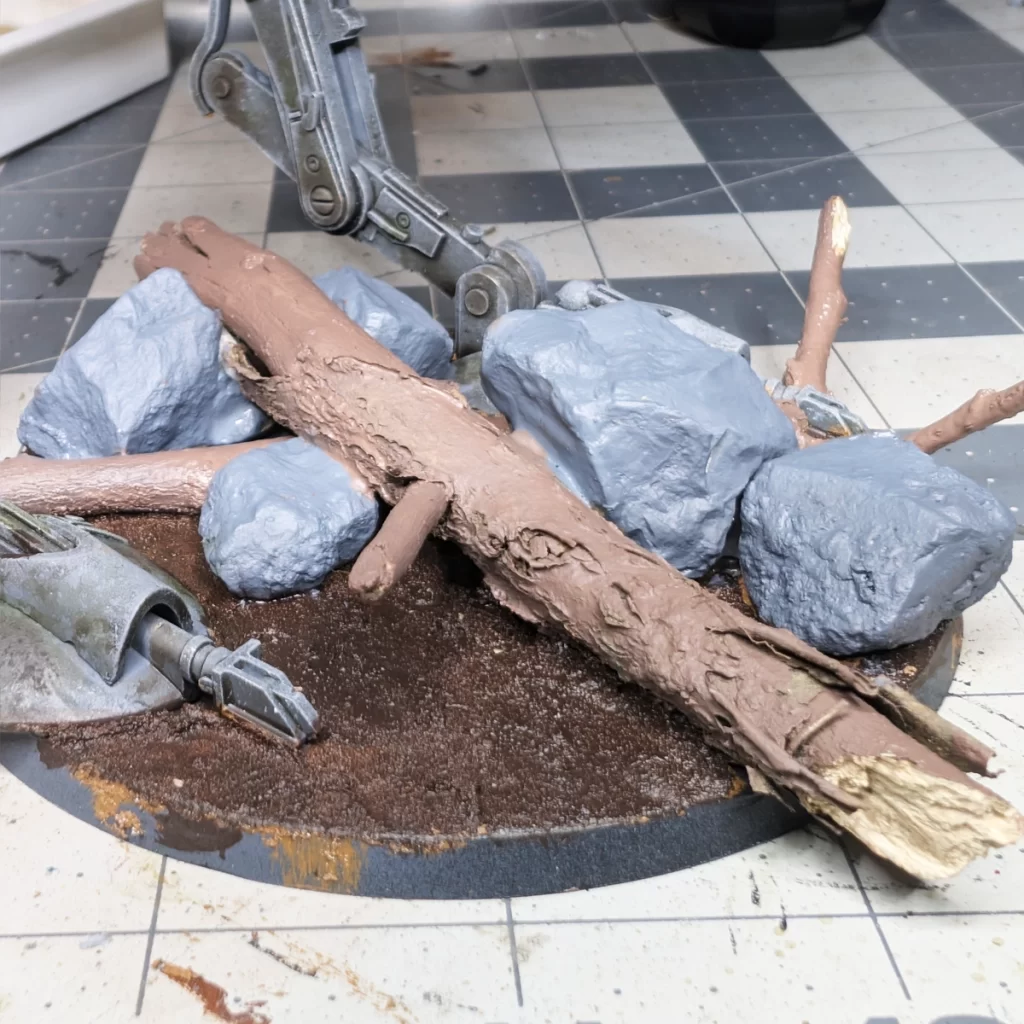
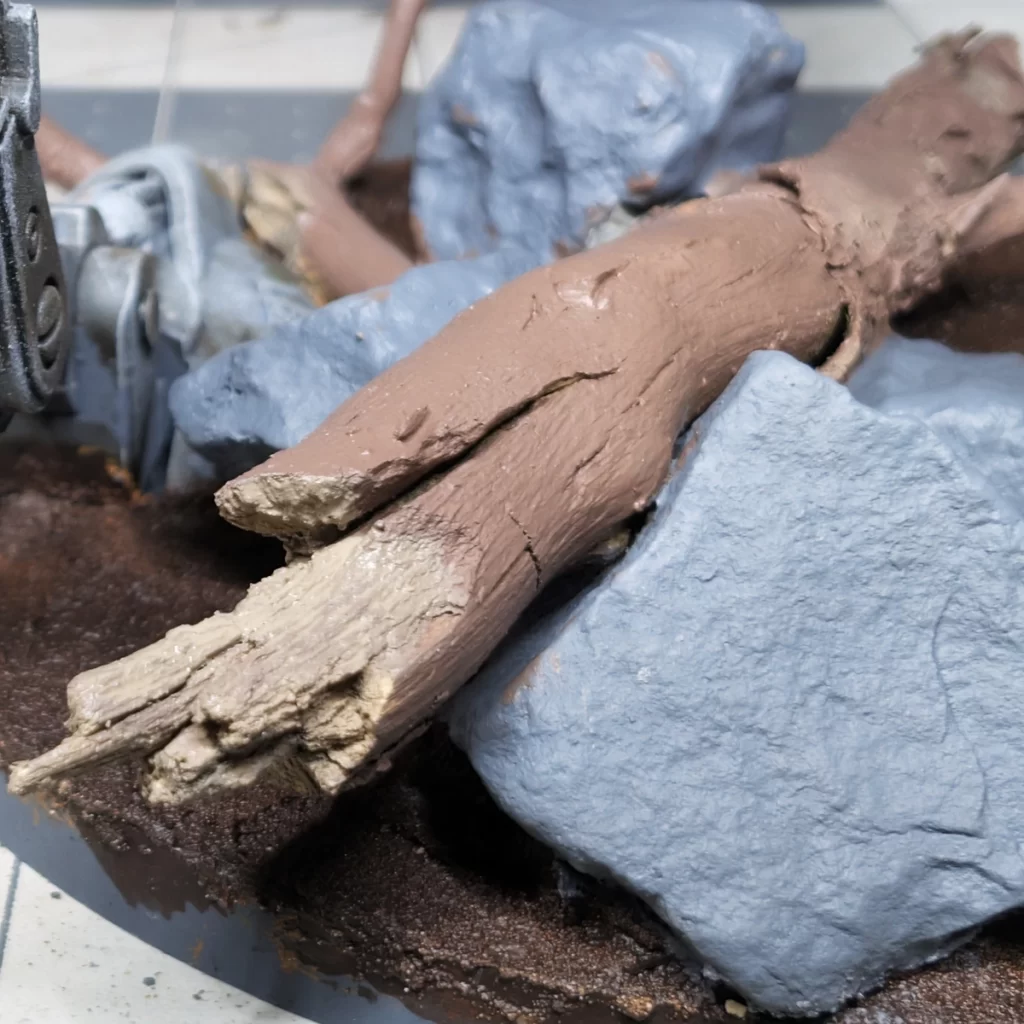
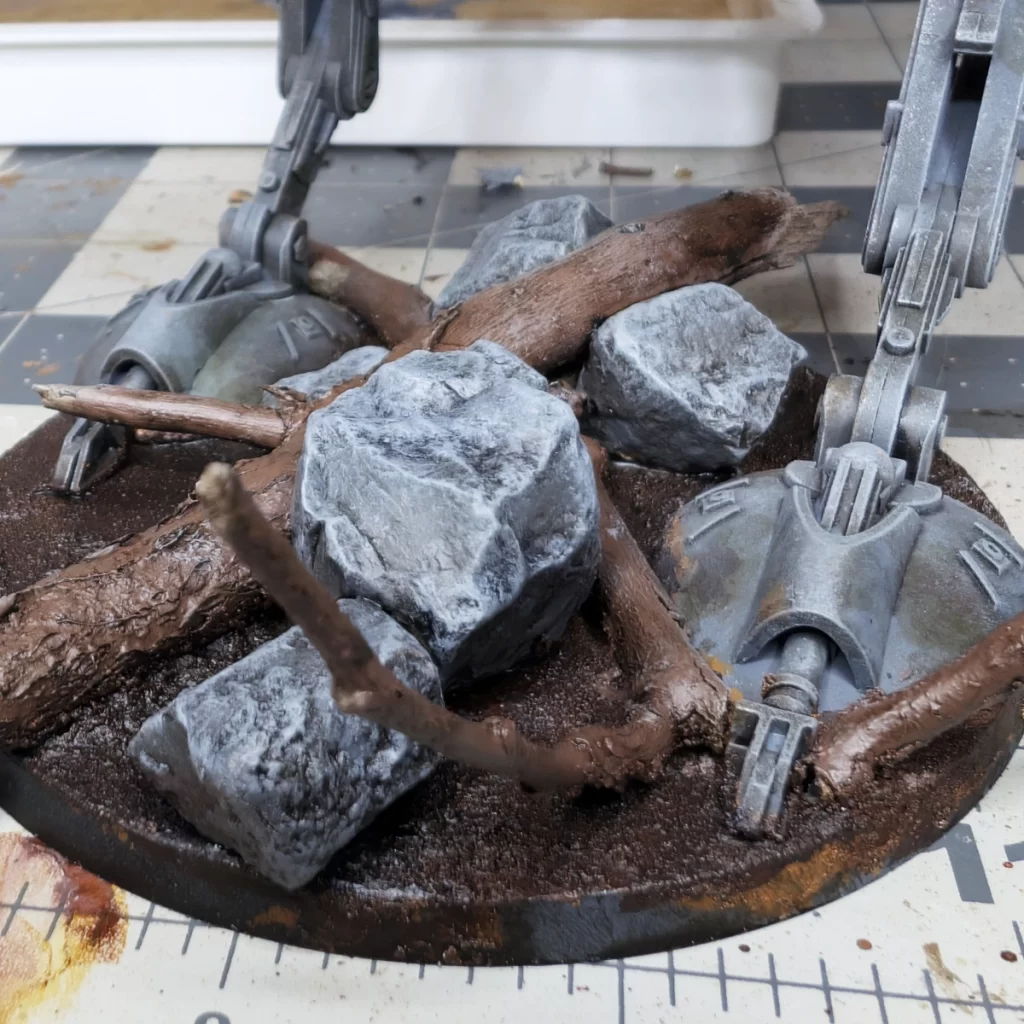
Figure out which rocks and sticks you want to use and test fit them on the base to see how they look. When you decide their positions, apply PVA glue with an old paintbrush and secure them to the base. Give the glue a little while to set before doing the next step so things don’t move around. The glue will likely need to cure over night to be more permanent.
If you’re confident with the security of your rocks and sticks, you can start applying Vallejo Brown Earth on the rest of the base. This a texture paint that will serve as the ground to our forest. You can apply it with the same brush you used for the PVA Glue (after cleaning, of course!). If you get the texture paint on your rocks, stick, or model, it can be easily wiped away with paper towel or cotton swabs. Feel free to leave some because it will incorporate the theme of the base to the model and make an overall cohesive theme.
It is advised to let this dry over night or over a few hours.
Basecoat the Basing Materials
James and I make fun of ourselves for, “painting rocks to make them look like rocks.” Well, this is exactly what we’re doing in this step. It’s not the rocks themselves that don’t look like rocks, but really what we’re going for here is the illusion of scale. A piece of gravel looks like a piece of gravel, but painted to scale it looks like a boulder on our model.
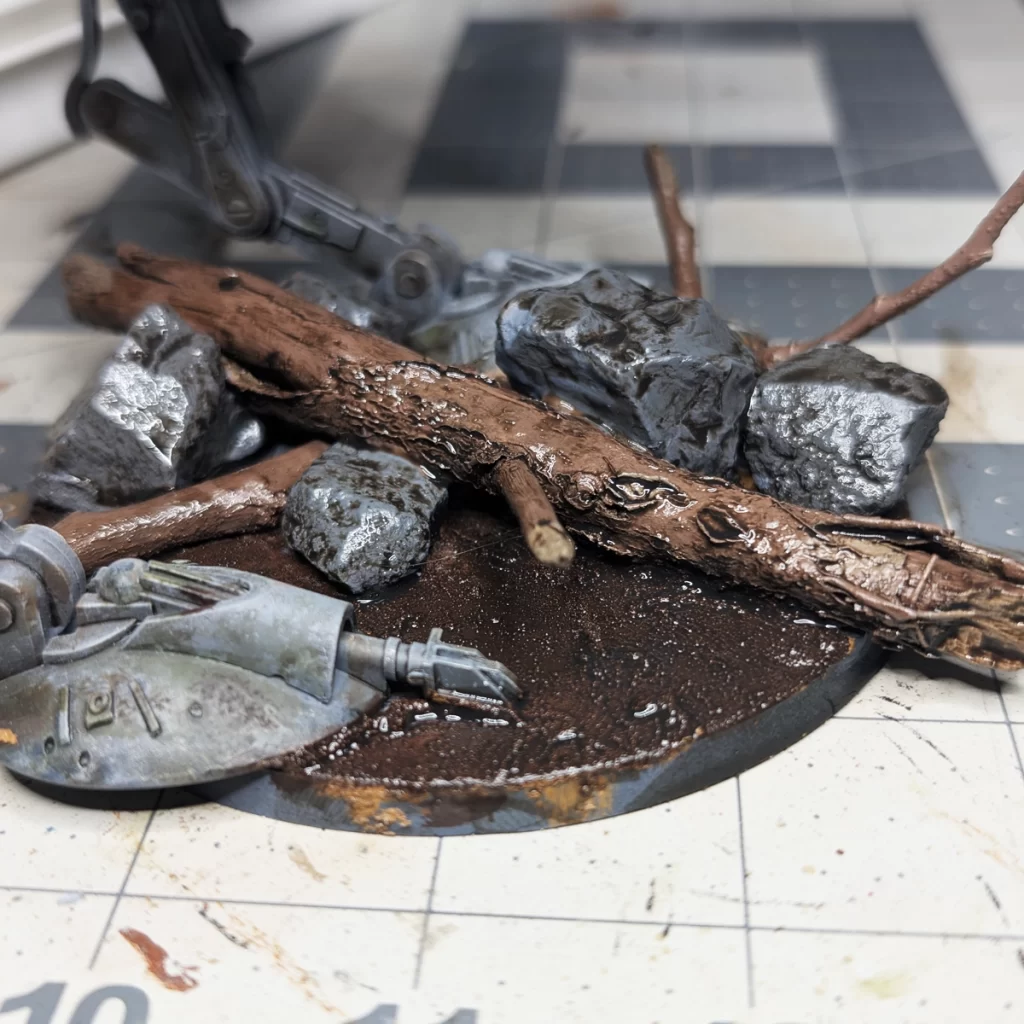
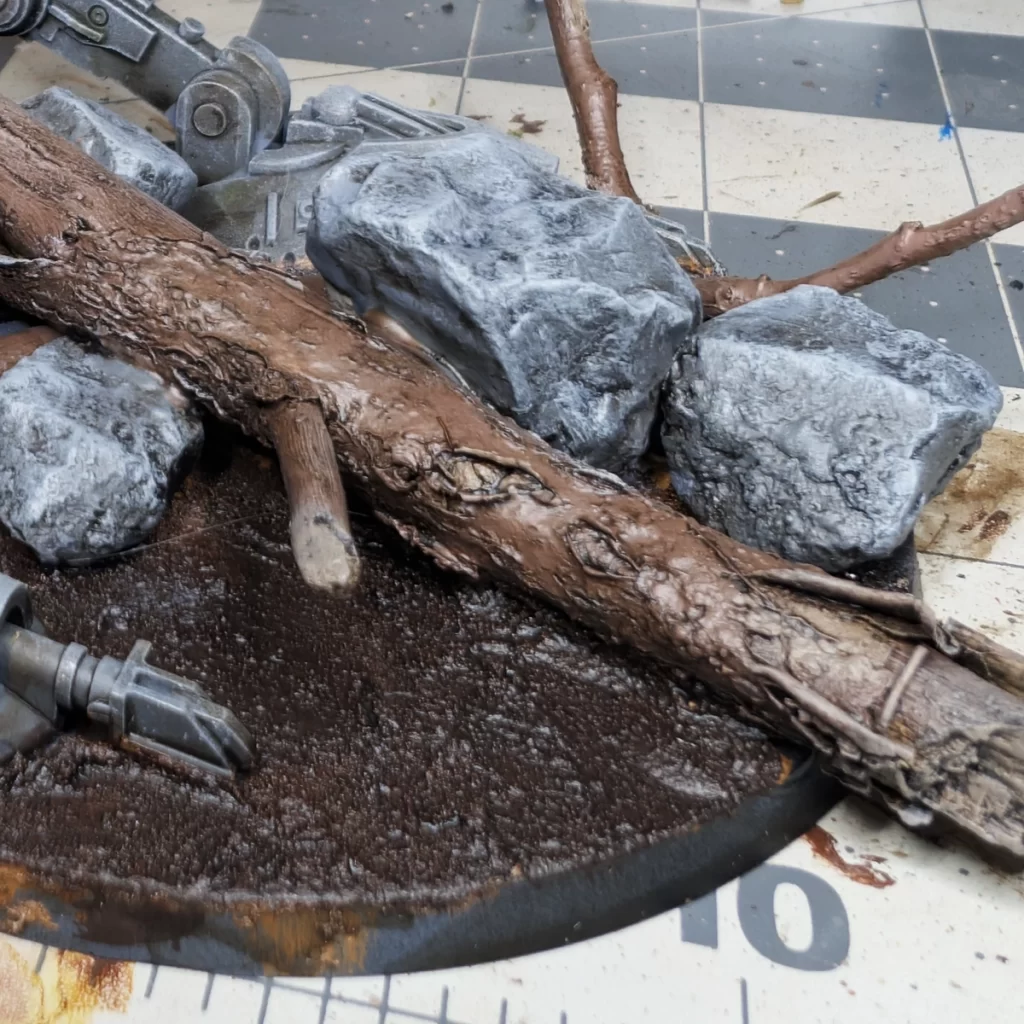
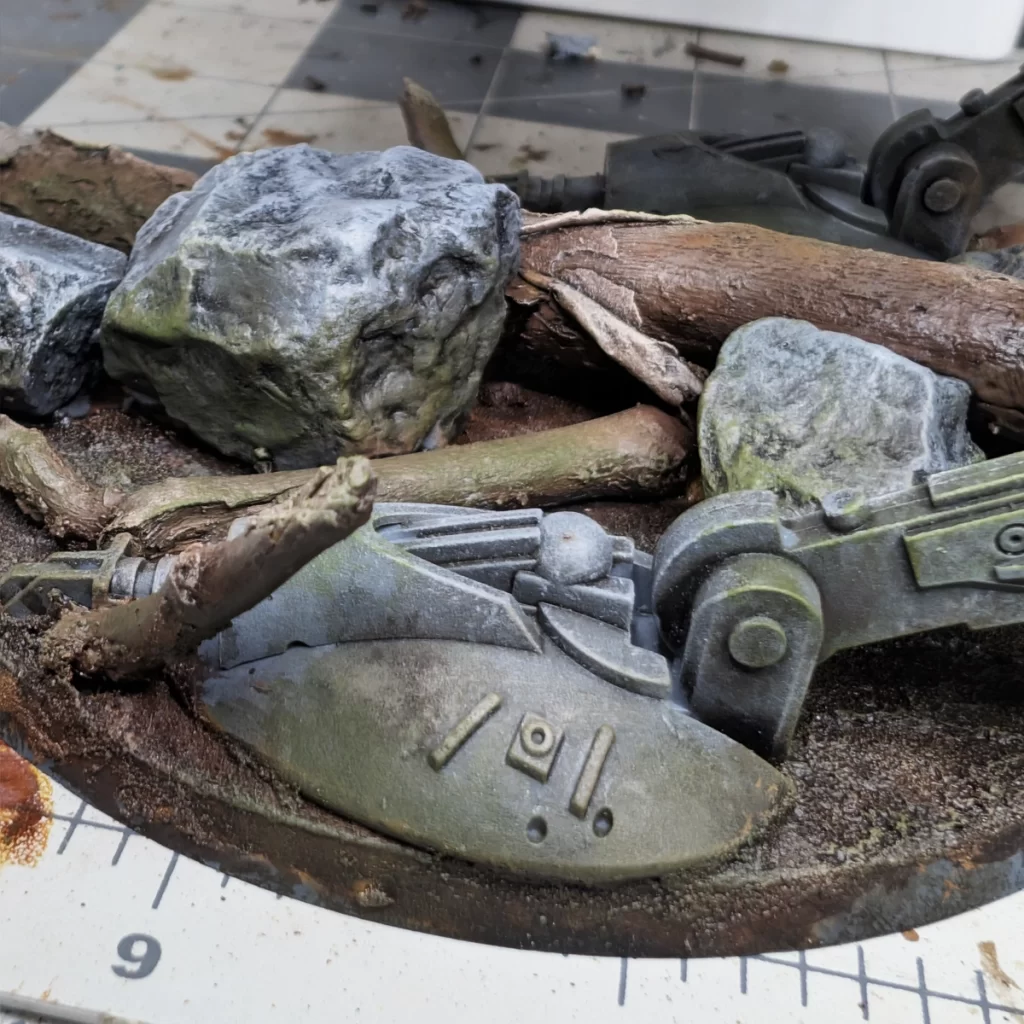
Start by painting the Brown Earth a nice dark brown. Here, I’ve used one of my favorites – Rhinox Hide. Don’t use a nice brush for this because the texture will shred your bristles. Maybe use your PVA Glue brush. Be careful around the model, but it’s okay to be a little messy around the sticks and rocks.
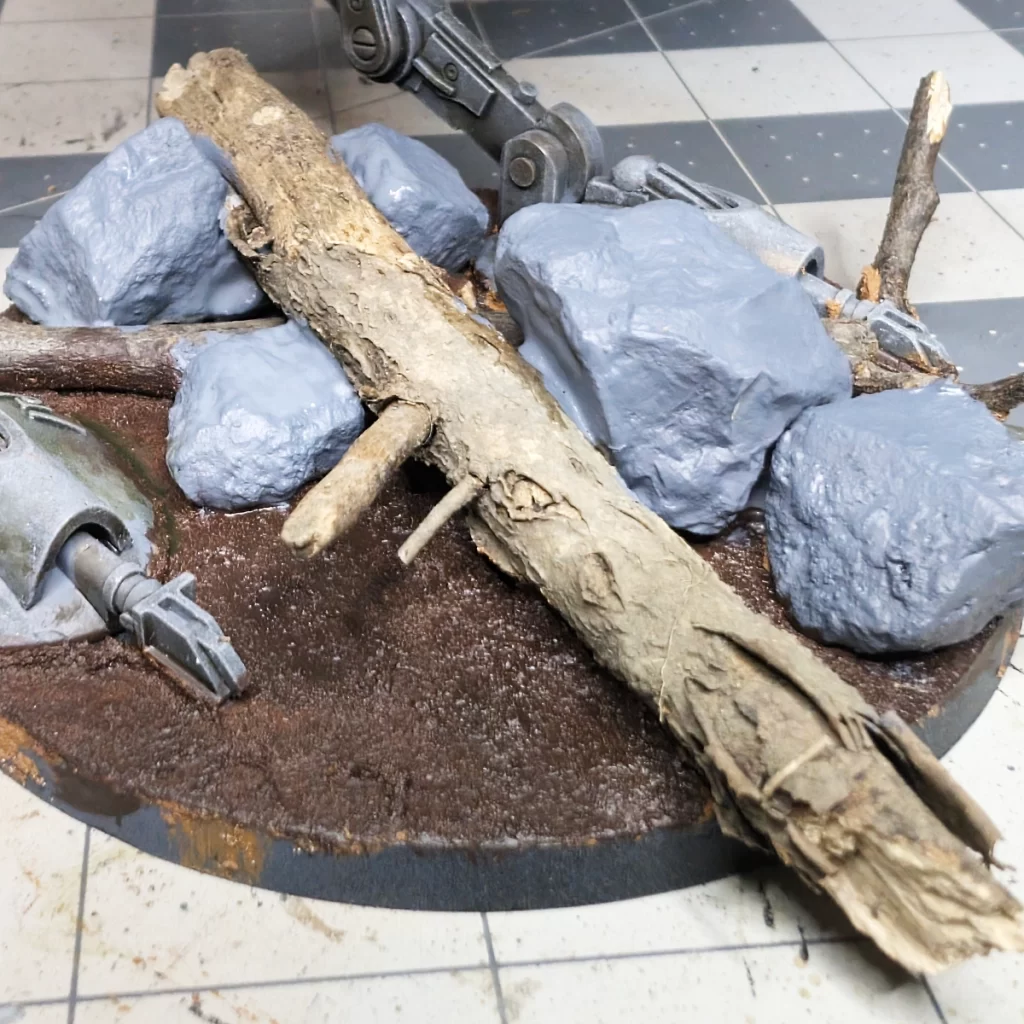
Next, paint your rocks a base coat of Mechanicus Standard Grey (picture 1). You may want to thin your paint if your rocks are very porous. As always, multiple thin coats works best to bring up the colors.
Paint the bark of your sticks with Gorthor Brown being careful not to mess up the ground or rocks.
And finally, paint the bare or broken parts of the sticks with Baneblade Brown.
Applying Shade to Add Shadows and Depth
With the groundwork in place, it’s time to bring out the textures. I applied a generous coat of Agrax Earthshade across the dirt, rocks, and sticks on the base. The wash seeps into the cracks and recesses, adding natural shadows and definition that make each element stand out. It tones down the brighter surfaces and unifies the different materials, giving the whole base a more realistic, earthy look. This step lays the foundation for the later highlights, ensuring the ground feels grounded and believable.

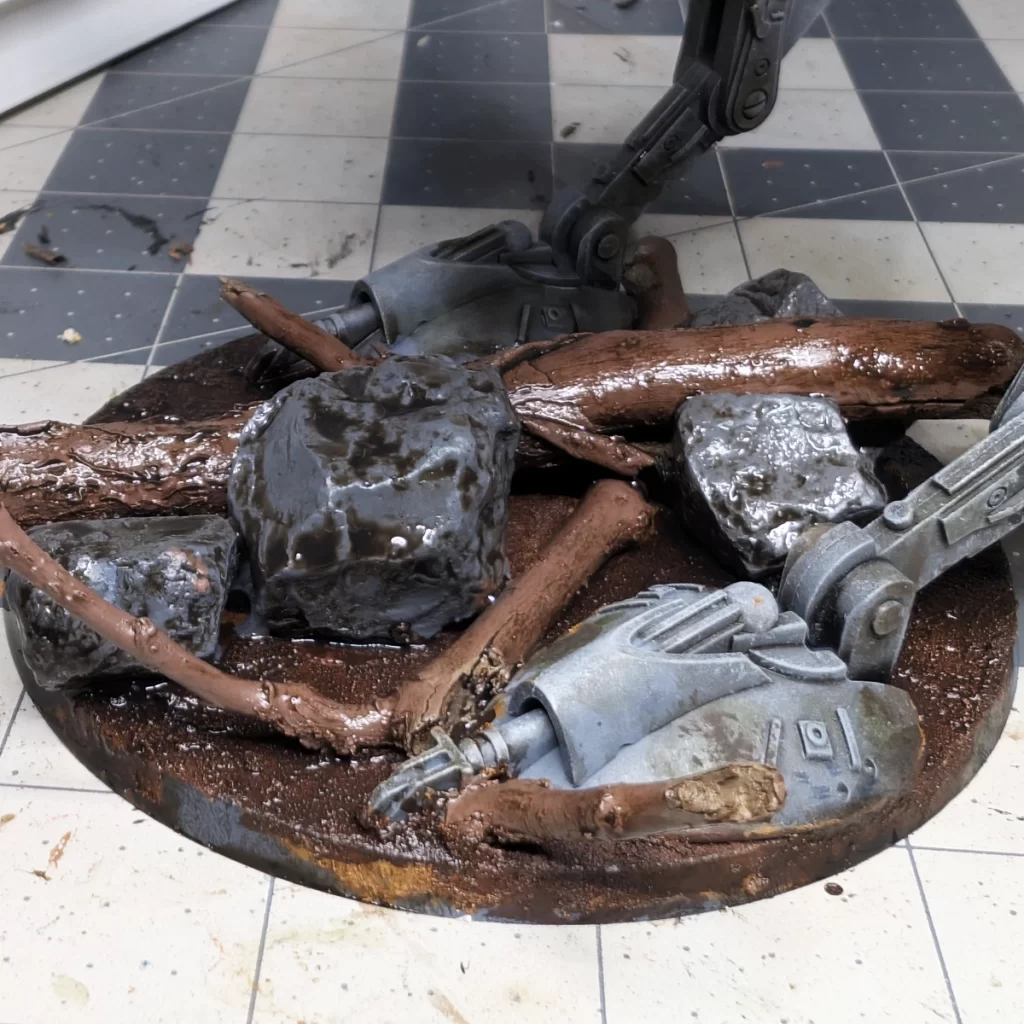
Apply the shade fairly liberally but taking care around the feet of the model.
Accentuating Texture by Drybrushing Elements
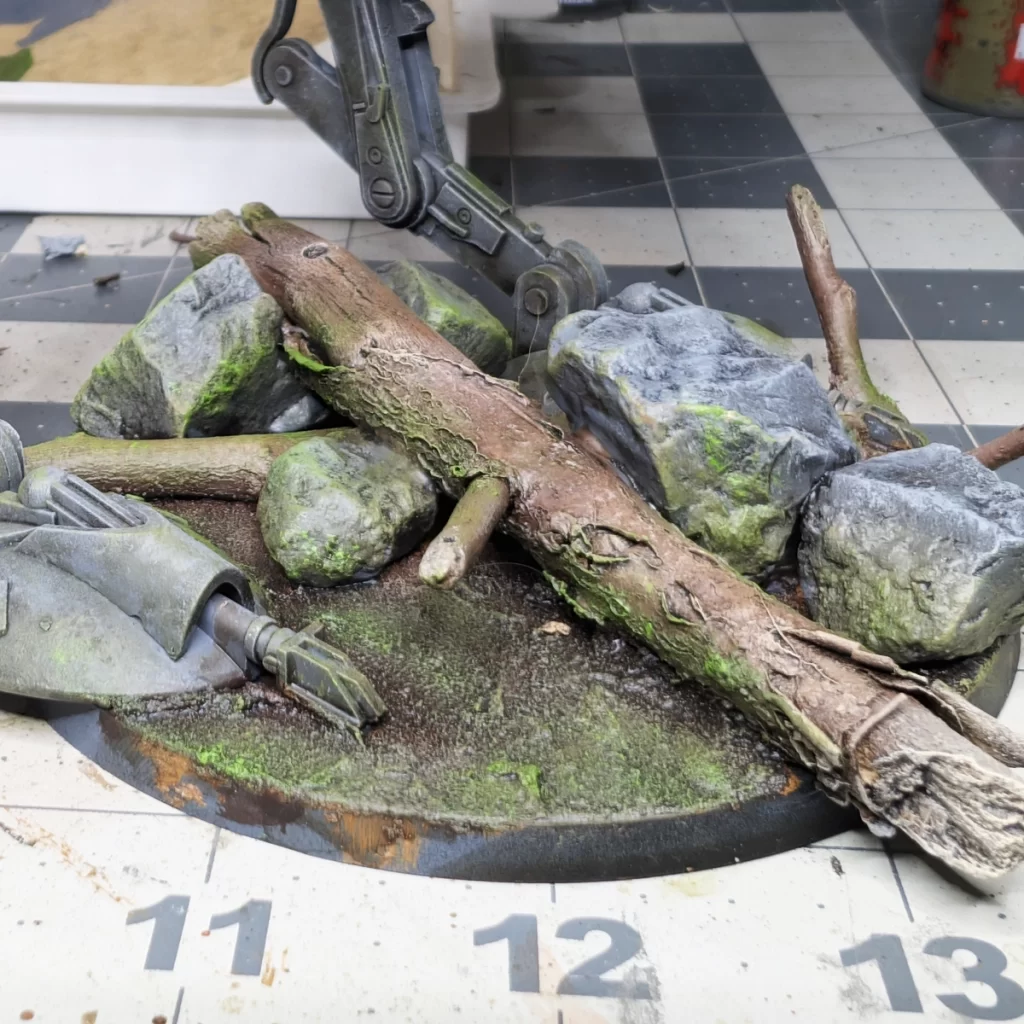
Once the wash has dried, I moved on to drybrushing to push contrast to textures. Using Baneblade Brown and Administratum Grey, I lightly brushed over the dirt, rocks, and sticks, catching only the raised surfaces. This quick technique adds highlights that make the details pop, giving the ground a more natural, weathered look. The drybrushing also ties the different elements together, creating a sense of depth and realism that feels right at home under the AT-ST.
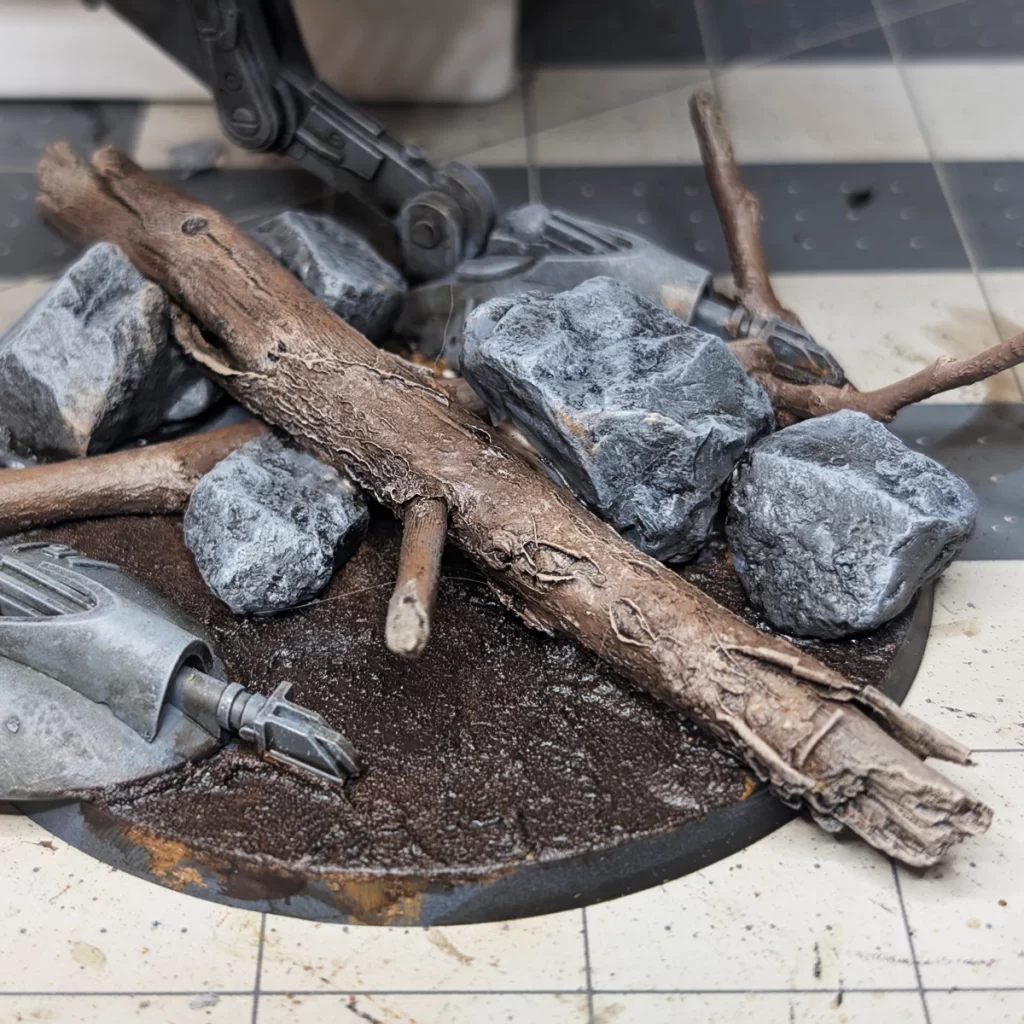
Drybrush Administratum Grey over the rocks. Now would be a good time to maybe touch up any details on the AT-ST’s feet or legs they may have been dulled in these past few processes.
Lightly drybrush Baneblade Brown all over the sticks (the bark and exposed wood).
Drybrushing the Ground
To bring out the texture of the soil, I used Steel Legion Drab and Deathworld Forest to drybrush over the raised areas of the dirt. This subtle highlight catches the rough edges and natural grain, creating the look of earth that’s been walked over and weathered by the elements. It also helps break up the flat color from the wash, adding depth and contrast so the ground feels more realistic and sets the stage for the rest of the base details.
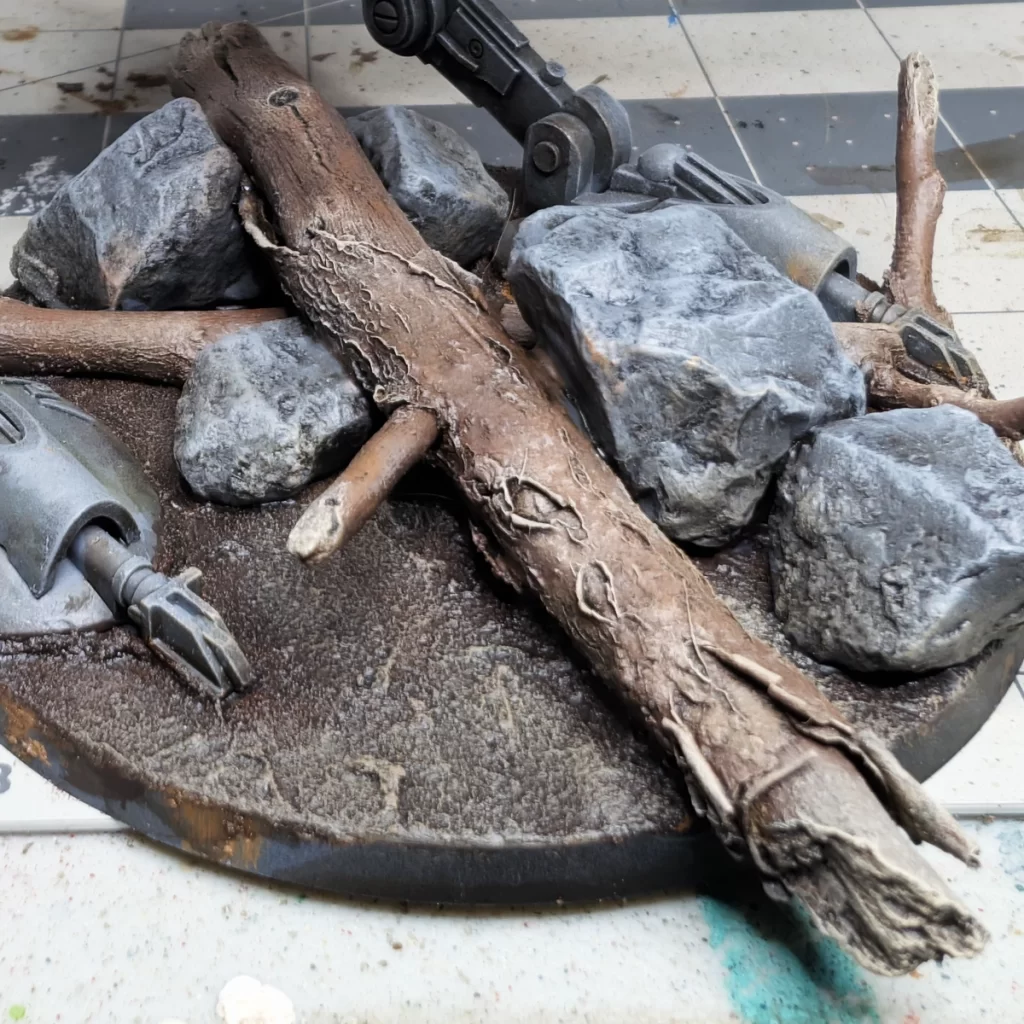
In the first step, drybrush the dirt rather heavily. You want to touch the bottom half of the sticks, rocks, and even the feet of the AT-ST. This will help tie the base elements to the earth and prime us for the next step.
Drybrush Deathworld Forest for the next step. You’ll want to go a little lighter on the brush to make it more of an accent or highlight color. Be sure to also get parts of the sticks, rocks, and again the AT-ST’s feet and a little bit up the legs. This gives the illusion of foliage staining and moss growth for our forest moon of Endor. Be sure to sparingly add some this drab green to some of the upper parts of the AT-ST, especially where the Athonian Camoshade is more prominent.
Subtle Vegetation Effects with Highlights
For a final touch of color, I lightly drybrushed the ground with Moot Green. This subtle layer suggests moss, grass, or plant life creeping over the soil, which adds variety to the base and ties it into a forest setting. The bright green works best when used sparingly—just catching the tops of the dirt texture—so it looks like natural growth rather than overpowering the earthy tones underneath.
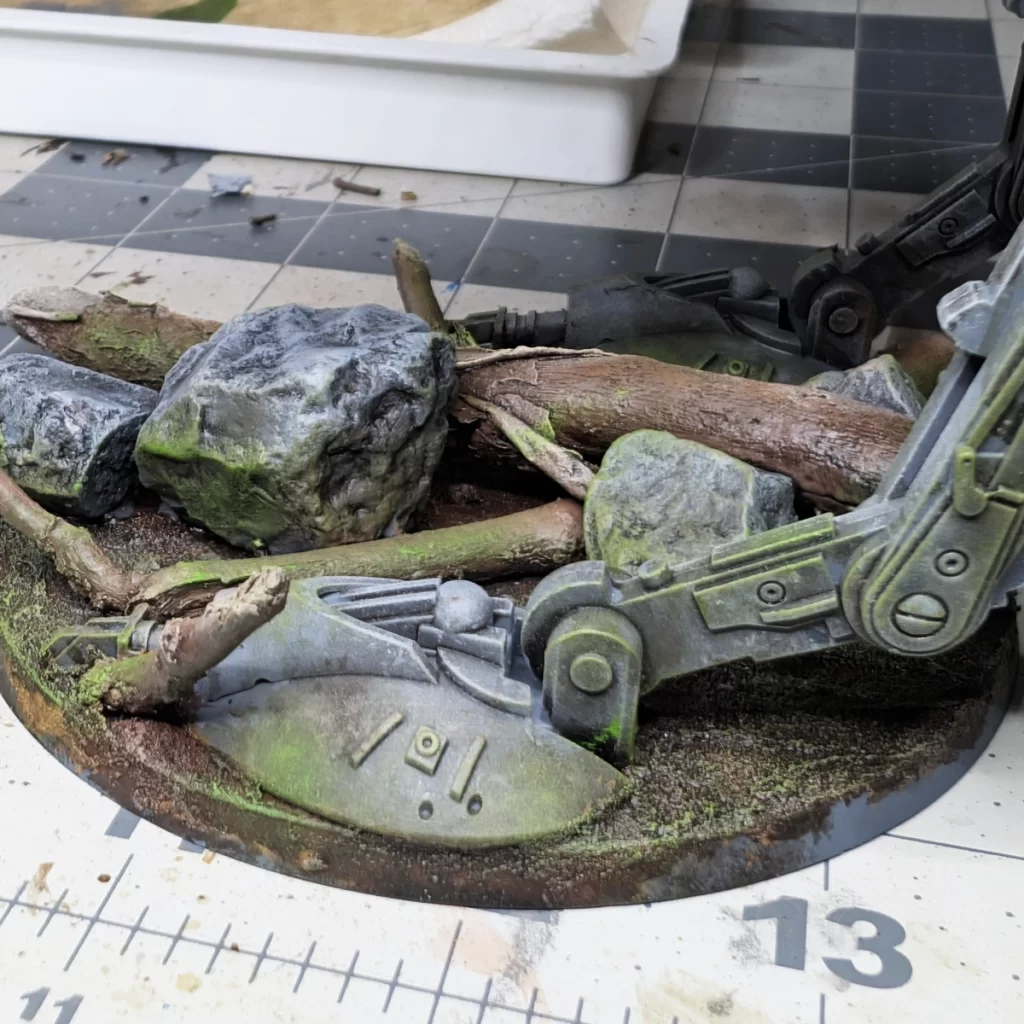
Focus a light drybrush where some of the more prominent patches of Deathworld Forest landed. This is an effect that looks very cool but a little goes a long way, so don’t get carried away. You’ll want to get the bottom half of the base elements and also spot-drybrush parts of the AT-ST vehicle. The legs and feet will be a little heavier with this moss-effect, and you’ll want to highlight parts of the upper vehicle where you may have added some Deathworld Forest.
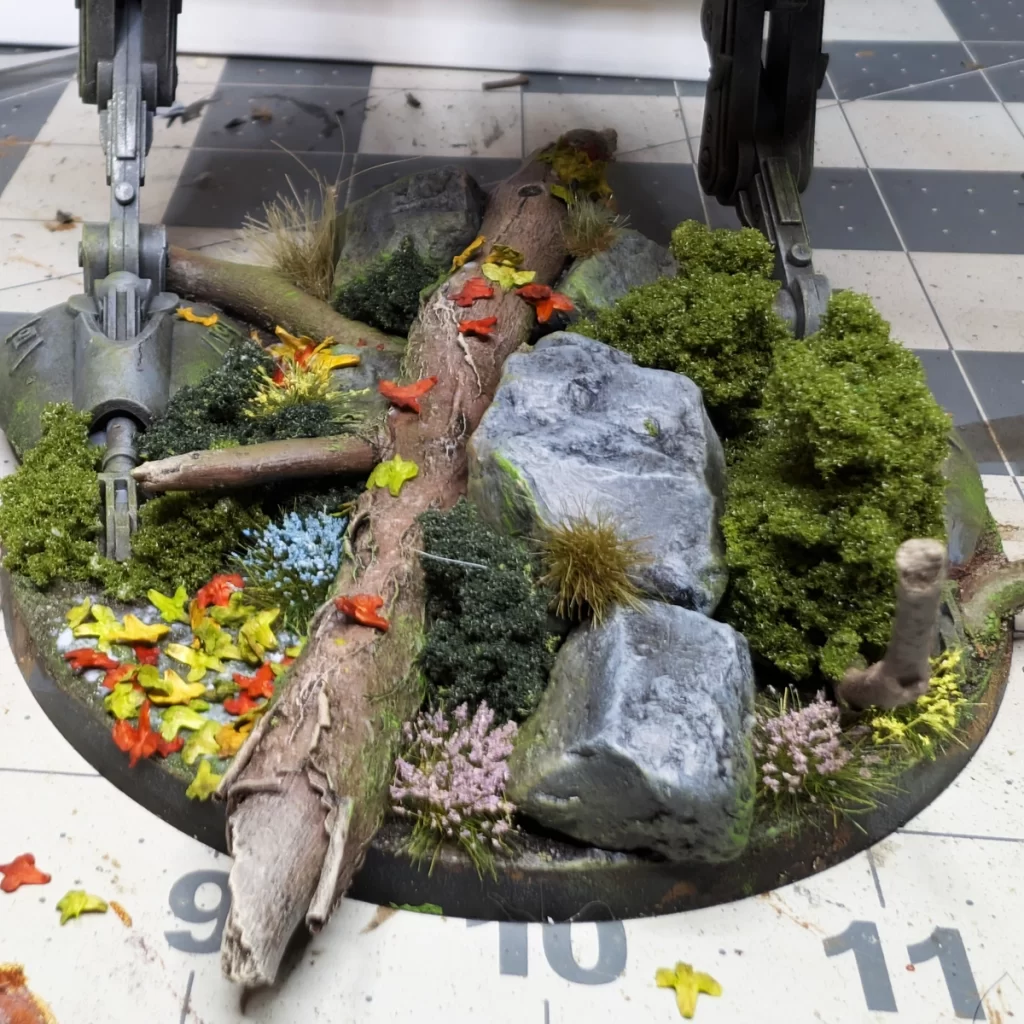
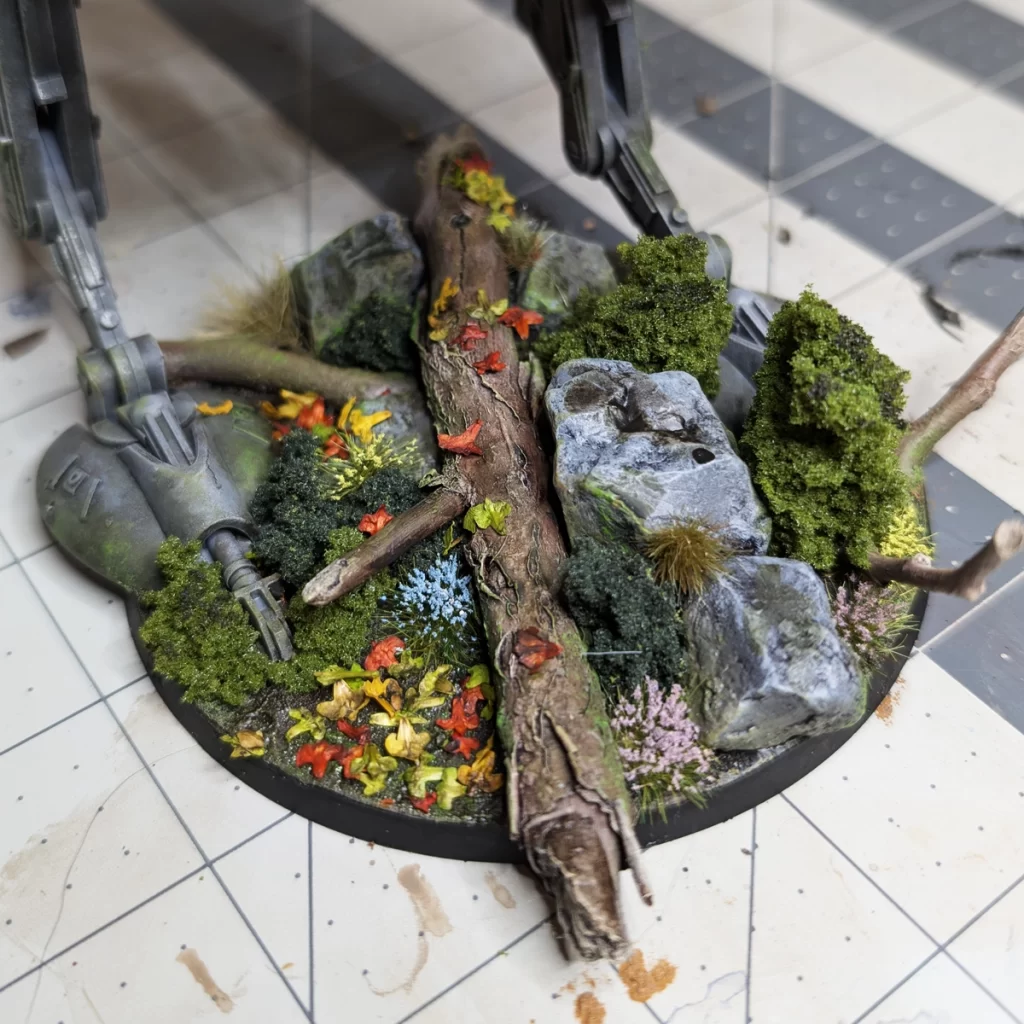
Enhancing the Base with Foliage
To complete the forest floor effect, I added small leaves and clumps of bushes to the base. These elements break up the monotony of the dirt and rocks, giving the terrain more variety and a sense of scale under the AT-ST. I positioned them carefully to look natural—tucking some behind rocks, letting others peek out from the edges—and used a touch of glue to keep everything secure. This final layer of foliage ties the base together, making it feel like a lived-in environment rather than just a flat surface.
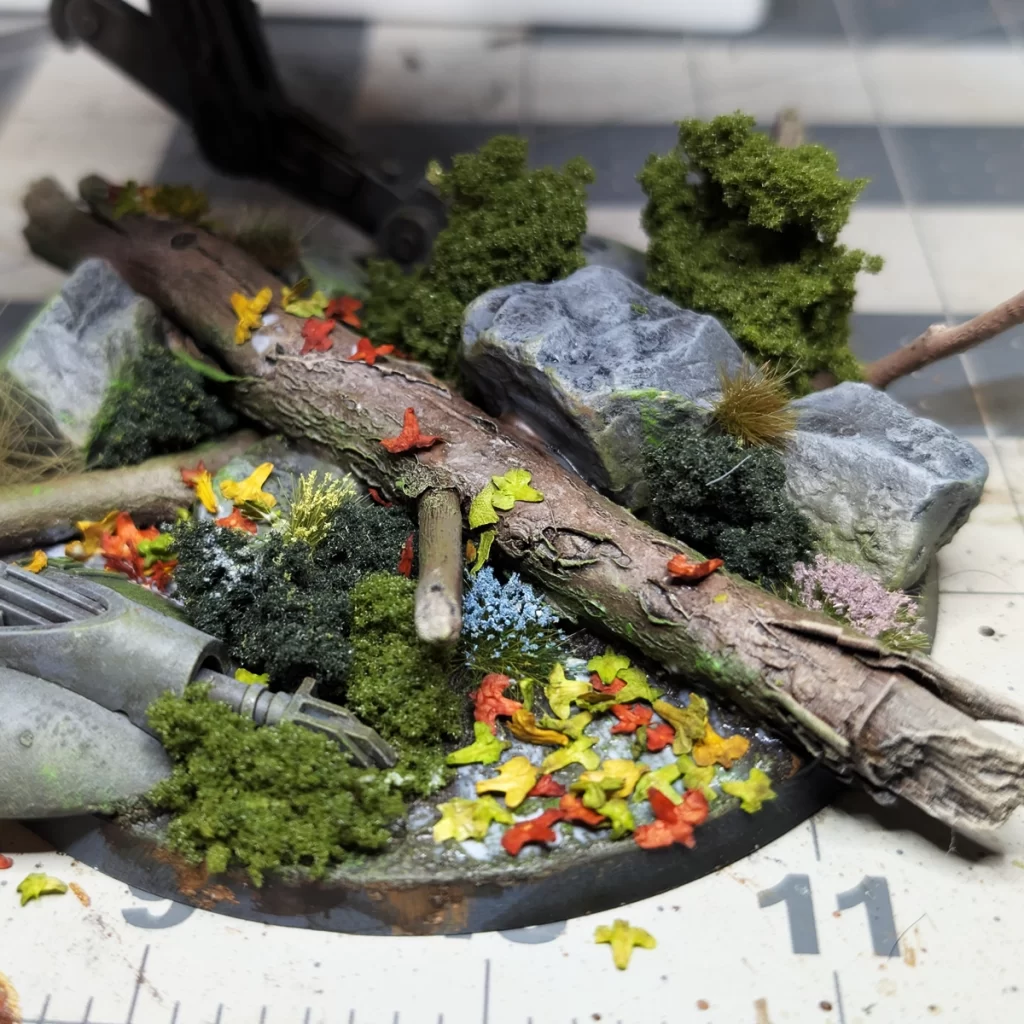
I strategically placed the bushes before gluing them down permanently, and you’ll noticed I used two different colors to break up the monotony. For the bushes I used PVA Glue, undiluted.
The flower tufts had their own sticky backing, so I used a small hobby tweezer to place and apply a little pressure to stick them in place once I decided where I wanted them.
And finally, for the leaves I watered down the PVA Glue. This helps reduce the glossy look left behind when the glue dries. Scatter your leaves! Some you may want to purposefully place, such as on the log or rocks. Tap off the excess, and let this whole thing dry for a few hours.
To absolutely finish this base, I used my mouldline remover tool to scrape away the Brown Earth texture paint off of the base rim and painted the base rim black. You’re now ready to varnish the model and the base, and this will also help lock down all of your basing elements.
Bringing It All Together
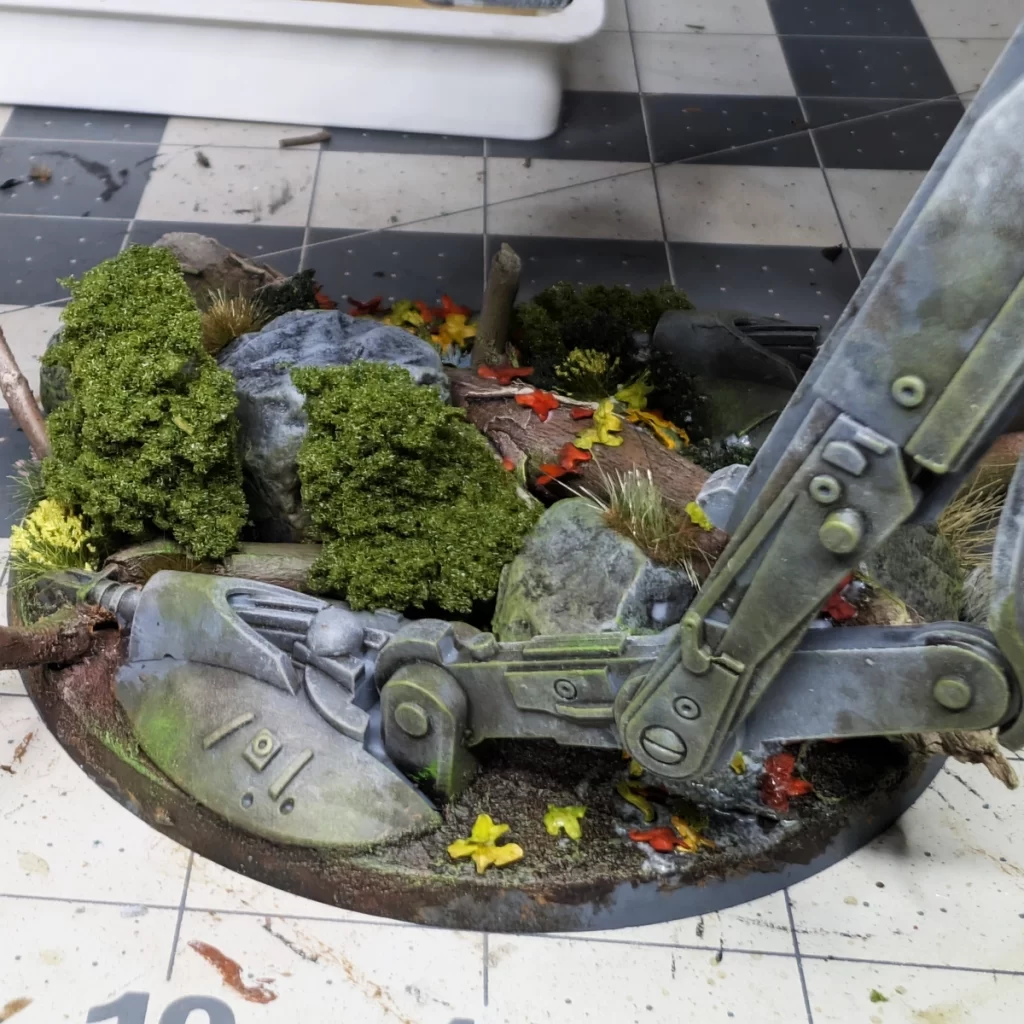
With all the elements in place—from the shaded dirt and highlighted rocks to the drybrushed ground and carefully placed foliage—the AT-ST’s base is complete. Each layer adds depth, texture, and subtle details that make the miniature feel grounded in its environment. Taking the time to build and finish the base not only enhances the model’s presence on the tabletop but also ties together all the painting work you’ve done on the AT-ST itself. This final step transforms the miniature from a standalone figure into a small, dynamic scene that captures the look and feel of the battlefield.
No responses yet